
Results 341 to 360 of 808
-
06-08-2018 #341

 Registered User
- Join Date
- Dec 2010
- Location
- Fredericksburg, VA.
- Posts
- 3,155

Spectacular work!
Steve Hayes
"Dust Off"
68 Camaro
Given sufficient initial acceleration, even pigs can fly!
-
06-10-2018 #342
Registered User
- Join Date
- Feb 2006
- Location
- Arizona, Phoenix area
- Posts
- 64
great progress and motivation for the rest of us....keep plugging away!
-
06-10-2018 #343

 Registered User
- Join Date
- Aug 2005
- Location
- Hamilton, NJ
- Posts
- 4,295
Torch red is great
Scott from NJ.
Vent Windows Forever! ...
Feather-light suspension, Konis just couldn't hold
I'm so glad I took a look inside your showroom doors
-
06-10-2018 #344
Registered User
- Join Date
- Aug 2014
- Posts
- 435
All that time you spent on the body work is evident. Looks amazing...especially pre-cut and buff.
I see a lot of people do things in different ways, and I've seen people paint the door jambs and interior sides of doors and other panels, then paint the whole car with all the parts on. Any particular reason you didn't go that route? Just curious about pros/cons for when I eventually paint my truck.
I've wanted a Blue with white stripe 1968 RS/SS (or at least an RS) for years now. But the next project might be a '57 Chevy for my dad. Fingers crossed he's still alive when I finish this stupid thing. lol
Jay
-
06-11-2018 #345
 Registered User
- Join Date
- Sep 2009
- Posts
- 2,705
Thanks for all of the compliments guys! I'm so happy with how it turned out.
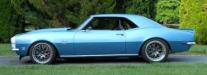
Jay, I basically went with the recommendation from my buddy who does bodywork for a living. He said that because Torch Red is a solid color with no metallics, that it won't be an issues painting them separately. If it was a metallic or pearl paint, we would have done exactly as you described and painted all exterior pieces at once.
1955 Nomad project LC9, 4L80e, C5 brakes, Vision wheels
1968 Camaro 6.2 w/ LSA, TR6060-Magnum hybrid and etc SOLD
1976 T/A LS1 6 Speed, and etc. SOLD
Follow me on Instagram: ryeguy2006a
-
06-11-2018 #346
Registered User
- Join Date
- Sep 2009
- Posts
- 2,705
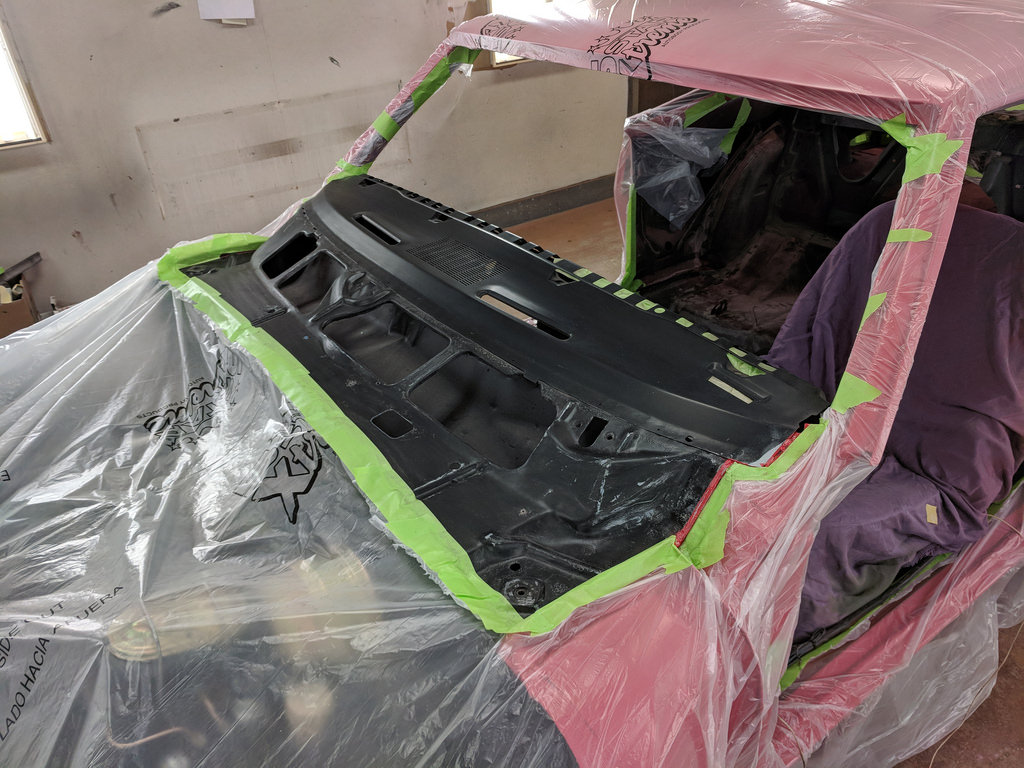
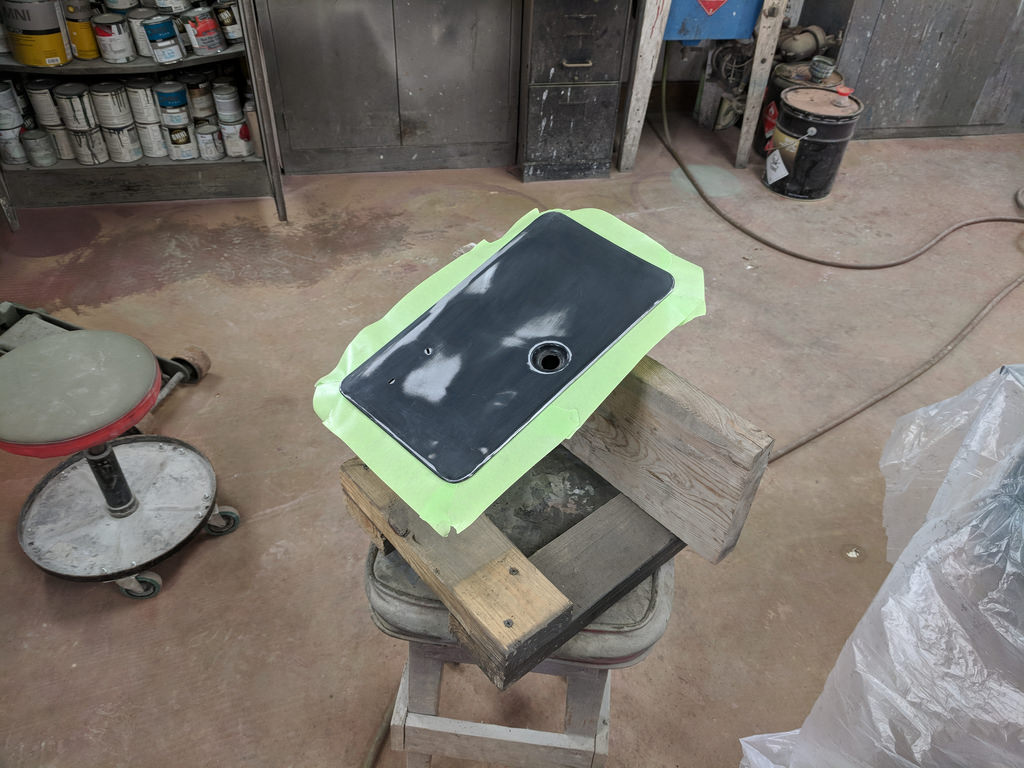
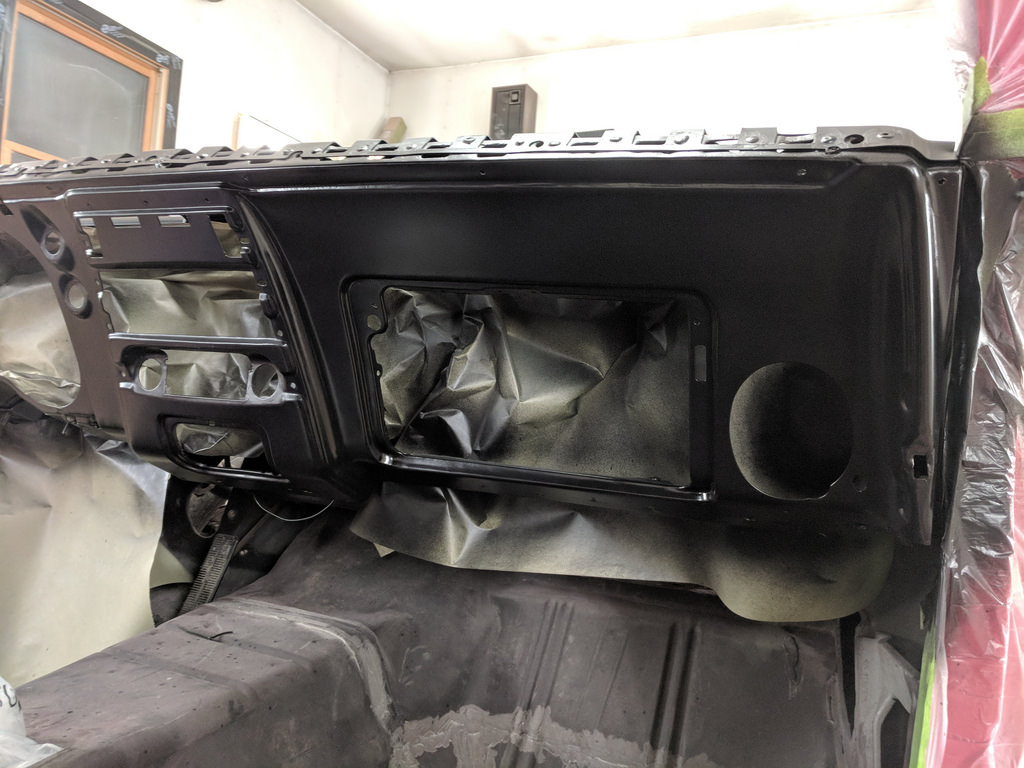
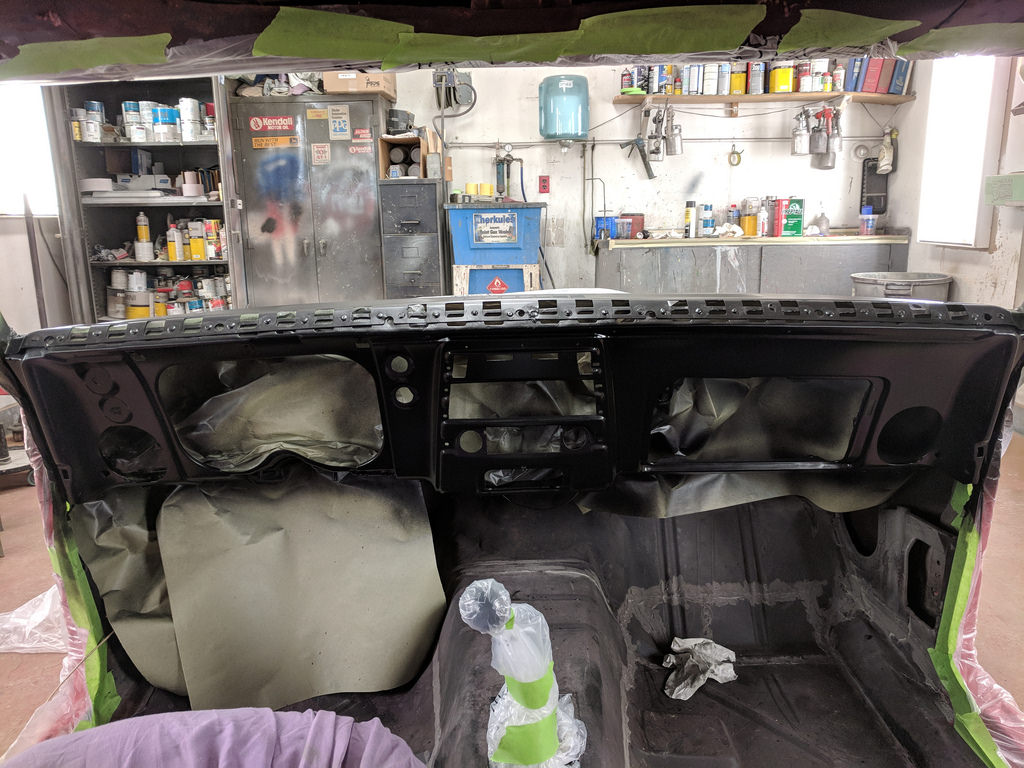
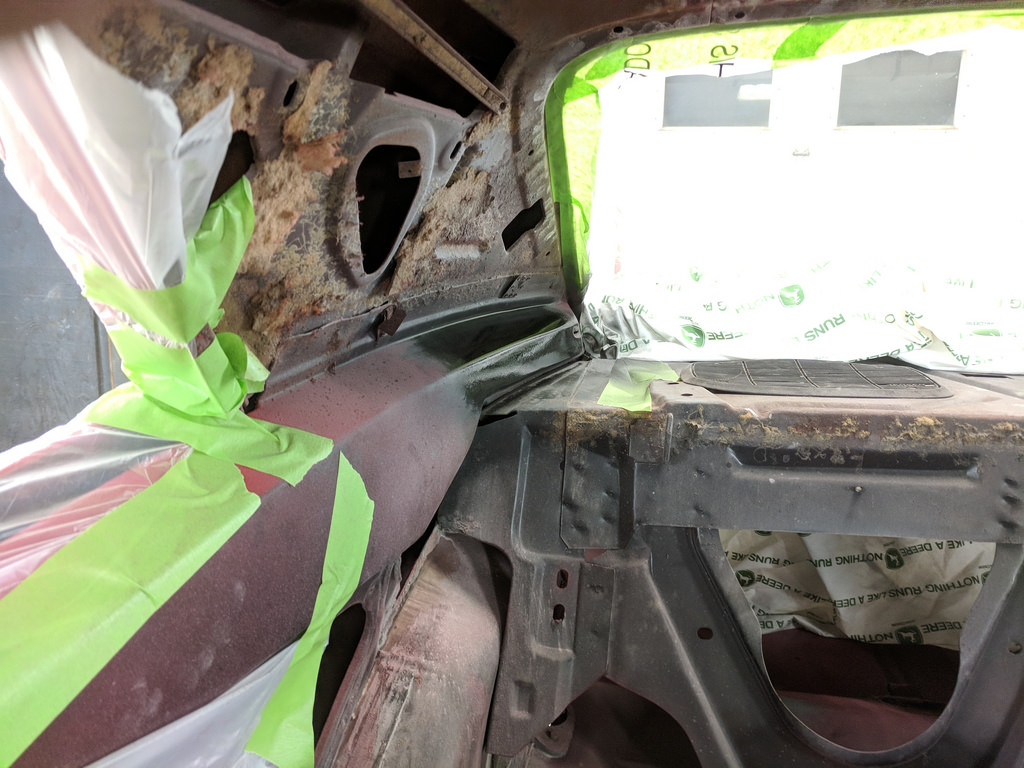
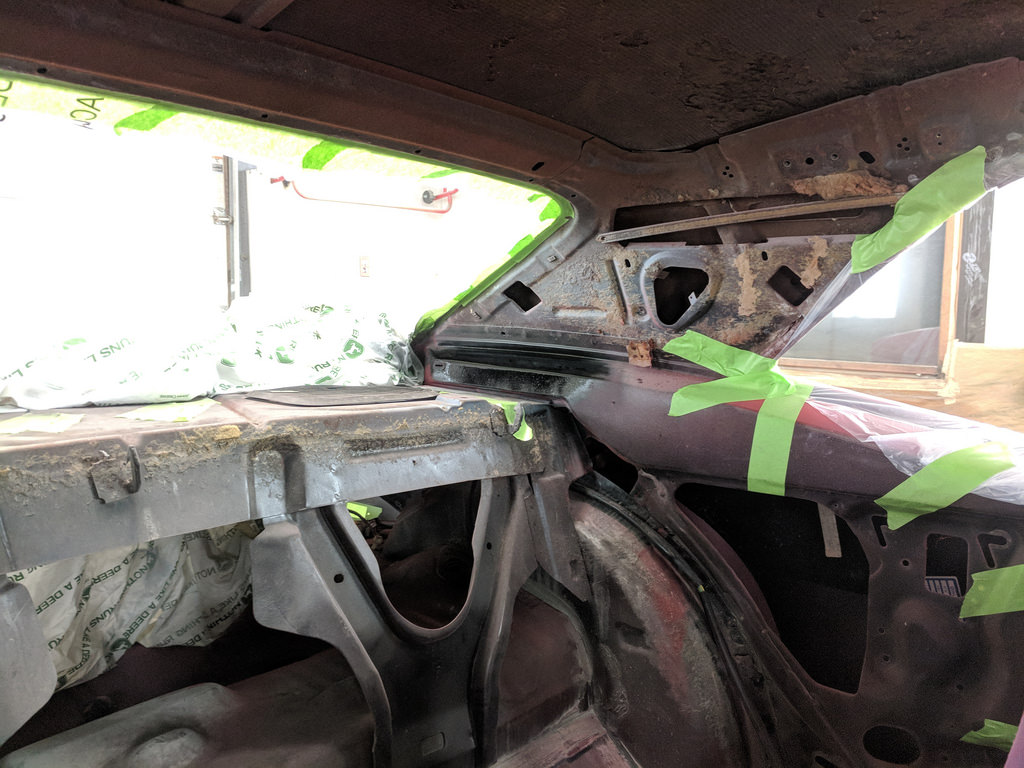
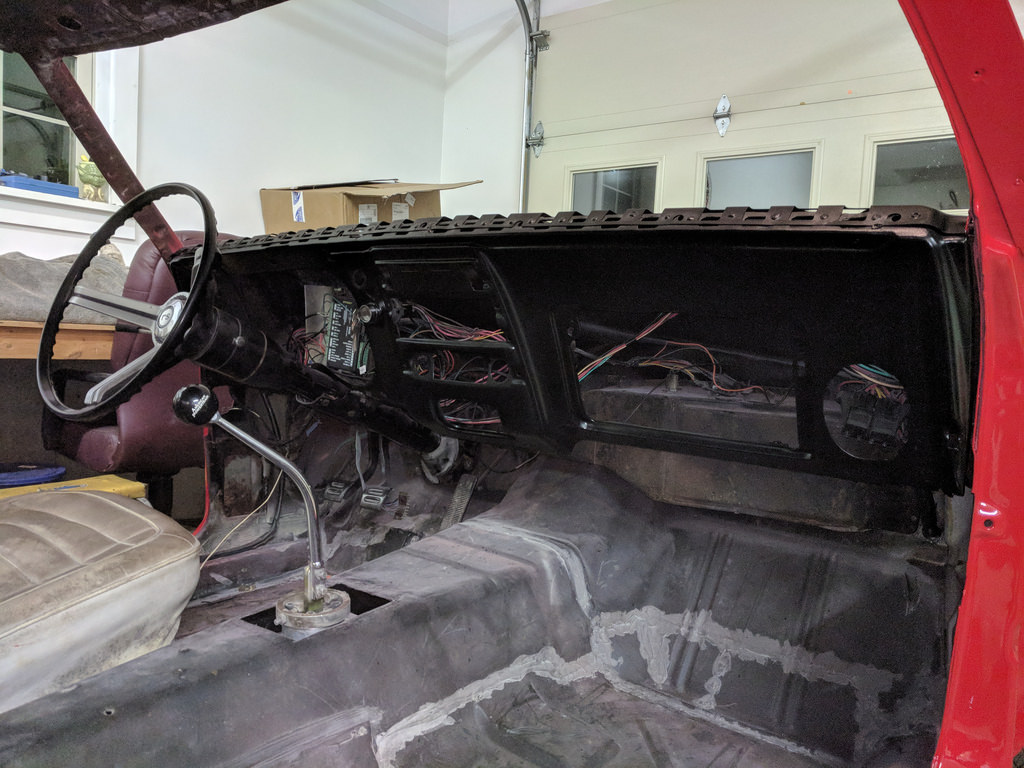
The last step before bringing the car home was to get the dash and cowl repainted. My buddy had covered my car with a plastic sheet to protect it from the car he was painting next door on his lift. So I used that as a base to mask from. It took me about 2 hours to back mask and carefully cover everything off. Then I scuffed the dash and upper cowl with a combination of 220, 400 grit, then a red scotch brite. I then wiped it all down good with some preps-all to remove all the grease and wax. Everything turned out so good! Very happy. I used a product by Transtar called Trim Black 2 in 1 in Satan color. I believe it is a very similar product as the SEM.
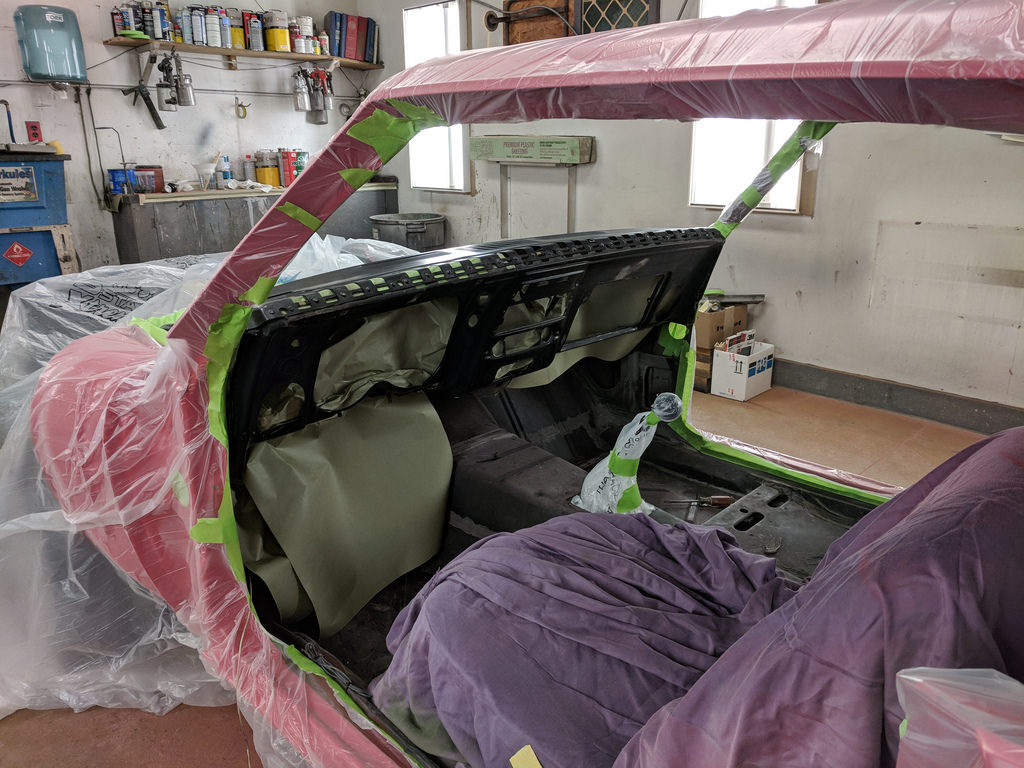
For the upper dash, I used the "dry spray" technique to try and replicate the suede finish on the upper dash. It did give it some texture, but not quite as much as I believe was factory. I'm happy with it though.

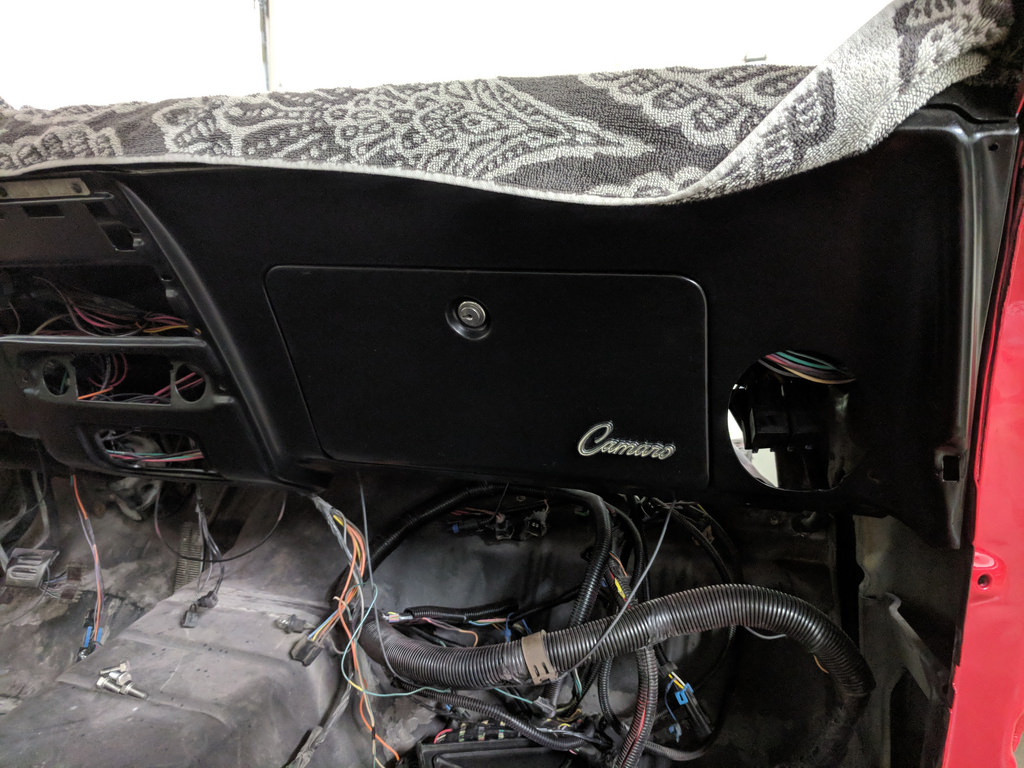
It took me a while to get the glove box "Camaro" emblem off, but I prepped the glove box door too.
The dash face was turning out beautiful. The driver side was flawless and the amount of gloss was spot on in my opinion.
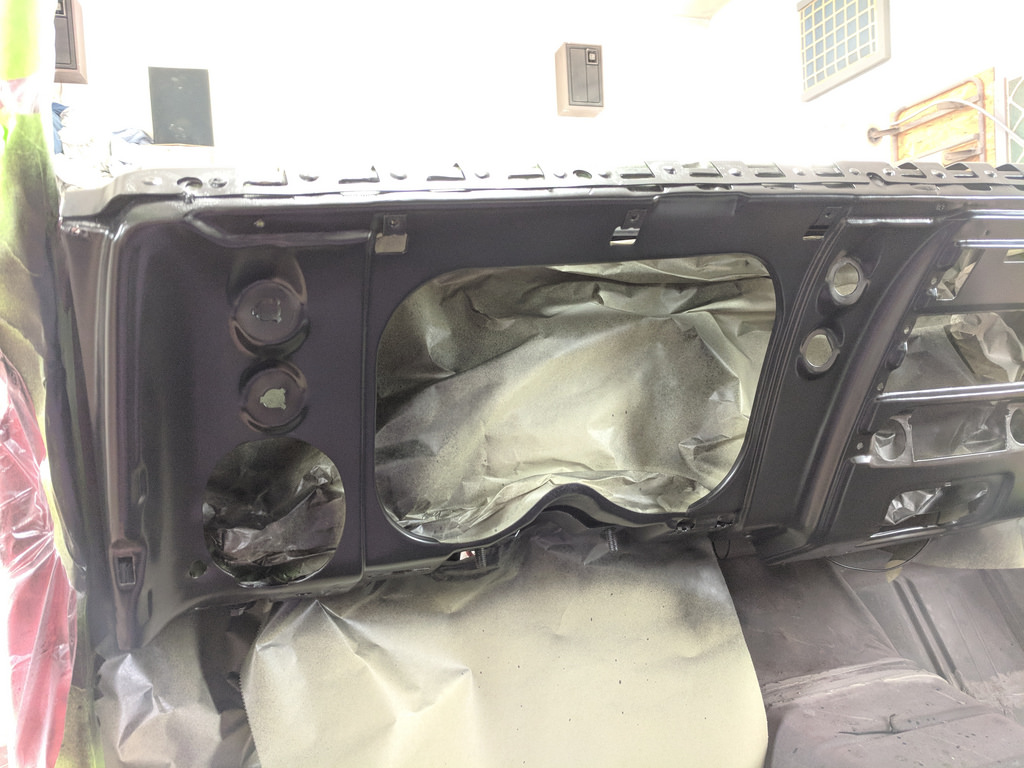
Then, while spraying the passenger's side there must have been some left over Armour All or something that had a reaction. It was disappointing, but not the end of the world.

I scuffed it down again with 220, then 400 , then a red scotch brite. Then I did the prepsall, but this time I used a self-etching primer as a base on the bare metal. That was the trick, and you would never know it had an issue.
Perfect, just like new!
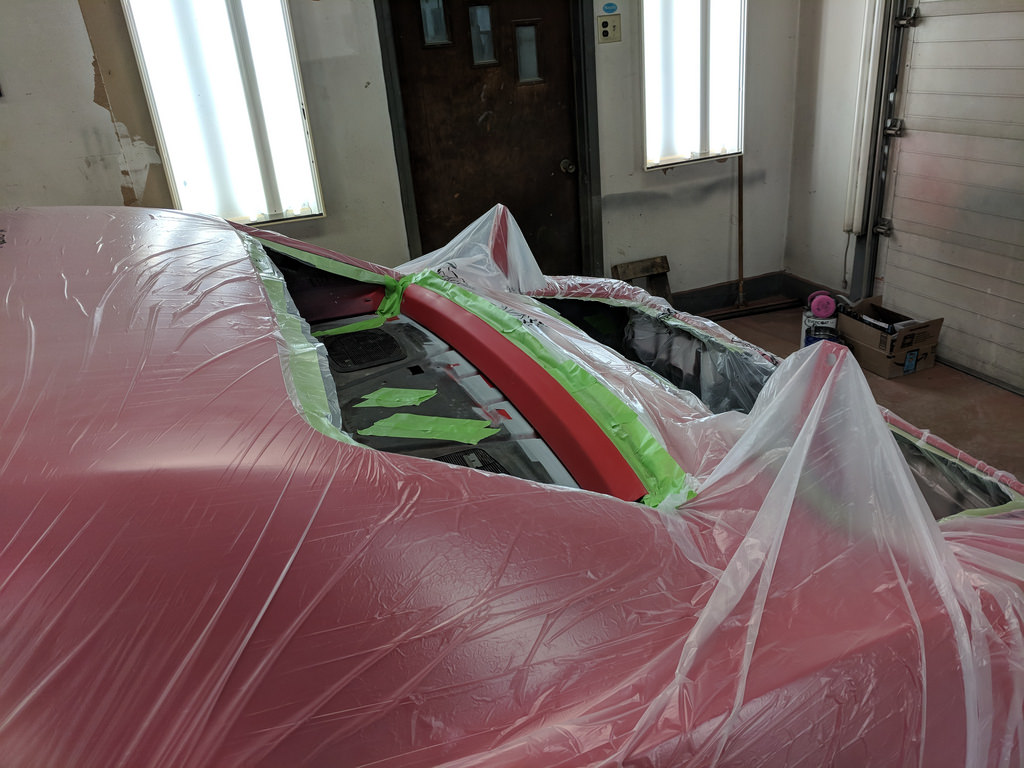
As I was letting the paint dry and preparing to get the car loaded on my trailer, I realized that the sides of the back dash wasn't finished. I forgot to take a picture of the completed back dash but that turned out great as well. I scuffed down the back sections and did the best I could to not get any dust in the finish. The actually turned out great without any runs or dust in the finish! Glad I remembered before I left the booth with it all masked off.
Finally was able to get it on the trailer, and back to my house! As you can see by the clock it was a late Friday night. I probably should have waited until the morning to get it, but we were having company over, and I already had the trailer attached to my truck.
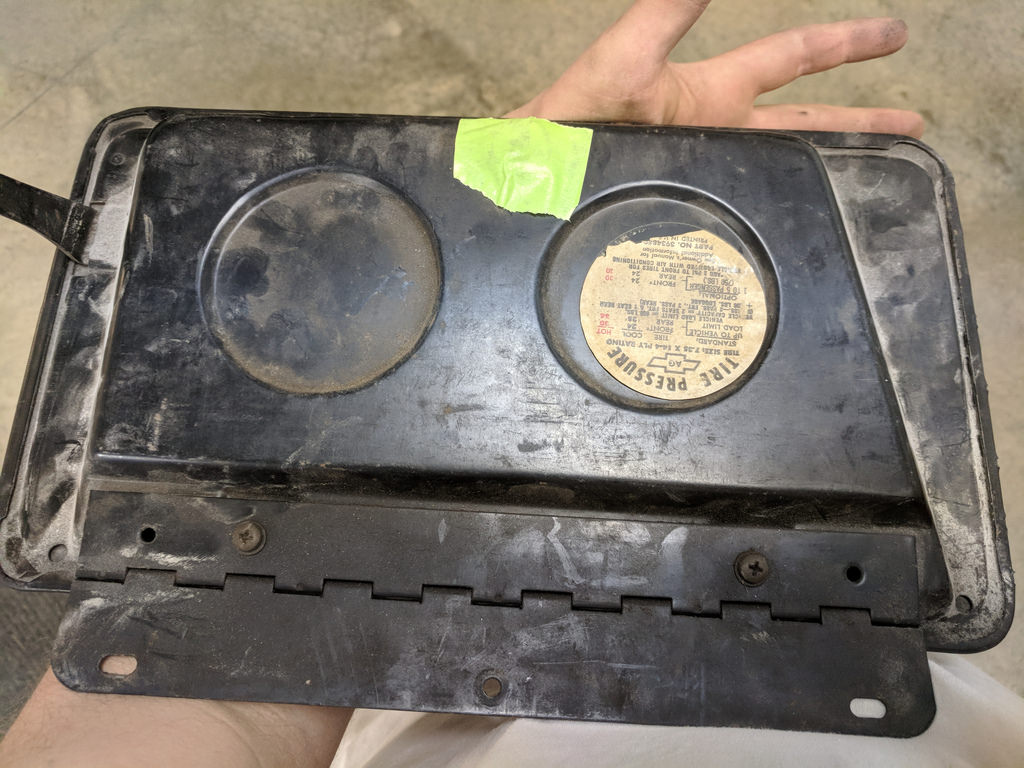
Hard to see in the picture, but it has a finish that is very close to original. Picture doesn't really capture it.

I left the back side original as I really like the original decal. If/when it ever falls off or is ruined I'll take it off and refinish the inside. And yes, I will clean up the backside before installation, haha.
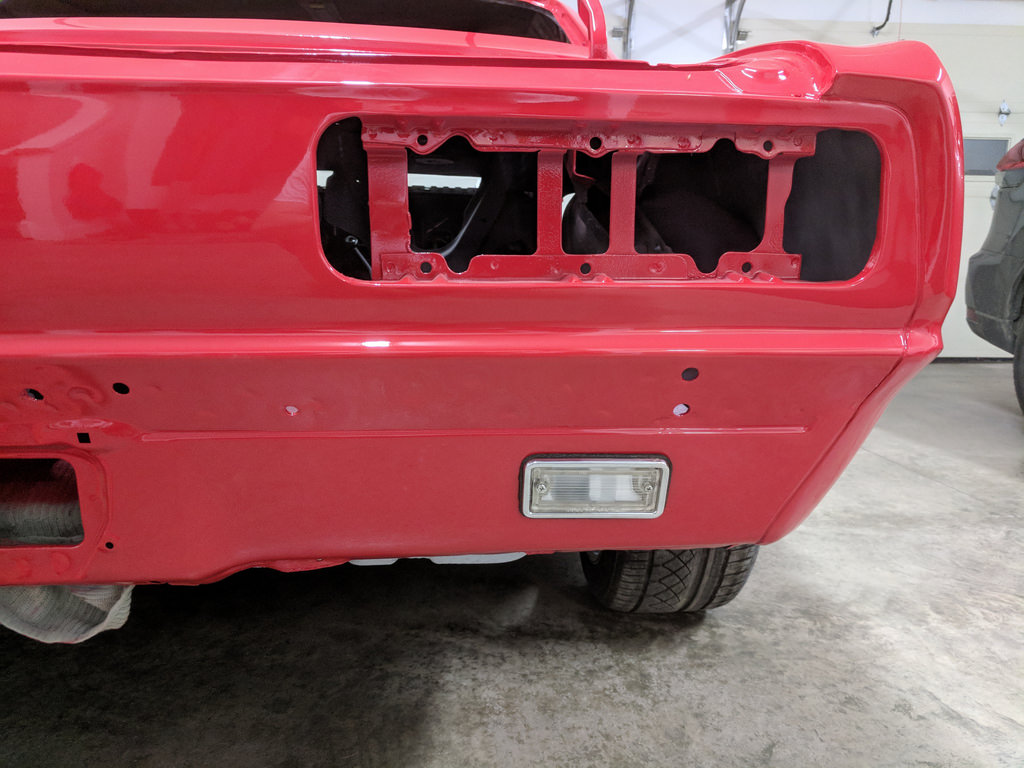
After I got the car back home I had a hard time as I wanted to bolt everything back on the car! I settled for the new reverse light that I picked up at Carlisle this year.
I need to make a list and prioritize what needs to be done so that I can get this car back on the road. I'm thinking going to prioritize by things that make the car safe, needed for an inspection, and needed for looks. Anything else will be something I do as I go, or over the winter.
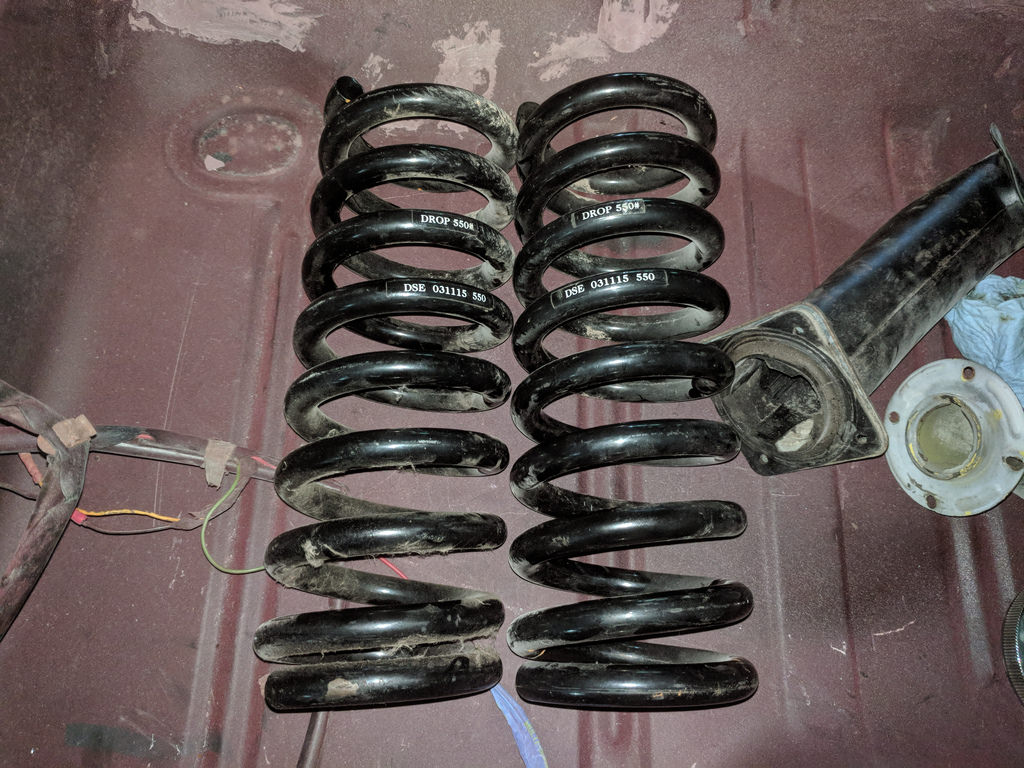
I also met a fellow PT member at an AutoX event to swap some parts. He wanted the Z51 rear brakes I picked up at Carlisle and I needed the front springs that he had. It worked out great as the event was about 40 mins from where we get groceries. So we took a trip up the finger lakes and had a great drive out. Thanks again Don and your car looks great. Love the wheels and gauges!
Cheers,
Ryan
1955 Nomad project LC9, 4L80e, C5 brakes, Vision wheels
1968 Camaro 6.2 w/ LSA, TR6060-Magnum hybrid and etc SOLD
1976 T/A LS1 6 Speed, and etc. SOLD
Follow me on Instagram: ryeguy2006a
-
06-11-2018 #347
Registered User
- Join Date
- Aug 2014
- Posts
- 435
Oh, Ryan...you forgot to cut the dash for a decent radio! lol
Jay
-
06-12-2018 #348
Registered User
- Join Date
- Sep 2009
- Posts
- 2,705
Jay, I'm trying to keep focused on getting the car on the road. I really would love to put a double din in the center. I have seen several people do it and when done right it looks great. Maybe after I get VA and have an excuse to cut it.
1955 Nomad project LC9, 4L80e, C5 brakes, Vision wheels
1968 Camaro 6.2 w/ LSA, TR6060-Magnum hybrid and etc SOLD
1976 T/A LS1 6 Speed, and etc. SOLD
Follow me on Instagram: ryeguy2006a
-
06-12-2018 #349
Registered User
- Join Date
- Aug 2014
- Posts
- 435
Back when I used to do these more often, I would use a Volvo 740 dash kit turned upside down to do single din radios. Just had to shave the sides down about 1/16" on each side and the angle was perfect. Sony and Pioneer both offer apps that allow you to control a radio from your phone or a tablet. You could do an inexpensive single din (much less work to make look good in that dash), but no option for a backup camera. You could get a gentex mirror with camera screen to do that. Makes more sense to me to put the screen there, since you should be looking up there anyway when backing up.
BTW, what's VA?
Jay
-
06-14-2018 #350
Registered User
- Join Date
- Sep 2009
- Posts
- 2,705
Those are some great ideas! You have definitely given this some thought. Oh, and VA is Vintage Air.
1955 Nomad project LC9, 4L80e, C5 brakes, Vision wheels
1968 Camaro 6.2 w/ LSA, TR6060-Magnum hybrid and etc SOLD
1976 T/A LS1 6 Speed, and etc. SOLD
Follow me on Instagram: ryeguy2006a
-
06-18-2018 #351
Registered User
- Join Date
- Sep 2009
- Posts
- 2,705
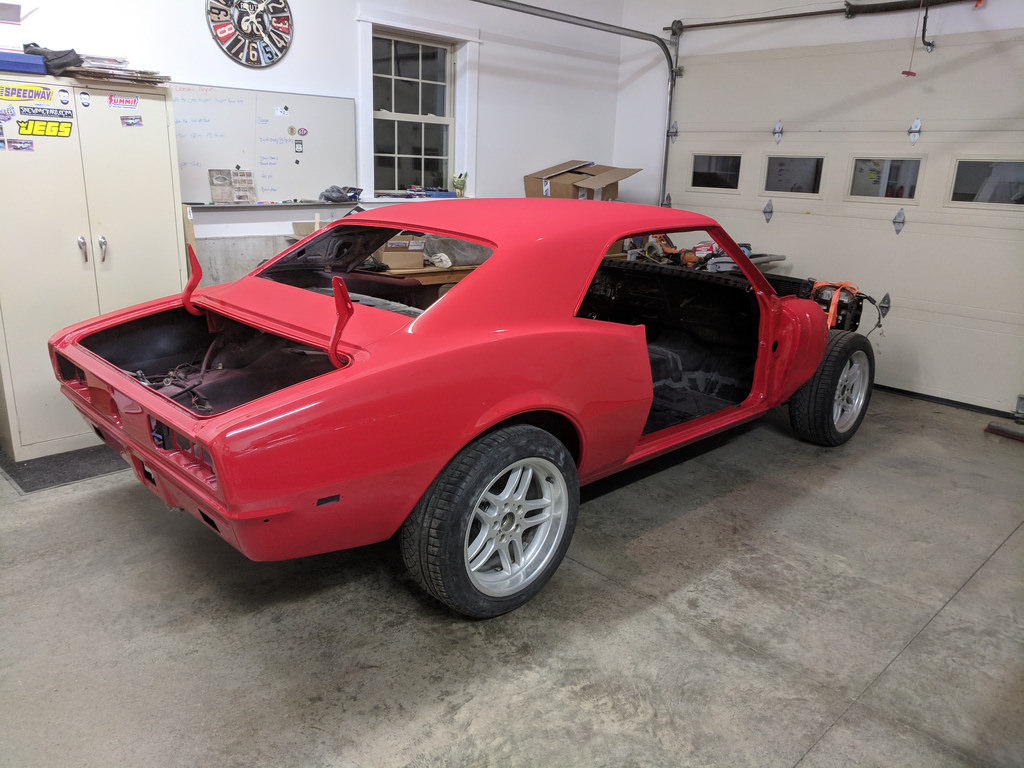
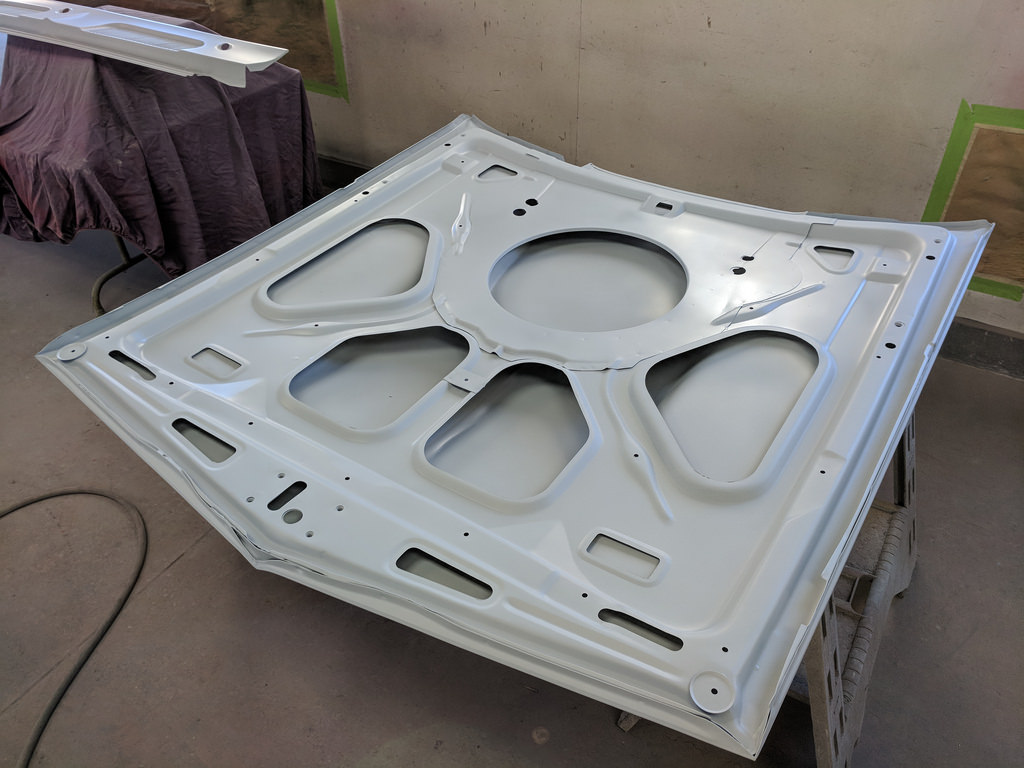
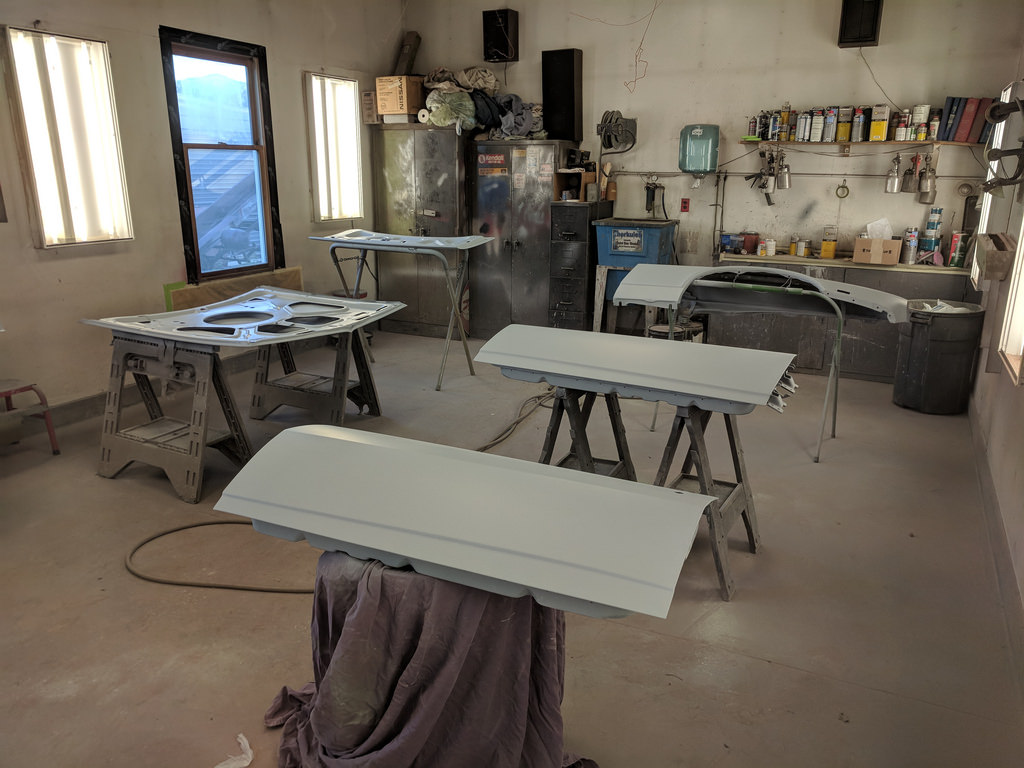
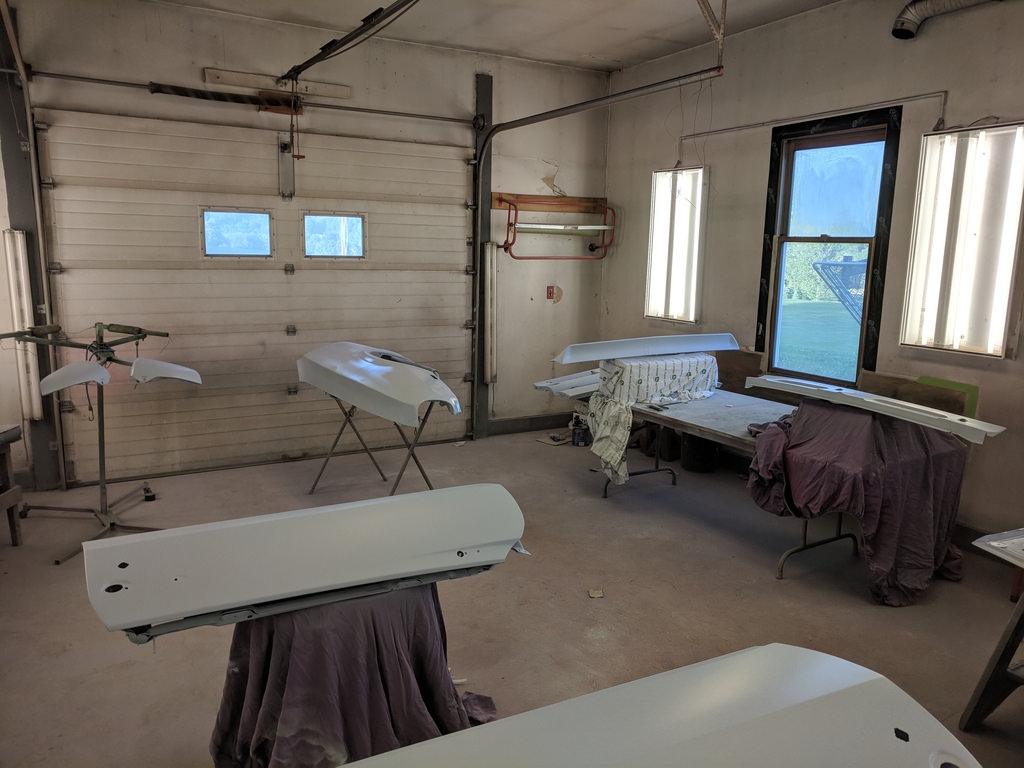
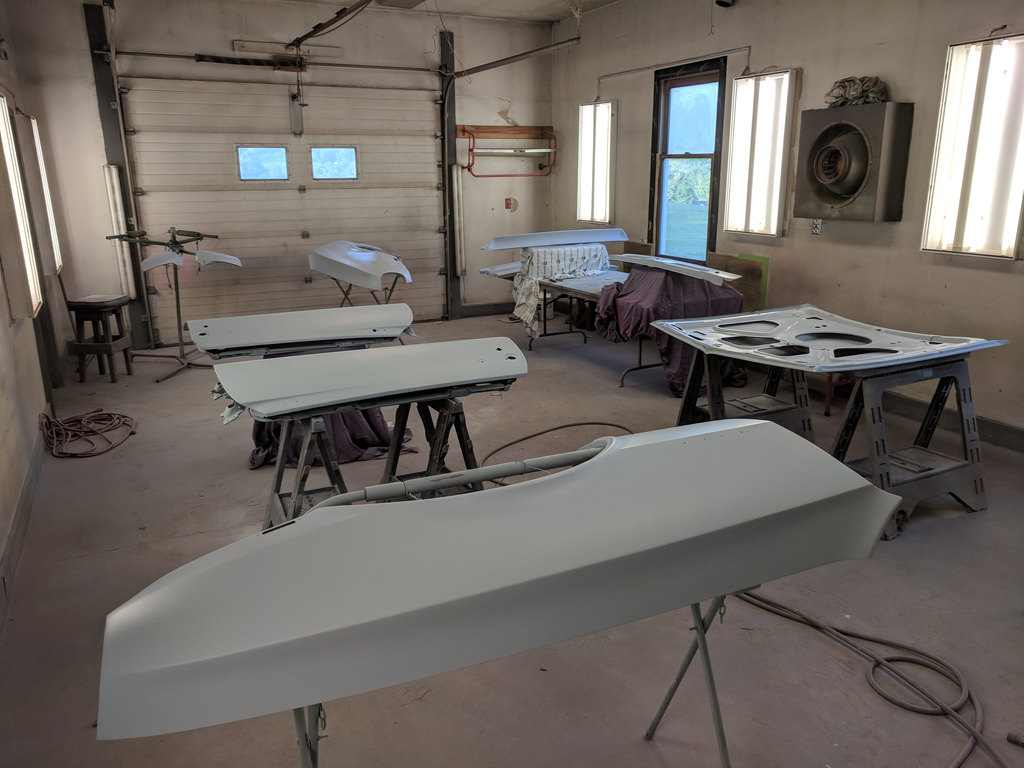
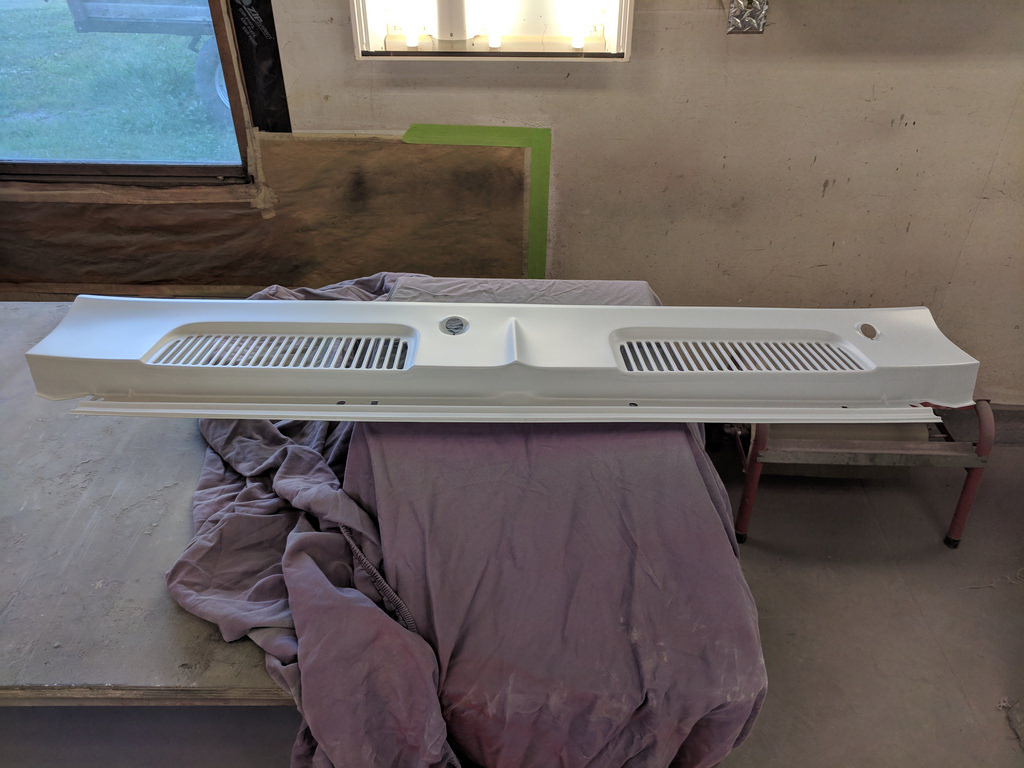
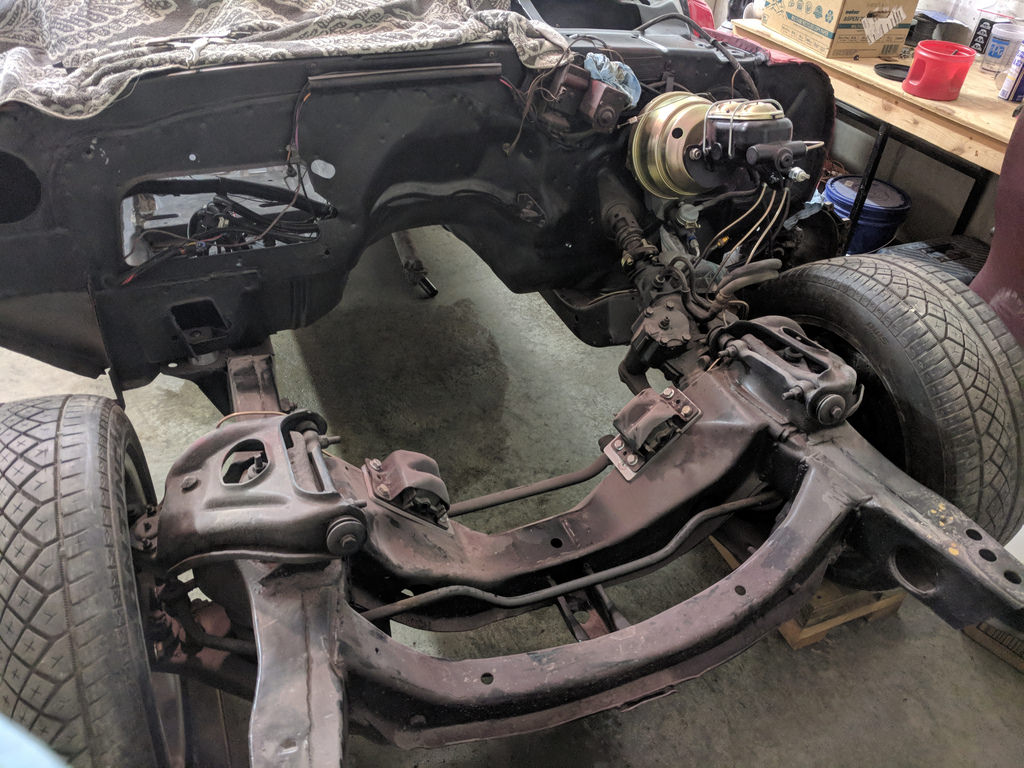
After I finished my honey-do list on Saturday afternoon, I was free to get some more work done on the remaining body panels. I did a final sand and once over on all the panels and they are looking super straight. I'm very happy as I was able to get primer on all the remaining body panels. For the hood and deck lid I shot them first with epoxy primer, then when it flashed I followed up with 2 coats of 2k high build.
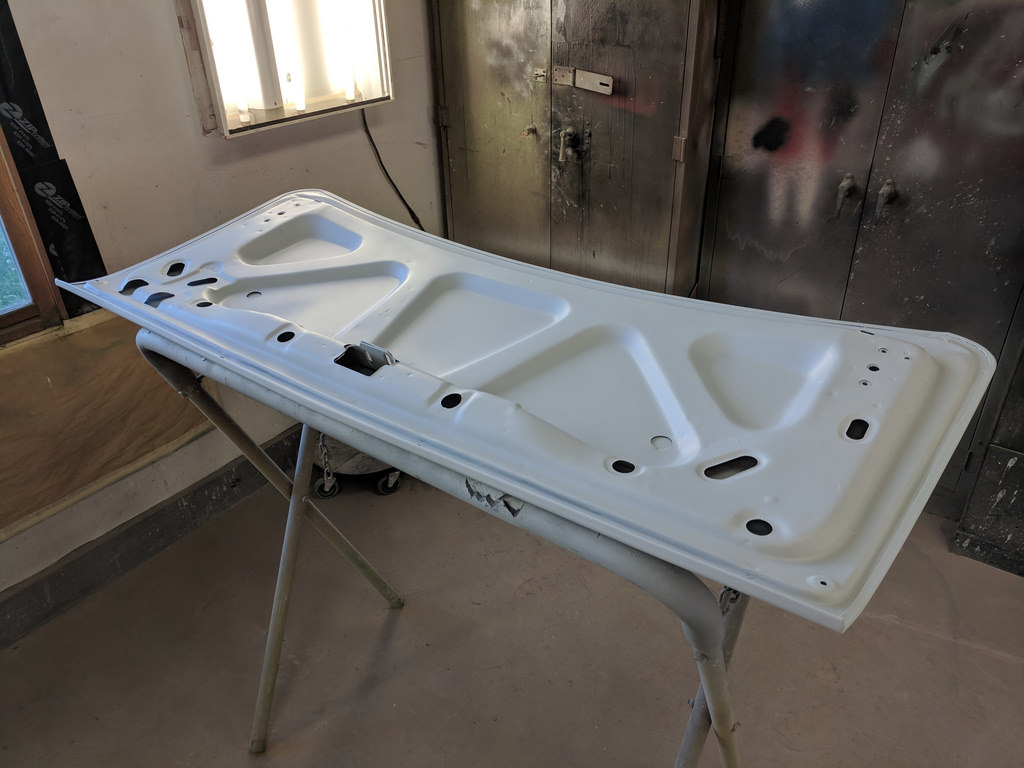
I put down 2 coats of the 2k high build on all the other panels.
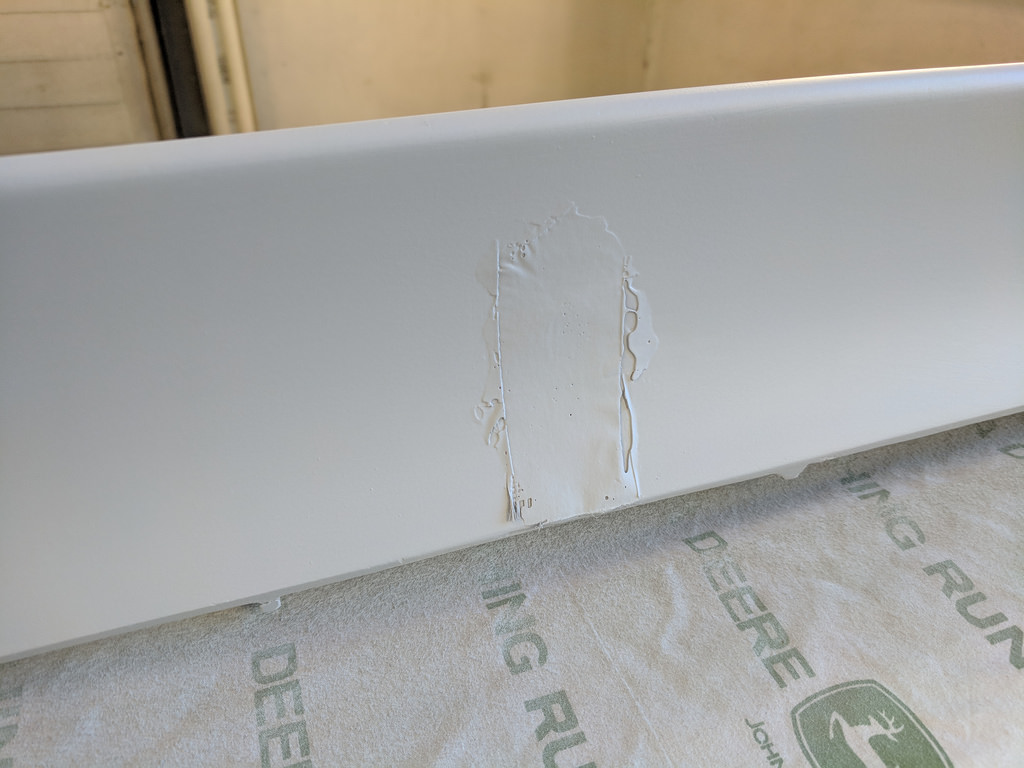
I had a crack in the rear spoiler that I drilled and repaired with fiberglass. There are a lot of scratches in it from someone who thought it would be a great idea to sand down to the fiberglass core with 80 grit... So I put 2 nice thick coats on this so hopefully I can get the majority of them out with guide coat. I reinforced the exterior with a piece of fiberglass. It looks bad, but should be very simple to buzz down and fill with a little skim coat.
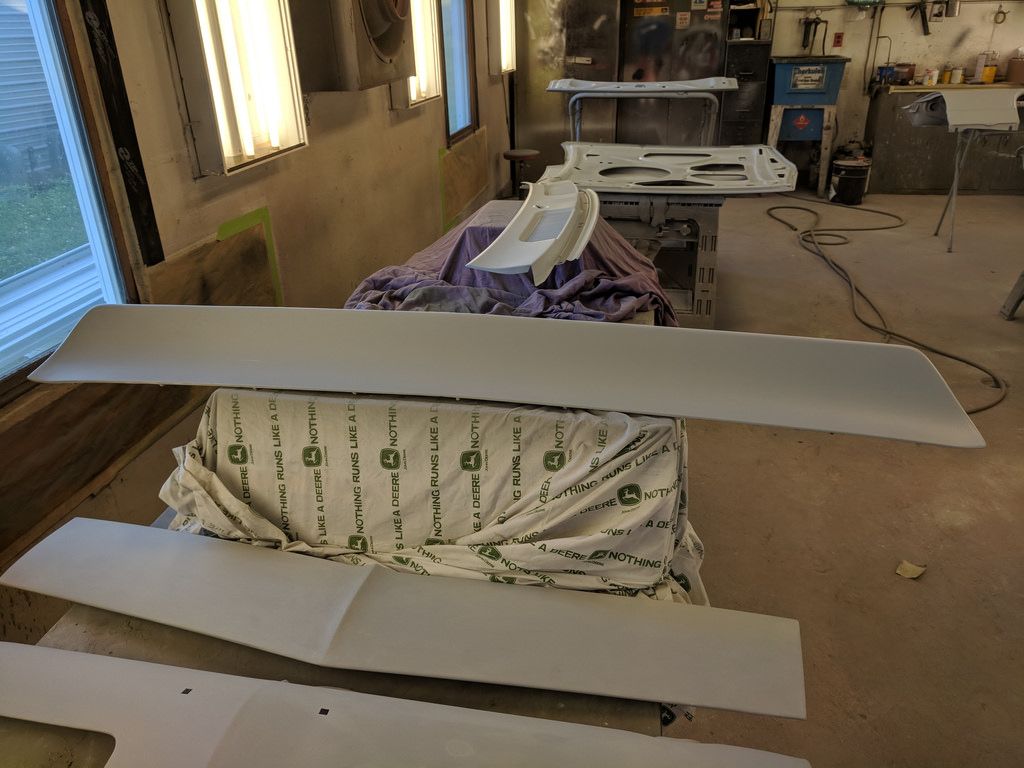
Felt good knowing that the doors, fenders, fender extensions, deck lid and cowl piece are now in a final primer with the next stage being color. The hood and rear spoiler will still need a little work, but I won't be ready for the hood for at least a few weeks, so it's not a huge deal.
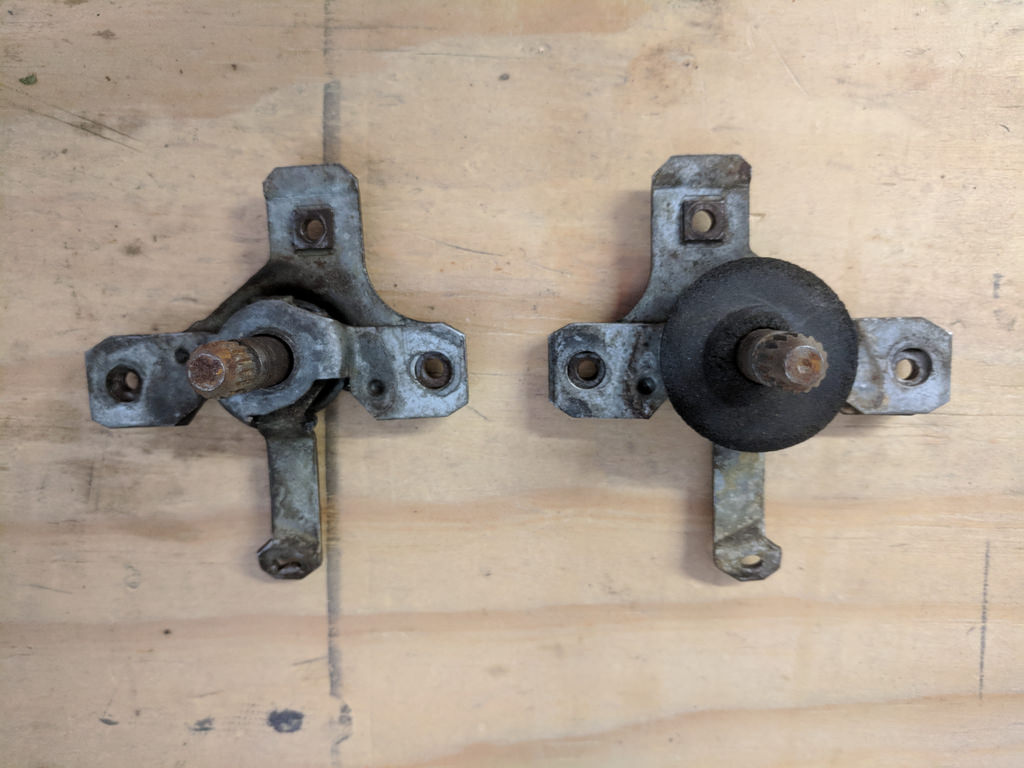
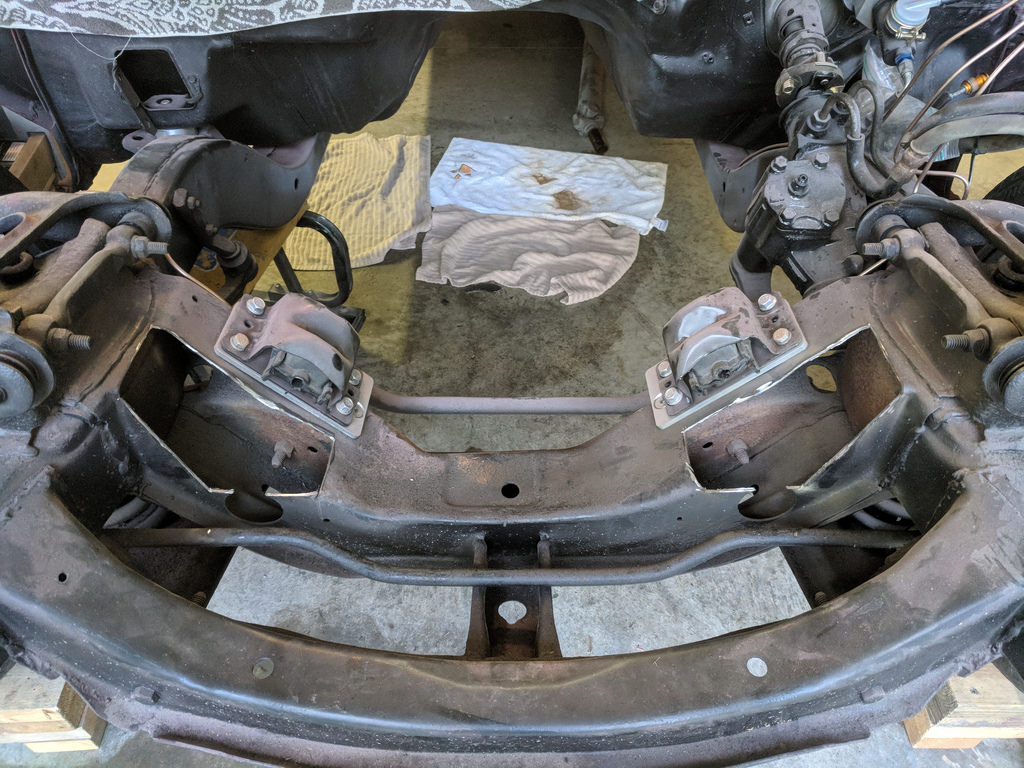
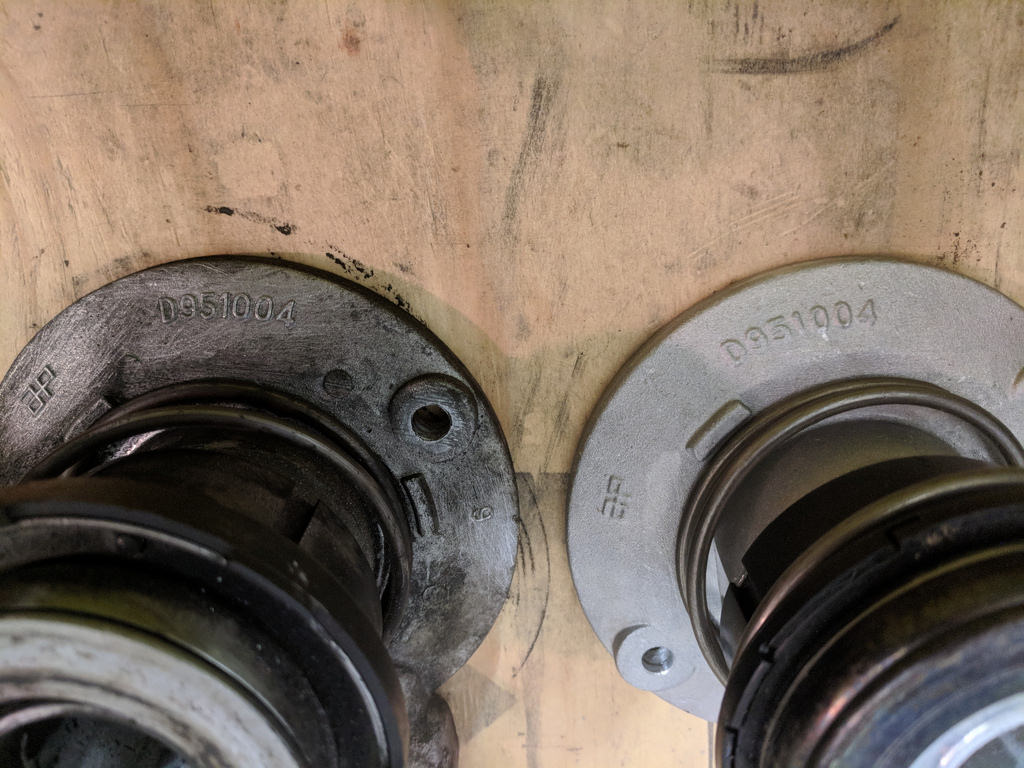
Next up was a few new parts updates. I've been keeping an eye out for the last few parts that I'm going to need to get my car back together. One of which was a set of standard door mechanisms. I got this pair on eBay for under $20.
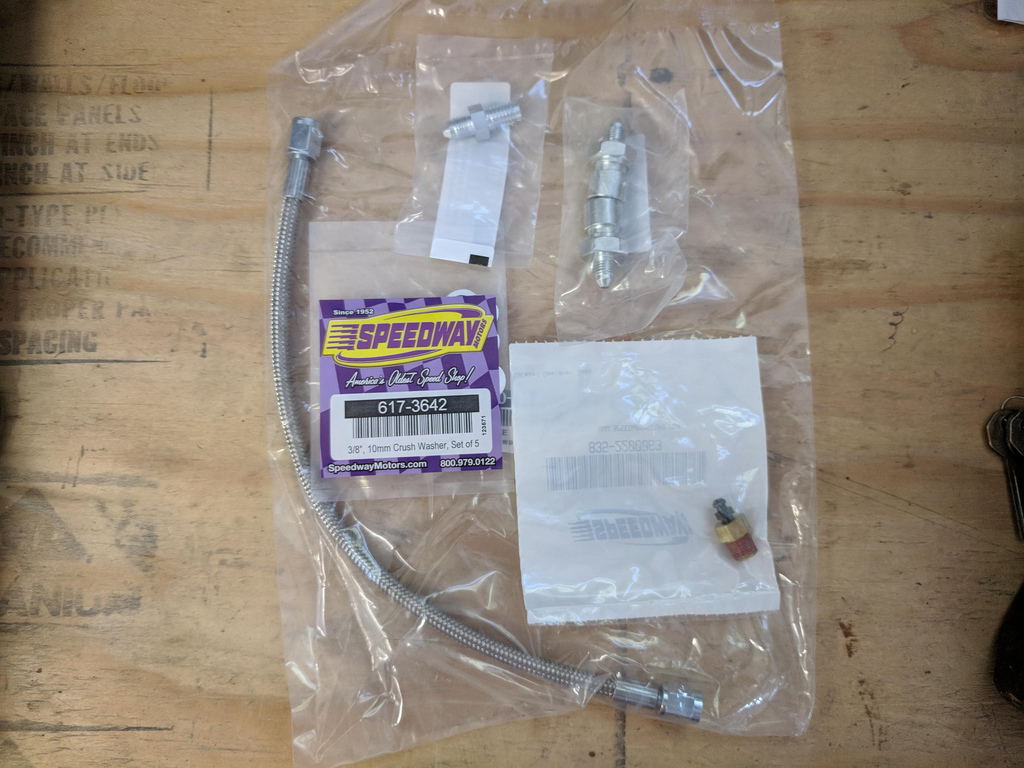
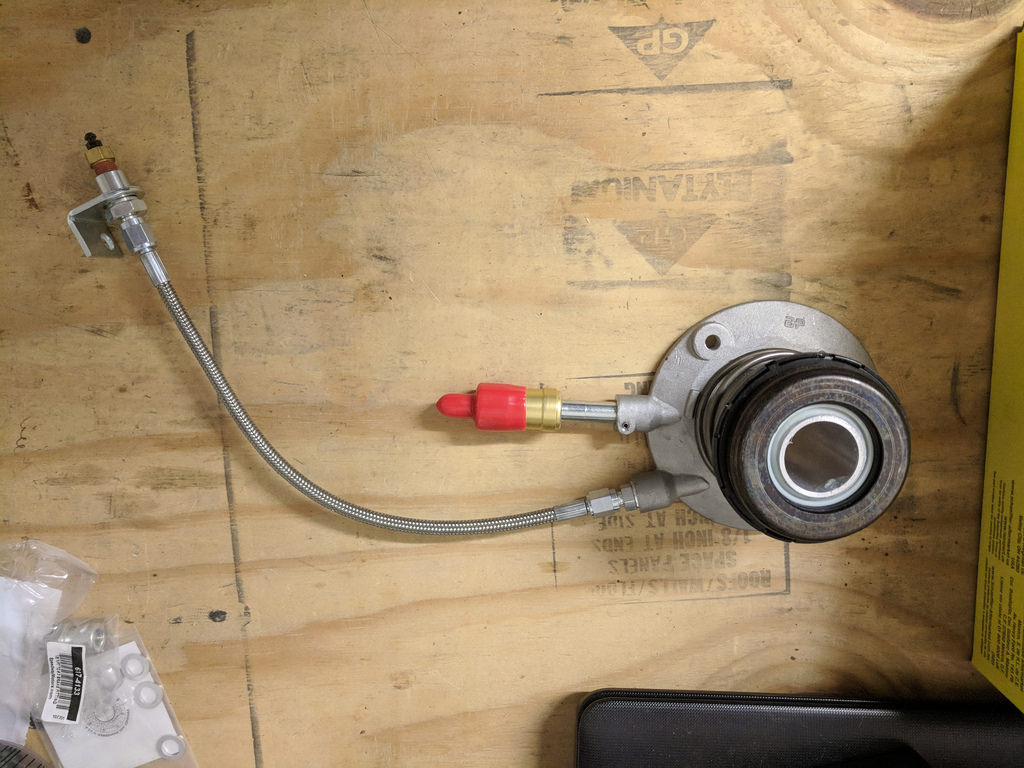
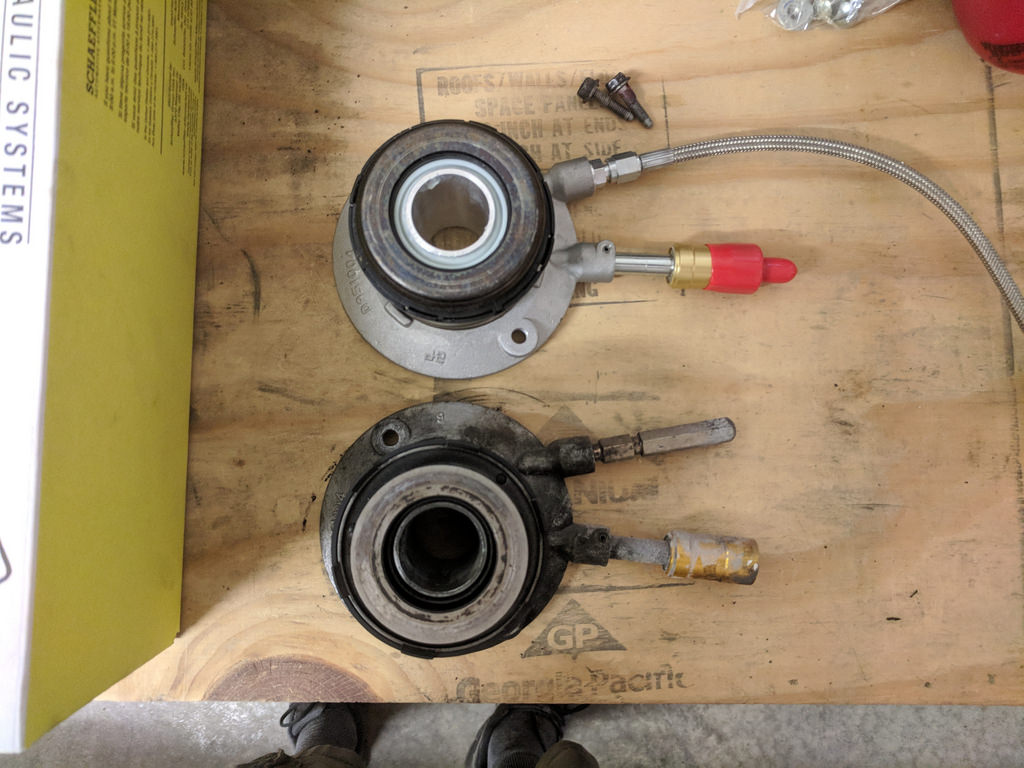
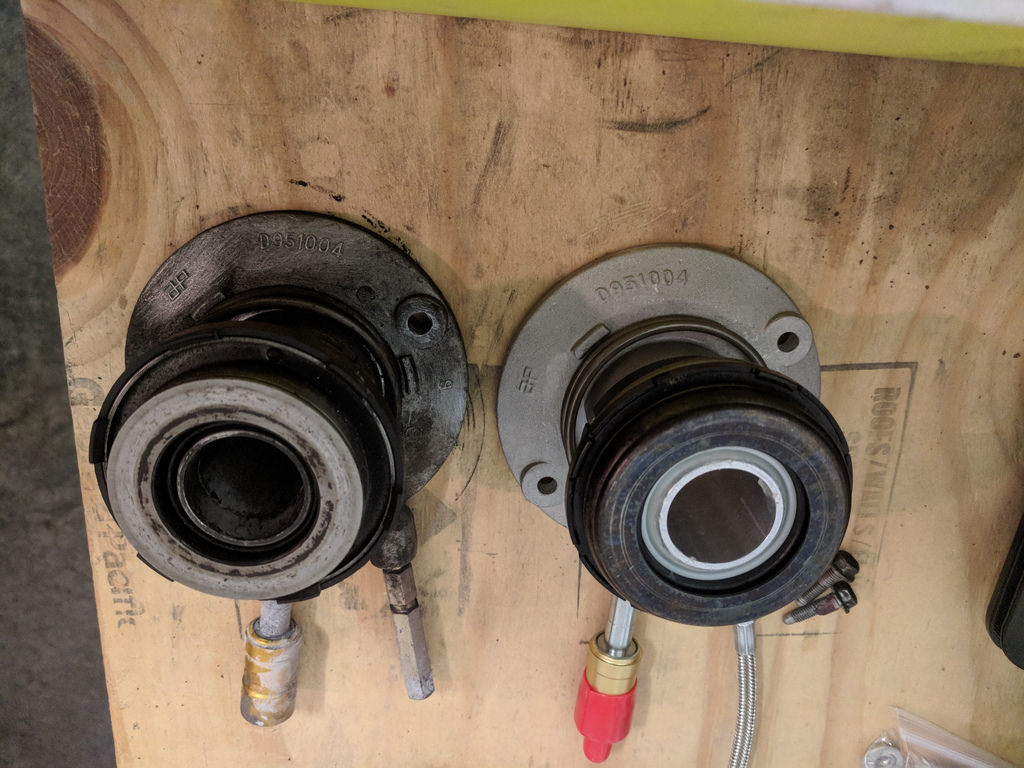
Since I got a new LS7 clutch and slave cylinder, I figured I might as well get the speed bleeder. I picked this one up from Speedway.
Since I'm running the truck pulley and LS1 Fbody accessories, I needed to run spacers to get everything out to the right depth. I have been running the water pump on the edge of the pulley as it fit, but wasn't right. I picked up these spacers and bolts to fix that issue, and will also double as a better location for my water temp sensor. I never liked how far off of the engine the plug was in the passenger side rear of the cylinder head.
 [/url]
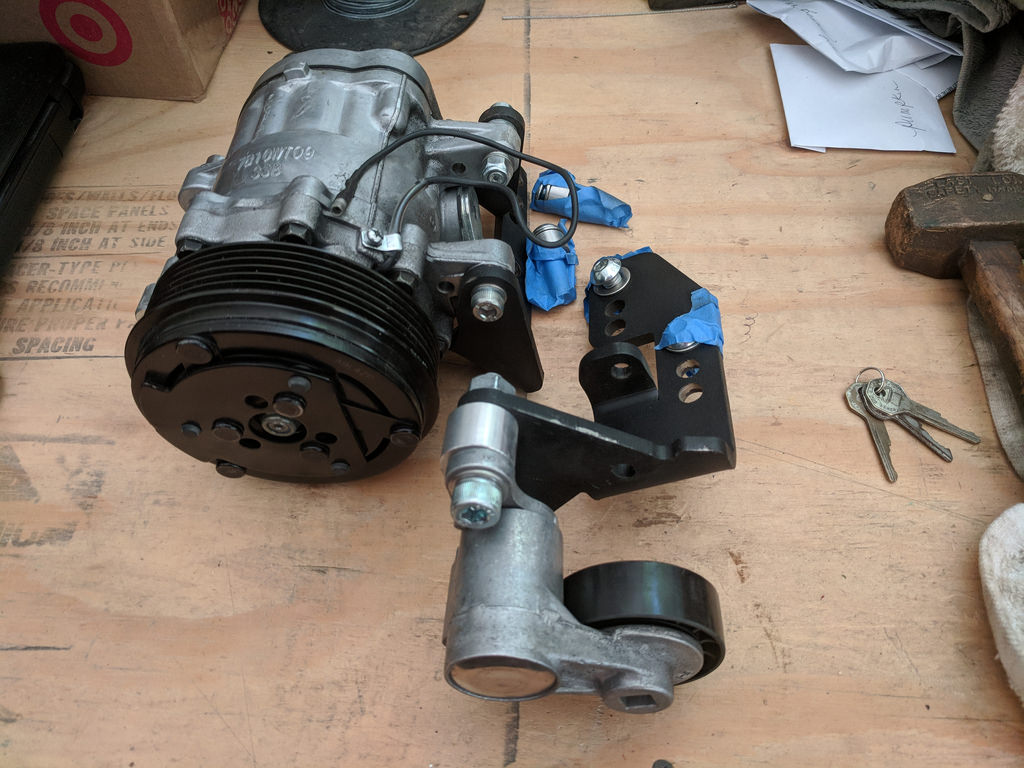
And lastly, I picked up a Sanden SD7B10, which is a mini compressor, and when configured with the Dirty Dingo low mounts I believe will work well with the Holley engine mounts. I picked these from a member on Camaros.net (Thanks Shad) as a used for mock-up only basically out of the box items. They were installed once, then he changed directions. Luckily for me, he already had them installed on his frame, with notches, and using the same Holley Mounts I have. So I'm basically going to copy his design and install it on my car. I need to pull my motor anyway to swap out my oil pan to the Holley 302-3, and I might as well notch my frame while the motor is out. Once modified, I'm going to put the compressor back in a box until I pull the trigger on the Vintage Air components. Just planning for the future.
Cheers,
Ryan
1955 Nomad project LC9, 4L80e, C5 brakes, Vision wheels
1968 Camaro 6.2 w/ LSA, TR6060-Magnum hybrid and etc SOLD
1976 T/A LS1 6 Speed, and etc. SOLD
Follow me on Instagram: ryeguy2006a
-
06-20-2018 #352
Registered User
- Join Date
- Sep 2009
- Posts
- 2,705
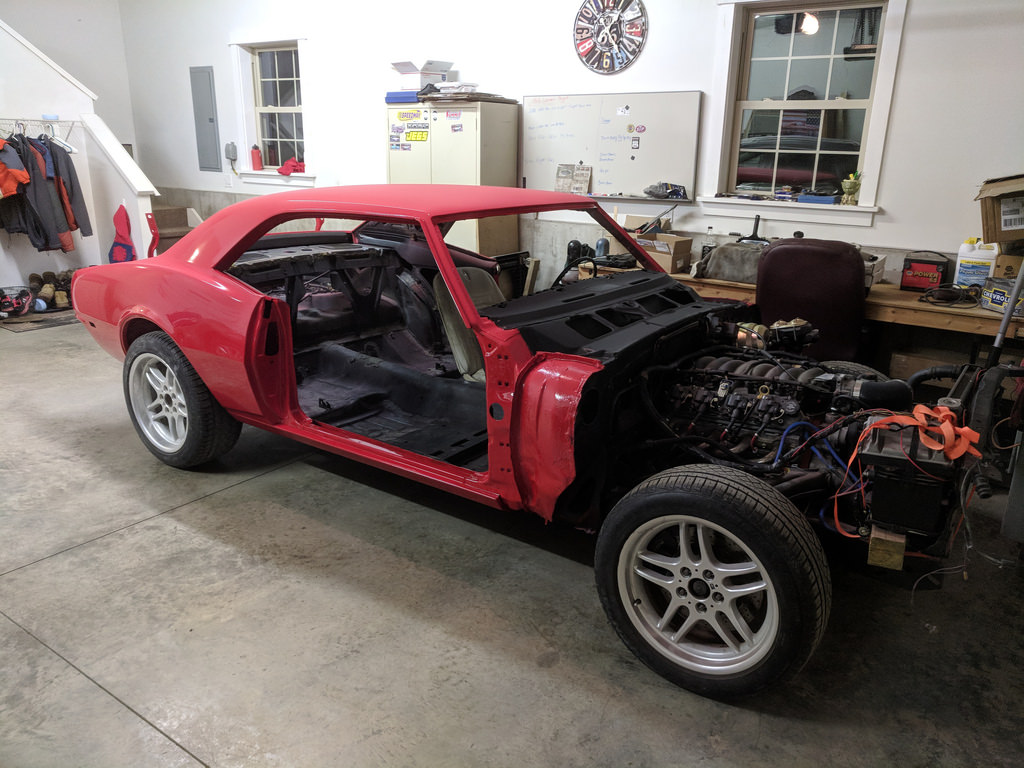
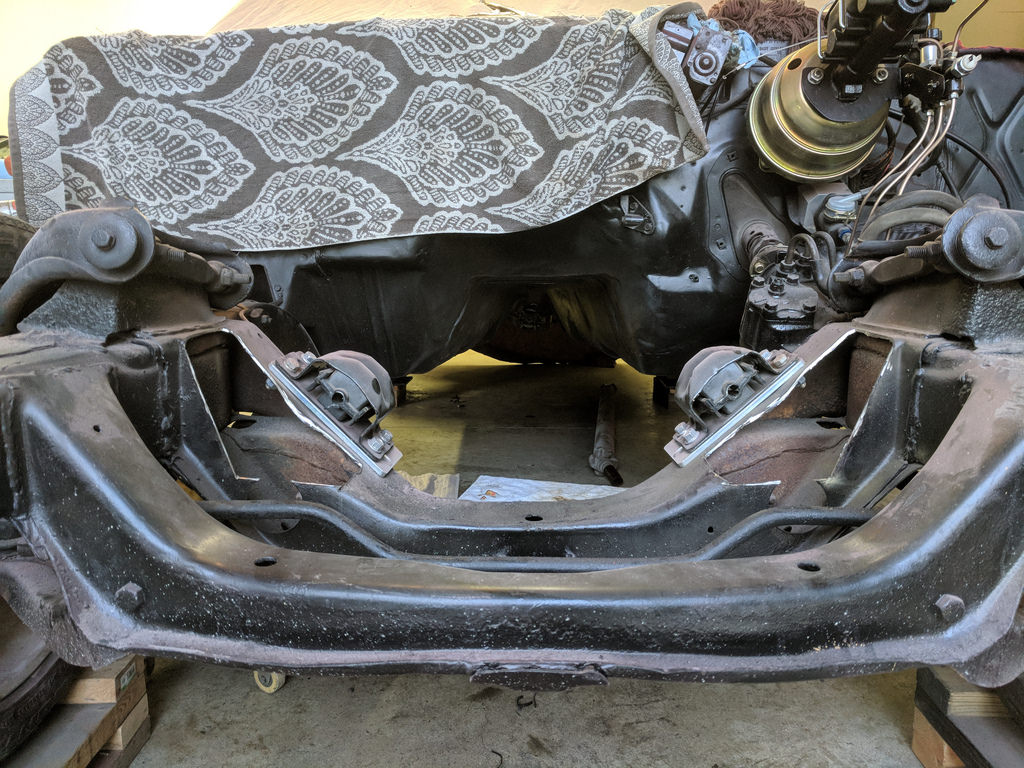
I worked for the last few days to get the car prepped to pull the motor. The biggest reason for pulling the motor is to replace the truck oil pan with the Holley 302-3 pan that I bought back in October when they first came out. I've been waiting for the opportunity to get the engine pulled so that I could replace it for a while now. My main goal was to get the body into paint, then focus on pulling the motor to swap things around. Many people were wondering why I would do it after paint, but to me it really didn't seem to make a difference either way. It actually ended up being a perfect because there was dust all over the engine bay from when it was painted and primed, so it gives me the opportunity to get it all cleaned and ready for a clean motor.
I pulled off basically everything but the engine Monday night. Seems like I'm going in the wrong direction...
Then last night I disconnected everything else and decided to get the motor out of there.

Everything was going great, then just as I was getting the drivetrain at about 45* with the cherry picker the plug I put in the transmission let go and all my trans fluid went on my clean floor... I got most of it with a towel, but I'm hoping that I can get in with a cleaner tonight and spray it down before it stains. A few mins later and the combo was out and trans separated from the motor.
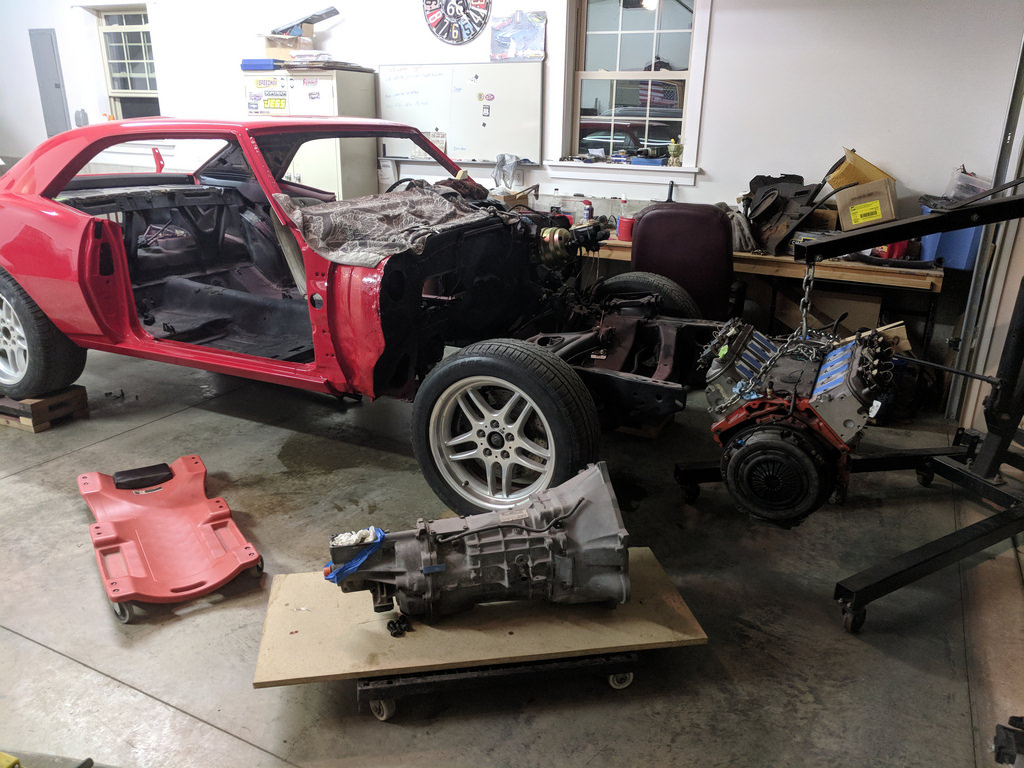
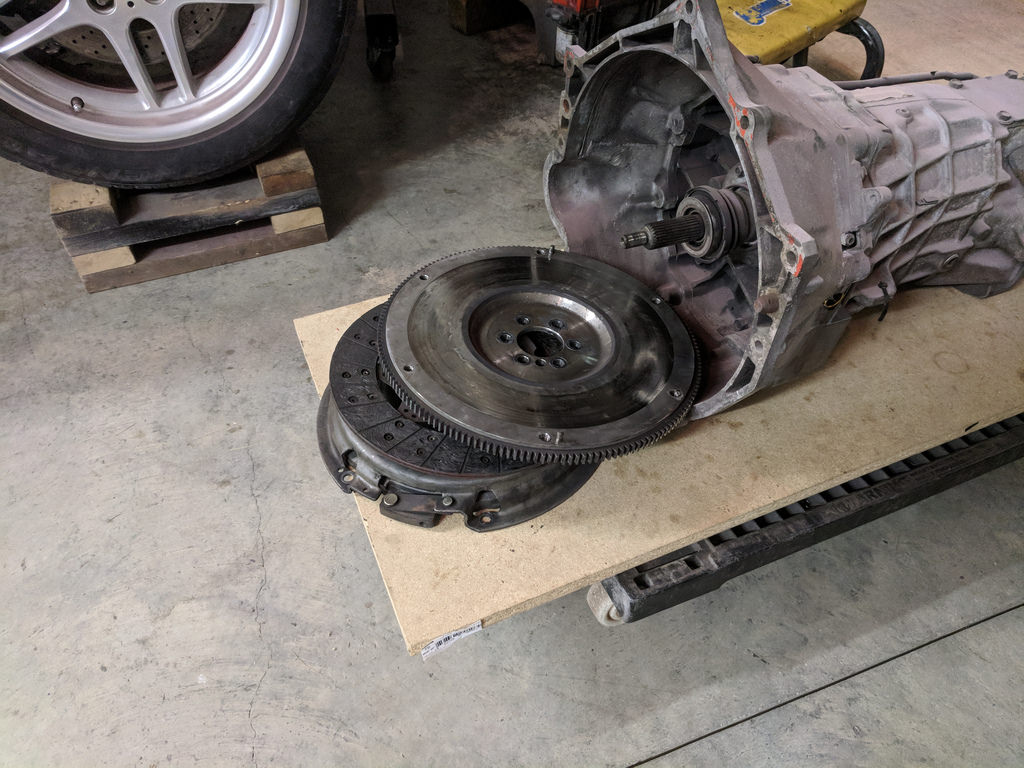
Old mystery clutch and flywheel gone and on my breadcart repurposed as a dolly.
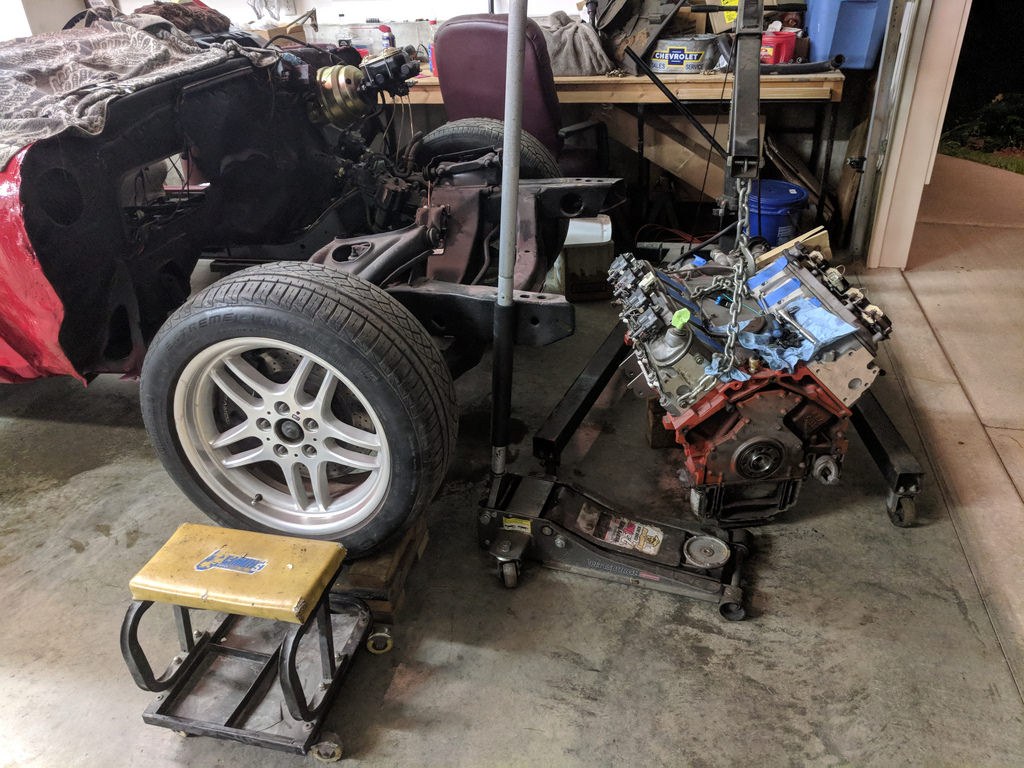
An empty feeling, but the silver lining is that I will get a bunch of clearance with the new pan, brand new LS7 clutch, new slave cylinder/throw out bearing, and once the frame is notched my accessories will fit perfectly. Plus I can get in there to clean everything once more before the engine/trans is in for good.
And to make sure that I ended on a high note, I installed the glove box door. Doesn't seem like it, but it was really nice to install a clean part. Quick and easy satisfaction.
I also started to play around with assembling the Speedway speed bleeder and new slave cylinder. It worked great and will hopefully save me a bunch of headaches and possible clutch contamination.
I have to say, now that I have already modified everything to fit I'm looking forward to just bolting stuff together and re-installing it. When I was in the process of removing the motor, everything came apart quickly and easily. Especially the 3 piece transmission mount that I made. It came out just the way I wanted without a hitch. I'm hoping that I won't catch any snags along the way and that it goes back together as easily as it came apart. Just need to make a few notches in the frame, welderup and reinstall the motor.
Cheers,
Ryan
1955 Nomad project LC9, 4L80e, C5 brakes, Vision wheels
1968 Camaro 6.2 w/ LSA, TR6060-Magnum hybrid and etc SOLD
1976 T/A LS1 6 Speed, and etc. SOLD
Follow me on Instagram: ryeguy2006a
-
06-20-2018 #353
Registered User
- Join Date
- Mar 2009
- Location
- Houston, TX
- Posts
- 1,192
Nice progress Ryan. I'm sure you've thought of it, but I'd suggest you mock up the engine/trans with the clutch hydraulics outside the car and test the clutch. That way if you need to pull engine/trans apart, it's not as big of a deal compared to pulling the whole thing out of the car.
Tu Ho
Firebird V2-LS swap
06-20-2018 #354
Registered User
- Join Date
- Sep 2009
- Posts
- 2,705
Thanks Tu! I'm not sure what you mean though about testing my clutch outside of the car? Do you mean to just verify that the hydraulics are working prior to sticking it into the car for final?
1955 Nomad project LC9, 4L80e, C5 brakes, Vision wheels
1968 Camaro 6.2 w/ LSA, TR6060-Magnum hybrid and etc SOLD
1976 T/A LS1 6 Speed, and etc. SOLD
Follow me on Instagram: ryeguy2006a
06-21-2018 #355
Registered User
- Join Date
- Sep 2009
- Posts
- 2,705
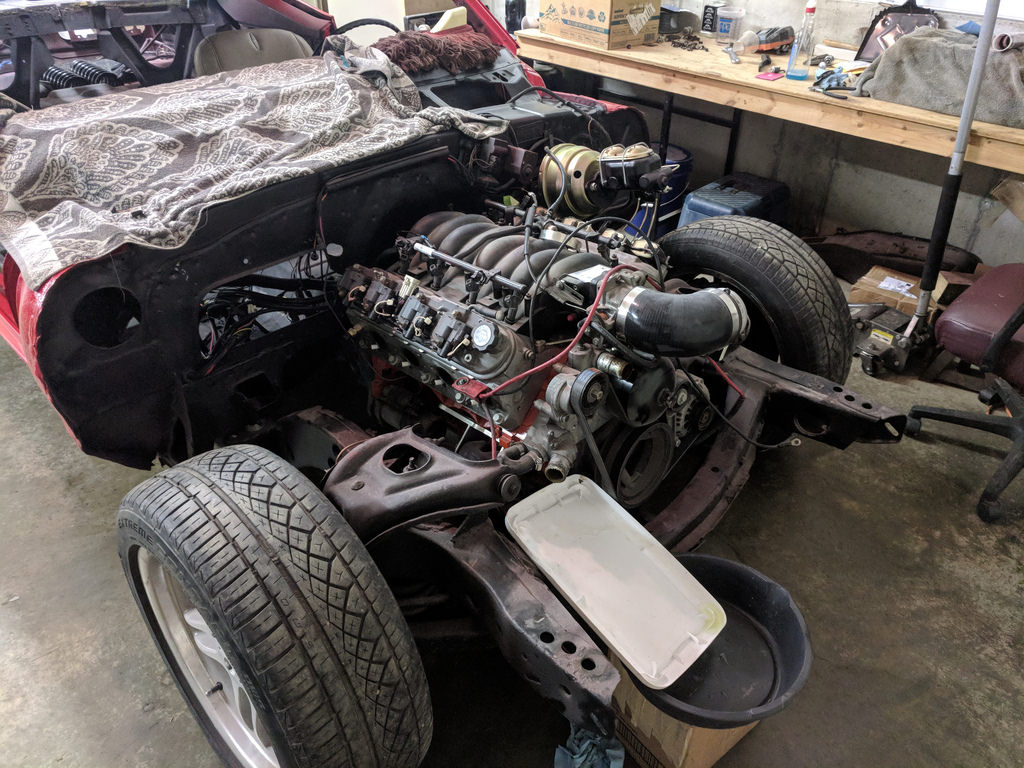
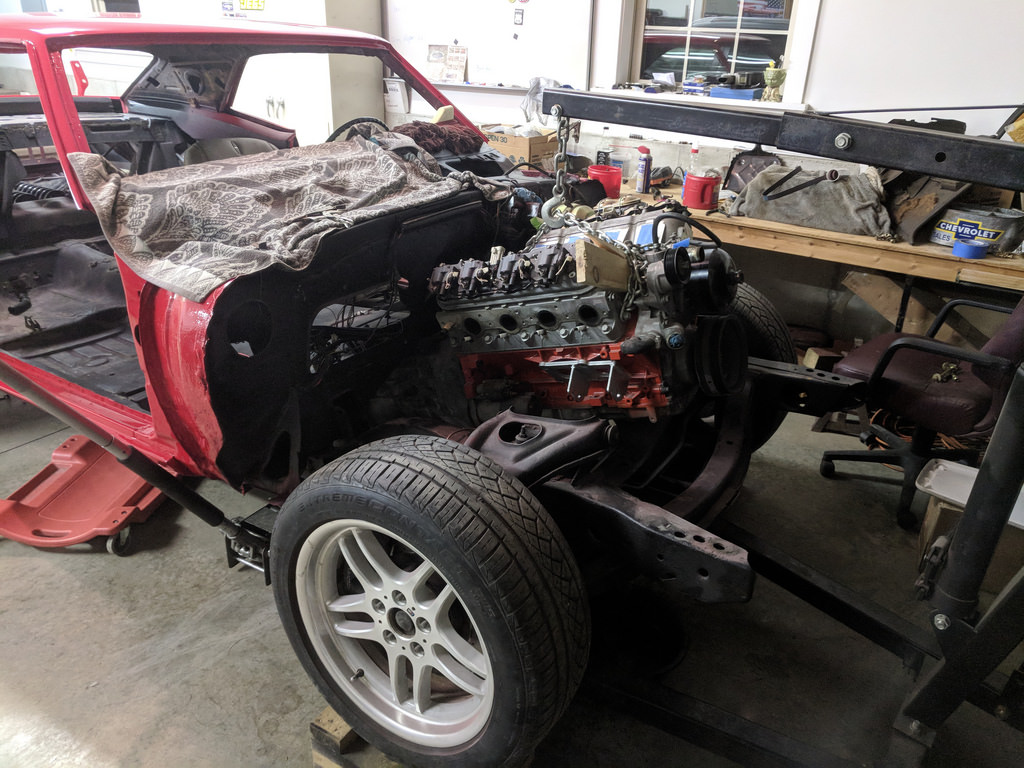
I finally tackled the project I have been putting off for a while now... the frame notch. Now that I had all the parts I needed for mock-ups and the engine pulled it was time to get cutting. Luckily for me, others like The Bandit have already paved the way for me so it was a matter of referencing his posts and making my cuts to mimic it. Although mine is slightly different as I'm using the Holley 12618HKR mounts, but the cuts are nearly identical. His was one of the cleanest looking frame notches that I have seen. Here goes nothing!
Looking good with the engine in place. With the Dirty Dingo (DD-LS-AC-LM-TR) adjustable mounts for the Sanden compressor.
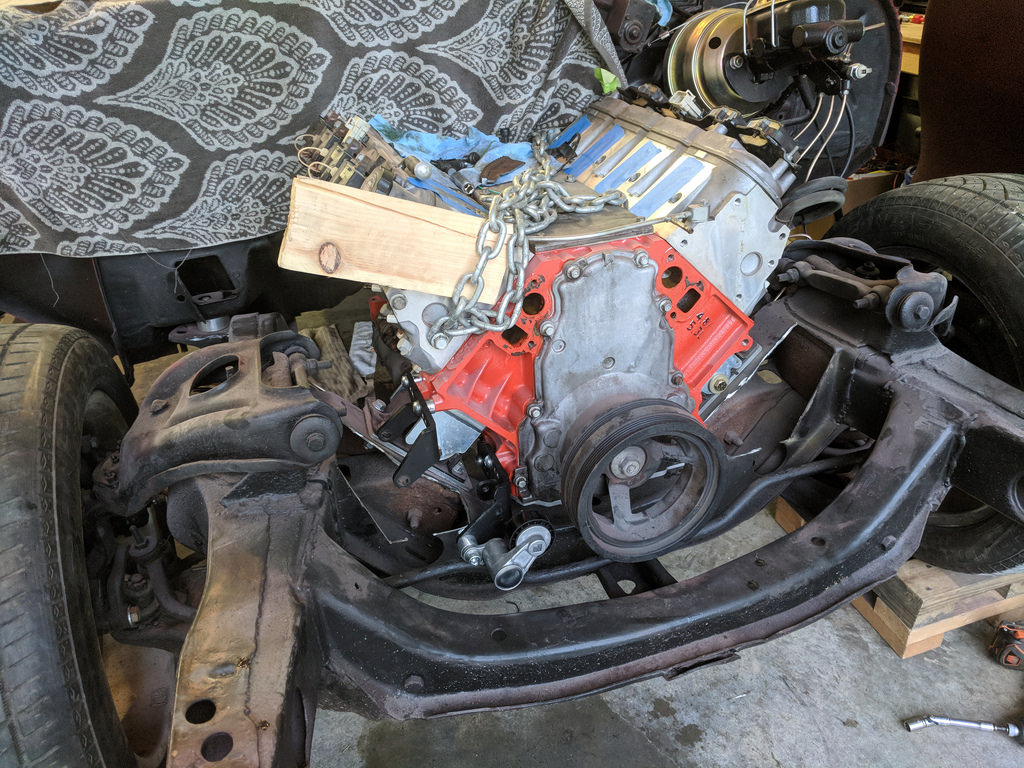
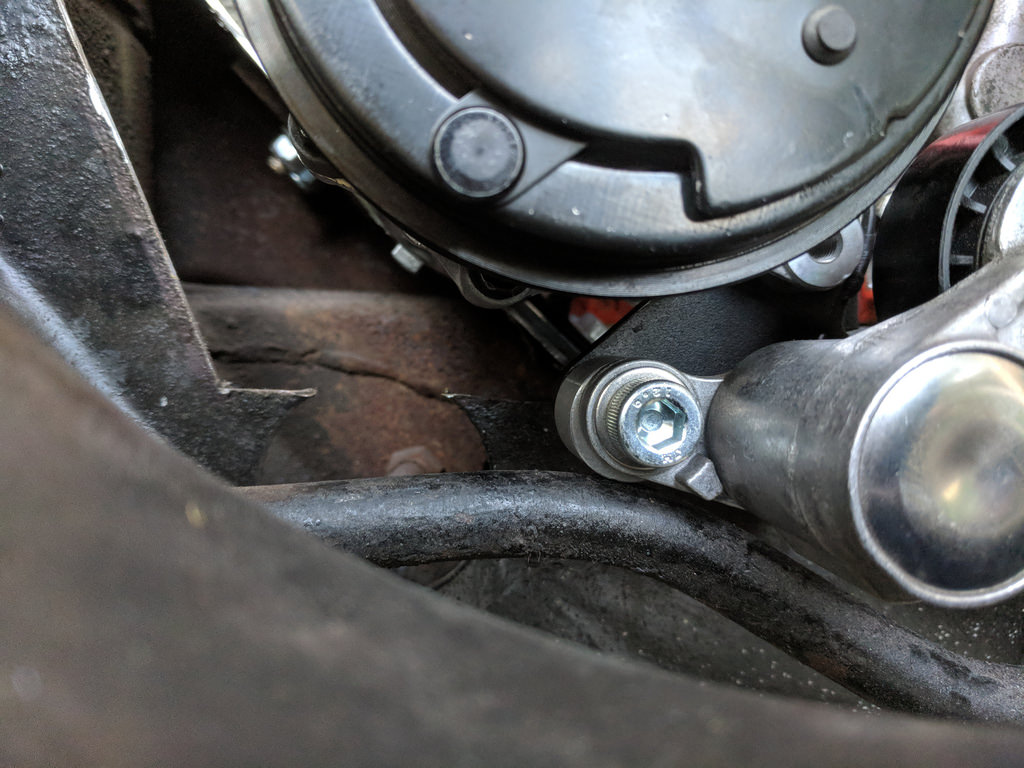
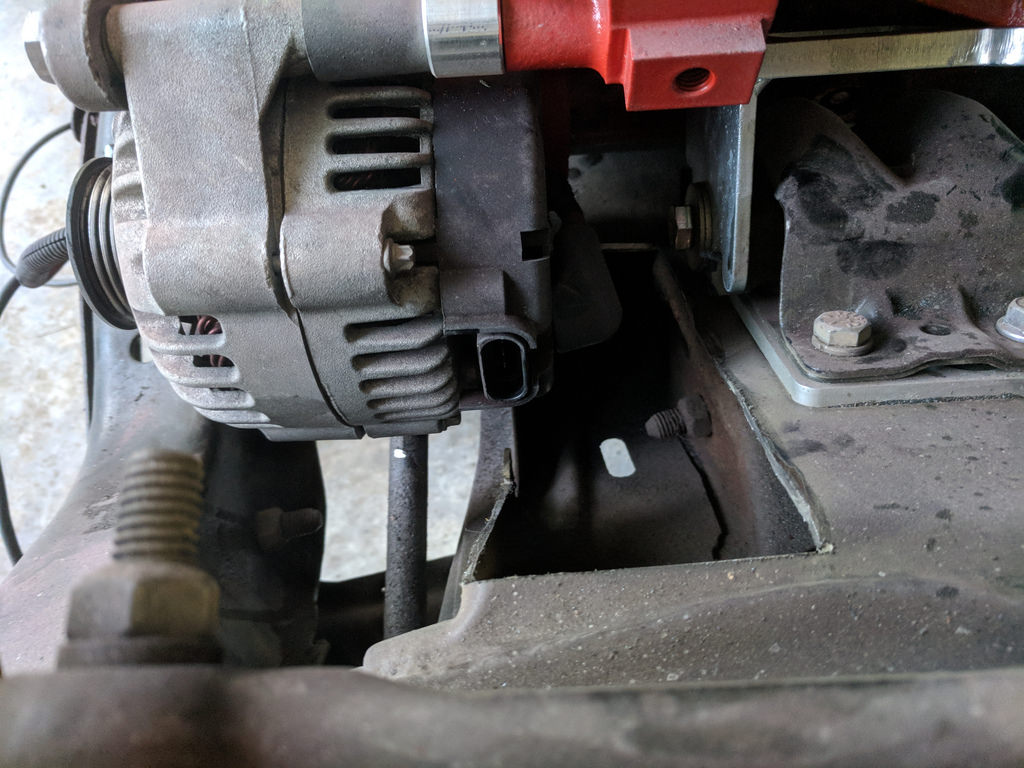
Then the moment I have been nervous about, test fitting the engine with the new Sanden SD7B10 A/C compressor in the low mount position. I got this knowing full well that it was going to be very tight, and boy is it! I'd say that there is about a 1/4" of distance between the bolt and the rear of the compressor. But, they are both solidly mounted so they will move together. WIN!

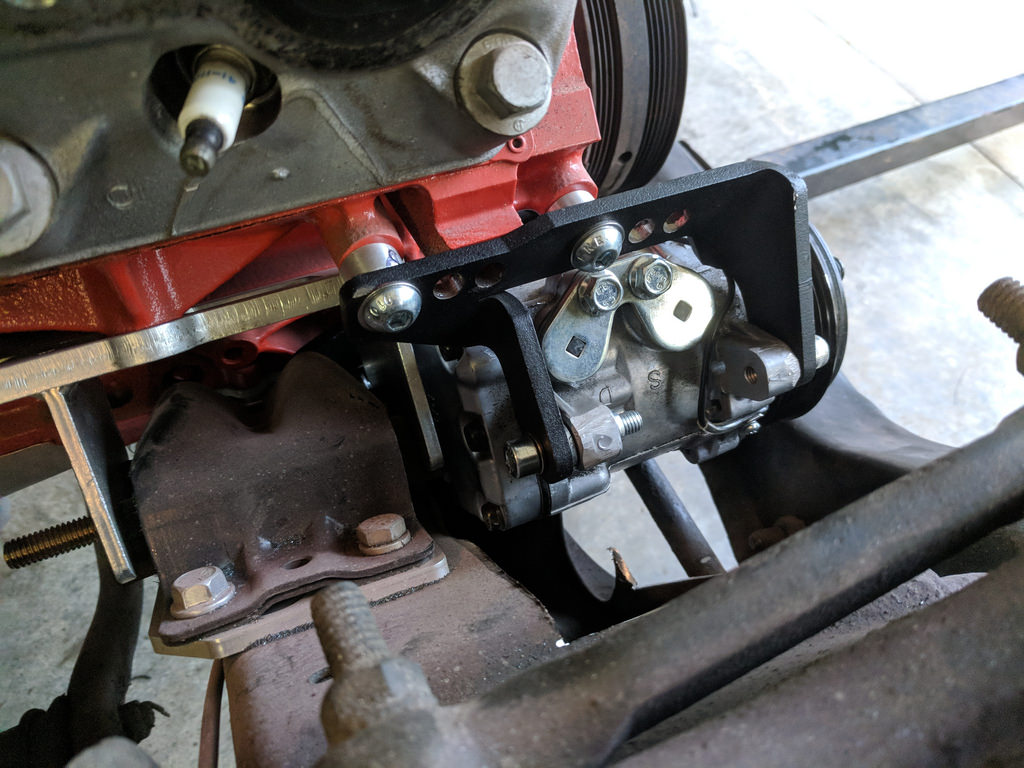
Just clears!
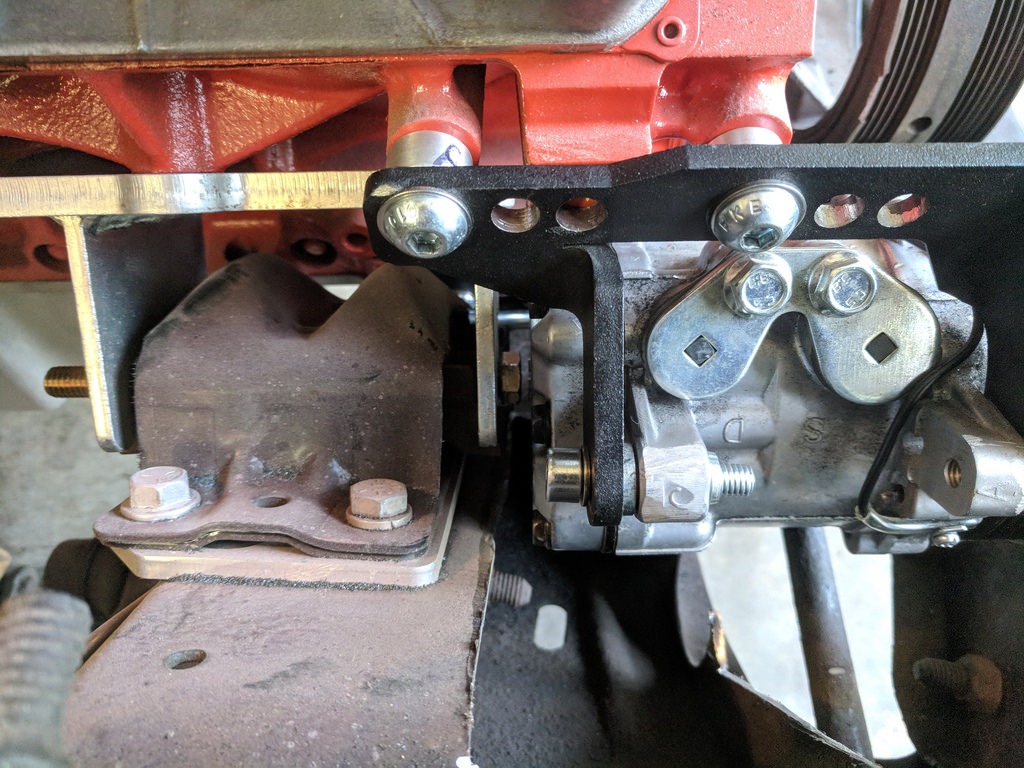
Then I put on the alternator, which fit previously, but the stud on the alternator for 12v from the battery was almost touching. Better just notch it so there aren't any issues. Tons of room now around the alternator.
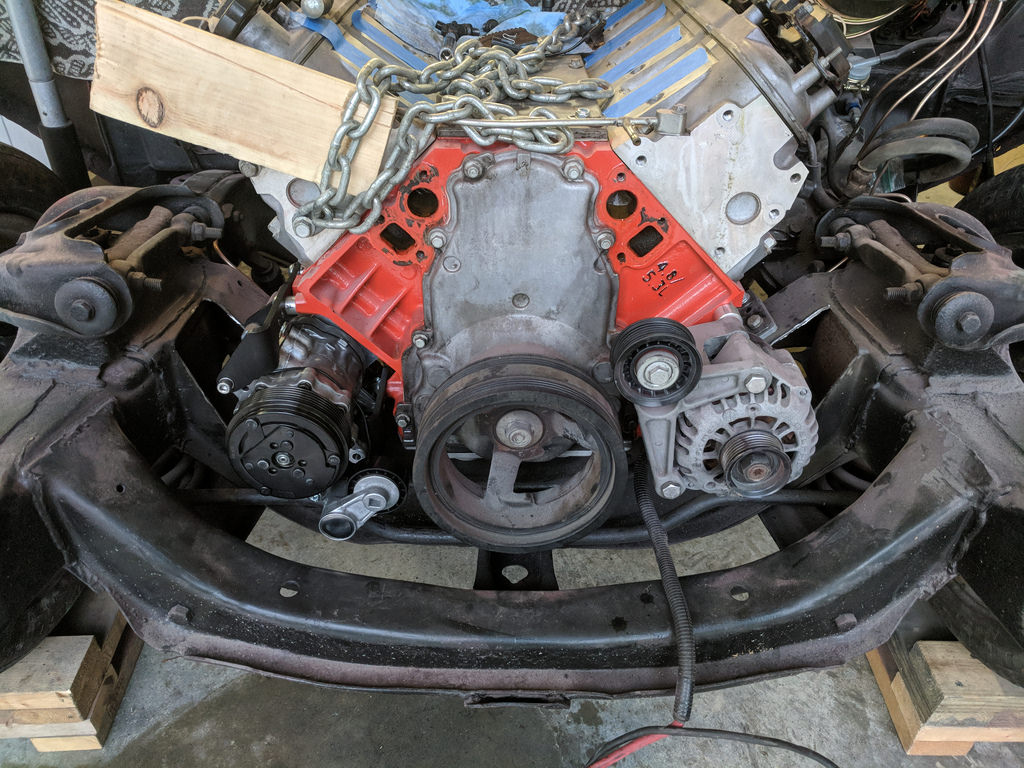
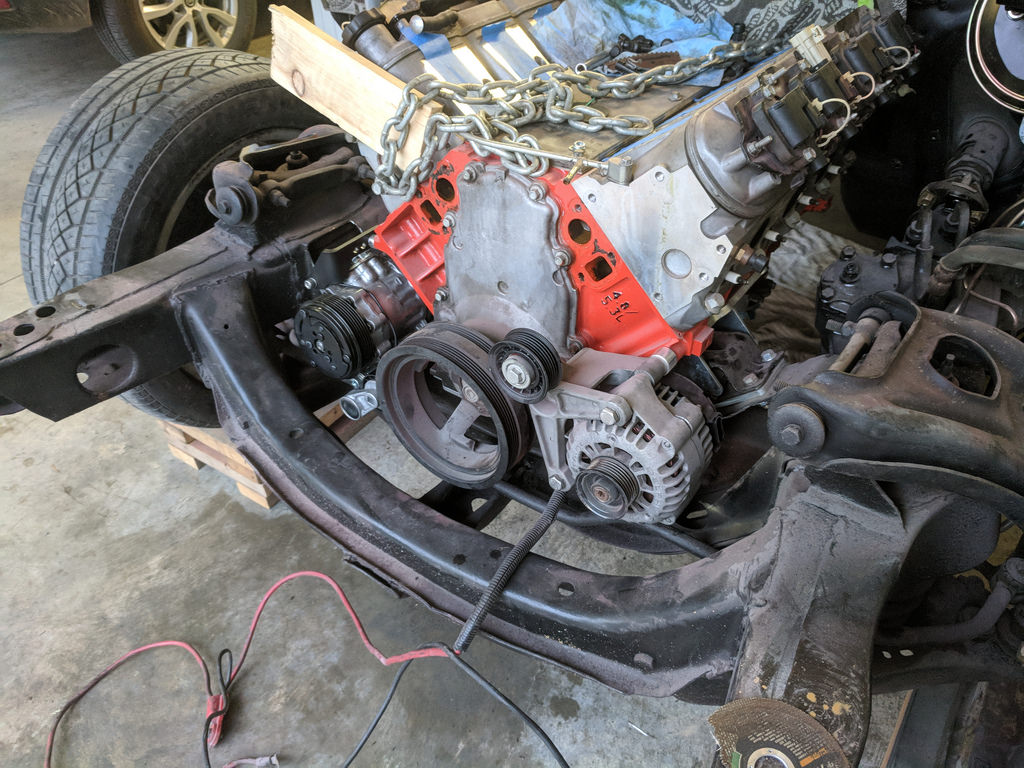
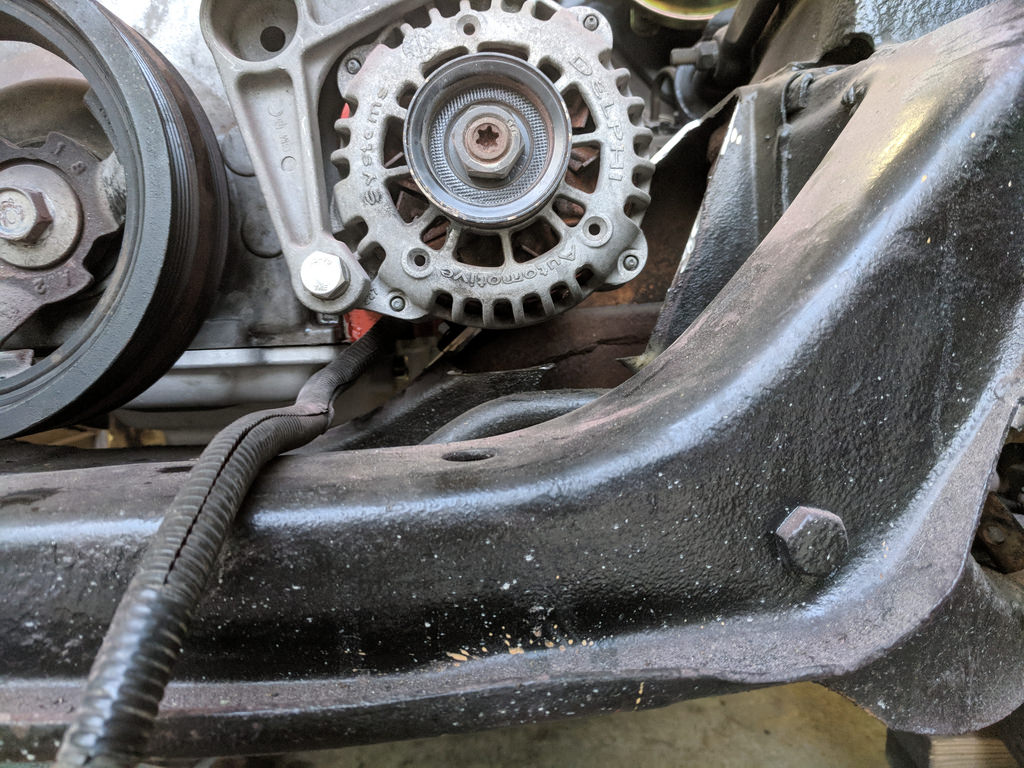
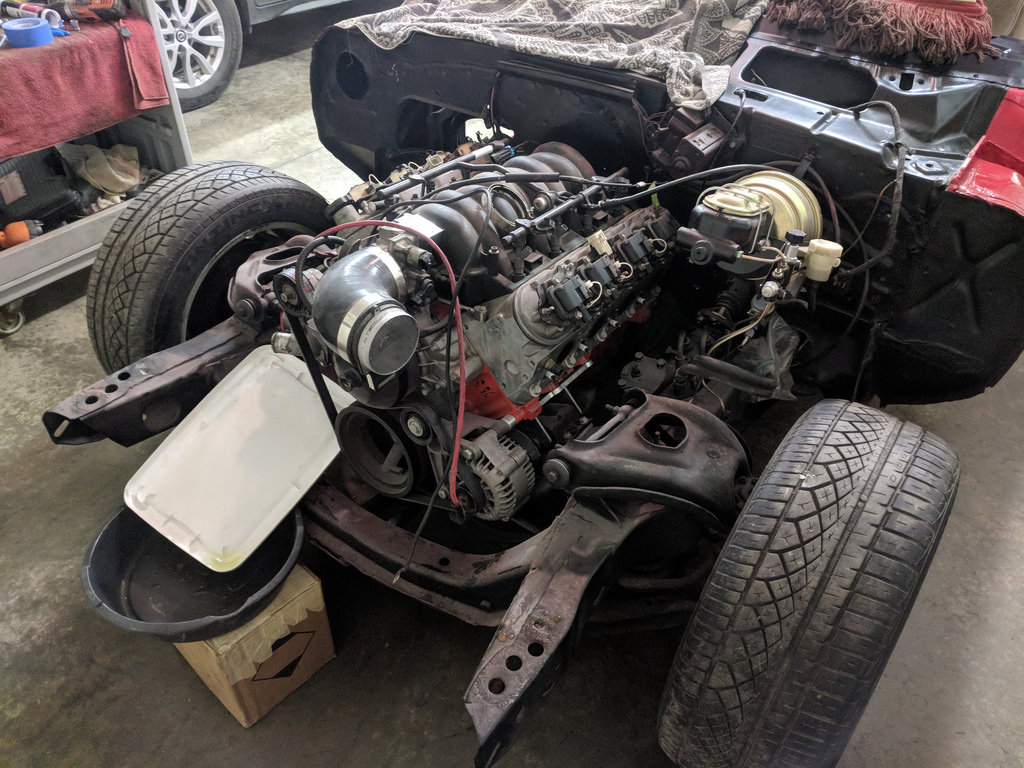
What happened simultaneously was was the installation of the Holley 302-3 oil pan. Before I did any final mock-up I wanted to ensure that I was using the right pan. So before I made the cuts, I swapped my oil pans. The engine dropped right in and the pan just fits everywhere. As I was walking around the car inspecting for clearance issues after I notched the frame for the low mount alternator and compressor, I had forgotten that I swapped the pans. When I started checking it over, there is so much clearance around everything. Holley did a great job on this pan. There isn't a transmission in this picture, but I set the motor to 3.5* where it would be when it's final
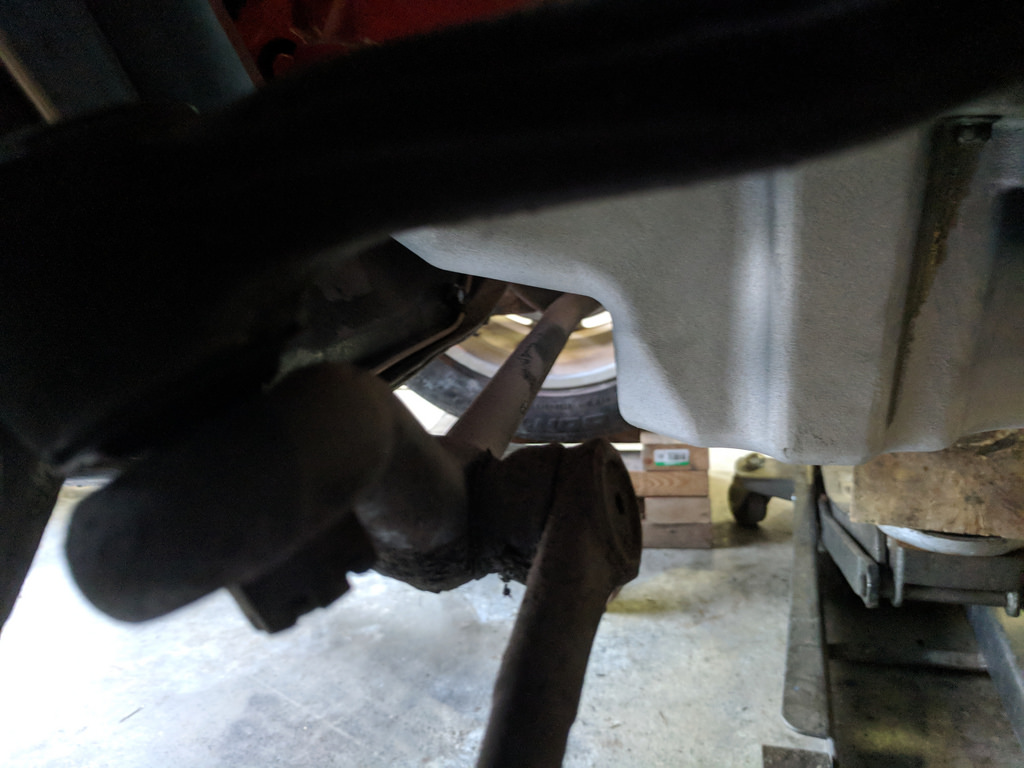
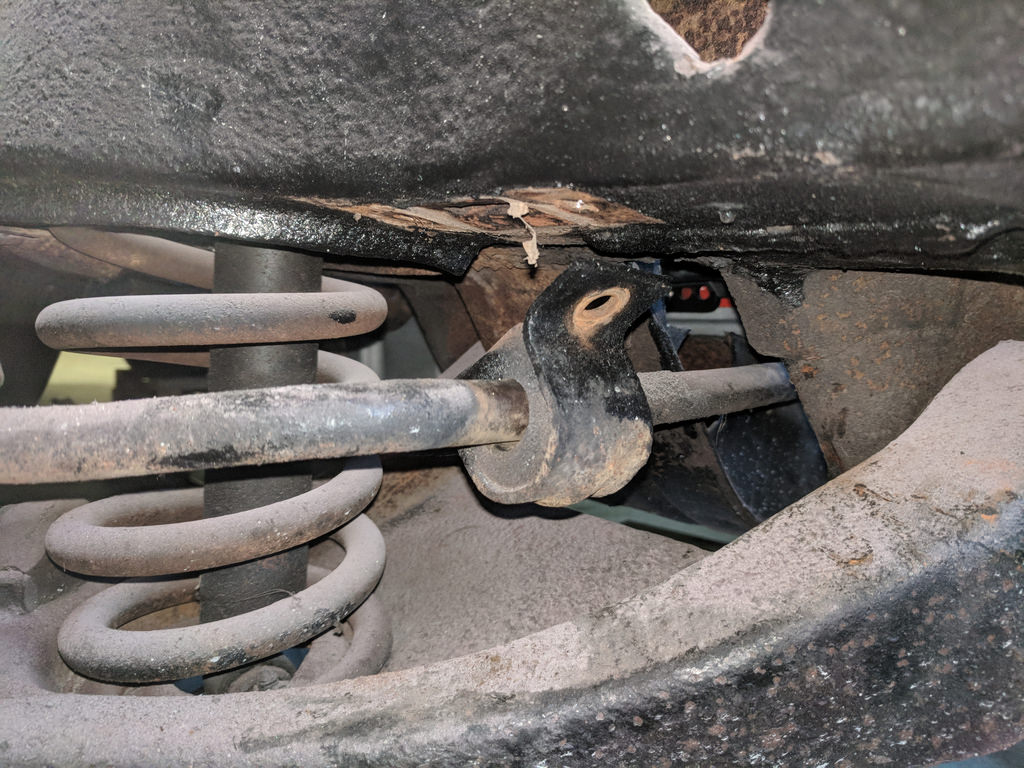
The AC compressor mounts do interfere with the sway bar. I have a few ideas about this, but I think the simplest solution is to get a spacer to bring the sway bar down. When I get more time to analyze what it would take to make that possible. I also need to think about future upgrades as I will likely want a bigger sway bar.
I also thought I would share this information for others that may be going through similar situations. Knowing that I was pulling the engine in the future, I figured I should probably swap out the stock slave cylinder and get a remote-bleeder while I had it out of the car. After some research, I found that Luk LSC265B was supposed to be the same part number as what you would get at a GM parts counter. I confirmed that when I replaced the stock one from my T56. Same numbers and same markings. Great score because on Rock Auto it was about $35 bucks!
It was a huge relief knowing that the oil pan and accessories are now set. I'm hoping to get the plates made and welded solid at some point in the next week. Saturday morning I'm going to wake up early and get the insides of all the panels sprayed out in Torch Red.
Cheers,
Ryan
1955 Nomad project LC9, 4L80e, C5 brakes, Vision wheels
1968 Camaro 6.2 w/ LSA, TR6060-Magnum hybrid and etc SOLD
1976 T/A LS1 6 Speed, and etc. SOLD
Follow me on Instagram: ryeguy2006a
06-21-2018 #356
Registered User
- Join Date
- Mar 2009
- Location
- Houston, TX
- Posts
- 1,192
Yes, that's what I meant. LOL. Originally Posted by ryeguy2006a
 Tu Ho
Tu Ho
Firebird V2-LS swap
06-21-2018 #357 Registered User
- Join Date
- Sep 2006
- Location
- TEXAS
- Posts
- 153
Outstanding job. How do you find the time to do it all and do it so well???
Burn em while we have em. Fossil fuels and rubber tires till the end!
06-22-2018 #358
Registered User
- Join Date
- Sep 2009
- Posts
- 2,705
I actually hadn't given it any thought Tu. I will make sure to do that. Thanks for the tip!
69Phoenix, I appreciate the compliment. Majority of my work gets done between 9-12 whenever I get the chance. The exceptions are what I call my "loud stuff" that can't be done during that time because it wakes everyone up. My son is very interested in whatever I'm doing so usually my wife keeps him occupied long enough for me to get the grinding or drilling done, then he's right out there with me.
1955 Nomad project LC9, 4L80e, C5 brakes, Vision wheels
1968 Camaro 6.2 w/ LSA, TR6060-Magnum hybrid and etc SOLD
1976 T/A LS1 6 Speed, and etc. SOLD
Follow me on Instagram: ryeguy2006a
06-22-2018 #359 Registered User
- Join Date
- Aug 2007
- Location
- Jonesboro, Arkansas
- Posts
- 2,506
Ryan,
Your doing a really nice job on your car. Everything is looking good and the color is going to be amazing. I know your seeing the light at the end of the tunnel by now and the anxiety is kicking in! Good job!
Carl Wilson
1968 Camaro - T-56 6 speed - 383 Stroker, 2014 Mustang GT seats. FiTech EFI, Tanks Inc. Tank with Deutschwerks fuel pump.
06-22-2018 #360 Registered User
- Join Date
- Nov 2010
- Location
- Ventura County CA
- Posts
- 556
Nice work! I have no regrets over notching my frame and putting those accessories down low. It really cleaned things up! Hope the plate work goes easy for you.
Do you know how much the swaybar needs to come down to clear that AC tensioner? I spaced my 1-1/8" Helwig swaybar down 1/2" from the frame to get clearance. There are some detailed photos in this post: https://ls1tech.com/forums/conversio...l#post16745270
Awesome to see the car in paint. You're making great progress!Clint - '70 Nova "restomod" cruiser & autocross family car

 Reply With Quote


