

Results 261 to 280 of 808
-
02-23-2018 #261

 Registered User
- Join Date
- Sep 2009
- Posts
- 2,709

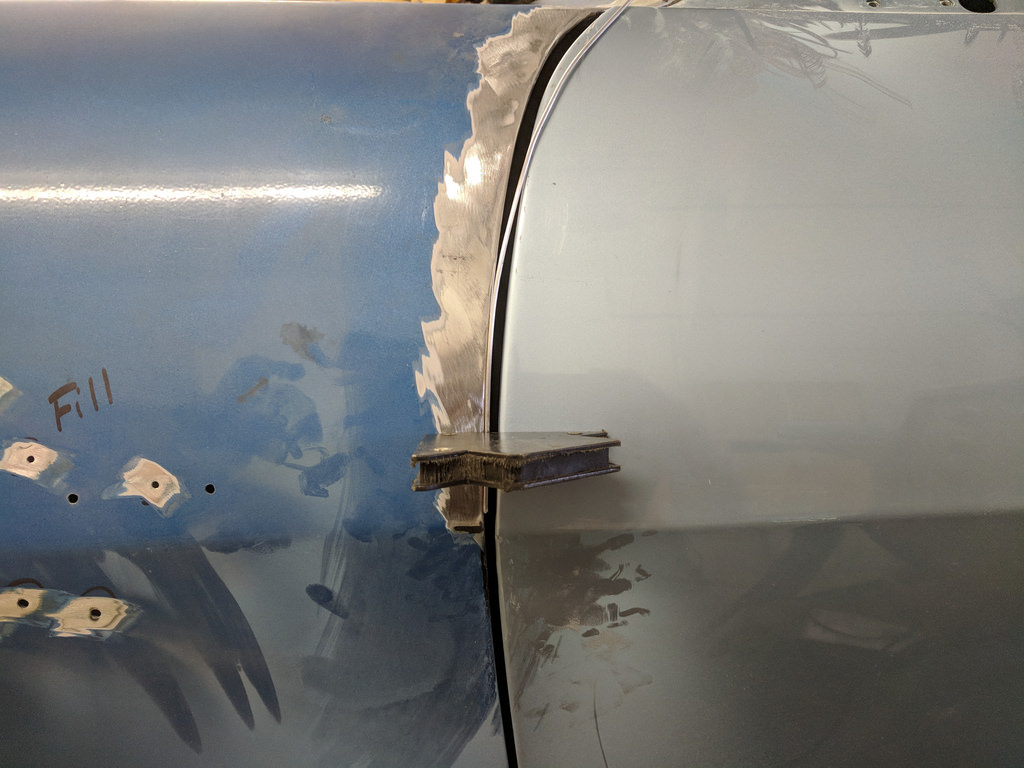
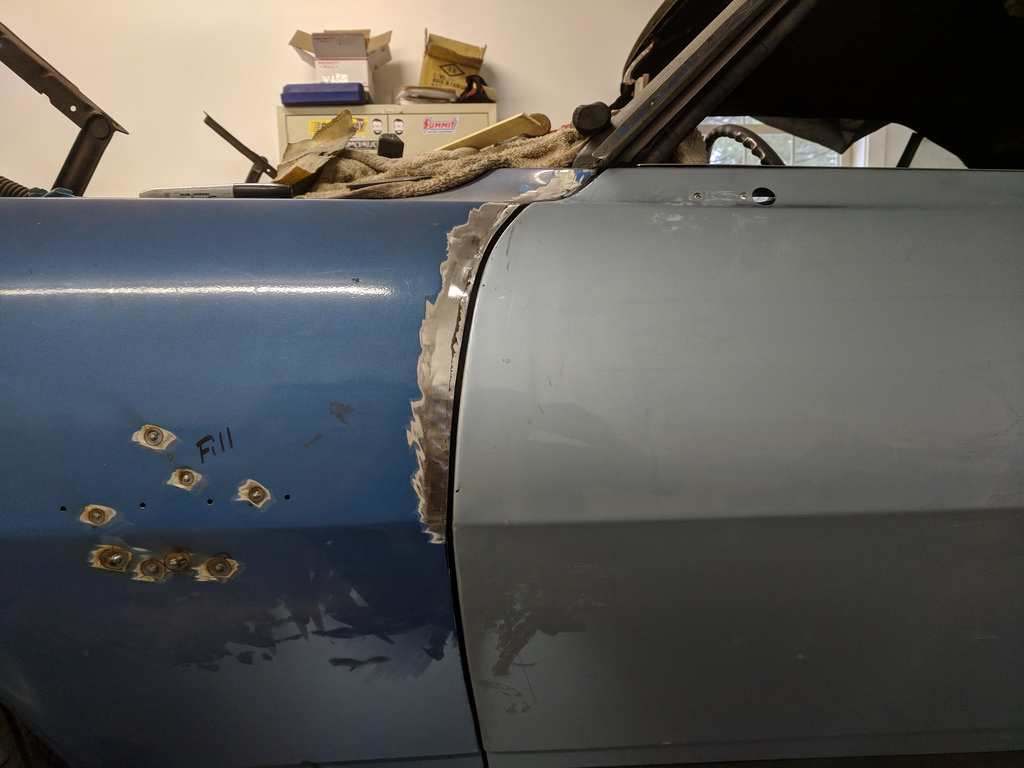
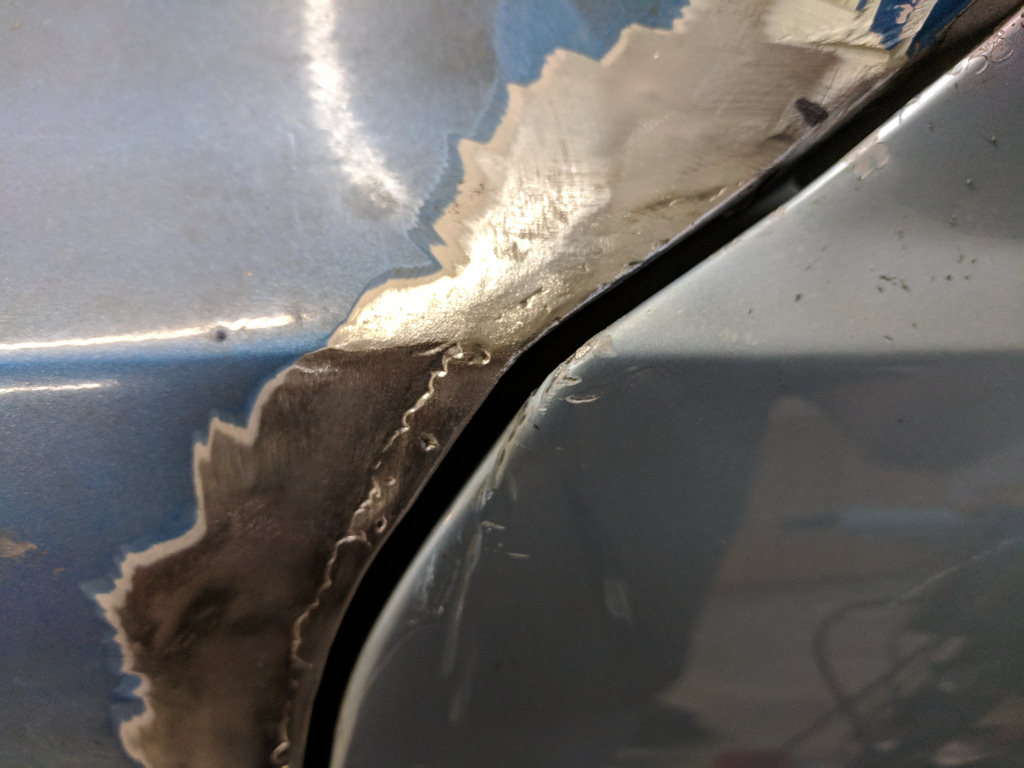
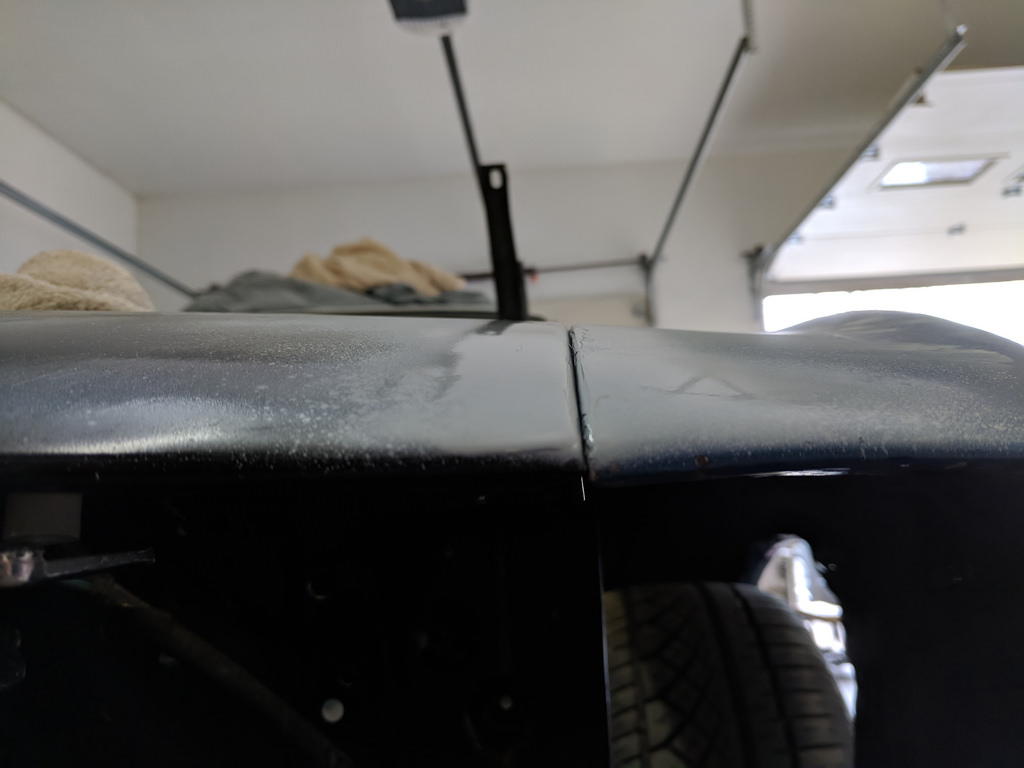
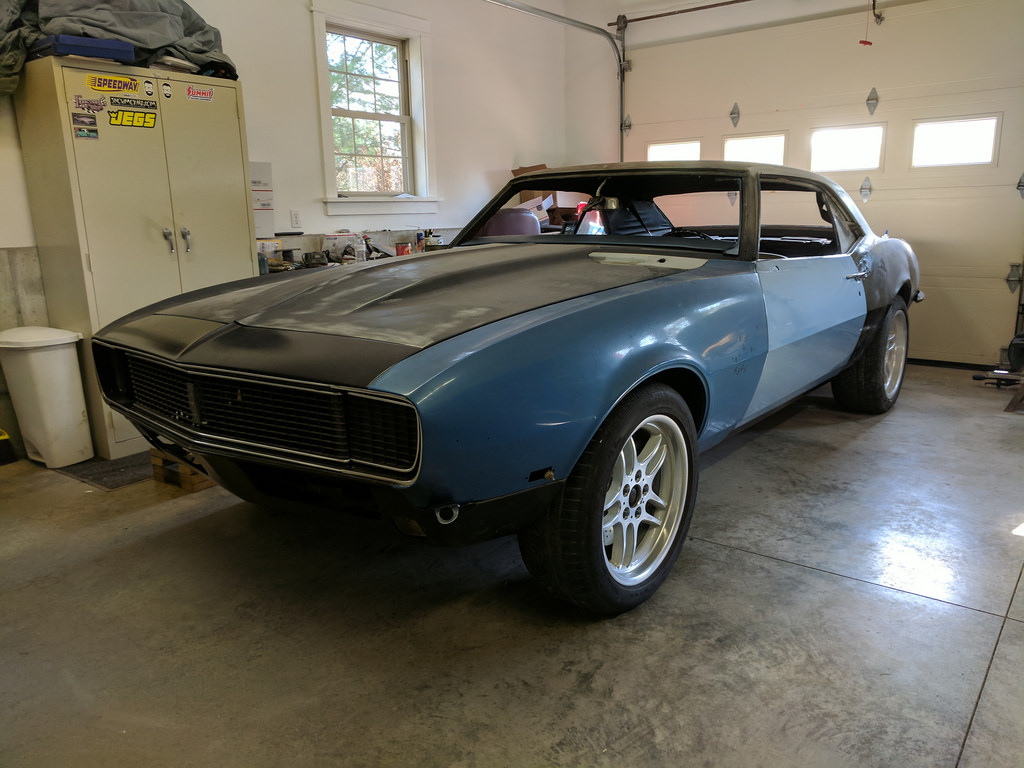
I took Thursday and Friday off this week to try and make a big push towards getting the car prepped for paint. I made a huge leap forward these past few days. I woke up from a dead sleep for some reason and figured I would post up my progress. (reason for the 2am post). I started off Thursday by assessing what needed to be done to get the driver's quarter panel finish welded. I wasn't entirely happy with what I originally came up with, so I cut part of it out and butt welded the entire length across.
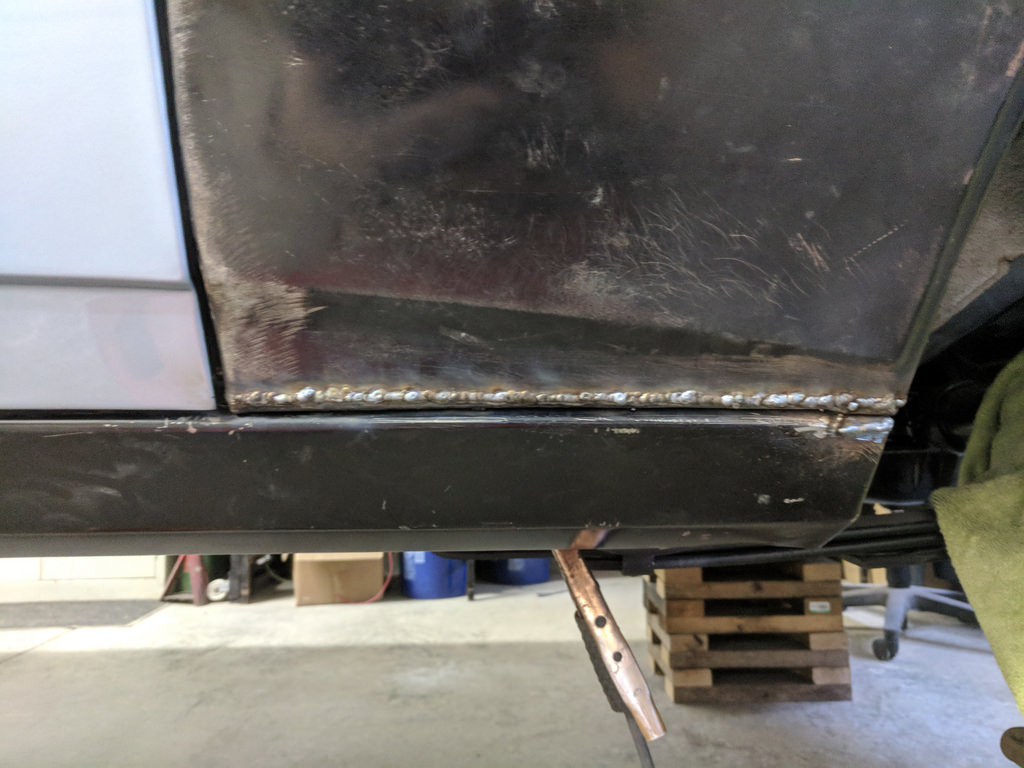
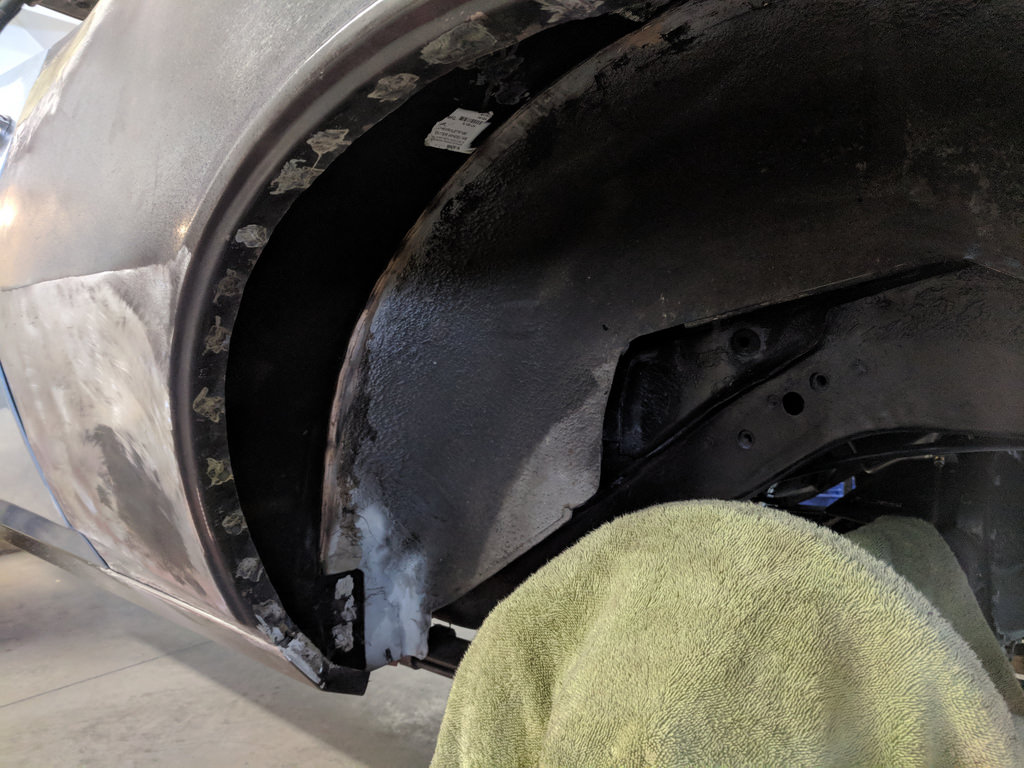
Then worked my way across the wheel arches. I had to massage the panels in a few places as it didn't want to sit flush against the outer wheel house.
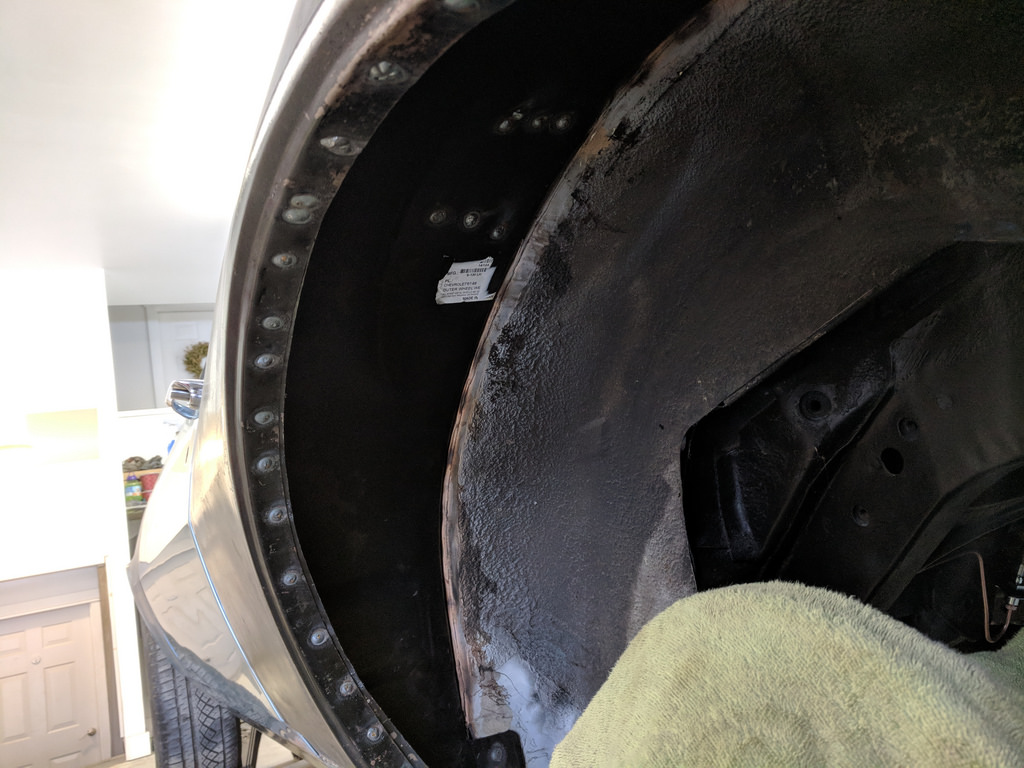
Didn't get a lot of pictures during the process as I was getting work done, but spot welded the entire piece and now the panels are in for good. Then grind it down.
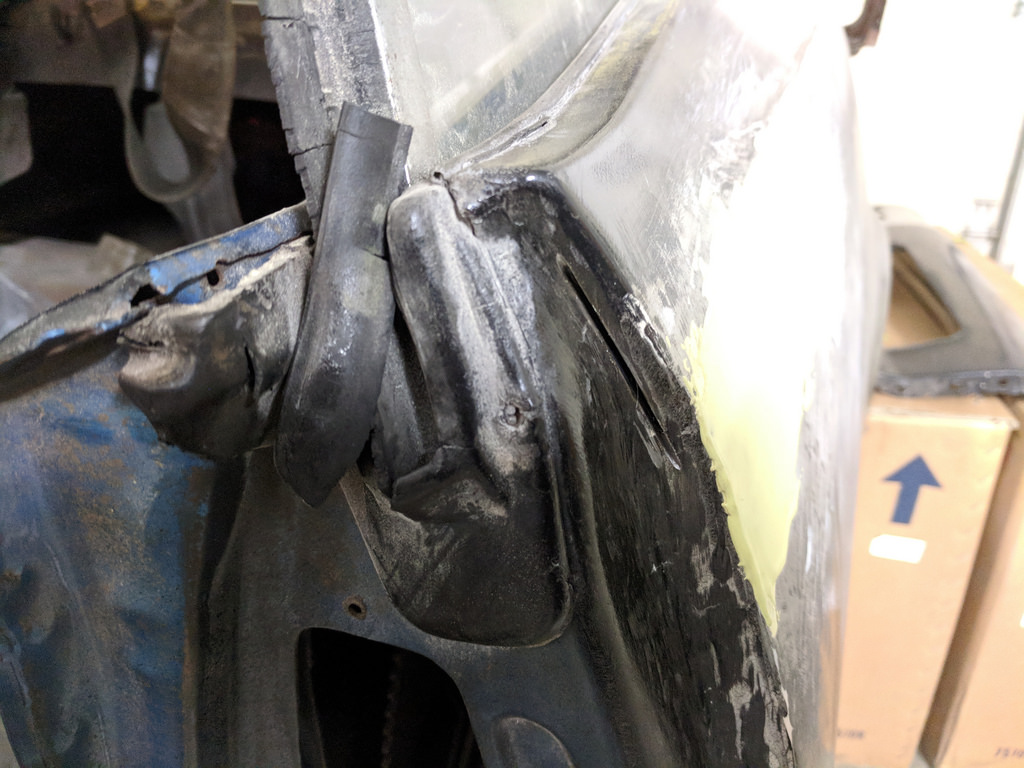
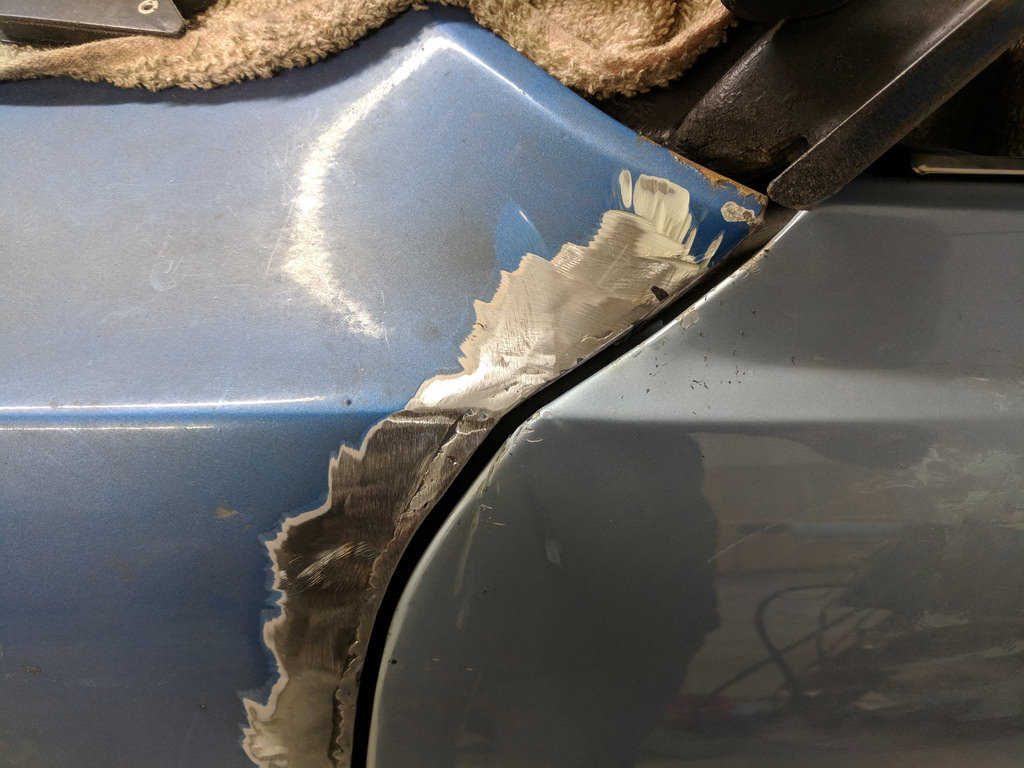
Wasn't happy with the way the top of the door was fitting, so I made a little slice here and tapped it down. Once I was happy with how it was sitting flush, I welded it back up.
Now that the quarter is done, I added a coat of long strand filler as a base coat to start with. Notice how poorly the body line matches up here as well.
Then with a first skim coat, getting closer.
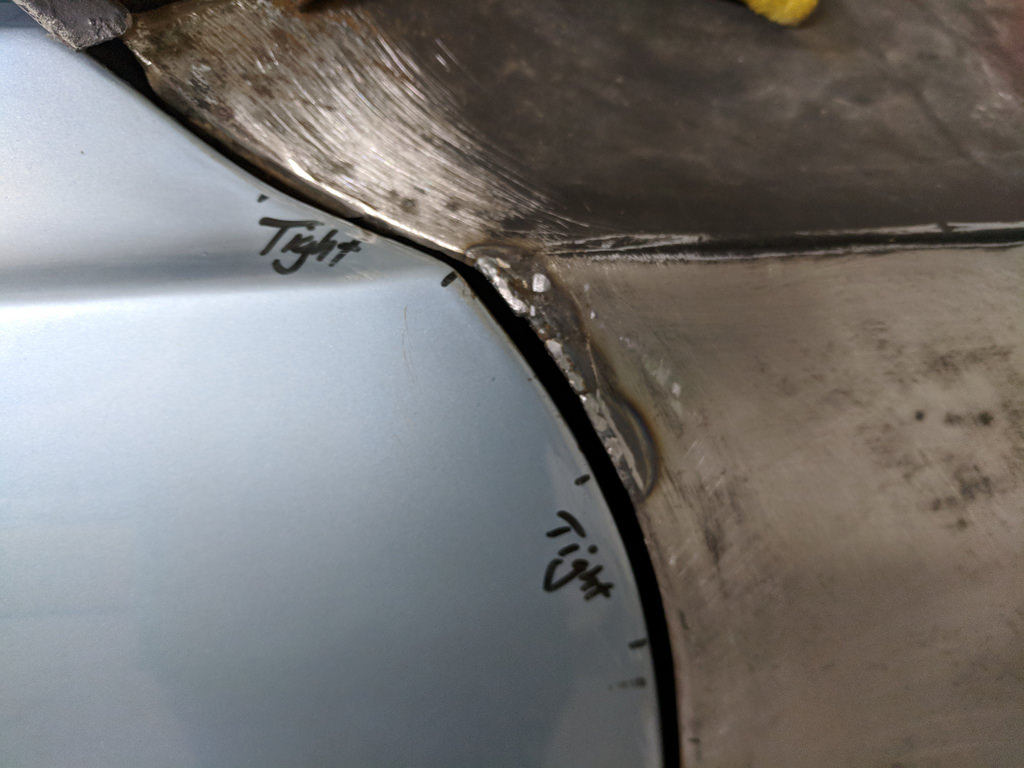
Putting it down in writing, it didn't seem like a whole lot of progress, but the welding, fitting, welding, grinding steps are very time consuming. After doing a little plowing and getting some sandpaper Friday morning I got back to work. I was very unhappy with the gaps at the top of the driver's fender, so I decided to use a trick I had seen before and weld in a filler rod to close the gap. I was originally going to buy some Tig rod and use that as filler, but since this is project Penny Pincher I opted to recycle some old hangers.
I had to scuff off the coatings on the hangers before I started welding.
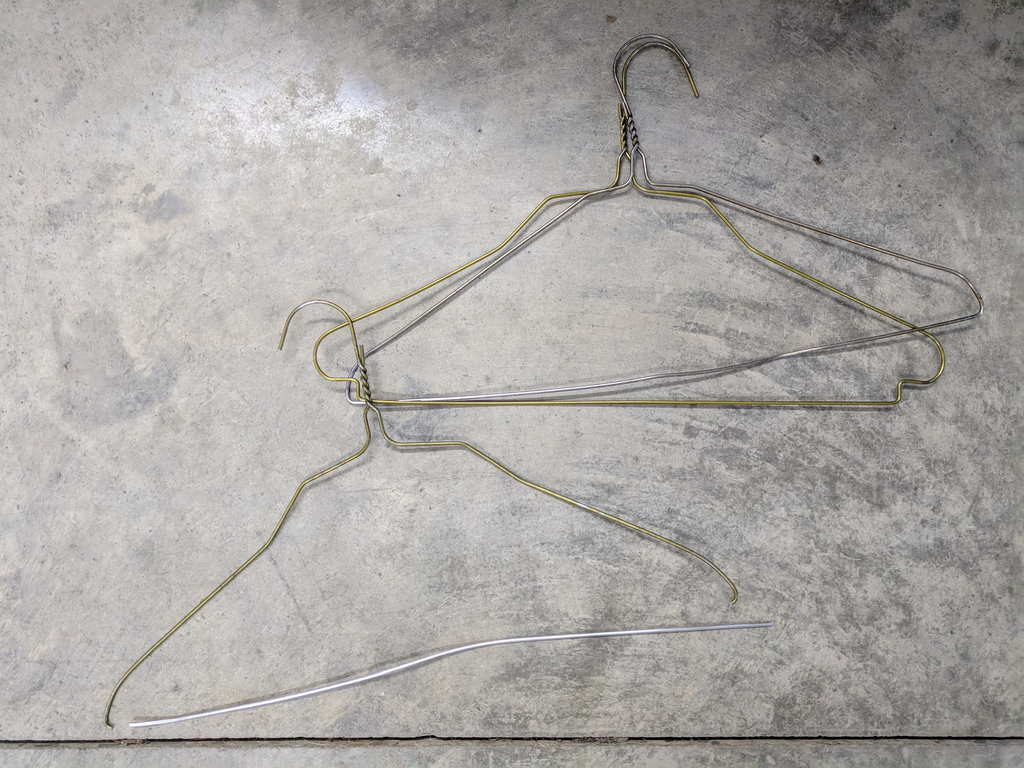

This should by no means be a tutorial, but it came out better than I expected in the end. Just made sure to take my time and go slow spacing out the welds.
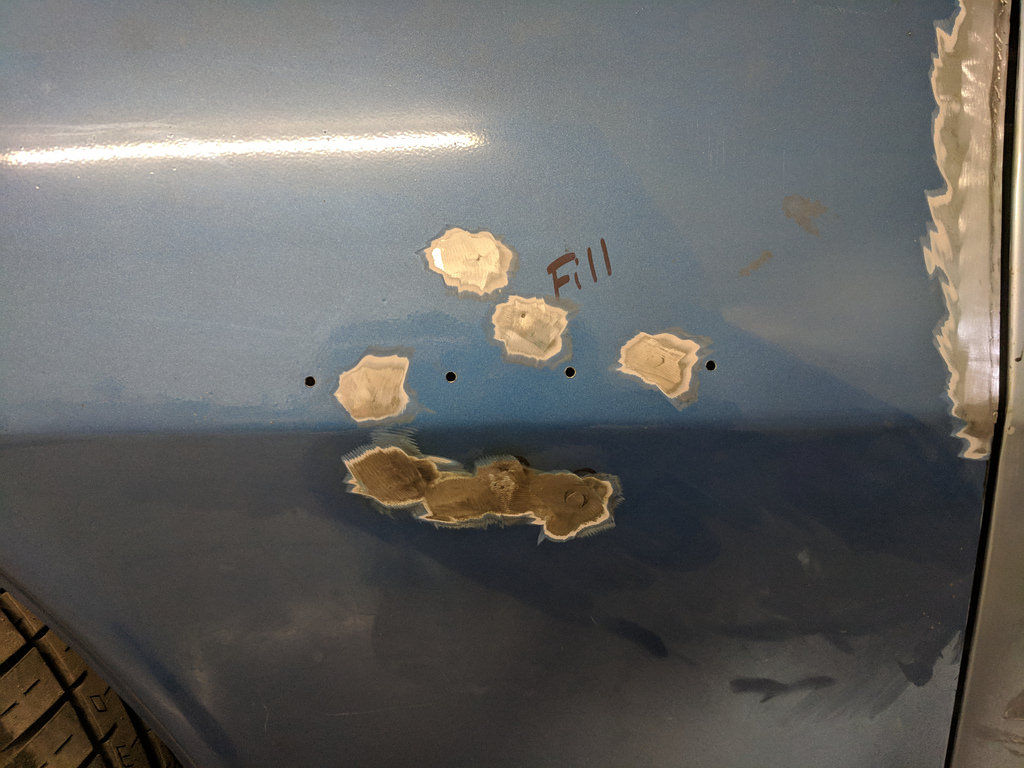
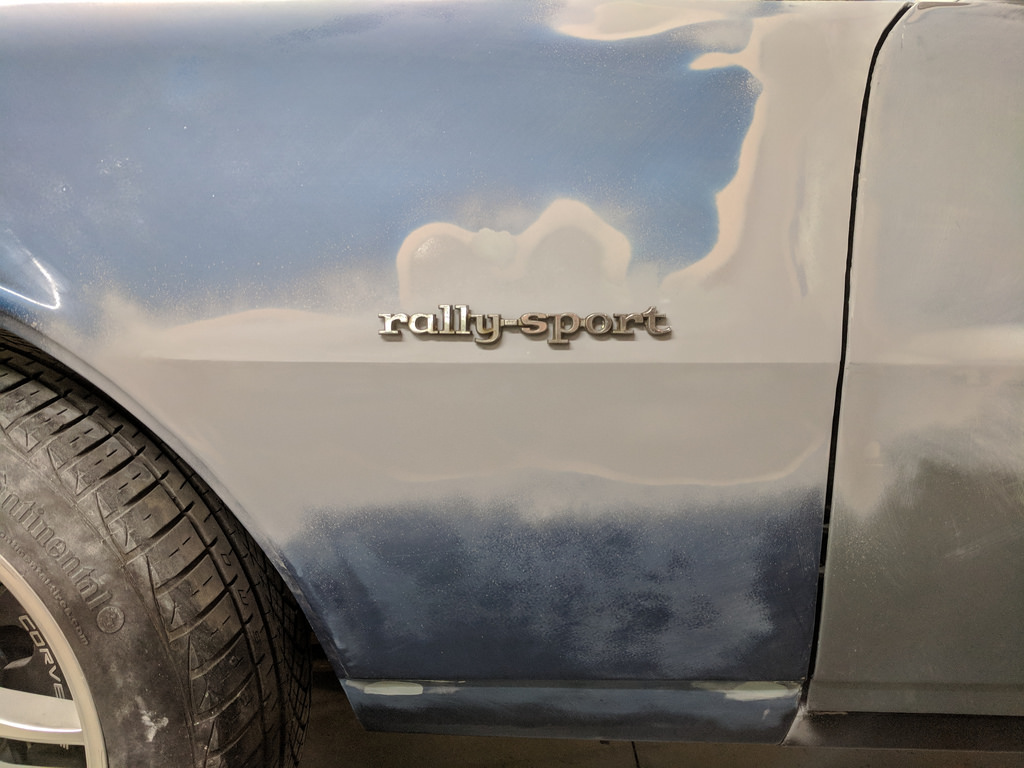
While I had the welder out and was waiting for the edges to cool I decided to fill the holes that I won't be using. I want a clean look with just the "rally-sport" emblem's on the fender.
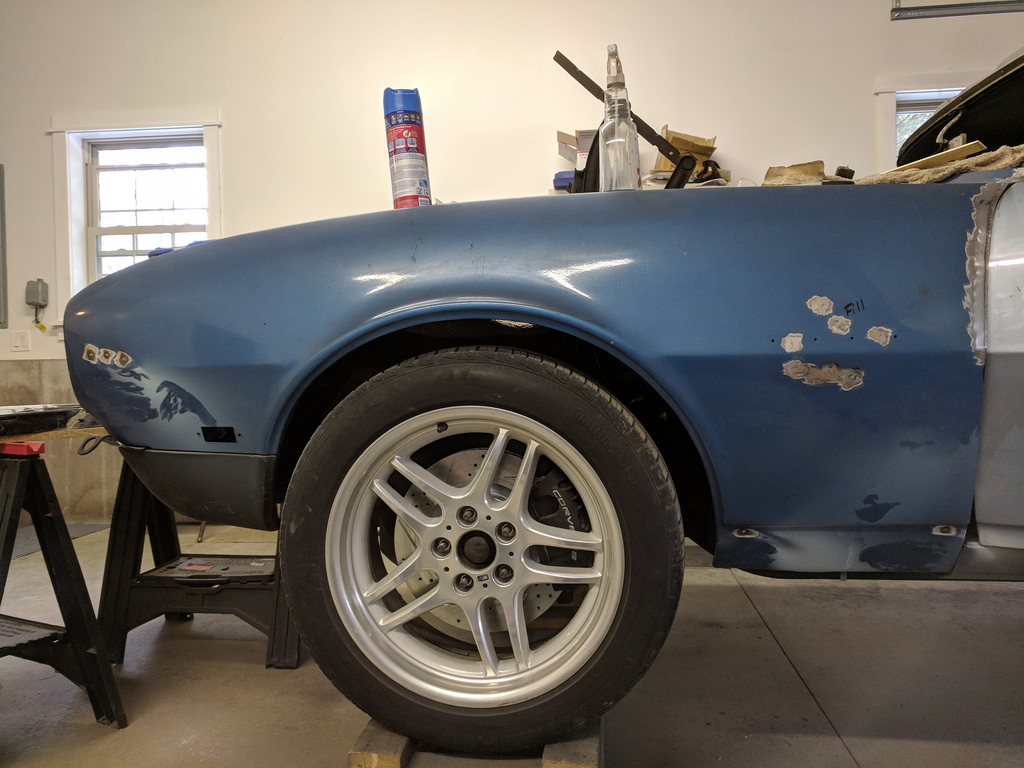
Then I threw the rear wheel back on and took a step back to see what the car looked like and I'm very happy with the results. Could have left the gaps but glad I took a few extra hours to close them up.
And one more shot of the gap.
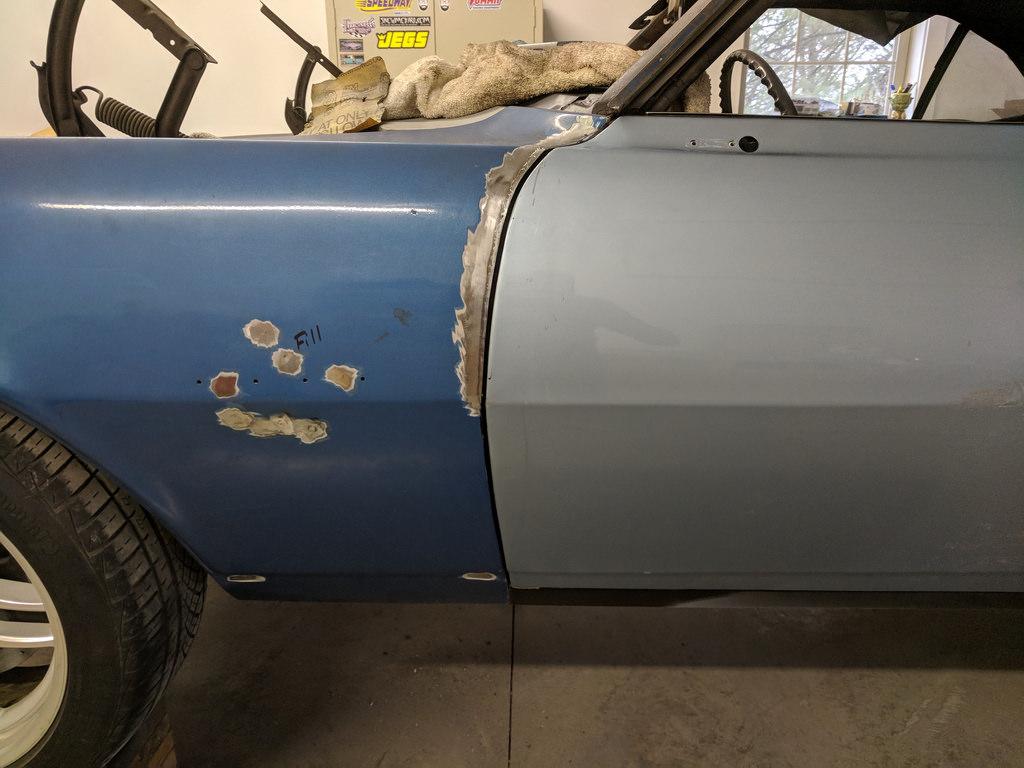
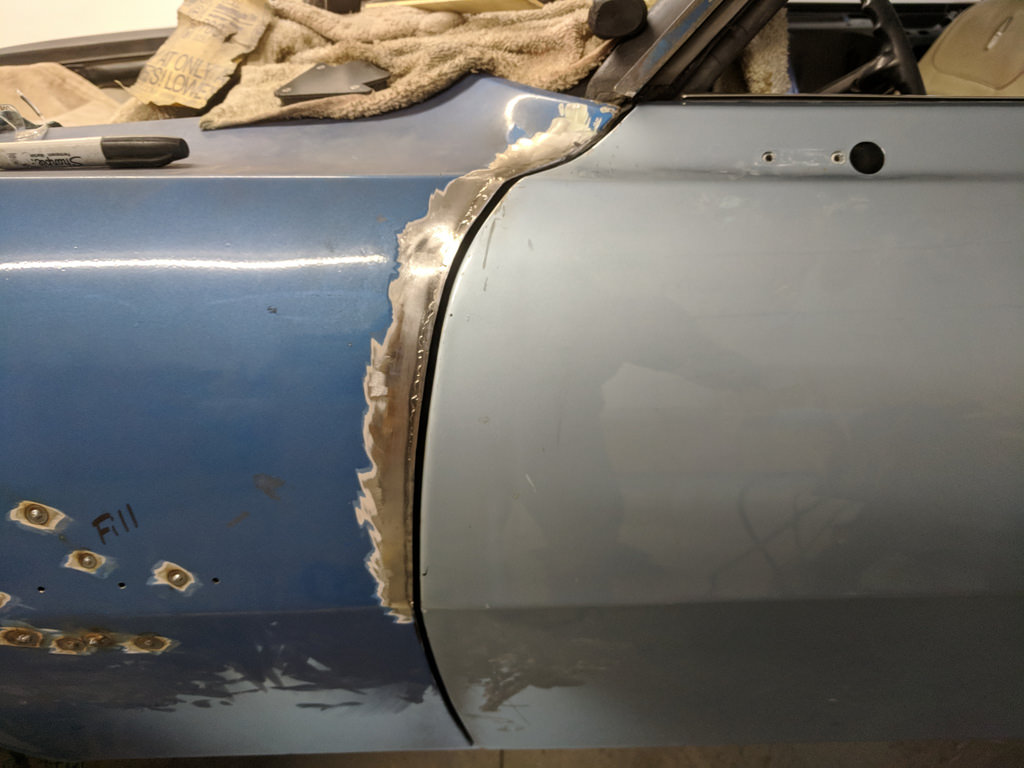
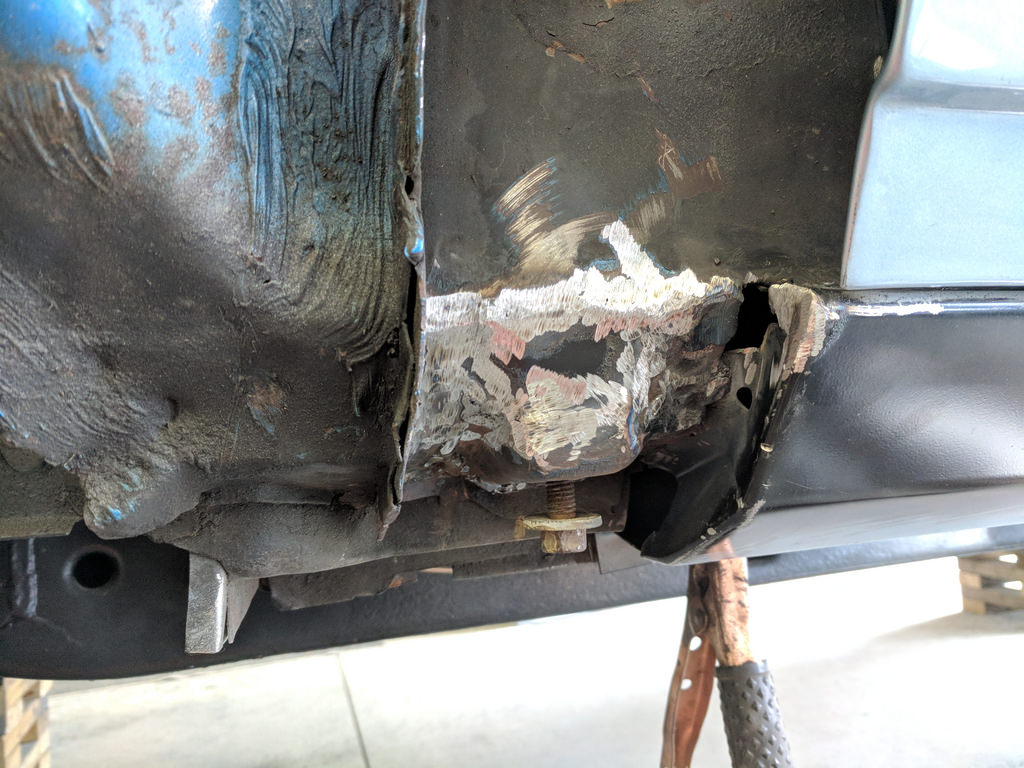
Now that the gaps are set and the extra holes filled, I had to pull the fender for a few reasons. I had to finish the back sides where I filled in the holes, finish the door gap from the inside, weld on a nut that broke off to bolt the fender brace, cut out/replace the last bit of rust on the lower cowl and fill in a hole from the previous owner. One step forward, but feels like I'm going the wrong way.
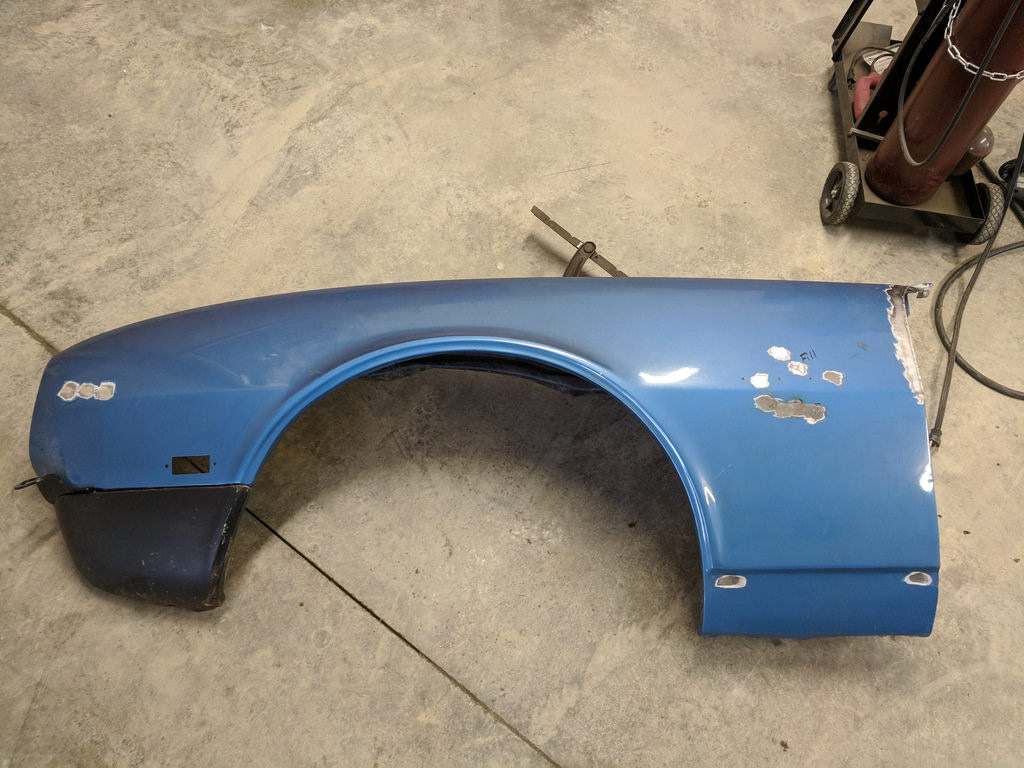
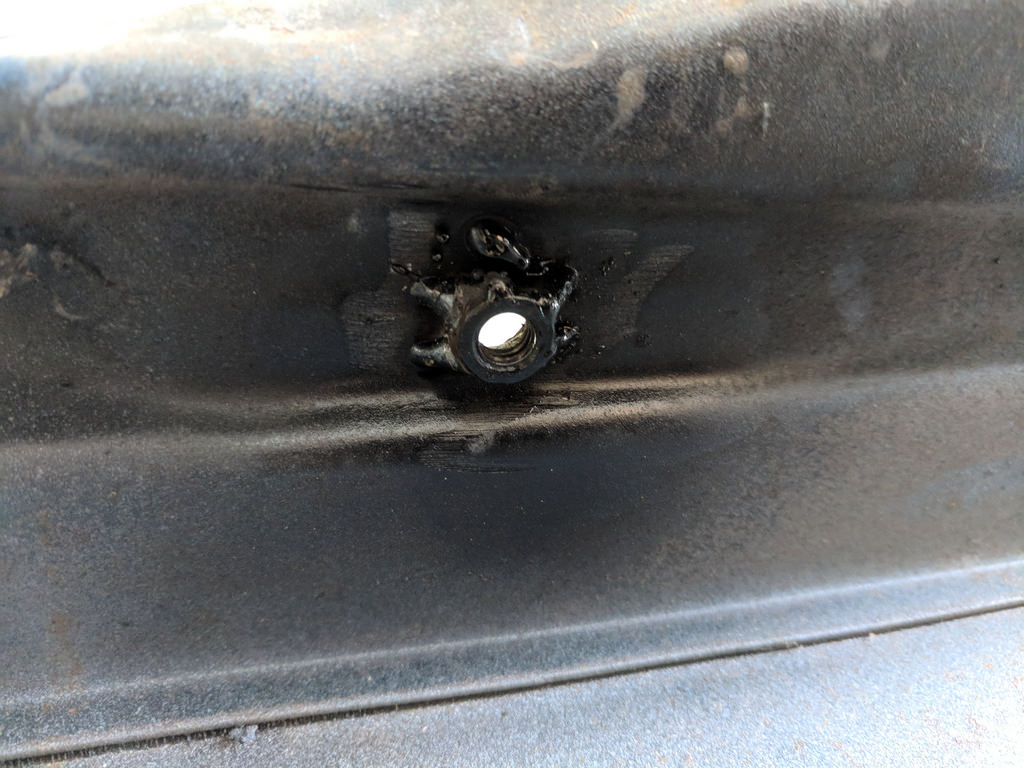
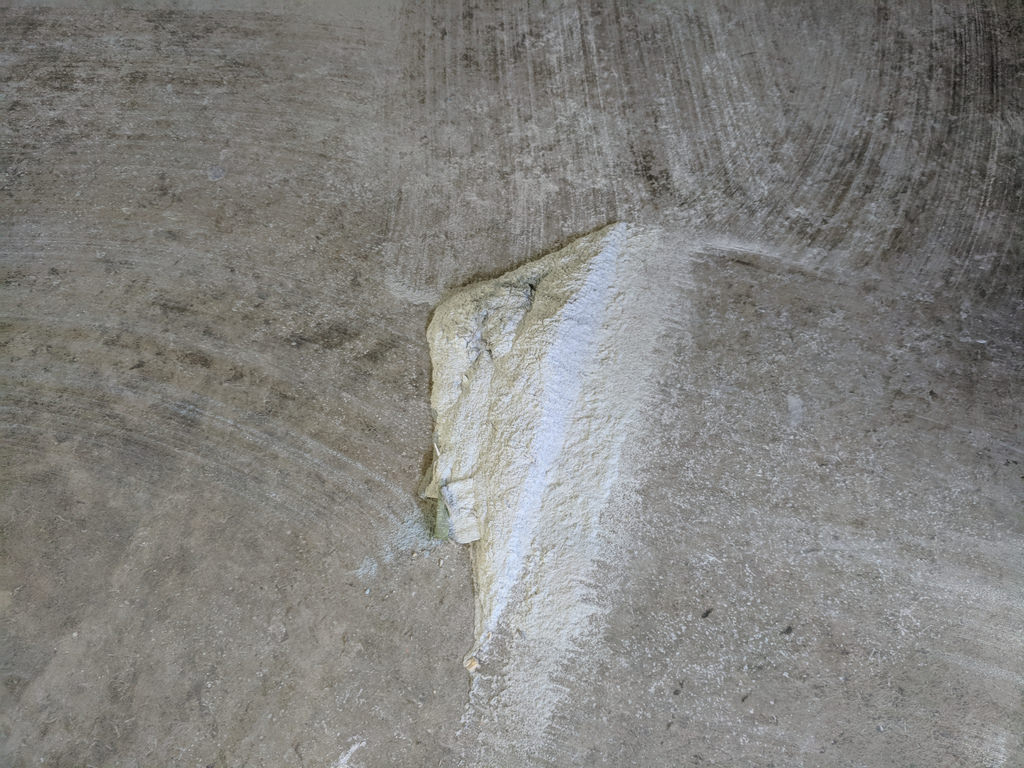
At some point, the previous owner welded in a new nut to fix the lower fender mount, but failed to finish the project leaving a rather large hole. After making a few templates out of cardboard, I got that all patched back up with some brand new metal. Nice and solid again.
That is where I ran out of time for the day. Overall very happy with the progress I have made. I'm hoping that I can make some time either today or later tonight when everyone is sleeping to cut out and finish that small patch on the cowl. Then I will be done, with the metal working! I spoke with a buddy recently who has a paint booth at his house and he said that I could bring my car over once I'm to a point where the car is ready for some primer. Once it's primed with several coats of high build I'm going to have a "block party" and get to sanding. I'm getting super excited to see the car painted, and now I'm having a change of heart with the paint. I'm leaning more towards Torch Red, but nothing is set in stone.
Cheers,
Ryan
1955 Nomad project LC9, 4L80e, C5 brakes, Vision wheels
1968 Camaro 6.2 w/ LSA, TR6060-Magnum hybrid and etc SOLD
1976 T/A LS1 6 Speed, and etc. SOLD
Follow me on Instagram: ryeguy2006a
-
02-24-2018 #262 Registered User
- Join Date
- Dec 2008
- Location
- Detroit
- Posts
- 2,585
Nice work there Ryan. I wish I had the balls to try and replace my quarters, I could save some money. Keep it going...
Big dreams, small pockets....
Chris--
'72 Cutlass S LSA/T56 Magnum
Bowler Performance, Rushforth Wheels, ATS, Holley EFI, KORE3, Ridetech
Project Motor City Madness
02-26-2018 #263
Registered User
- Join Date
- Sep 2009
- Posts
- 2,709
Get a welder, grinder and some body hammers. It's really not as bad as it looks. If your welds look bad, grind them off and start again. Anything that is cut off can be welded back on. There are so many builds on here to use as a guide. Even the specialty tools don't have to add up to that much. I have a used Miller 135 ($425 bucks), Harbor Freight Chicago grinder ($25 bucks) and some cheap body hammers and dolly's ($35). Other than the welding wire and gas, I get all of the consumables from HF. Originally Posted by csouth

I use cardboard templates to make all of my patch panels. I found that if you make your templates as accurate as possible before you transfer to metal that there are significantly less fitment issues before welding.
1955 Nomad project LC9, 4L80e, C5 brakes, Vision wheels
1968 Camaro 6.2 w/ LSA, TR6060-Magnum hybrid and etc SOLD
1976 T/A LS1 6 Speed, and etc. SOLD
Follow me on Instagram: ryeguy2006a
02-26-2018 #264
Registered User
- Join Date
- Dec 2008
- Location
- Detroit
- Posts
- 2,585
I had a welder and sold it recently, looking to get another soon. It was a good welder(Clarke), but it had a built in spool gun which i found awkward. I'm looking at a Hobart Handler 140. I think my biggest concern is the area around the the trunk and tail panel. I have some time to make up my mind. My body guy gave me a price based on quarters only. He said it would be cheaper if I do it when I bring the car in for paint. Originally Posted by ryeguy2006a
Big dreams, small pockets....
Chris--
'72 Cutlass S LSA/T56 Magnum
Bowler Performance, Rushforth Wheels, ATS, Holley EFI, KORE3, Ridetech
Project Motor City Madness
02-27-2018 #265
Registered User
- Join Date
- Sep 2009
- Posts
- 2,709
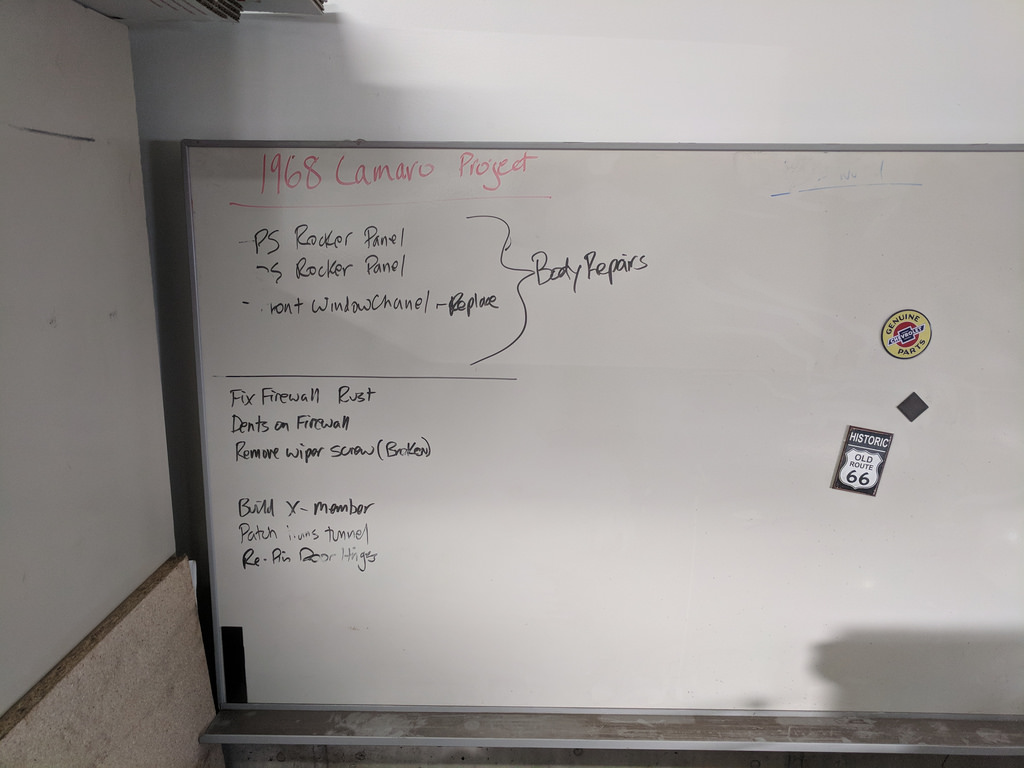
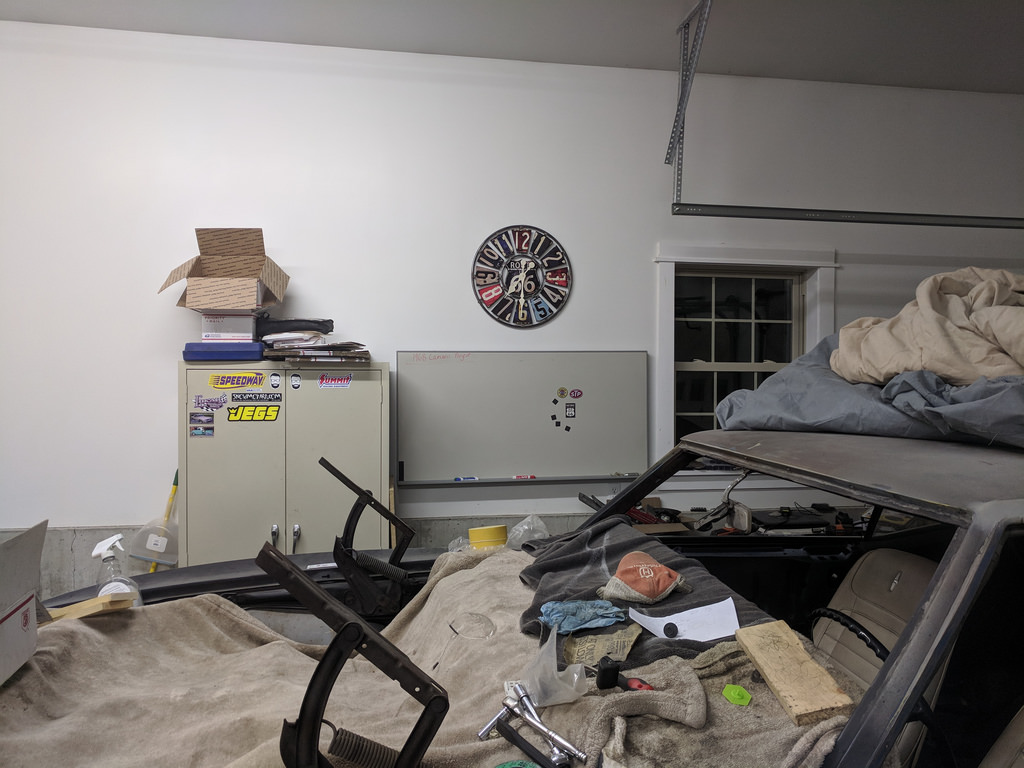
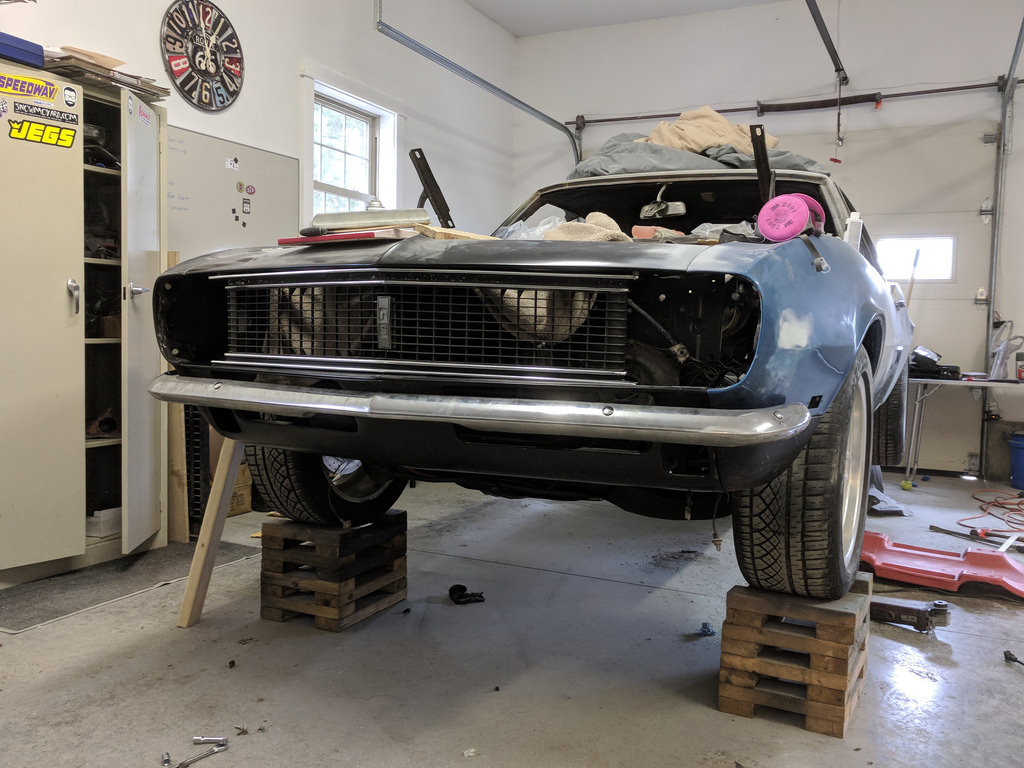
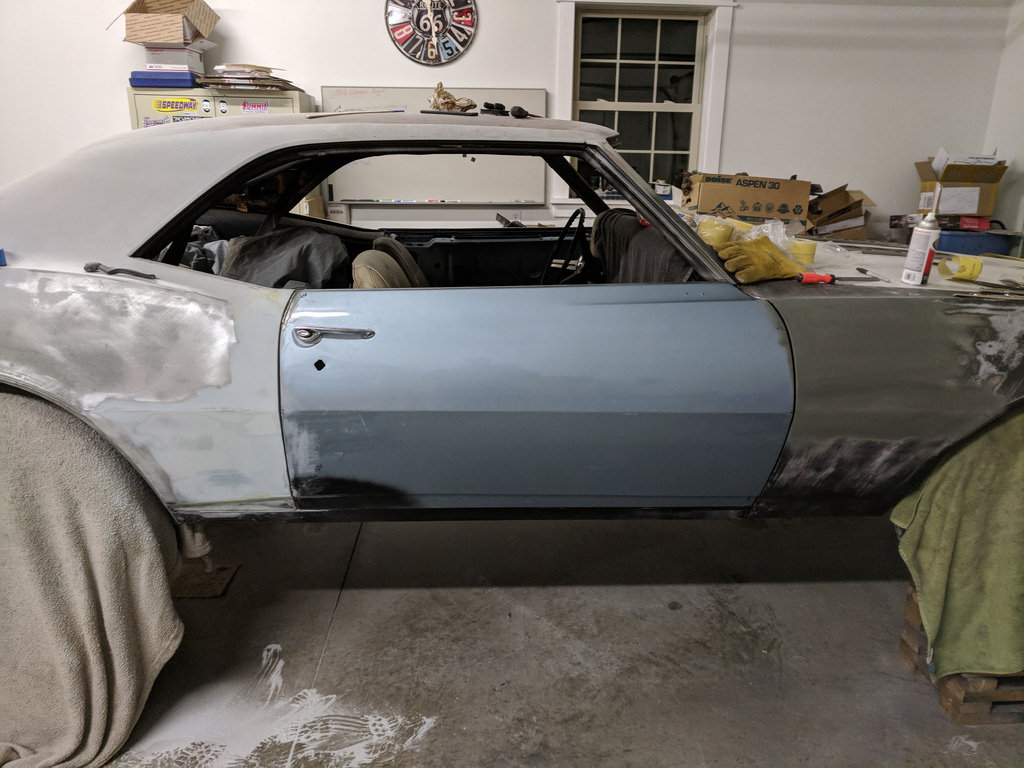
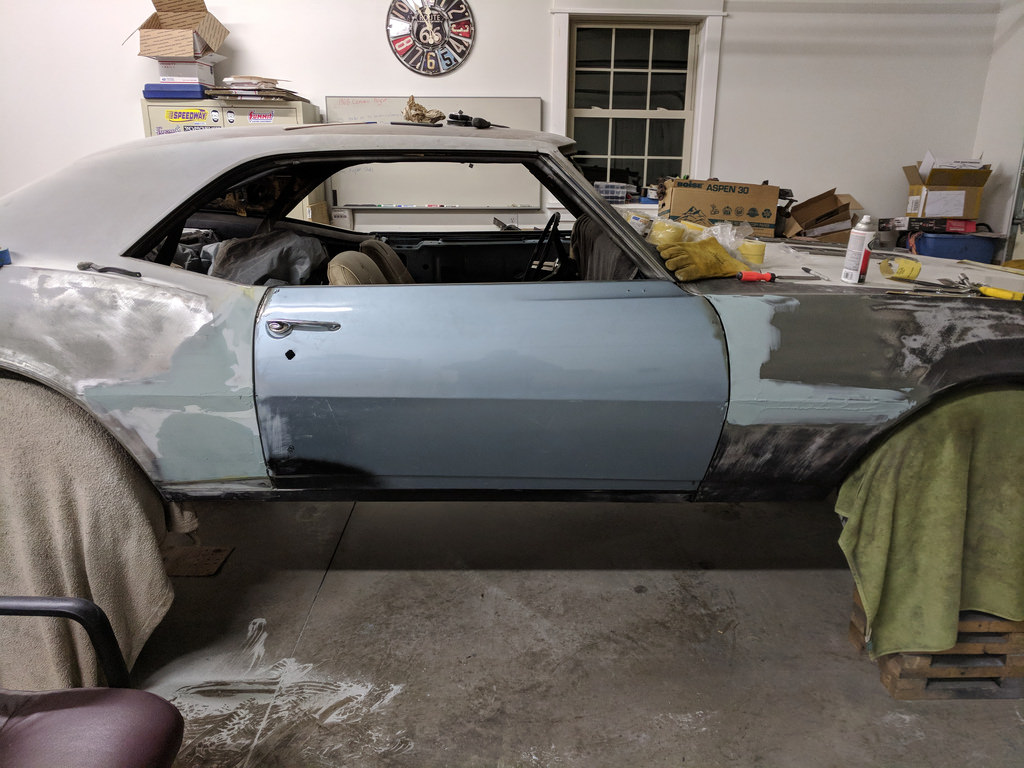
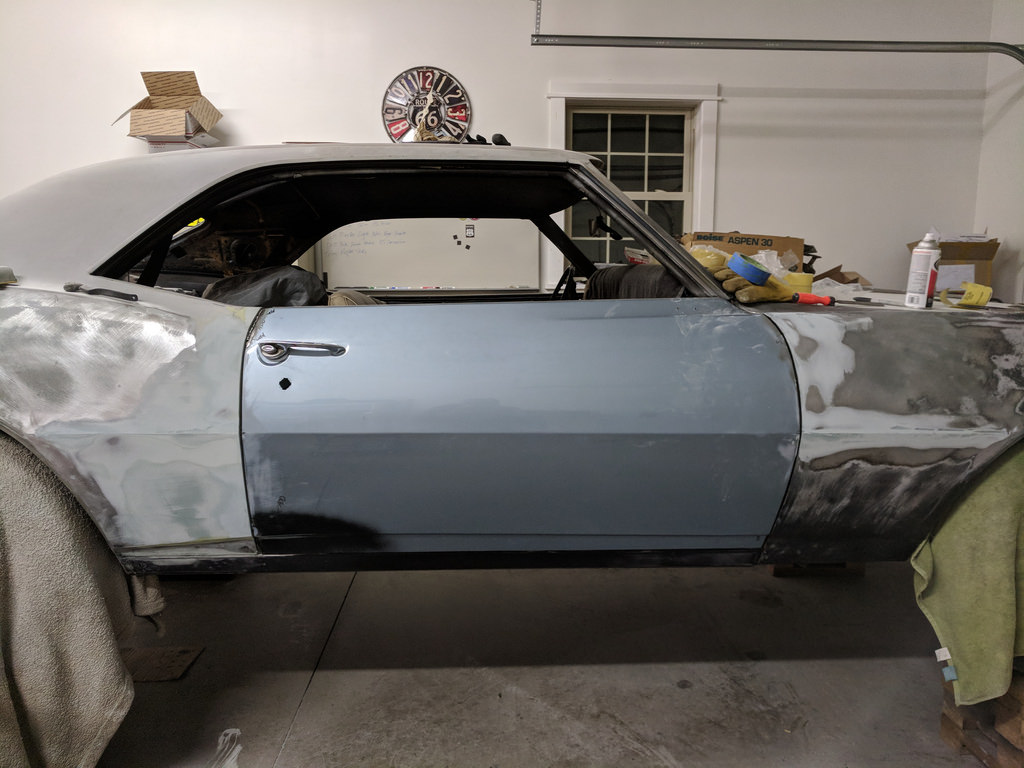
Thought some of you may think that this is entertaining. If you remember from the first part of my build thread I had a white board that I was keeping track of progress with and when I moved about a year and a half ago I packed it away. Well I was organizing things Sunday and decided that it was time to hang it back up. I had to shuffle some things around, but found a good spot for it. What is funny to me is looking back and seeing how far the car has progressed since I moved. I was happy to report that I crossed everything off of this list!
And all cleaned up. Hung up my clock too!

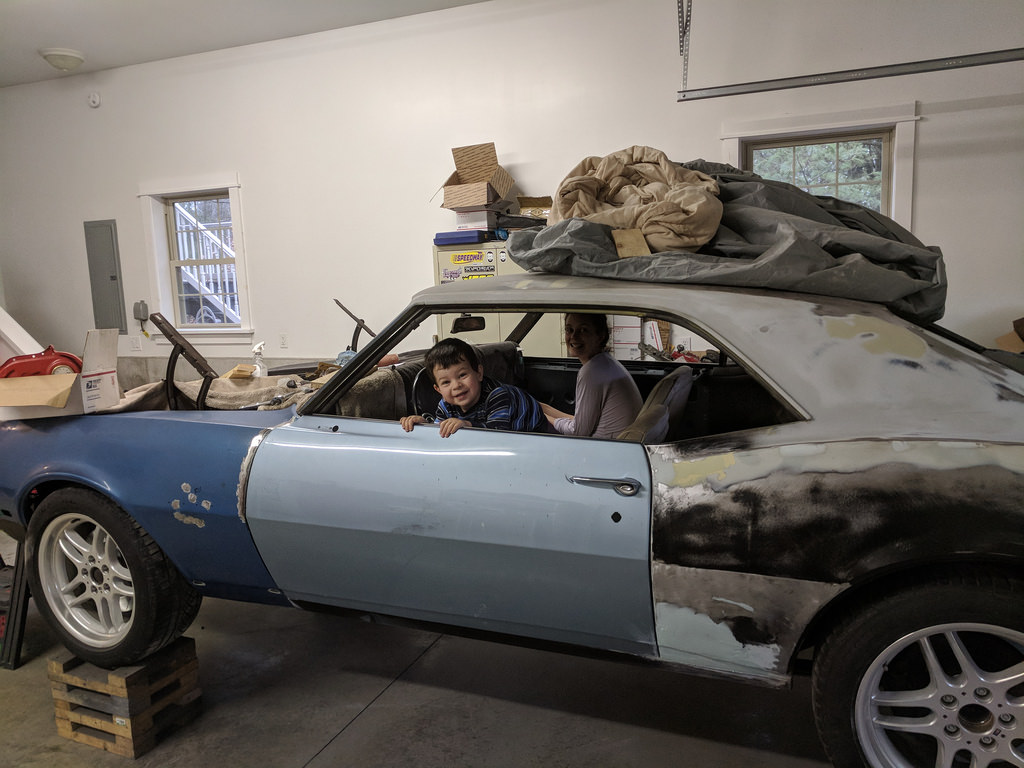
Another cool picture was from earlier on Sunday, when my wife and son were out in the garage helping me clean up. My son asked if he could drive and told my wife in his deep "race car driver" voice "Get in baby!" I asked him where are you taking your mama? He says, "I'm going to California and you can come too!" I lost it and couldn't stop laughing.
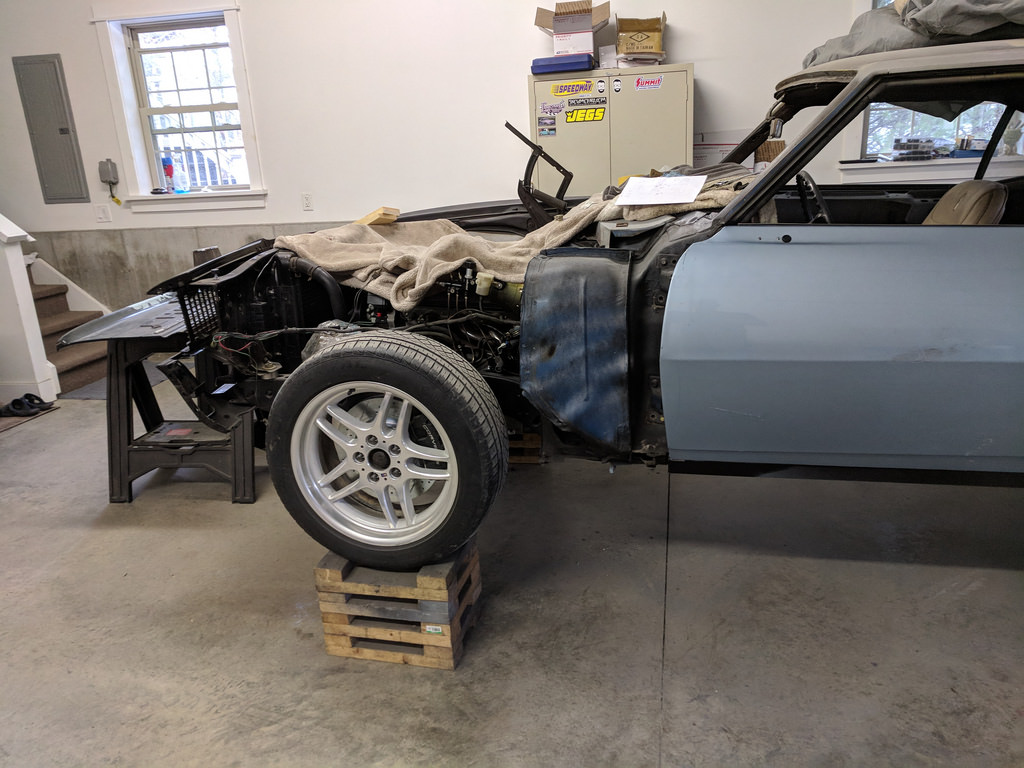
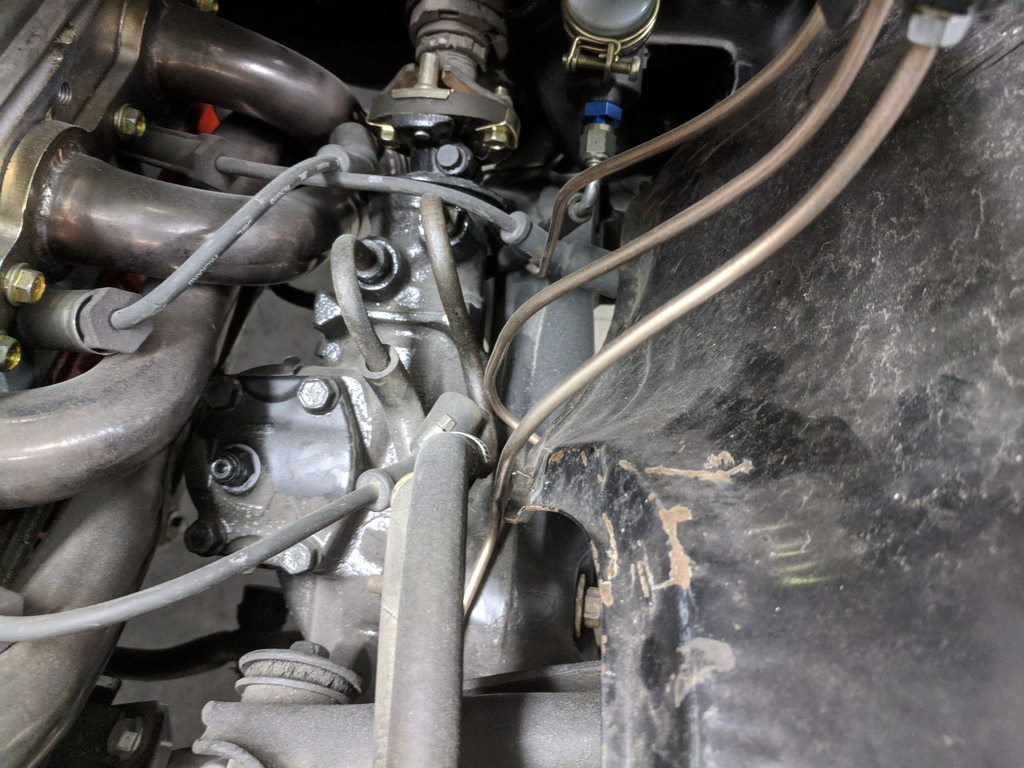
I forgot to add this picture too. While I had the driver's fender off, I wanted to make sure that my brake lines were actually going to clear the inner fender. I was happily surprised that they do! Excuse the dirty mess in the engine bay...
1955 Nomad project LC9, 4L80e, C5 brakes, Vision wheels
1968 Camaro 6.2 w/ LSA, TR6060-Magnum hybrid and etc SOLD
1976 T/A LS1 6 Speed, and etc. SOLD
Follow me on Instagram: ryeguy2006a
02-27-2018 #266
Registered User
- Join Date
- Jun 2013
- Posts
- 43
love this build, very close to where i am with my car so its nice to see progress.
03-05-2018 #267
Registered User
- Join Date
- Sep 2009
- Posts
- 2,709
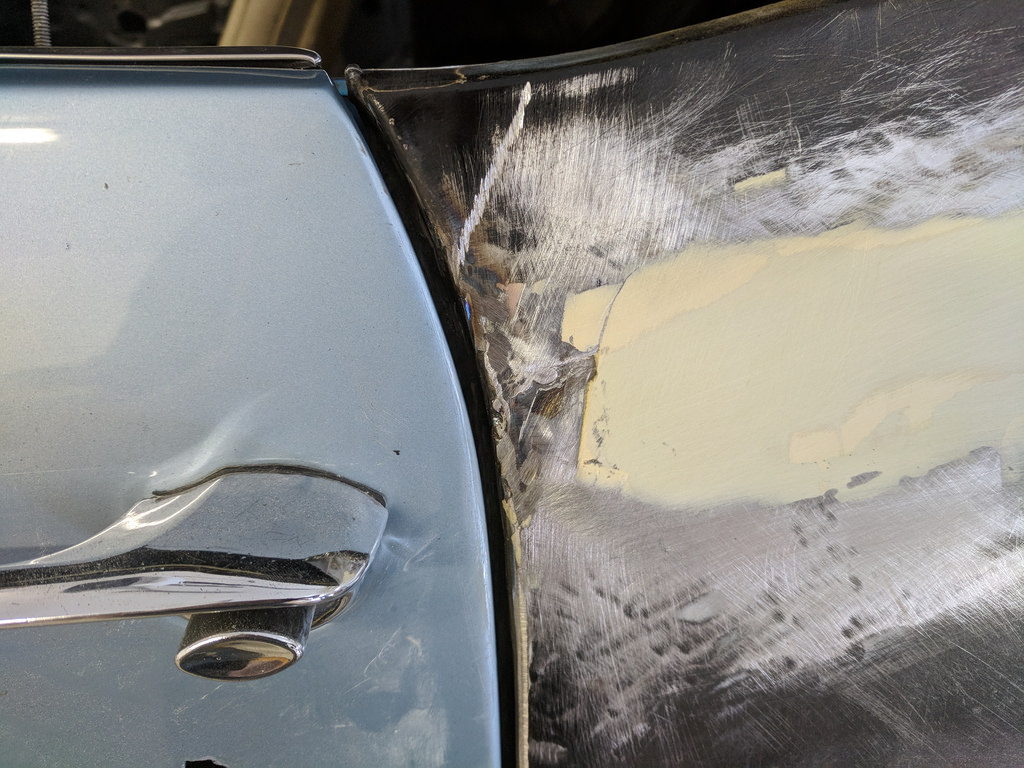
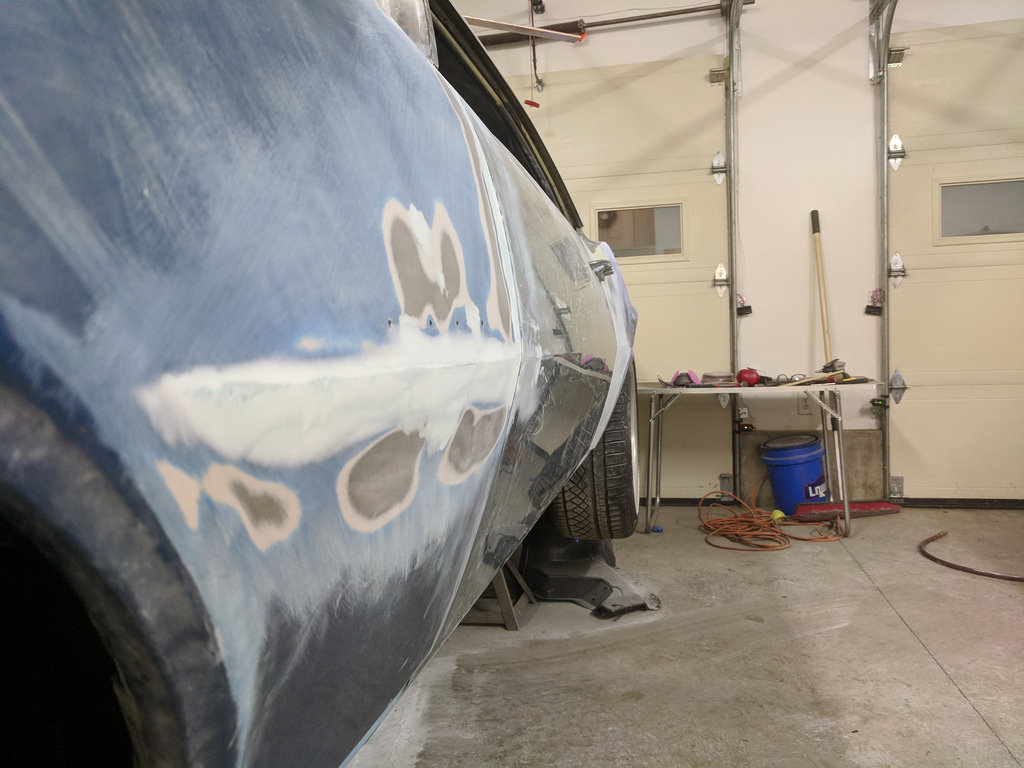
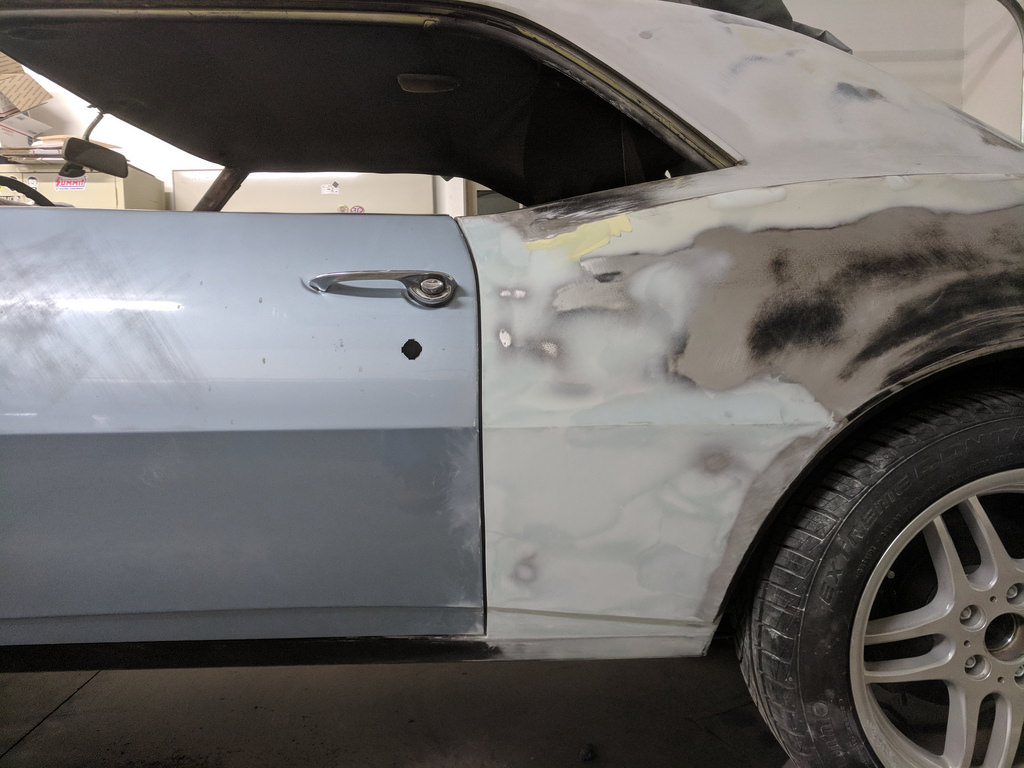
Got a little more sanding done this weekend. Since this is new to me it seems to be taking me longer to get the overall shapes that I want, but making progress. The center body line on the driver's fender was way off, which I'm guessing is due to a bad stamping. So I had to drop the body line by about 1/8". For being the first time, I was pretty pleased with the results. Everything is still being shaped right now in 80 grit so I still will have a lot more sanding in my future.
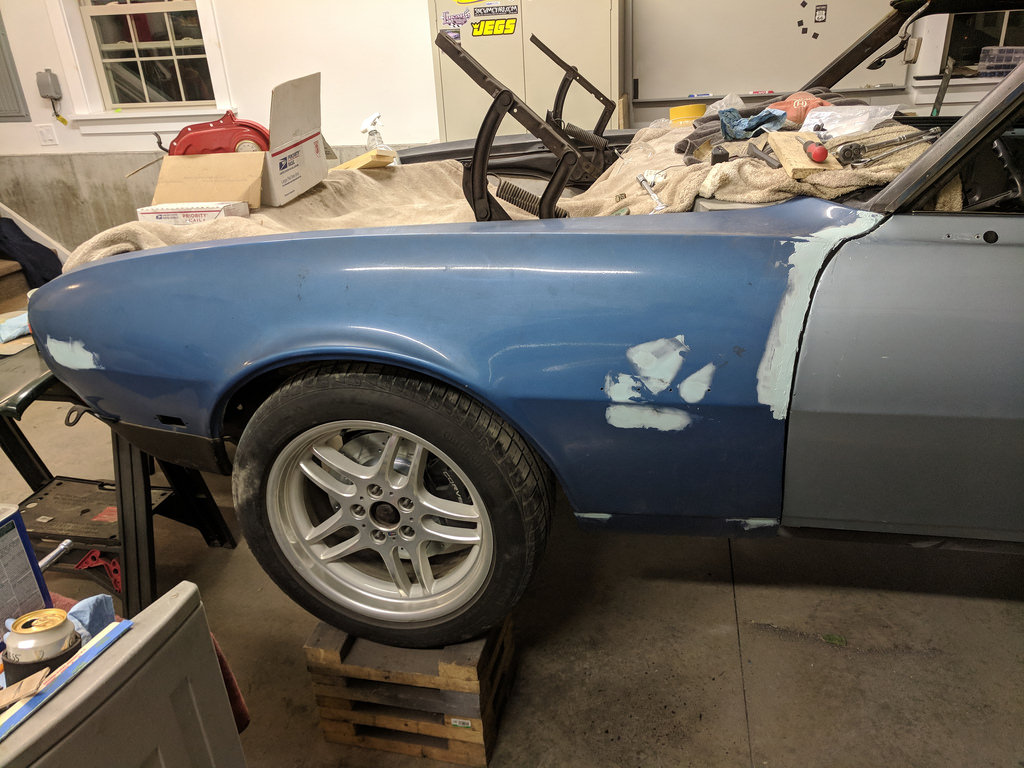
Quarter panel body line is looking better.
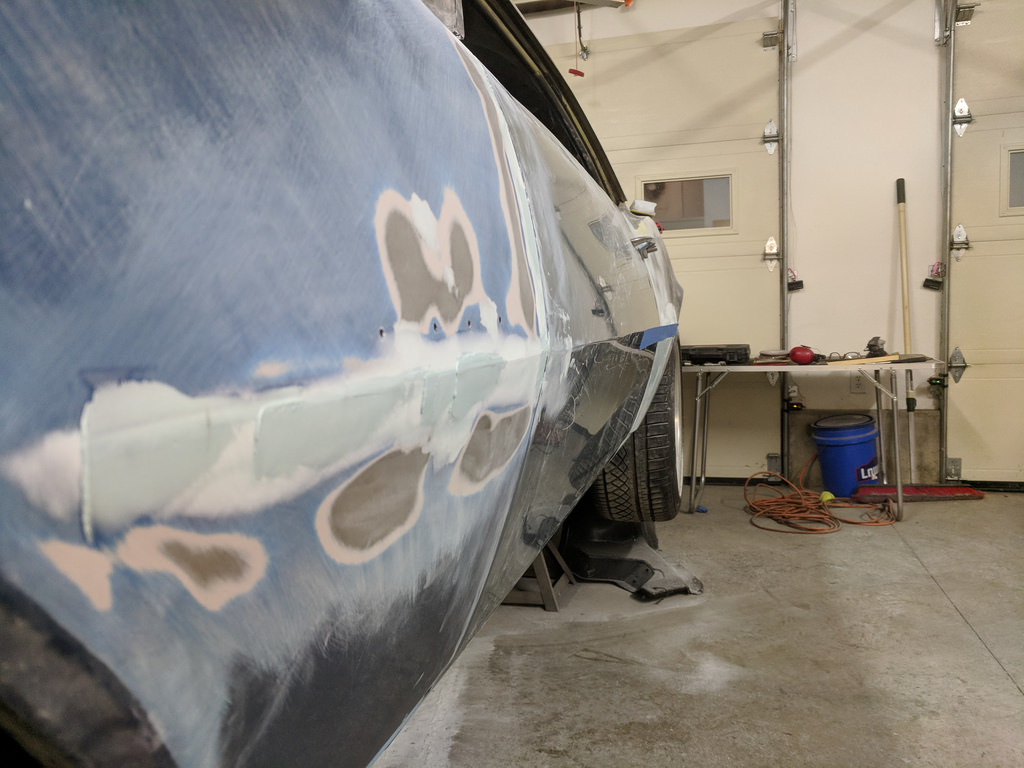
Started working on the fender to door body lines to get the body line dropped to match the door. I'm loving my gaps
Then after the first round of shaping on the fender. Definitely much happier with that line, but still needs some work. The line on the quarter panel looks like it tips down, but I think it's because of the way the quarter flares out.
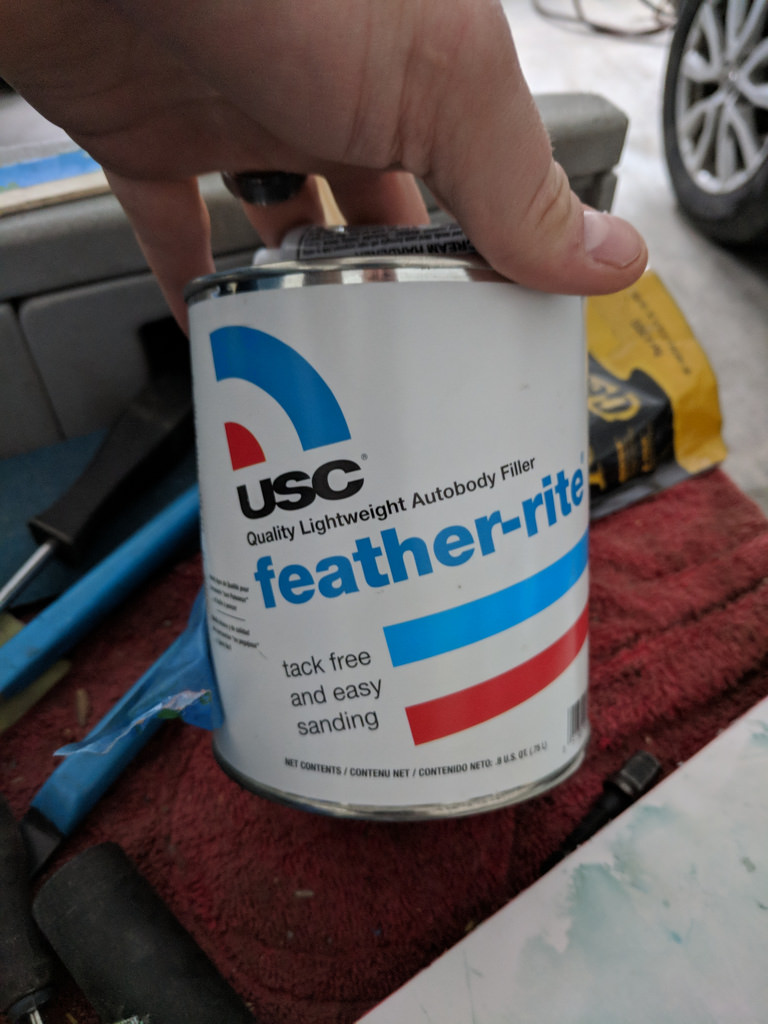
Also if anyone is wondering, I'm using USC Feather-Rite which was what the guy at the body shop recommended. It is working great and easy to sand.
 [/url]
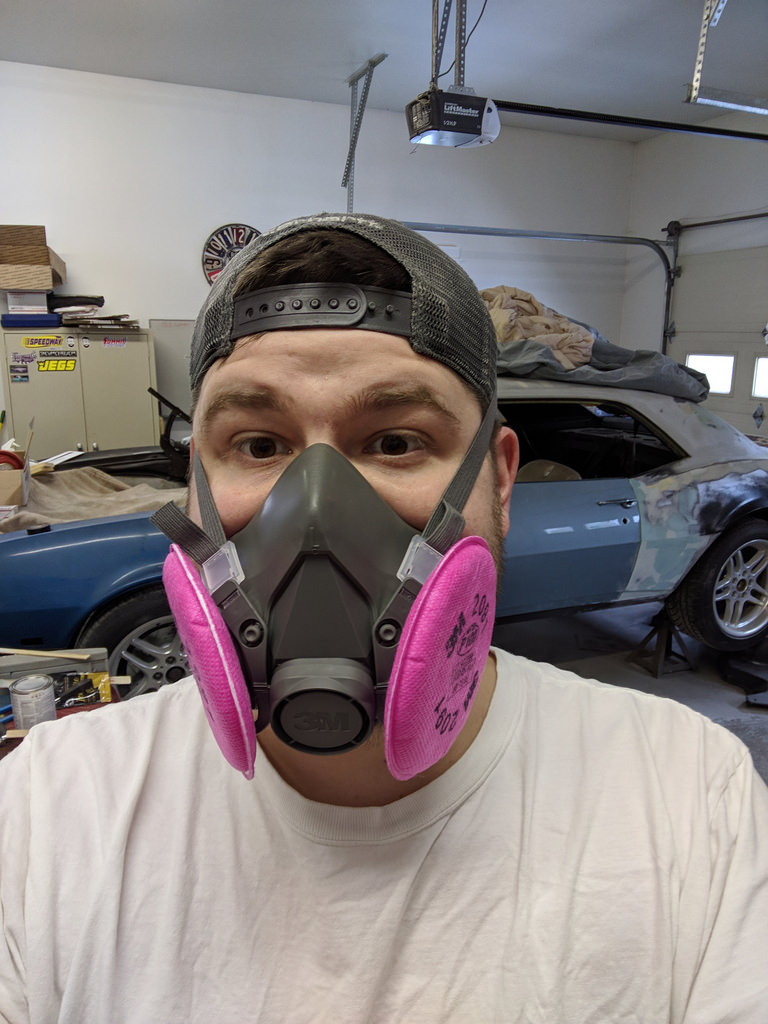
Also if anyone is having trouble with sanding dust like I was, I looked up some cheap disposable masks but didn't like how they felt. Then I came across this one by 3M, with replacable filters. I picked it up on eBay for $14.50 and it works incredibly well. No more coughing for a day after sanding.
Lots of work, but not a lot to show for it. Now I know why they call it paint Jail!
1955 Nomad project LC9, 4L80e, C5 brakes, Vision wheels
1968 Camaro 6.2 w/ LSA, TR6060-Magnum hybrid and etc SOLD
1976 T/A LS1 6 Speed, and etc. SOLD
Follow me on Instagram: ryeguy2006a
03-06-2018 #268
Registered User
- Join Date
- Sep 2009
- Posts
- 2,709
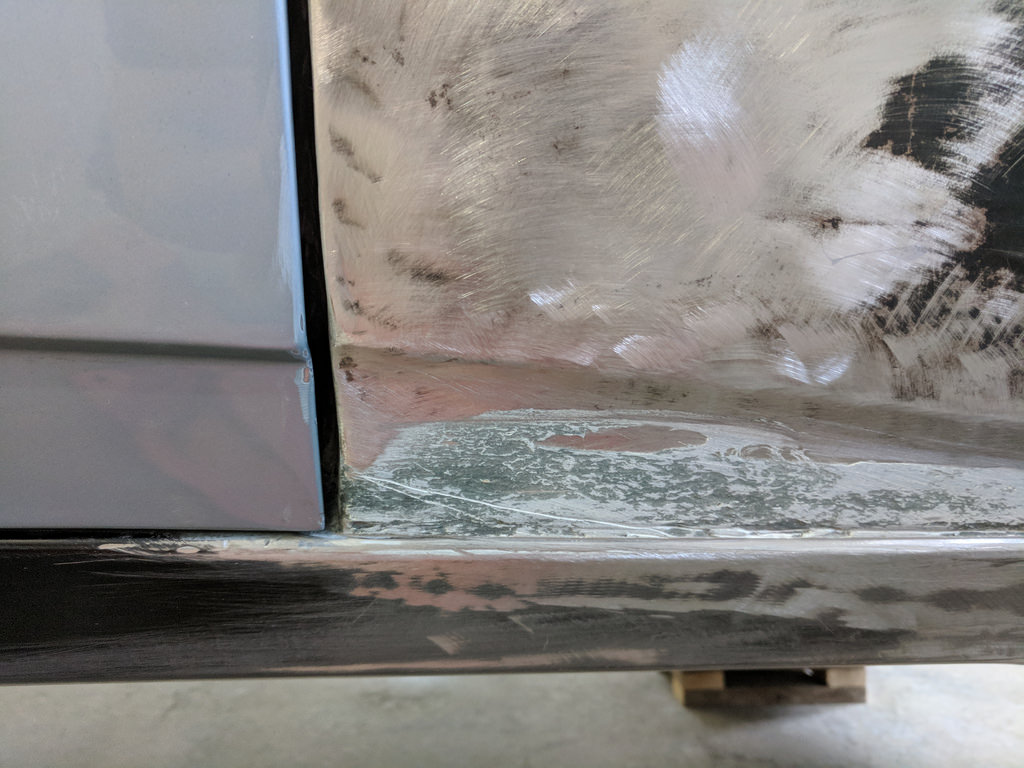
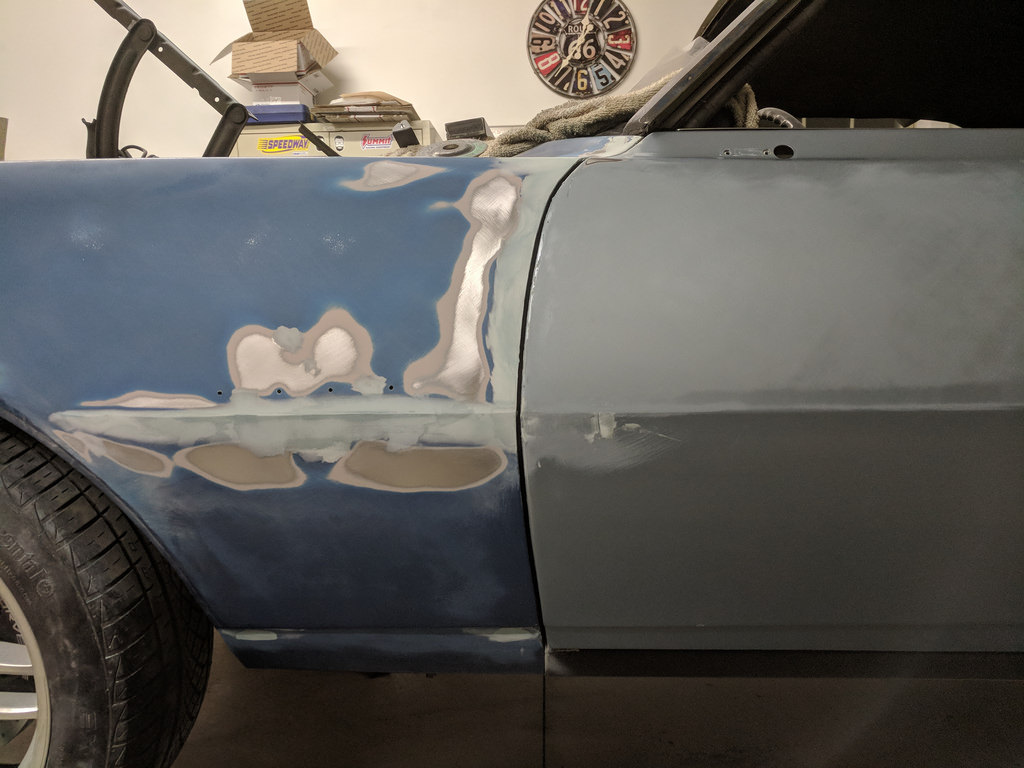
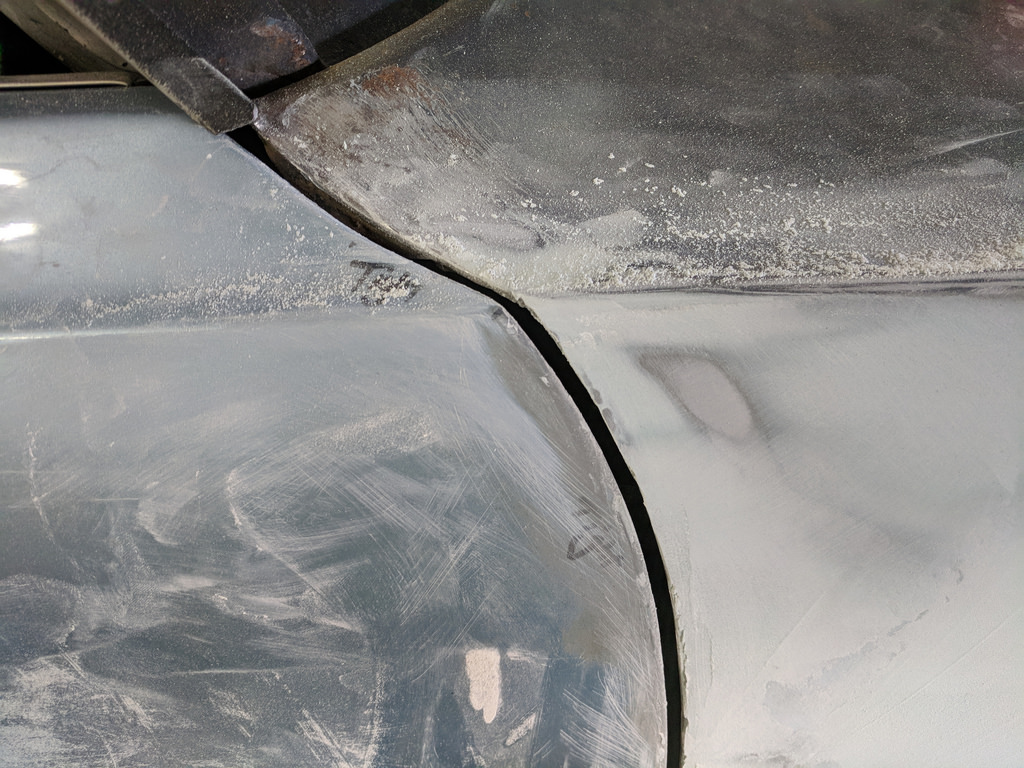
Wife went to bed early last night, so I took the opportunity to get some more sanding done. The more that I looked at the body line on the quarter panel, the more I realized that it truly dipped down slightly. I confirmed when I put a straight edge up to it. It was about 1/8" low. So I figured I better fix it now or it will always bug me. Hard to see from the picture, but it's pretty noticeable in person.
I added some more filler to move the body line up where I wanted it and used a piece of masking tape to guide my line. Not sure if it's correct, but it worked for me.
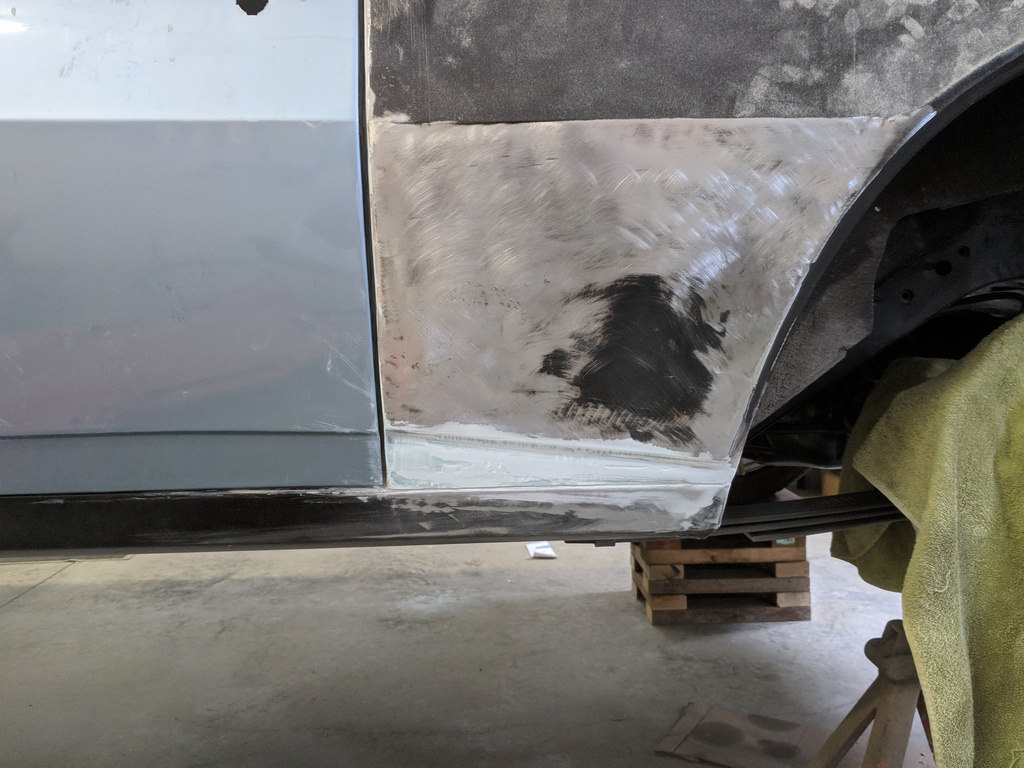
After the first round of sanding with 80 grit. Very pleased as it's right where I want it.

I had to add some more to catch some of the low spots from the first round.
It's not perfect, but next time I mix up some glaze coat I will fill in the tiny low spots where I didn't add enough filler. Then I switched to the 180 grit paper and it really smoothed things down. Once the low spots are hit the driver's side will be ready for primer. I'm very happy right now with the fit and finish of the body panels and gaps on the driver's side.

My buddy with a paint booth told me to get the whole body sanded down to 180 in preparation for the epoxy primer. Hopefully over the next few weeks it will be ready to go to his place for final prep, primer and paint. I'm hoping that maybe tonight I can mix up some of the glaze coat tonight and fill in some of the small low spots. Then it will be done until we block it out with the 2k primers.
Cheers,
Ryan
1955 Nomad project LC9, 4L80e, C5 brakes, Vision wheels
1968 Camaro 6.2 w/ LSA, TR6060-Magnum hybrid and etc SOLD
1976 T/A LS1 6 Speed, and etc. SOLD
Follow me on Instagram: ryeguy2006a
03-08-2018 #269
Registered User
- Join Date
- Sep 2009
- Posts
- 2,709
Well I went into the garage last night to spread some glaze filler and was planning on letting it sit overnight, but after I filled our outdoor wood boiler around 8pm I came back in through the garage I thought, "let me just see what this looks like when I sand that off." Well I got into a groove and next thing I know it's 11:30 as I sprayed down some primer to check my lines.

And I had to throw on my rally-sport emblems for fun!

I'm pumped because the driver's side is sanded down to 180 grit ready for some epoxy! The passenger's side needs to have a little tweaking here and there but I already did quite a bit of the body work before. It really only needs a glaze coat and some panel fitment then it should be ready as well. Next up is to tweak on the front of the driver's fender where it meets the upper valance, slight modification to the lower valance center and then tweak the fitment of the lower valance to the passenger fender extension.
1955 Nomad project LC9, 4L80e, C5 brakes, Vision wheels
1968 Camaro 6.2 w/ LSA, TR6060-Magnum hybrid and etc SOLD
1976 T/A LS1 6 Speed, and etc. SOLD
Follow me on Instagram: ryeguy2006a
03-12-2018 #270
Registered User
- Join Date
- Sep 2009
- Posts
- 2,709
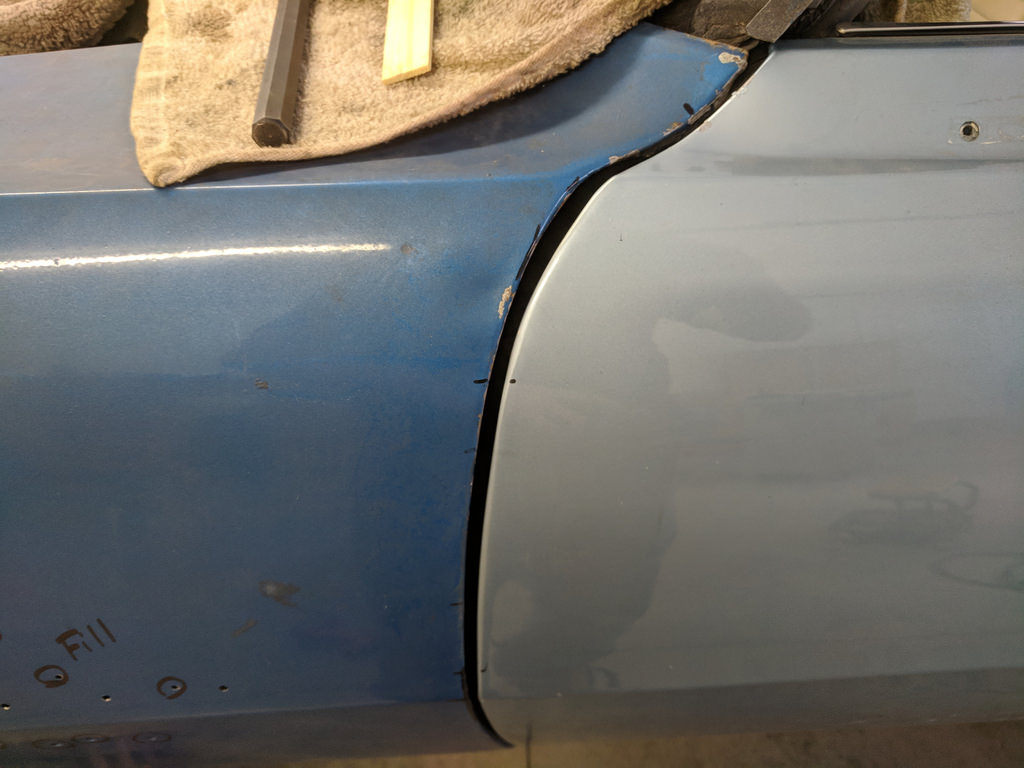
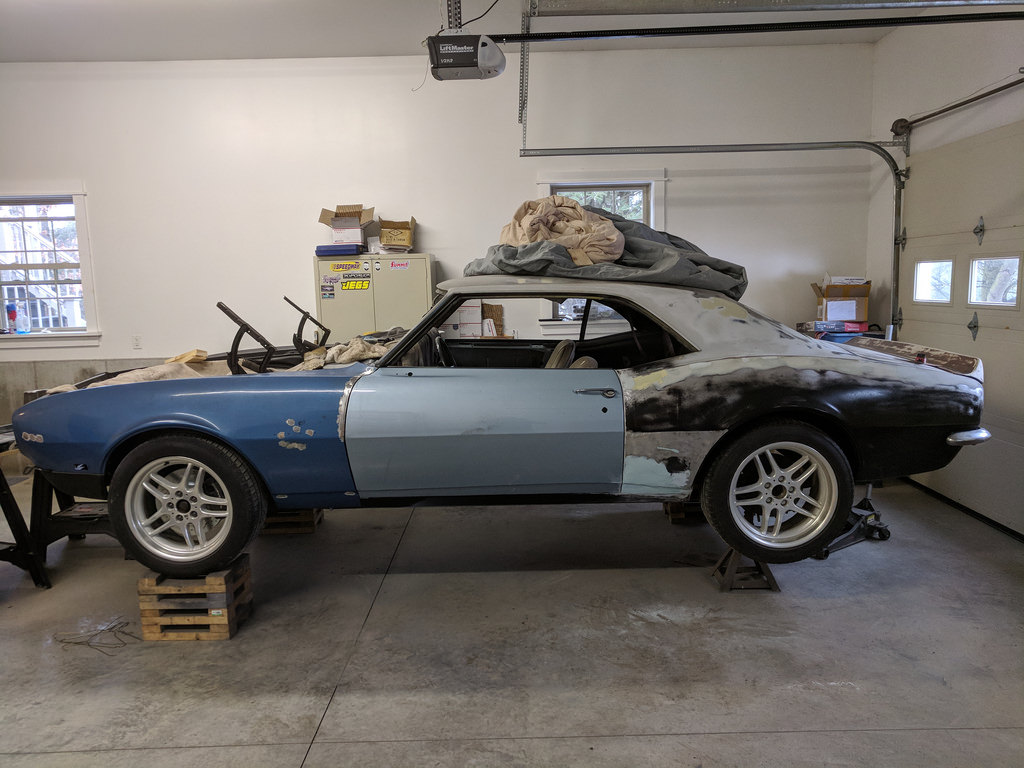
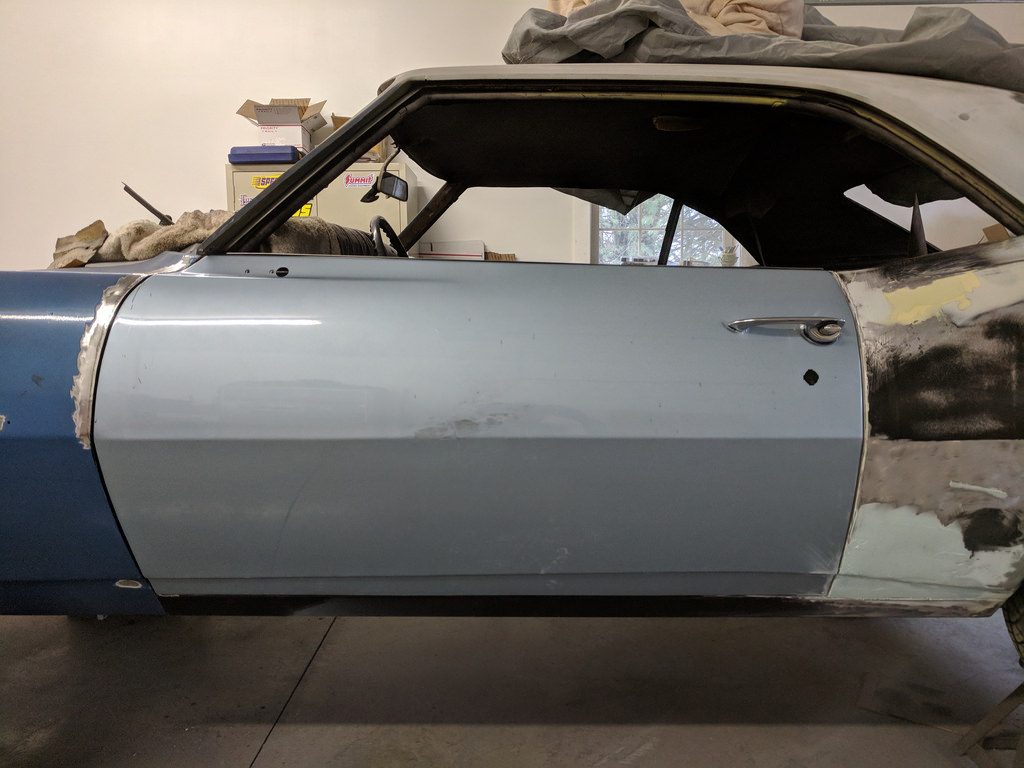
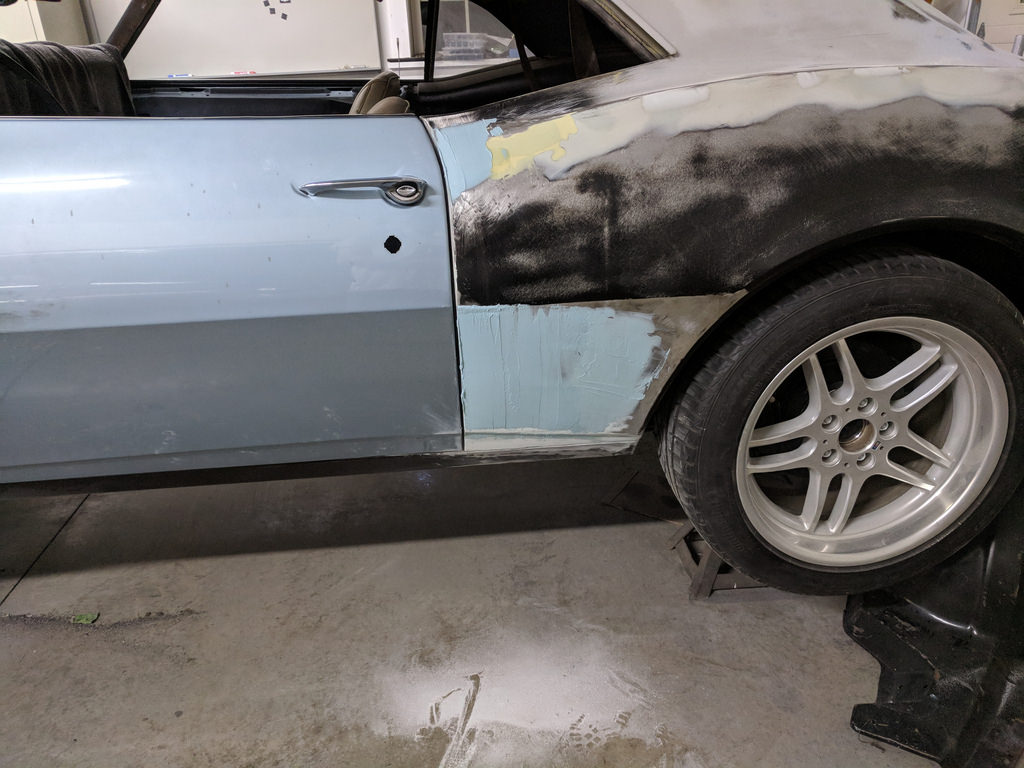
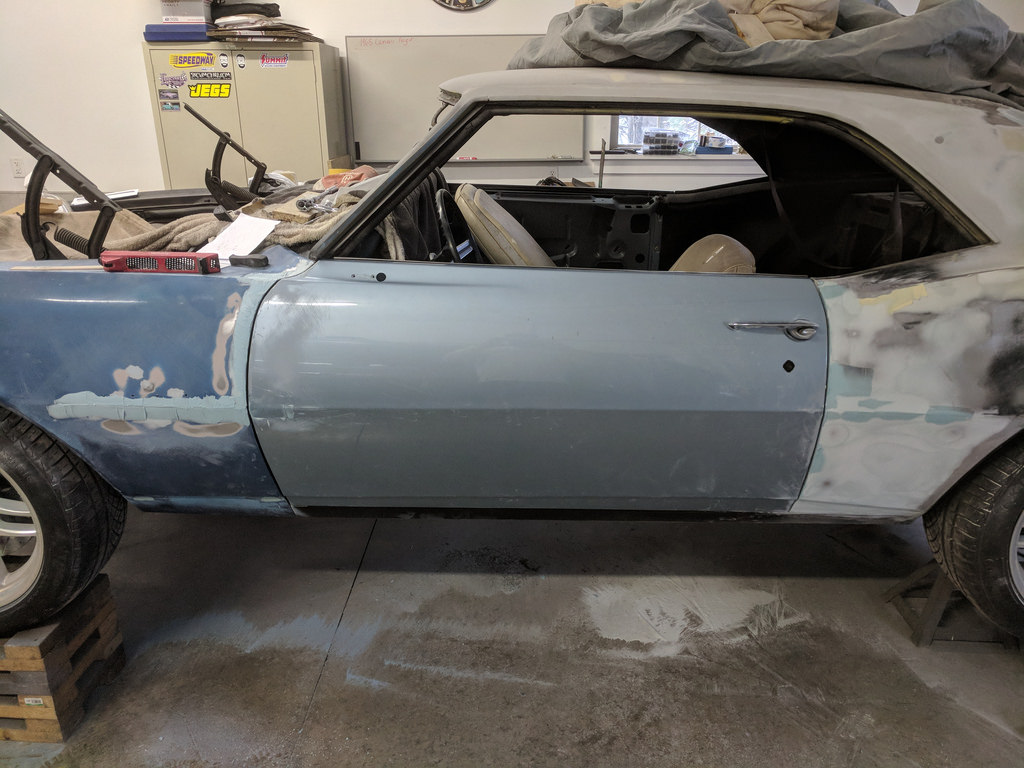
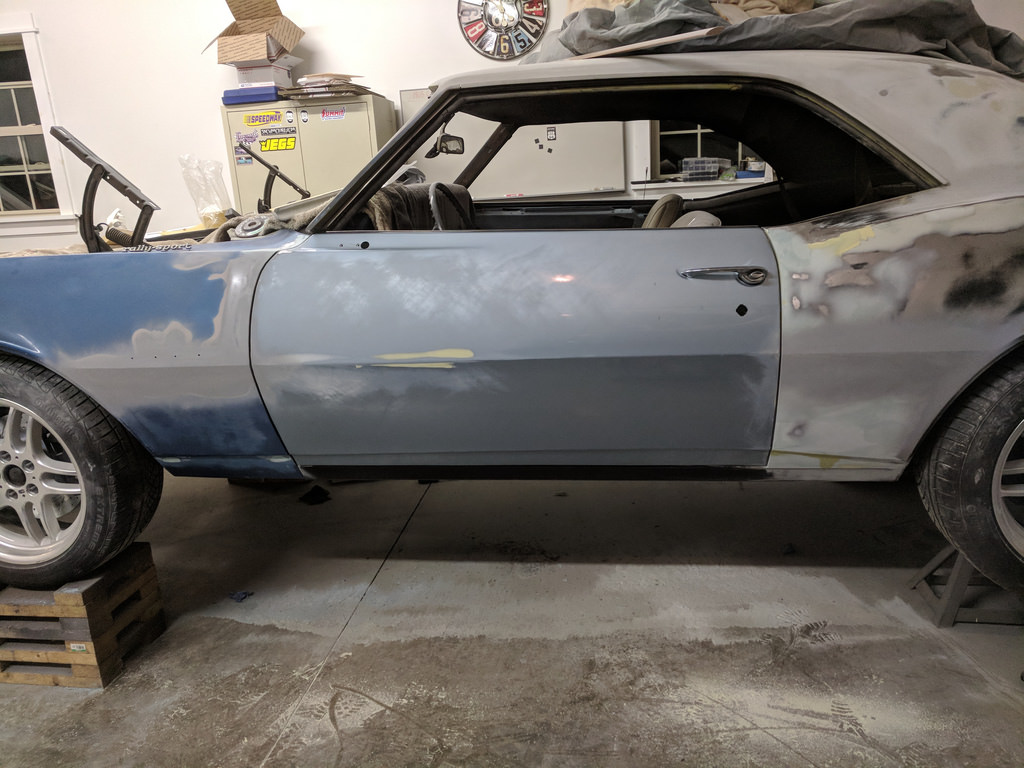
While the family was napping on Sunday afternoon, I was able to get out in my garage for a few hours. I had two things that I needed to finish before the driver's side was done. One was to lightly tap the lower edge of the door to fit up against the rocker panel and the other was to get the very front of the fender to line up with the upper valance panel. I started out by tapping in the bottom of the door. After that was done, I was very pleased with the driver's side fender/door/quarter fitment. Now if I can get the passenger's side to match I will be thrilled.
Now it fits up nice and tight against the rocker like it should.
Next up was the fender/valance panel fitment. I did everything I could to "massage" the fender to try and get the panel to sit flush but it became clear it needed to be modified.
Fitment before.

I took my cut off wheel and made a little slice along the inner edge where it needed to be dropped. Then I used my body hammer to lightly tap it down.
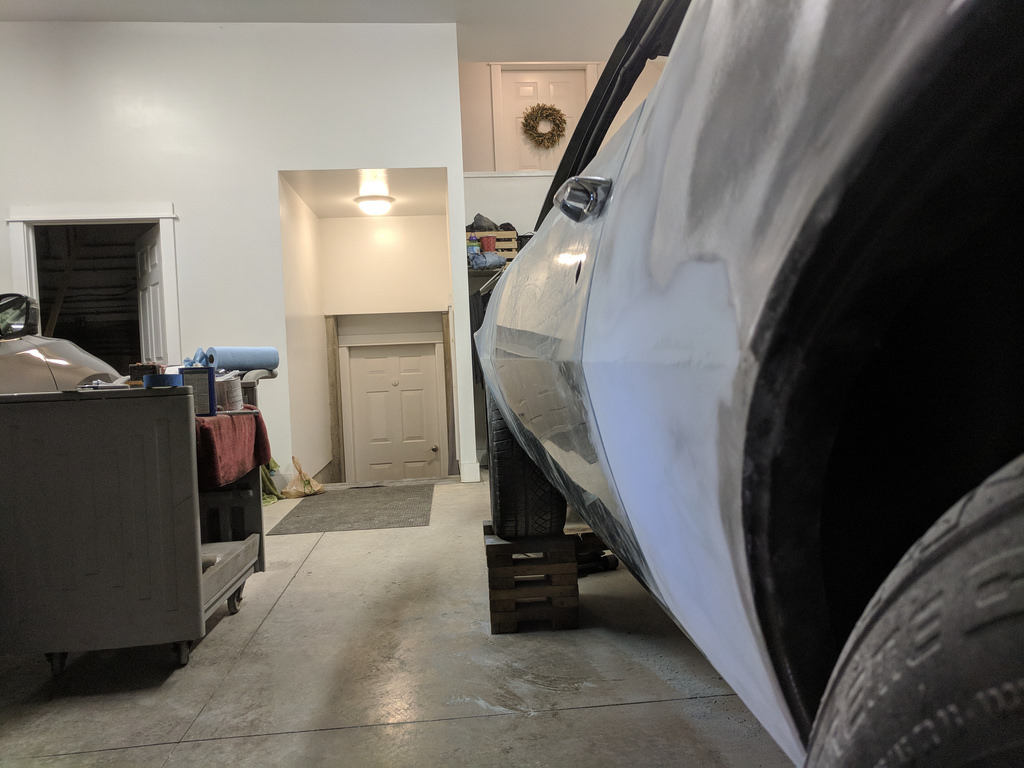
Once I pull the fender off I'm going to weld it shut and no one will ever notice it was modified. I feel like I hit a milestone as the driver's side is all fit and finished until it goes to the body shop. Although I will have a lot of sanding in my future to get the body blocked out the major modifications are behind me. It's now time to turn my attention to the passenger's side. I shouldn't say it, but I believe this side will go much faster. The body gaps are already very close and it doesn't look like I will need to add rods to any of the gaps but time will tell. I turned the car around and I had just been sweeping the sanding dust under the car. This is what accumulated! To give a scale, the pile is about the length of my 24" shop broom.
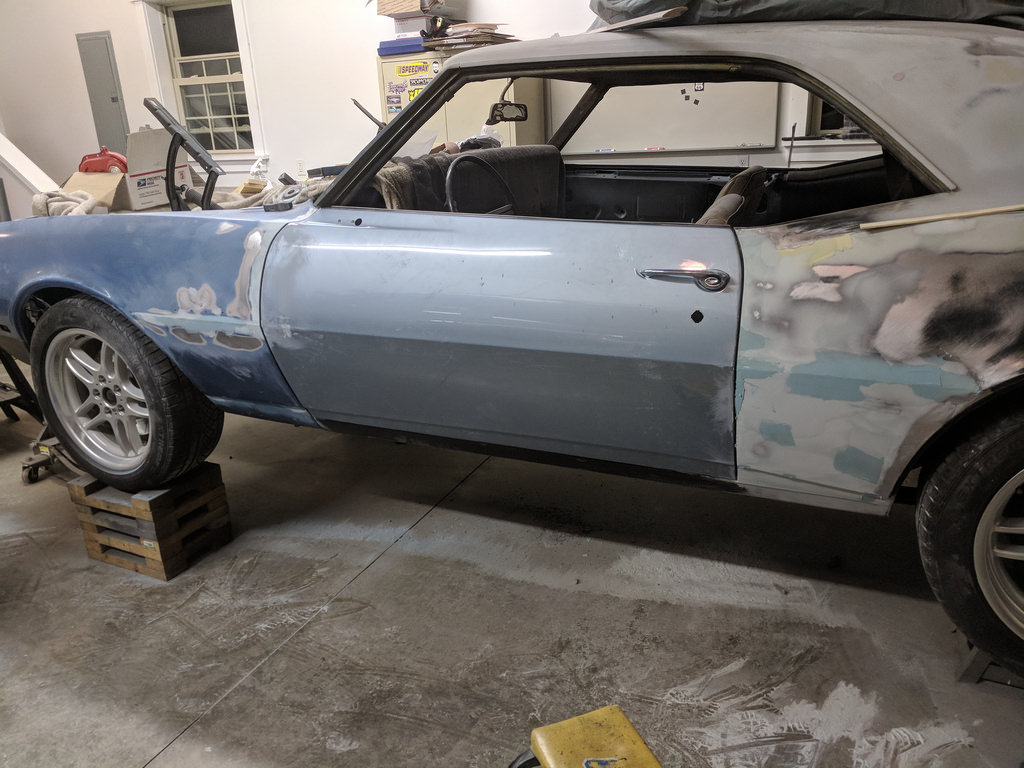
And this is the passenger's side as it sits now. I need to move the door forward to match the gaps on the driver's side, and then I can define the body line on the fender. Otherwise I'm happy with it.
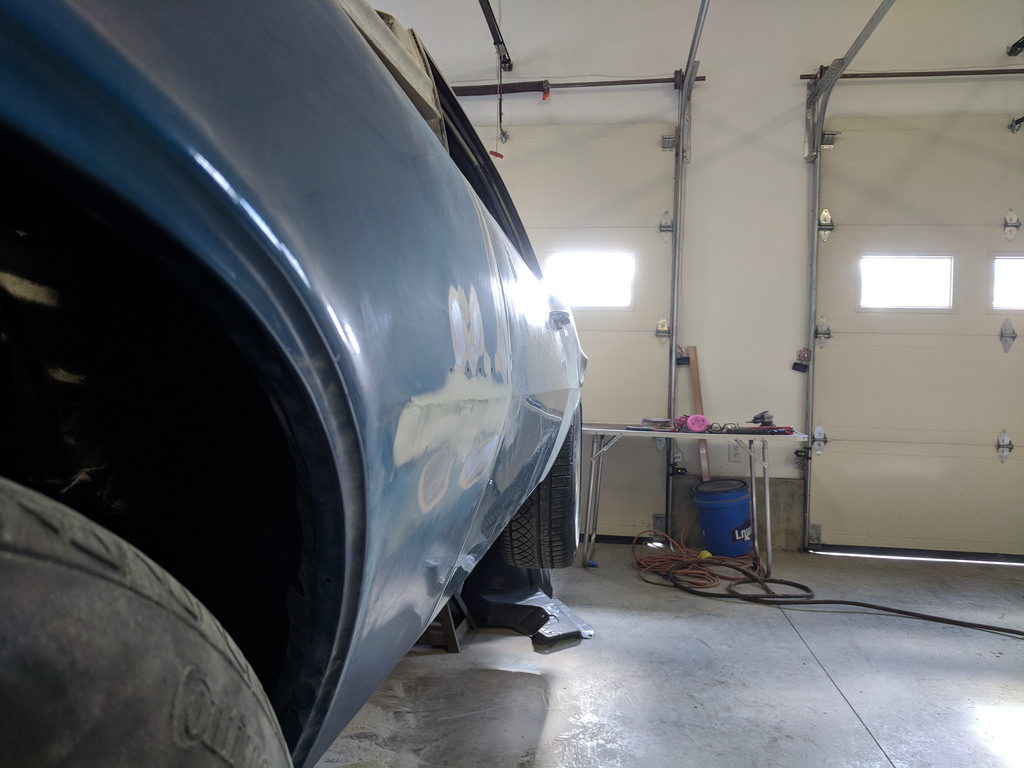
Before I moved the car around, I finally bought the rubber mounts for the front bumper and wanted to test fit that. I figured it would be a good idea to make sure that it fit before I get the car painted. I was pleasantly surprised that it fit right up and was centered next to the upper valance.
It's getting so close now. I can't wait to see it all painted.
Ryan
1955 Nomad project LC9, 4L80e, C5 brakes, Vision wheels
1968 Camaro 6.2 w/ LSA, TR6060-Magnum hybrid and etc SOLD
1976 T/A LS1 6 Speed, and etc. SOLD
Follow me on Instagram: ryeguy2006a
03-12-2018 #271 Registered User
- Join Date
- Dec 2016
- Location
- Montgomery County PA
- Posts
- 59
Looking good, hard work is paying off.
03-14-2018 #272
Registered User
- Join Date
- Aug 2014
- Posts
- 435
Hey Ryan, Camaro is coming along great. Genius idea with the coat hangers. Also, I picked up that same hammer and dolly set (mainly after seeing it here) and it's a million times better than the set I bought years ago. Can't wait to see yours in one color!
Jay
03-14-2018 #273 Registered User
- Join Date
- Nov 2006
- Location
- Ma.
- Posts
- 5,567
Ryan looking good, nice work.
Wayne
Car FINALLY home !!!!!! lol
Project FNQUIK https://www.pro-touring.com/showthre...ghlight=FNQUIK
03-15-2018 #274
Registered User
- Join Date
- Sep 2009
- Posts
- 2,709
Thanks for all the compliments! It helps to keep me motivated for sure.
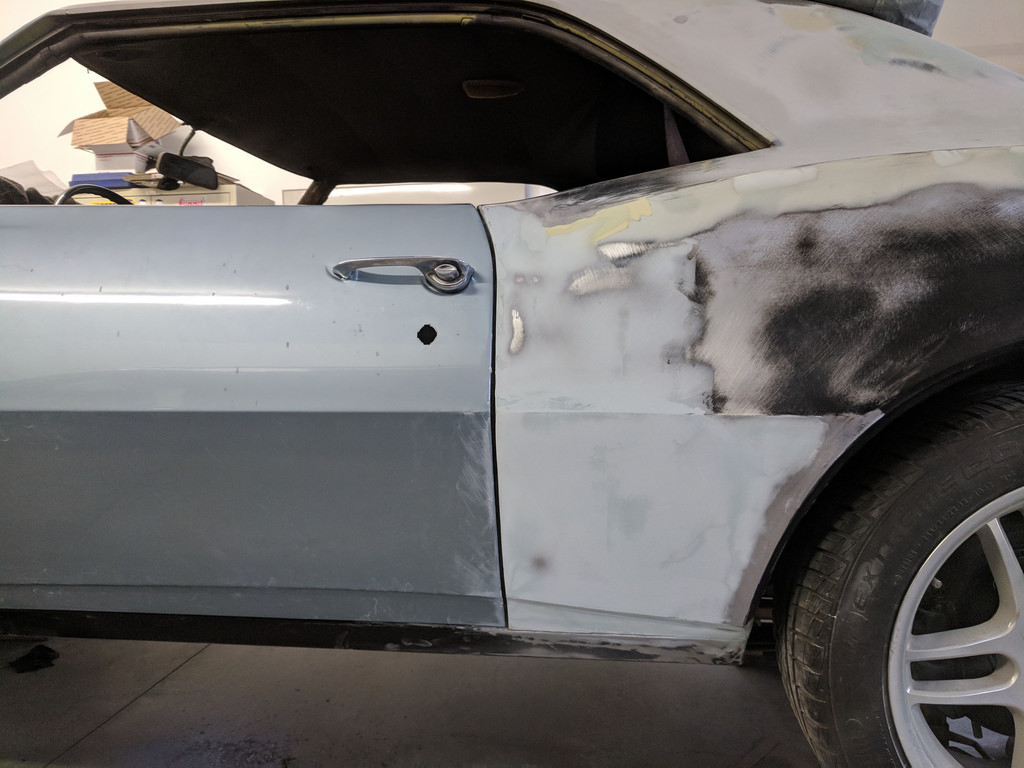
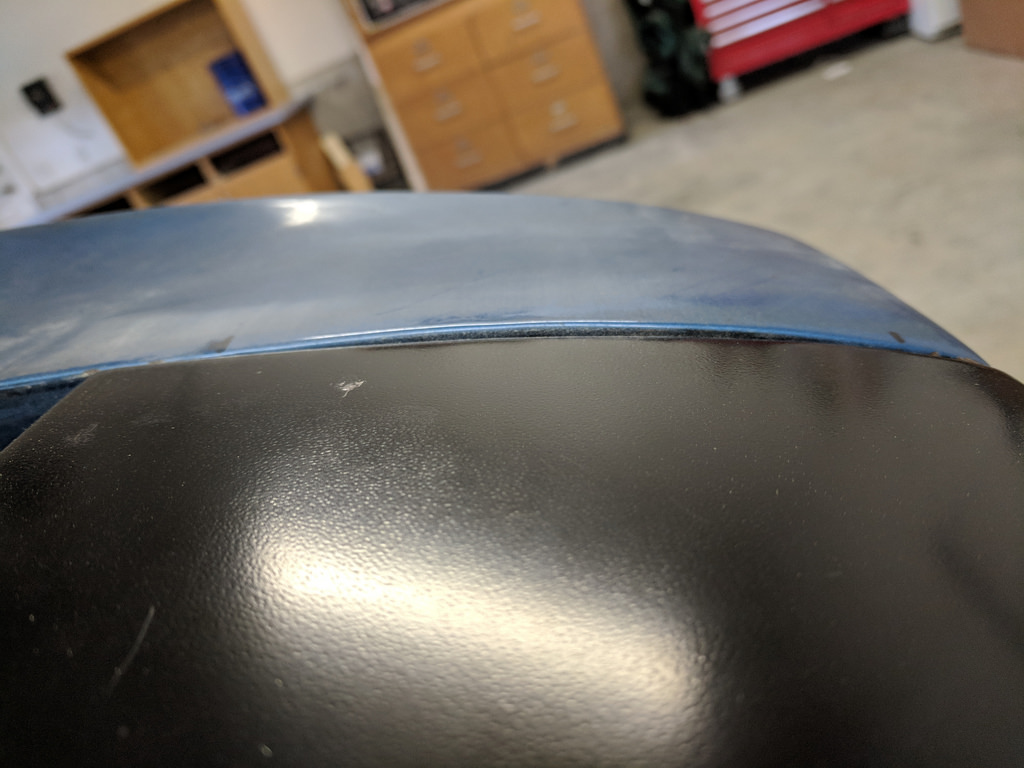
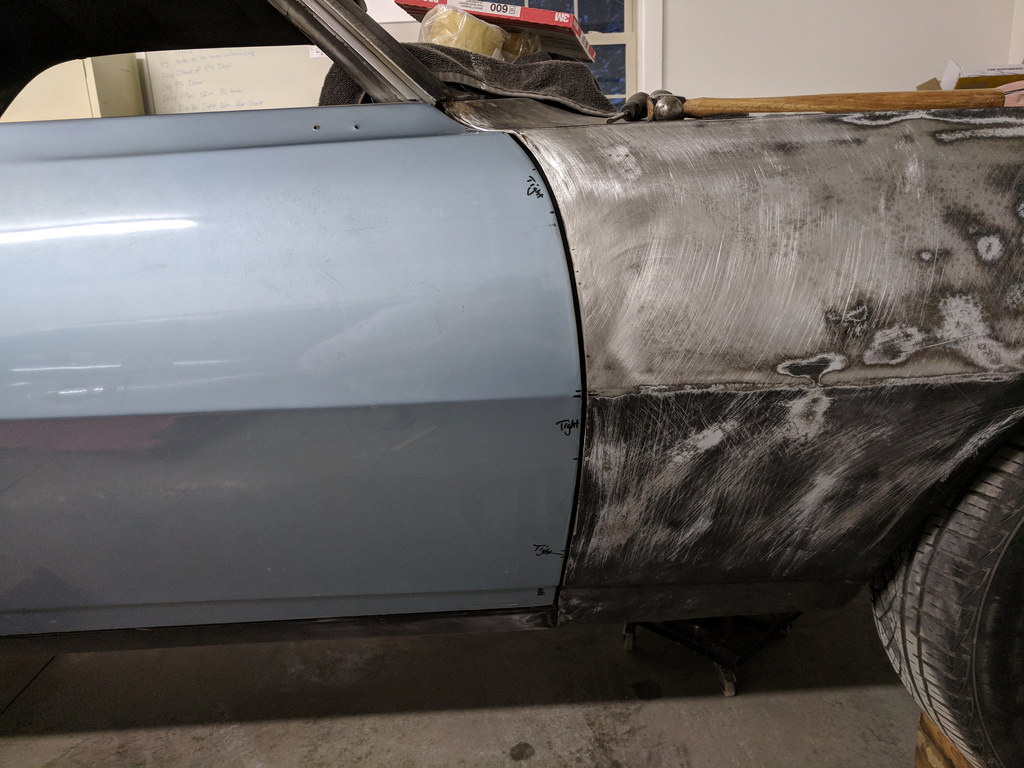
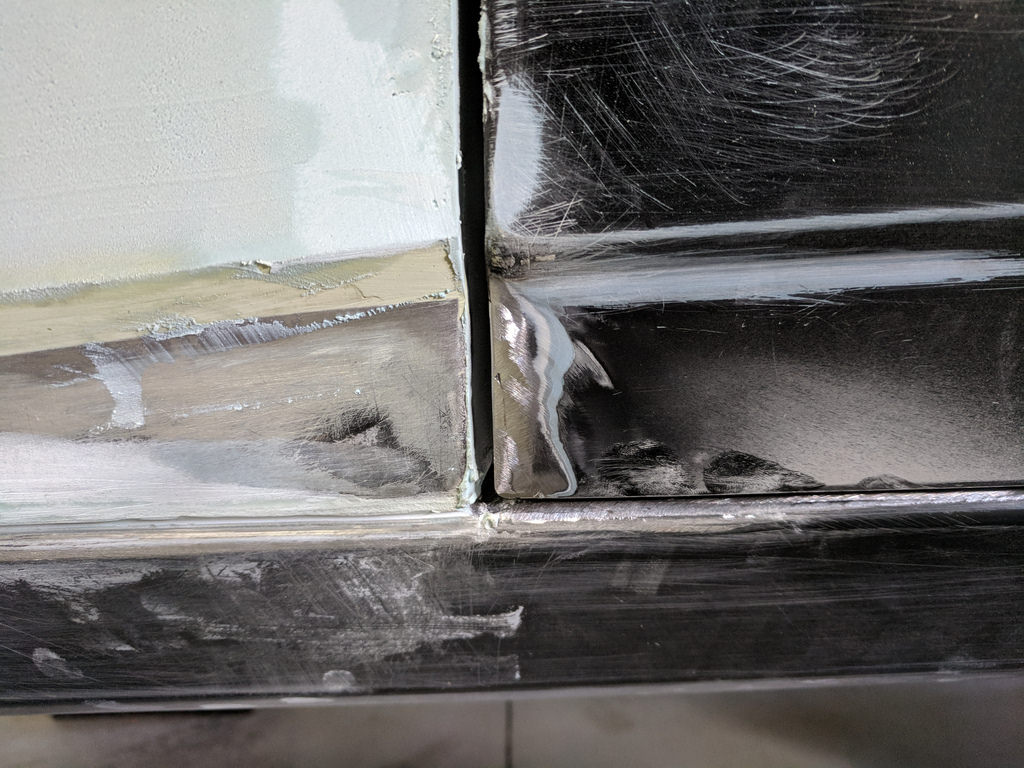
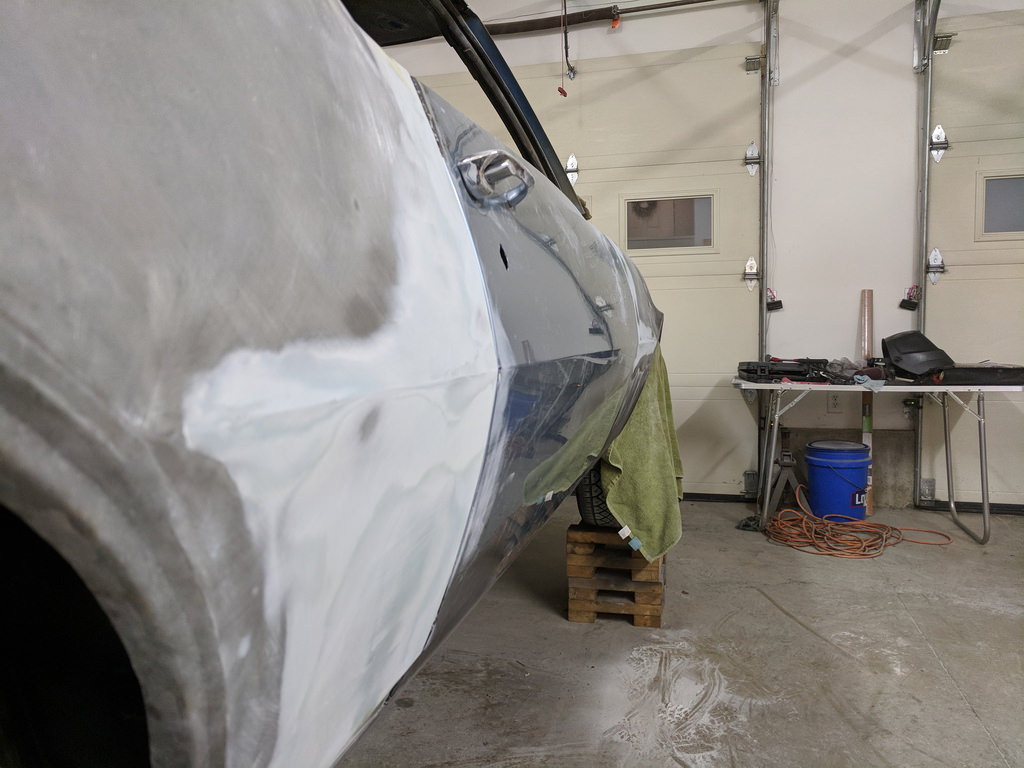
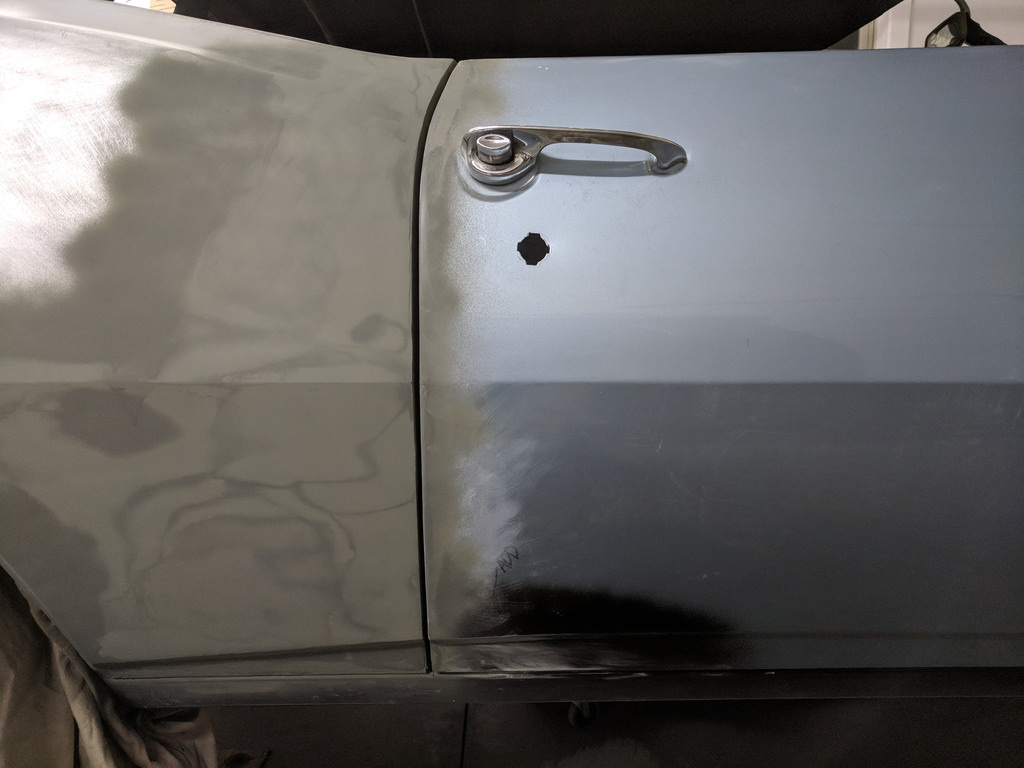
Since my garage is attached to my house, and with my son's room wall is shared with the garage I have to be very careful how loud I am working at night. I have pushed my limits a few times with an unhappy wife who was woken up... So last night when I got home from work I had to do my "loud stuff". I had to get the grinder out for a few things first of which was fixing a factory flaw along the bottom edge of the door. the door is very straight until the last 2" and it noticeably dips down. It was actually contacting the rocker panel causing some misalignment. It's hard to see in the first picture, but it is pressed against the rocker pushing out.

And after I trimmed about 3/16 of an inch off to straighten it. It is a little high at the moment, but I did it on purpose as I need to weld the corner edge where I split the skin. Much better now.
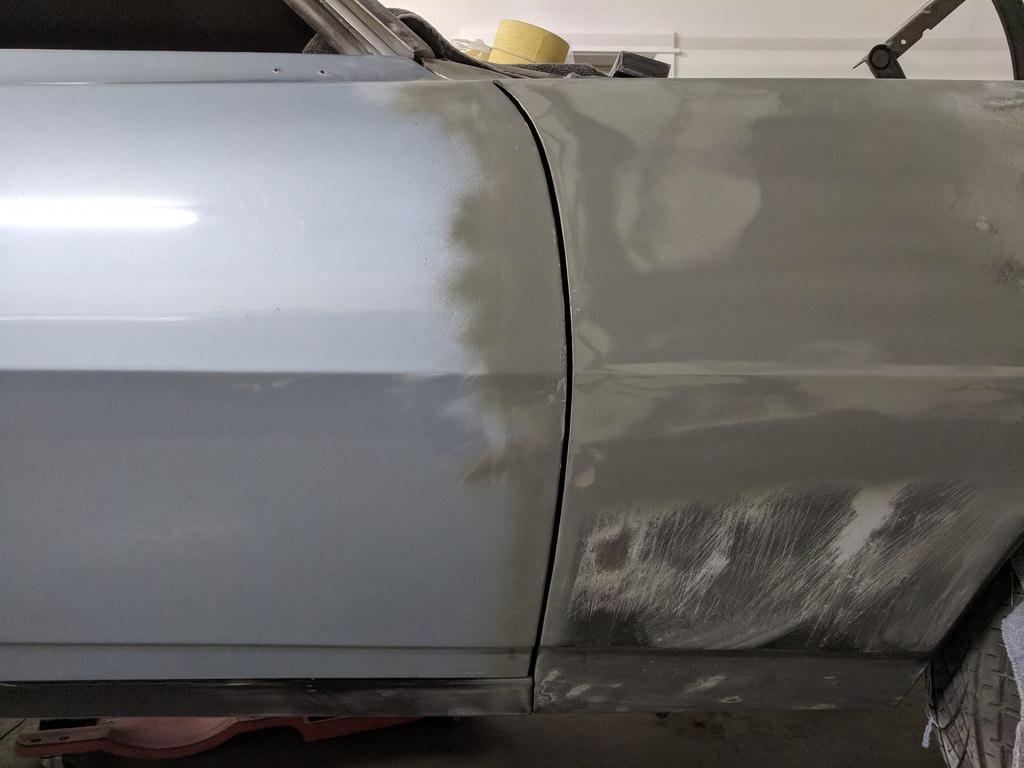
Next thing was to give some attention to the top edge of the fender. It was much higher than where the door, so it needed to be tapped into place.
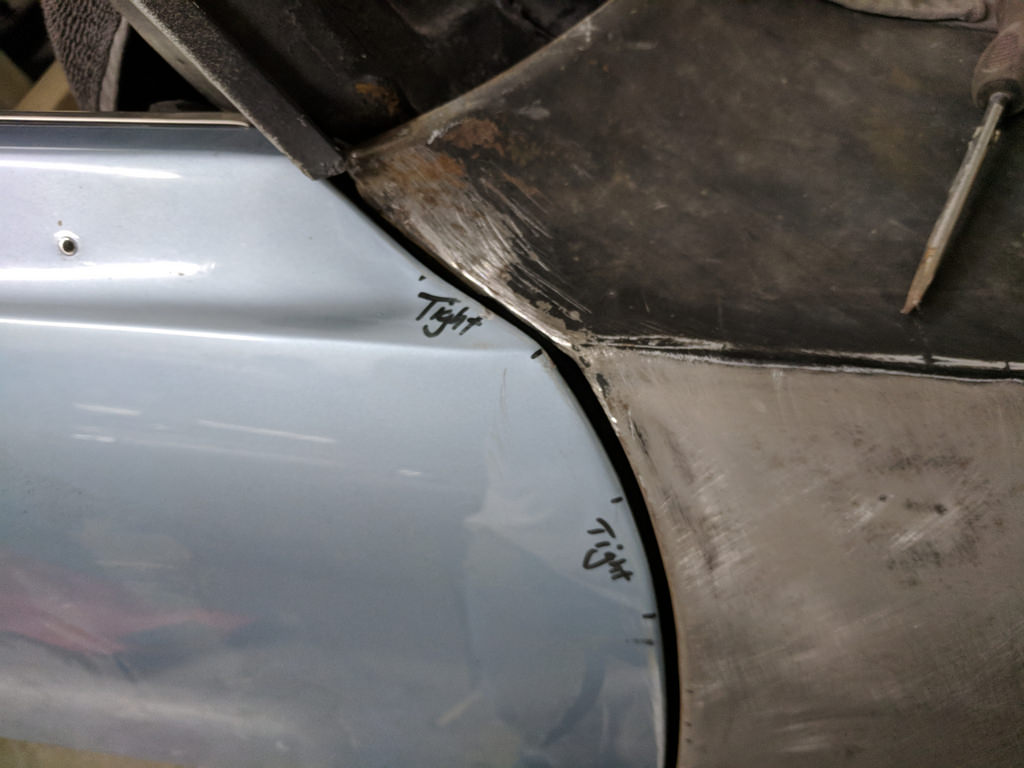
You can also see where my marks were where the gap was tight. I just had to open it up slightly with my grinder as well. The front is very consistent now.
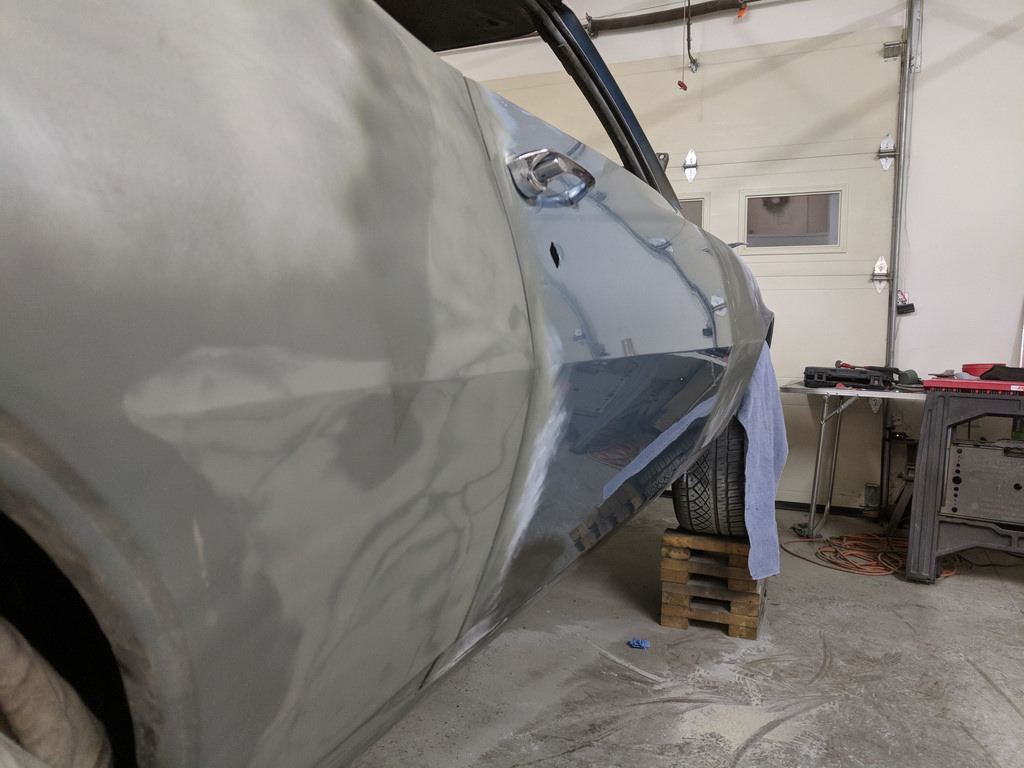
I didn't take a picture as I was working along, but I also had to give some hammer work to the lower fender where it meets the rocker. It had a good bulge at the edge where it must have been dropped at some point. It was very loud, but the body hammers I bought were invaluable. Next on my list is to add a little filler rod to the front lower gap on the door as it isn't straight where the body line comes down. Also need to add some rod to the top rear rounded edge of the door. The rounded edge has a noticeable flat spot that in turn causes a pretty good size gap at the quarter panel.
My wife and I took the day off tomorrow because our daycare provider has the day off as well. Hoping to have a fun day with our little guy. But that also means that I can stay up a little later tonight since I won't have to be up as early tomorrow. I'm hoping to sneak out to the garage tonight and weld up the edges with filler rod so I can start the little filler work that the fender needs.
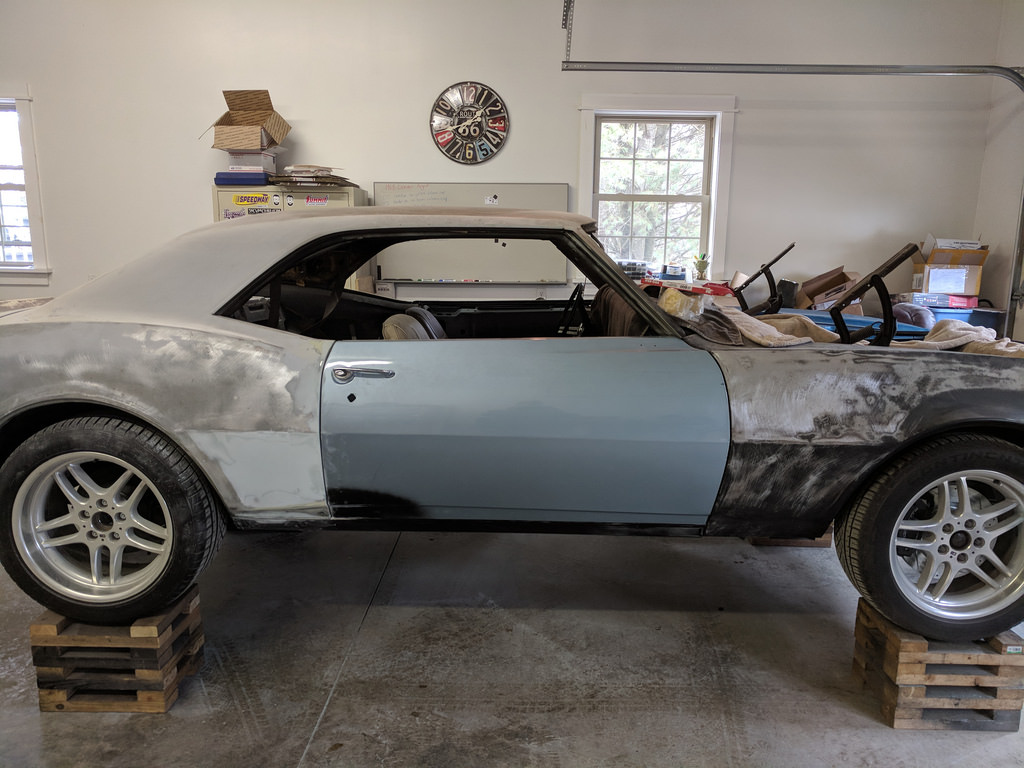
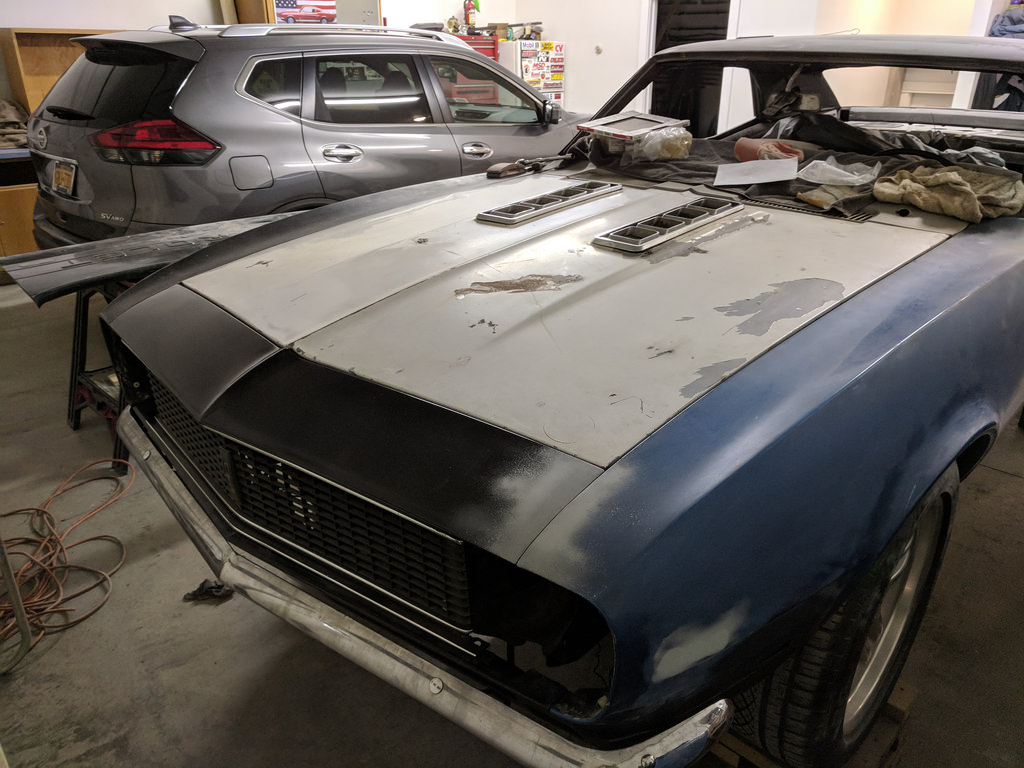
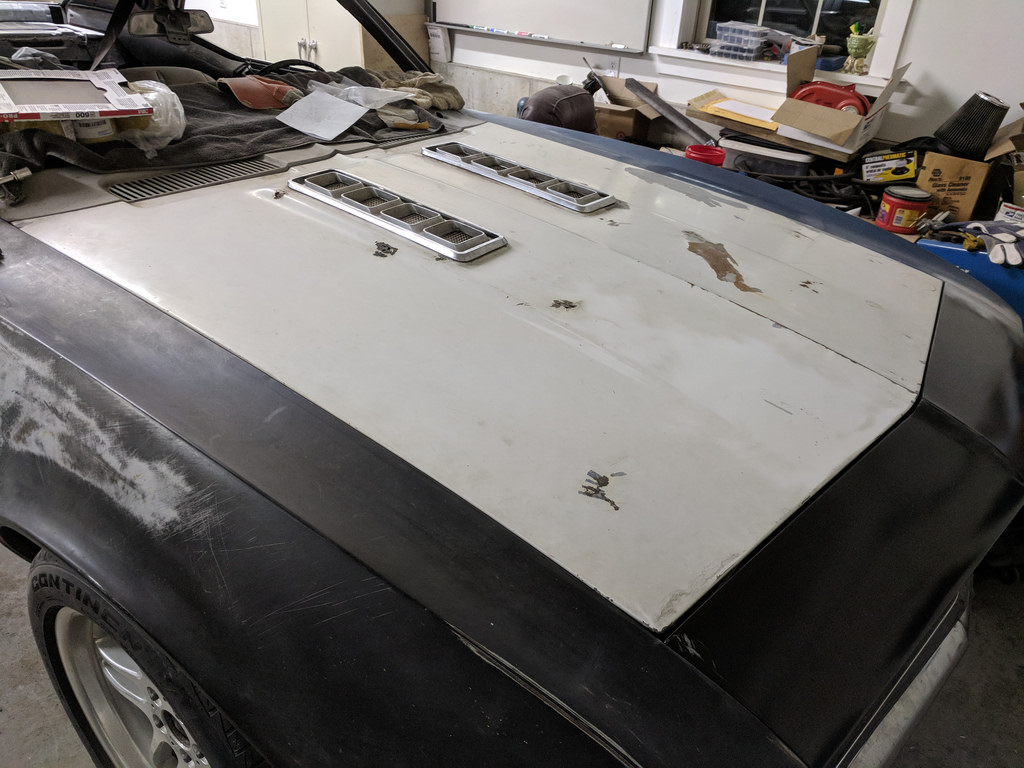
Looking ahead I had some help putting the SS hood on and got it all fitted up to the car. Now I'm torn though as I really like the classic look of the SS hood, but the cowl hood is very sleek and aggressive looking. I'm torn between the two...
Cheers,
Ryan
1955 Nomad project LC9, 4L80e, C5 brakes, Vision wheels
1968 Camaro 6.2 w/ LSA, TR6060-Magnum hybrid and etc SOLD
1976 T/A LS1 6 Speed, and etc. SOLD
Follow me on Instagram: ryeguy2006a
03-15-2018 #275
Registered User
- Join Date
- Aug 2008
- Posts
- 42
I vote SS hood!
03-15-2018 #276 Registered User
- Join Date
- Jun 2012
- Location
- South Lyon, MI
- Posts
- 1,217
The SS hood. I think the cowl hood is too common.
Bill Harvey
Scope Creep - 1974 Nova - https://www.pro-touring.com/showthre...rit-of-America
Family Fun - 1955 Belair - https://www.pro-touring.com/showthre...hter-55-Belair
03-19-2018 #277
Registered User
- Join Date
- Sep 2009
- Posts
- 2,709
Thanks for all of the feedback on the hood choices. I came to realize this weekend that with the repairs that the SS hood needs, it's going to be much quicker to go with the cowl hood. For me it really came down to being as simple as that. The cowl hood is brand new, and the SS hood is an original hood that needs several small patches that will be time consuming. I'm hoping that once the car is painted that I can have enough left over to spray the SS hood when I have more time prep and repair the hood.
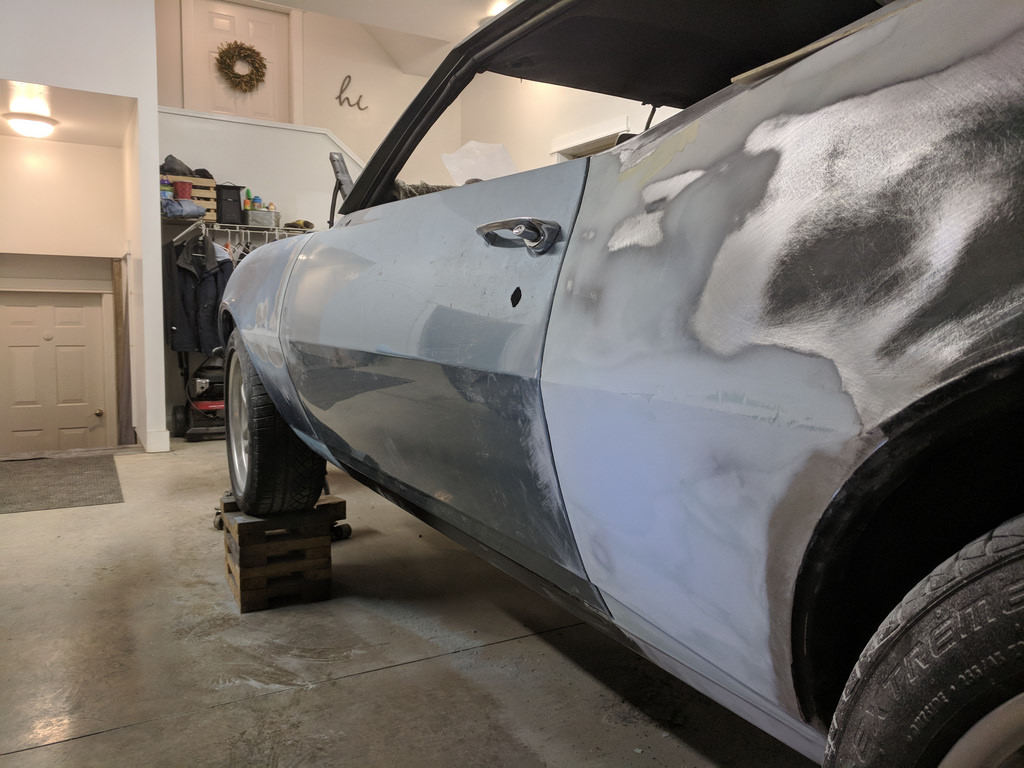
Towards the end of last week I tightened up the fenders/doors/quarters and they are now in final fitment. With that done, I was able to see what needed to be addressed for my gapping and found that several areas needed to be slightly tweaked. I added some welds to the rear upper gap of the fender as it rolled down. Just enough to allow it to be flush, then added a skim coat of body filler.
I also had to add some filler rod to the upper rear lip of the door as it had a flaw in the curved edge. There was a visible flat spot where it needed to be rounded. I forgot to take a picture as I was working, but same steps as the driver's fender. I also added some weld to the lower edge at the rear of the door as it kicked in which is also a stamping flaw. Again, just a slight amount to bring my gaps where they needed to be.


I then scuffed the fender down and sprayed some etching primer. Once that dried, I put some a skim coat of filler down to bring my gaps and body lines where they need to be.
I didn't think that was too bad after two rounds of the skim coat filler! I definitely learned more quickly on this side.

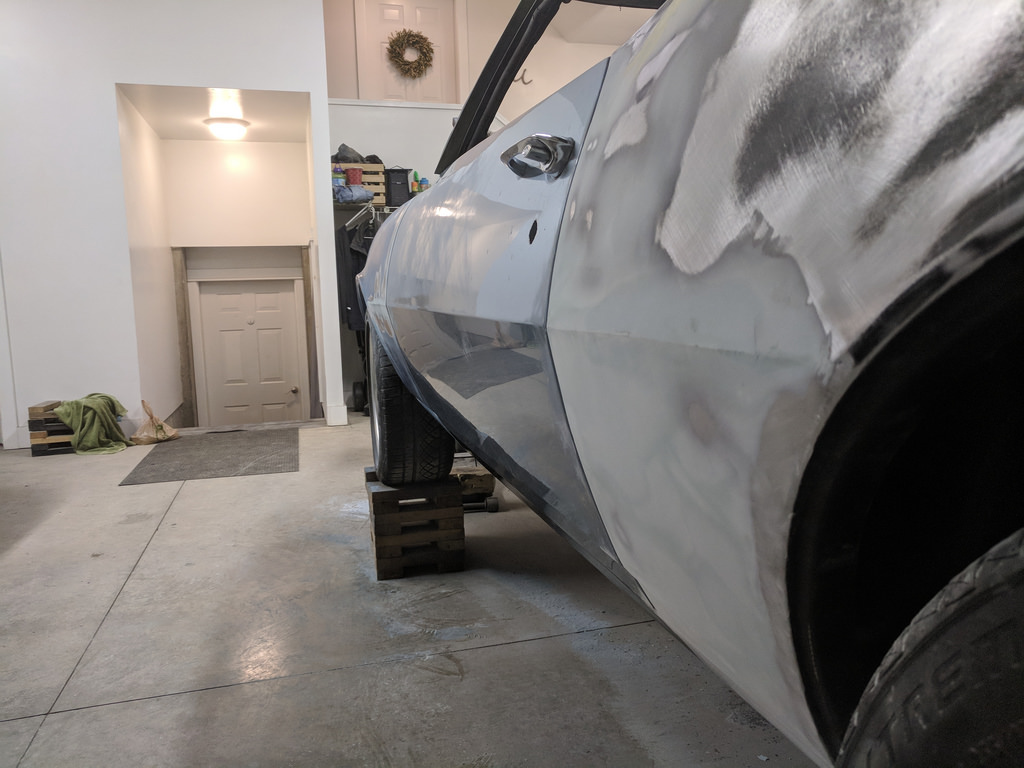
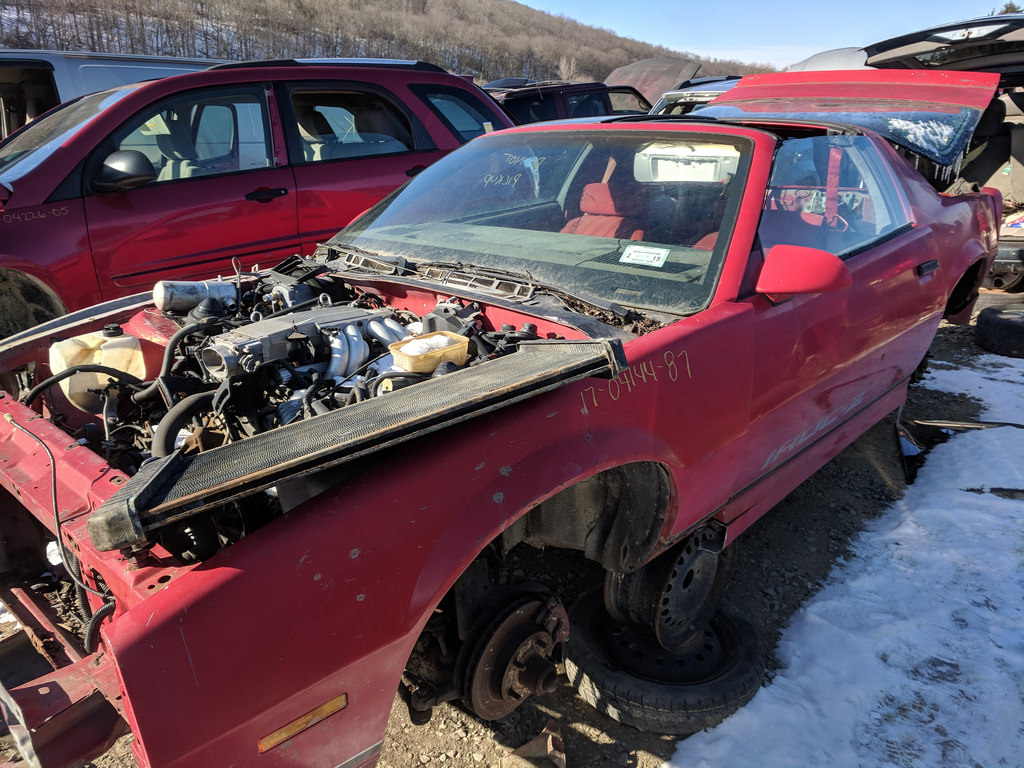
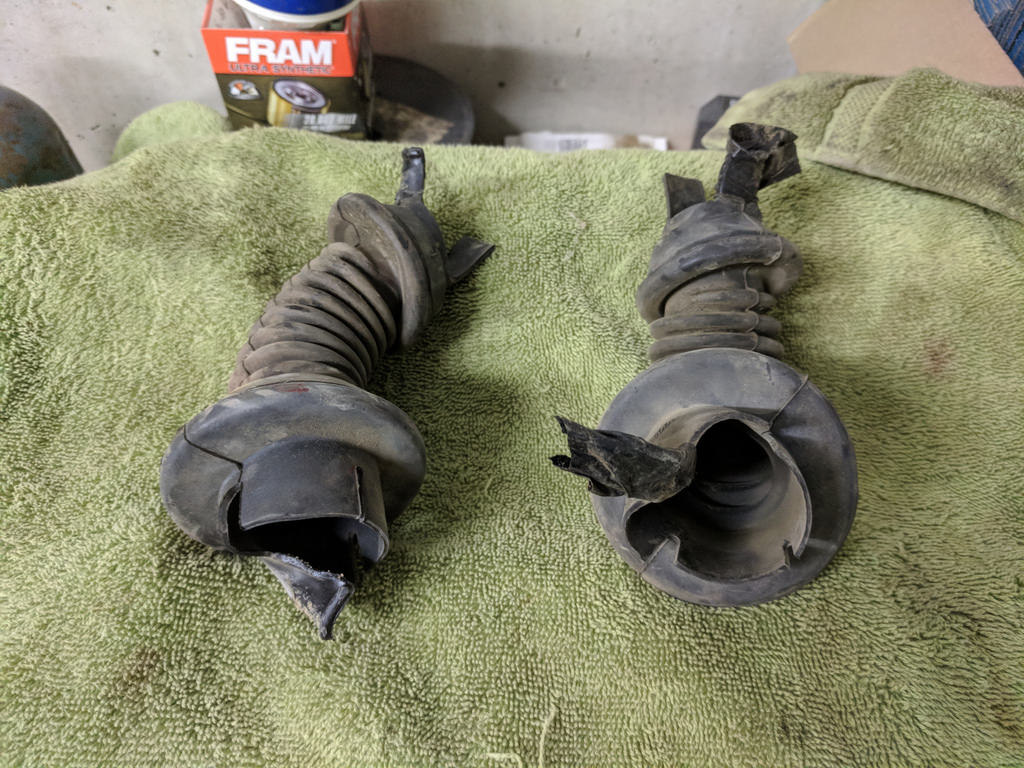
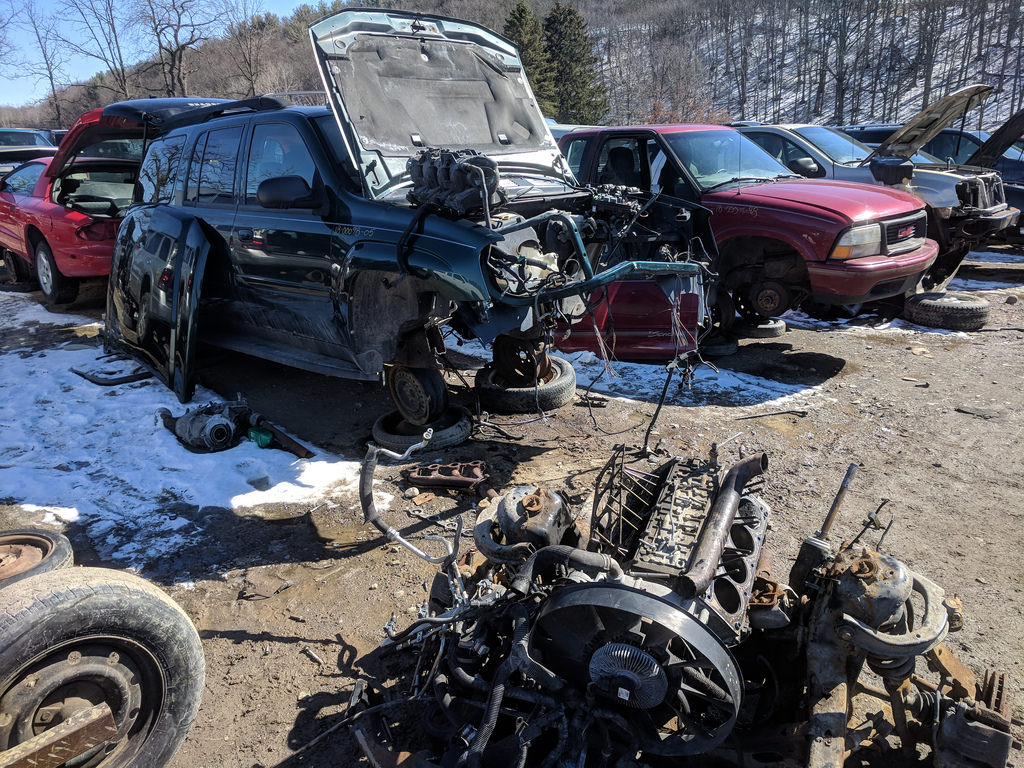
Before I left for the night, I mixed up just a little more filler and filled in all the low spots that you see. Hoping to sand that off soon then this side should be ready for epoxy! Moving on to this Saturday, I made a trip to one of my favorite places... a pick a part yard. I needed some parts for my truck and there were a few things that I needed to pick up for the Camaro too. The biggest thing that I was looking for was a pair of door wiring boots. I was planning on installing some factory boots, but am finding out that others have had issues with those not having enough room when adding power windows and locks. I need them so that I can drill holes in the body and doors prior to paint. This sad IROC Camaro donated some door boots to my car, too bad as it wasn't in that bad of shape.
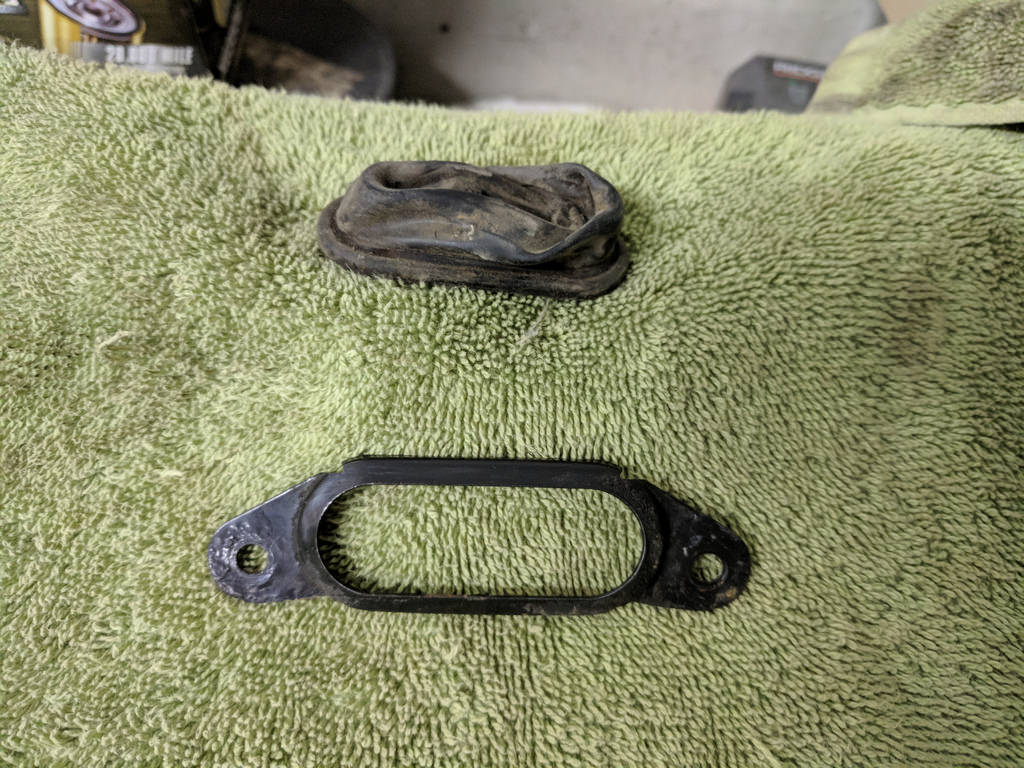
Another part that I have been trying to track down is a small part for the LS1 rear brakes that you cannot buy new. This little boot retainer for the e-brake cable. I have one good one and the other one rusted in half. I spent about 2 hours trying to get little part off because the car had the locking lug nuts with no key in sight. It's in excellent condition and they didn't even charge me for it! Score!
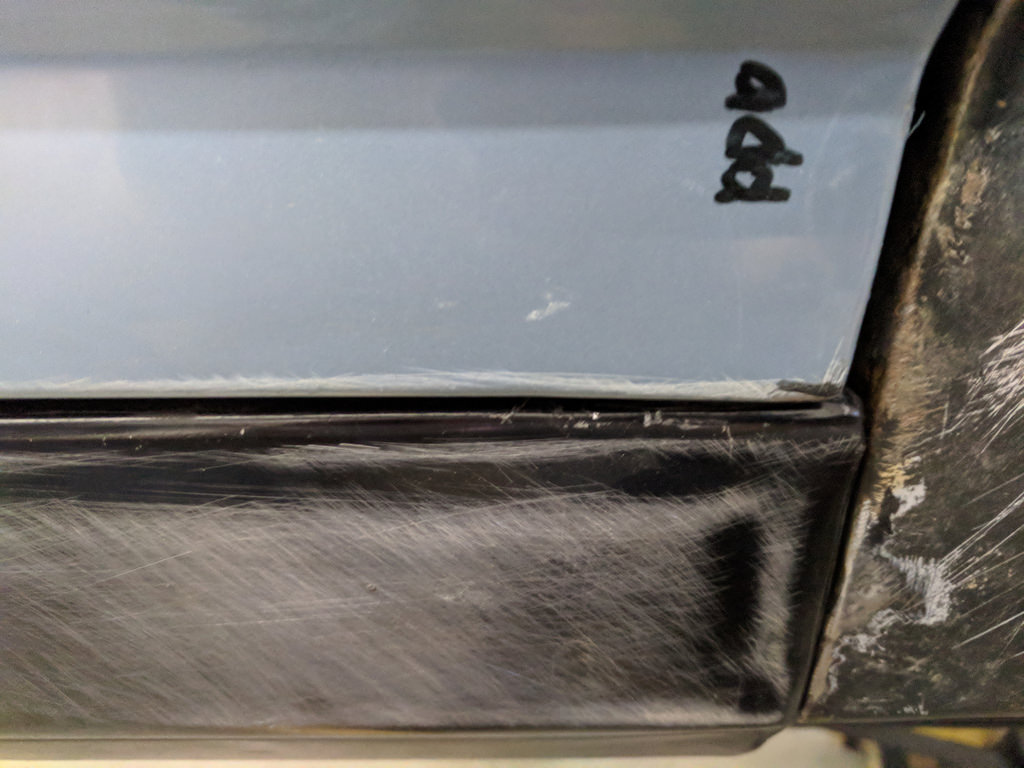
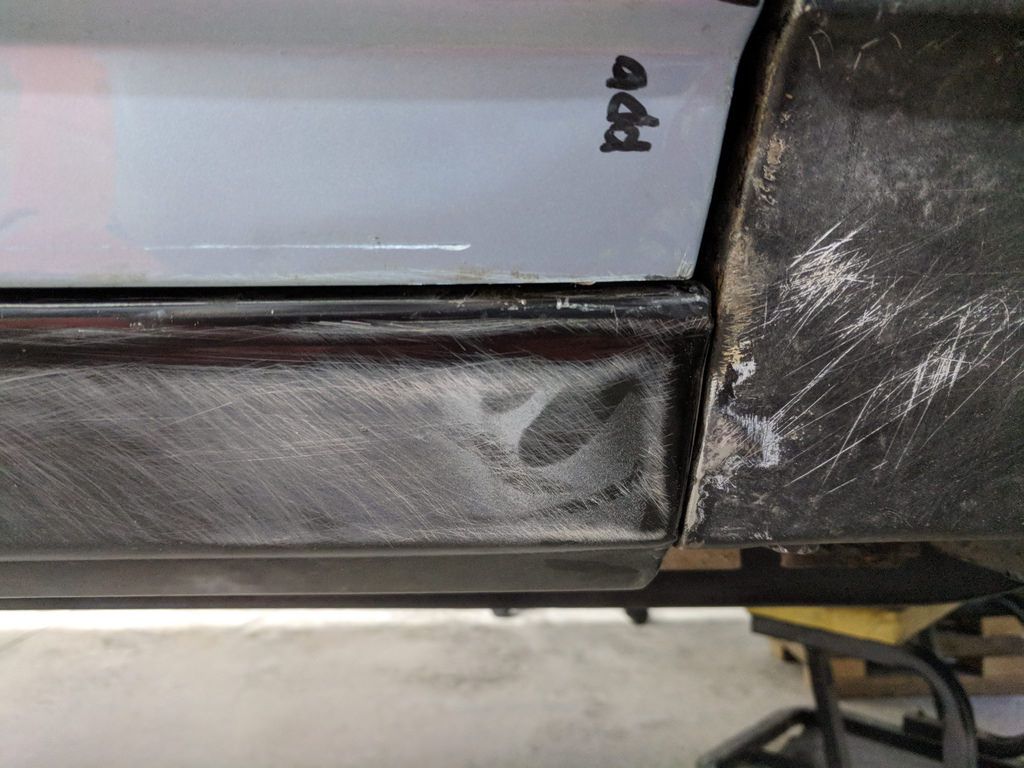
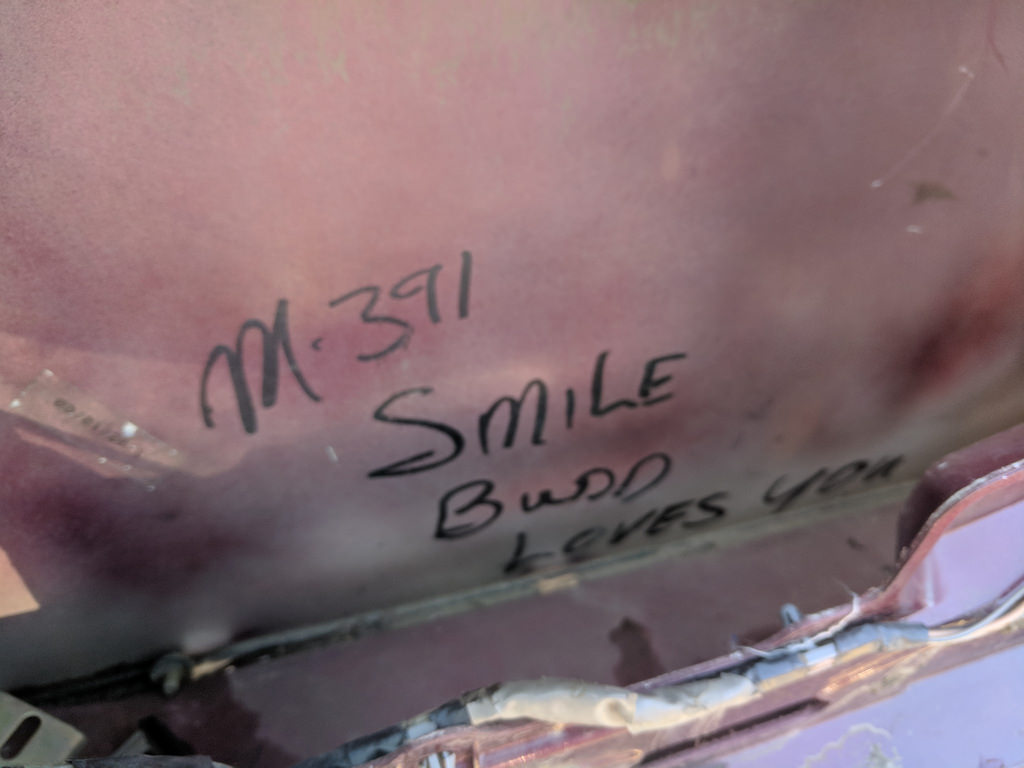
Now all of this pain and suffering was worth it when I found this note in the door of the Camaro from a nice assembly worker, Budd. Must have been a slow day on the assembly line, or possibly his last day before retirement? I would love to know this story haha. If you can't read it, "Smile Budd loves you"
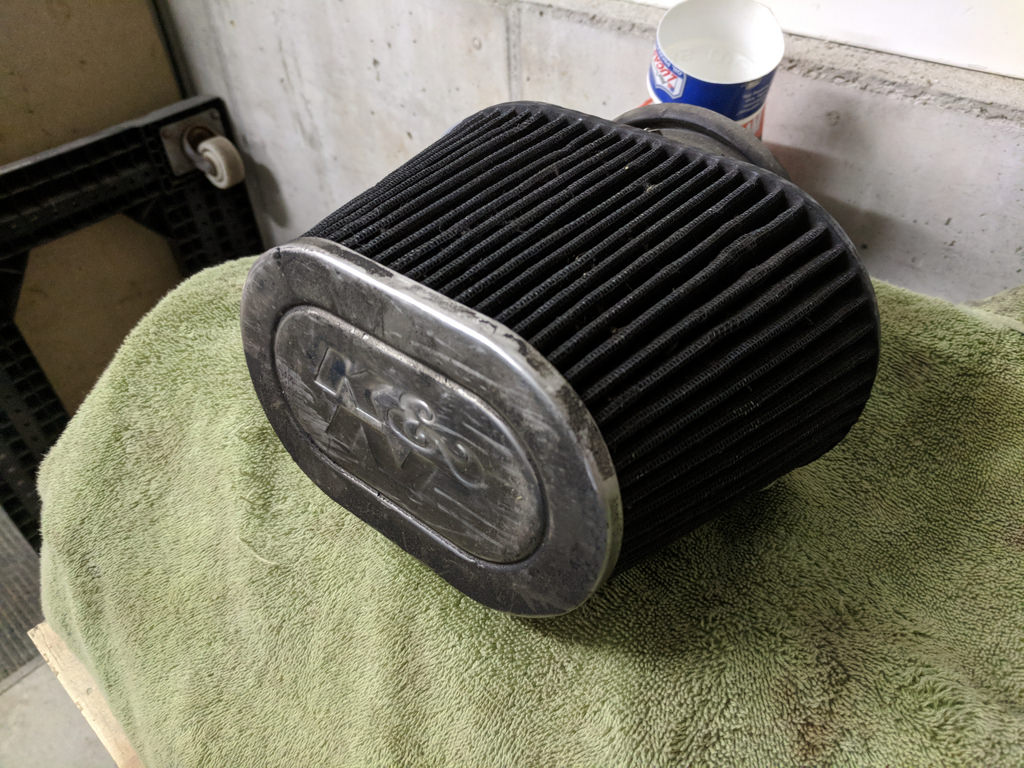
Not sure what I am going to do with it, but I found a dirty but nice K&N filter. $2 bucks, Nice.
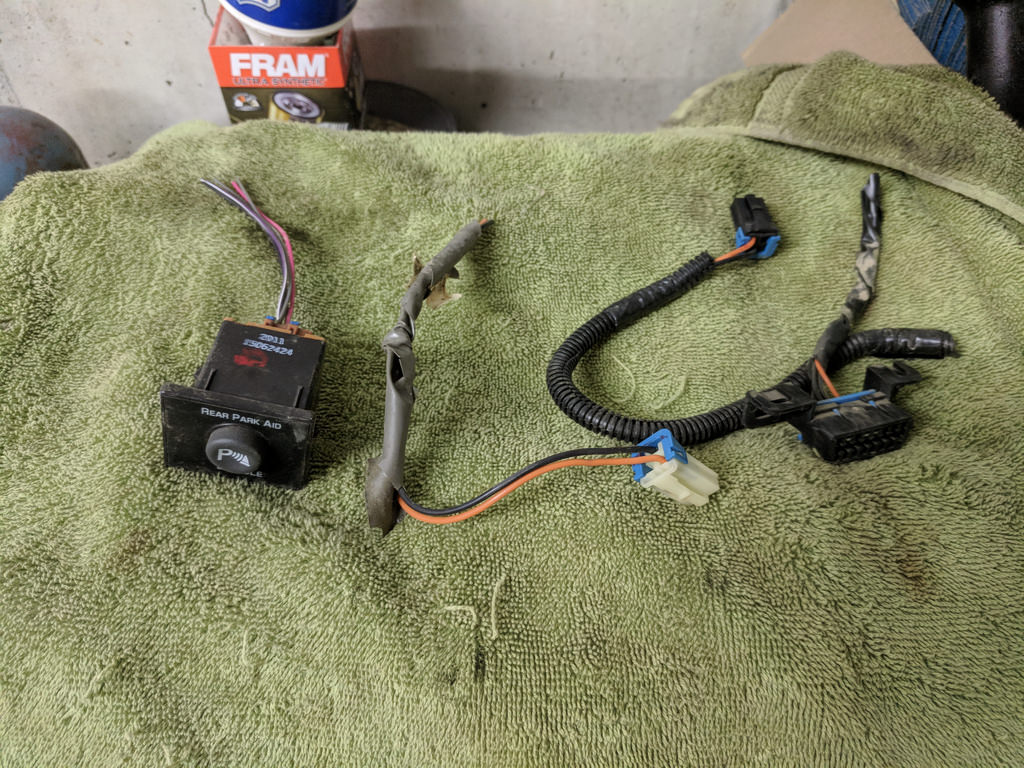
Some misc. wiring connectors.
I didn't need it, but I found this steering wheel for my truck from a loaded Tahoe. My truck originally came with a black steering wheel, but I upgraded to the wheel last year that had the steering wheel buttons. The catch was that it was tan (same color as my interior), but I didn't like it as it was too much tan. Plus my airbag says "GMC" and my truck is a Silverado. So now I can swap the wheels over and put my bowtie back on.

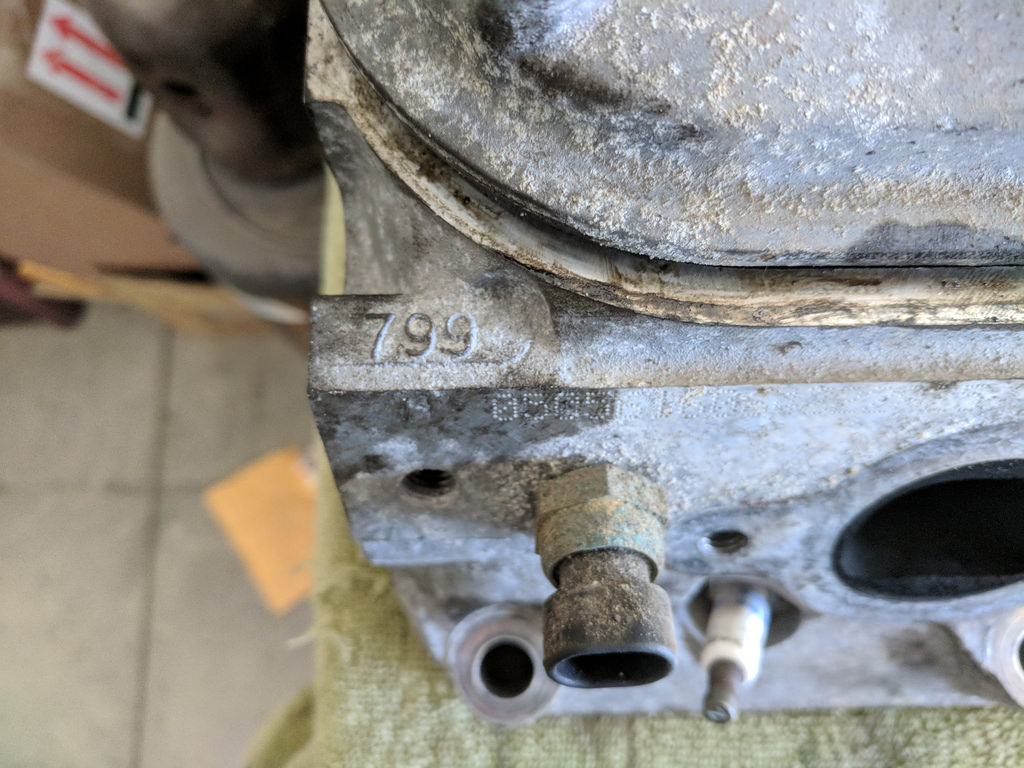
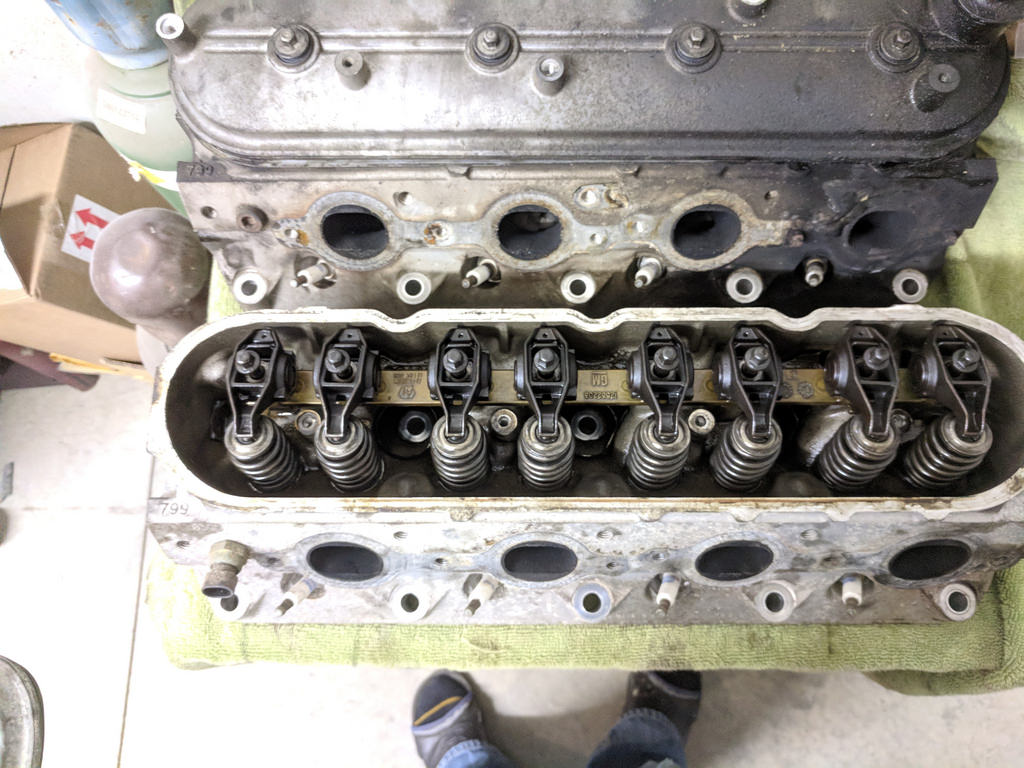
And my score of the day was a pair of 799 heads off of an 06 Trailblazer with the aluminum LM4 5.3 and only 123k miles. I was originally going to pull the whole motor, but forgot that the diff is bolted to the oil pan and I didn't have all the tools to pull the axles and etc... So I pulled just the heads. They are in great shape other than the two exhaust manifold studs that were broke. Luckly, they have enough of the stud sticking out that I can grab onto it with something.
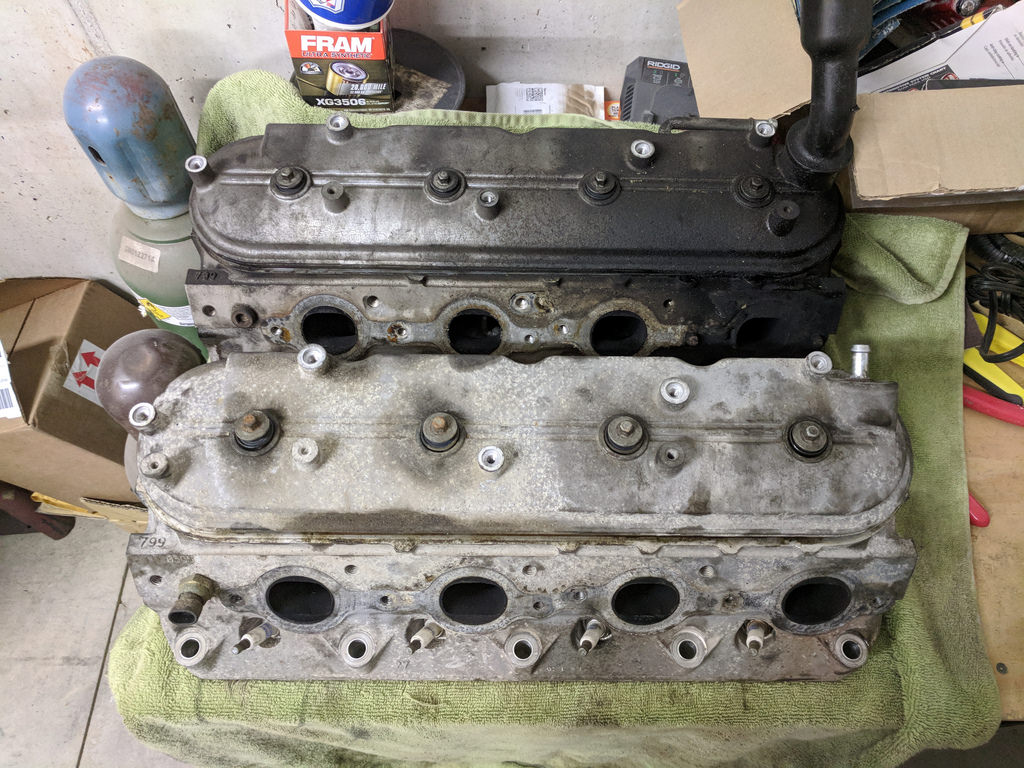
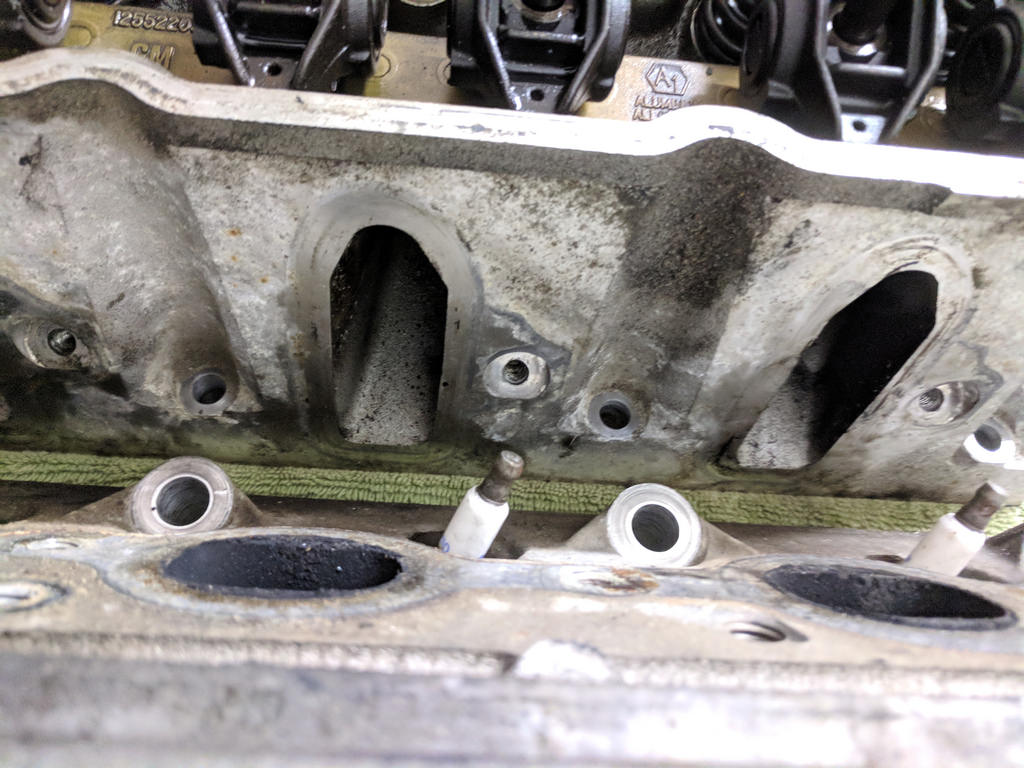
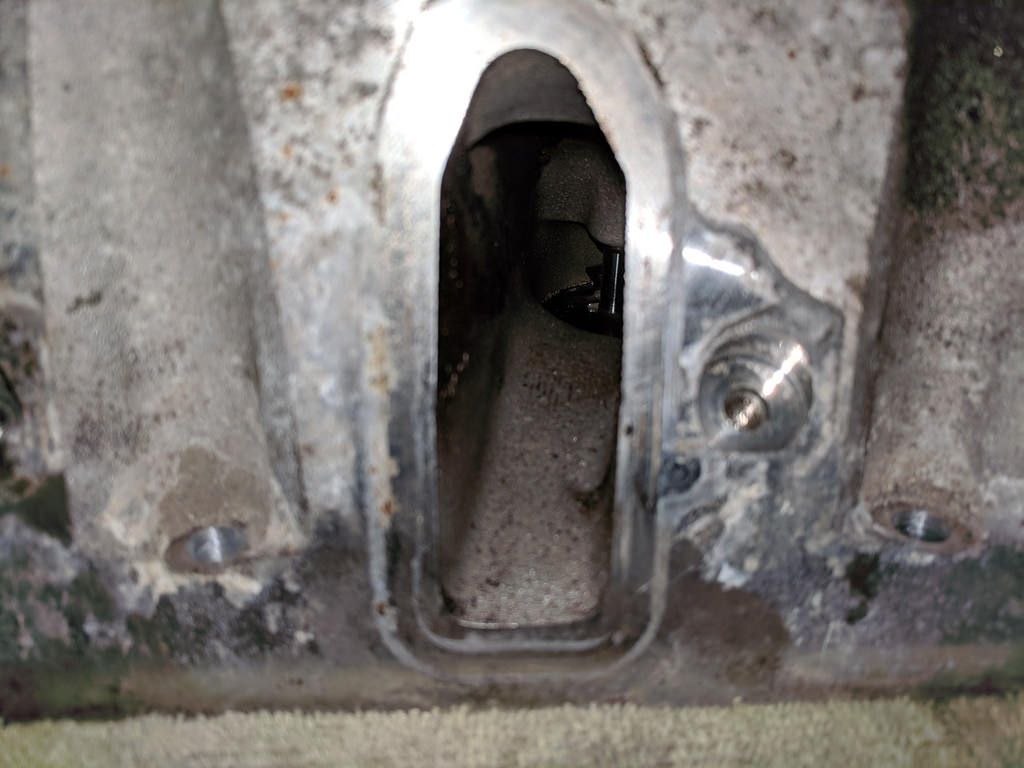
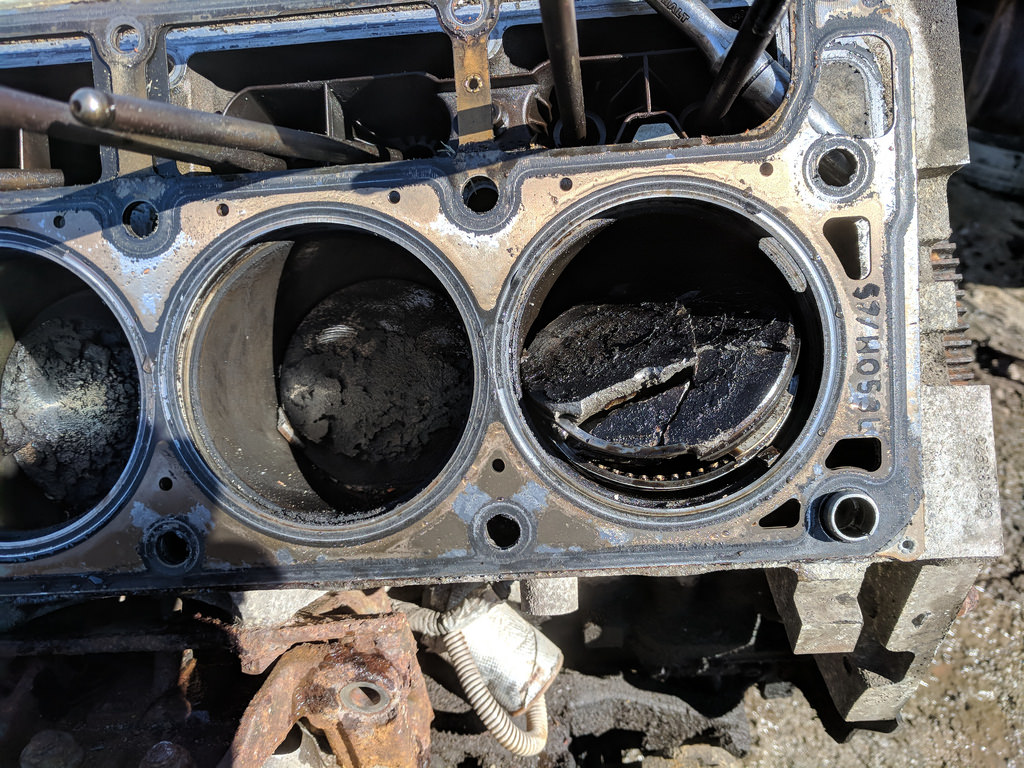
...After I pulled the heads, I'm glad I didn't pull the motor. Another motor killed by the dreaded DOD lifter failure. The only damage from this carnage to the head was a tiny dent next to the spark plug. Very surprising actually.
I didn't get much work done on the car this weekend as I spent a good part of the day at this pick a part yard. Hoping to let my hands heal and get back to sanding this week.
Cheers,
Ryan
1955 Nomad project LC9, 4L80e, C5 brakes, Vision wheels
1968 Camaro 6.2 w/ LSA, TR6060-Magnum hybrid and etc SOLD
1976 T/A LS1 6 Speed, and etc. SOLD
Follow me on Instagram: ryeguy2006a
03-28-2018 #278
Registered User
- Join Date
- Sep 2009
- Posts
- 2,709
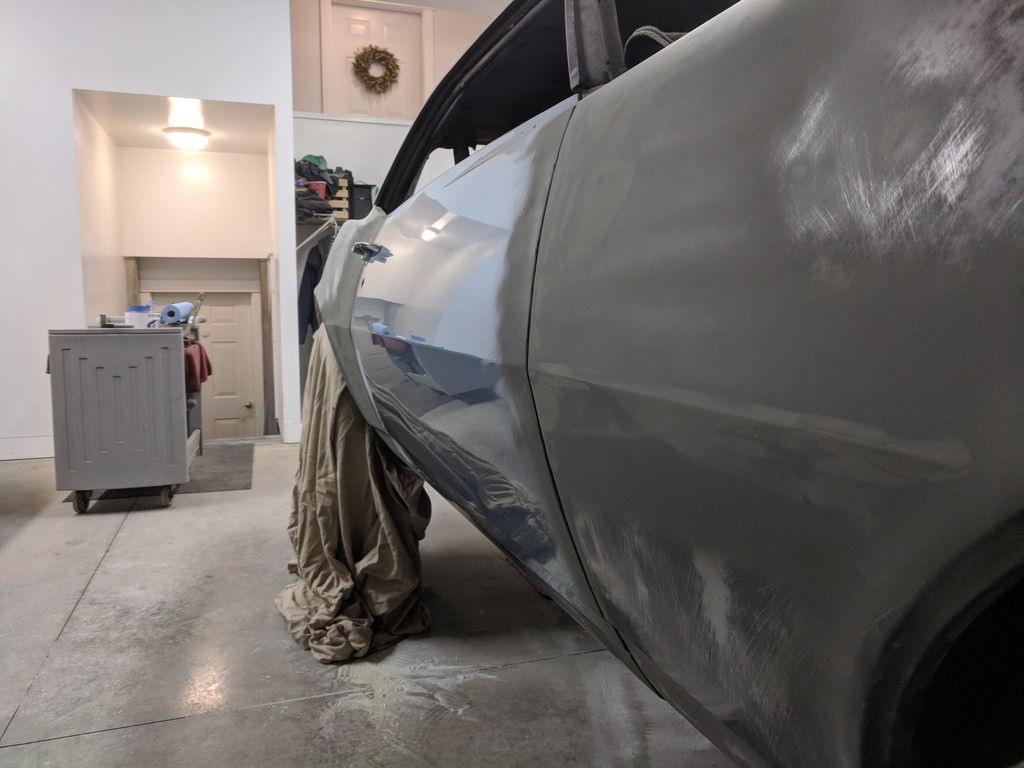
I didn't get as much done this weekend as I thought, but still making progress. I finally finished up gapping the car and all of the body lines are finished enough for primer. I put the hood on and all of the lines are nearly perfect so I couldn't be happier. Some pictures of the lines and gaps with a light coat of etching primer.
And the body lines are looking nice and straight.
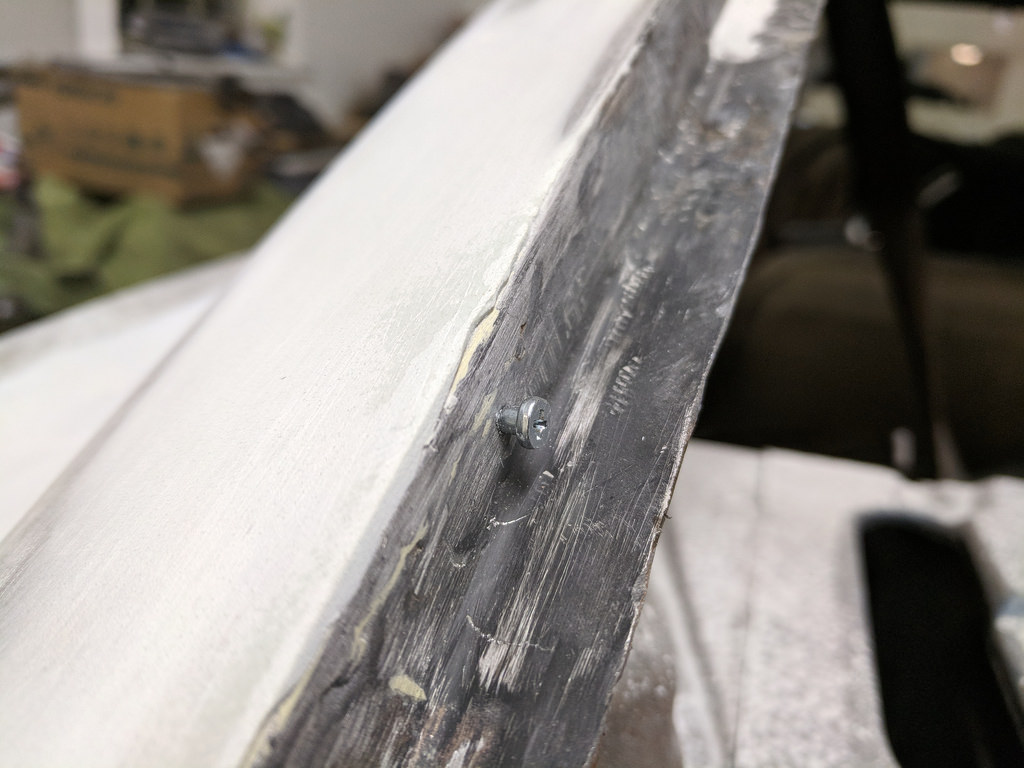
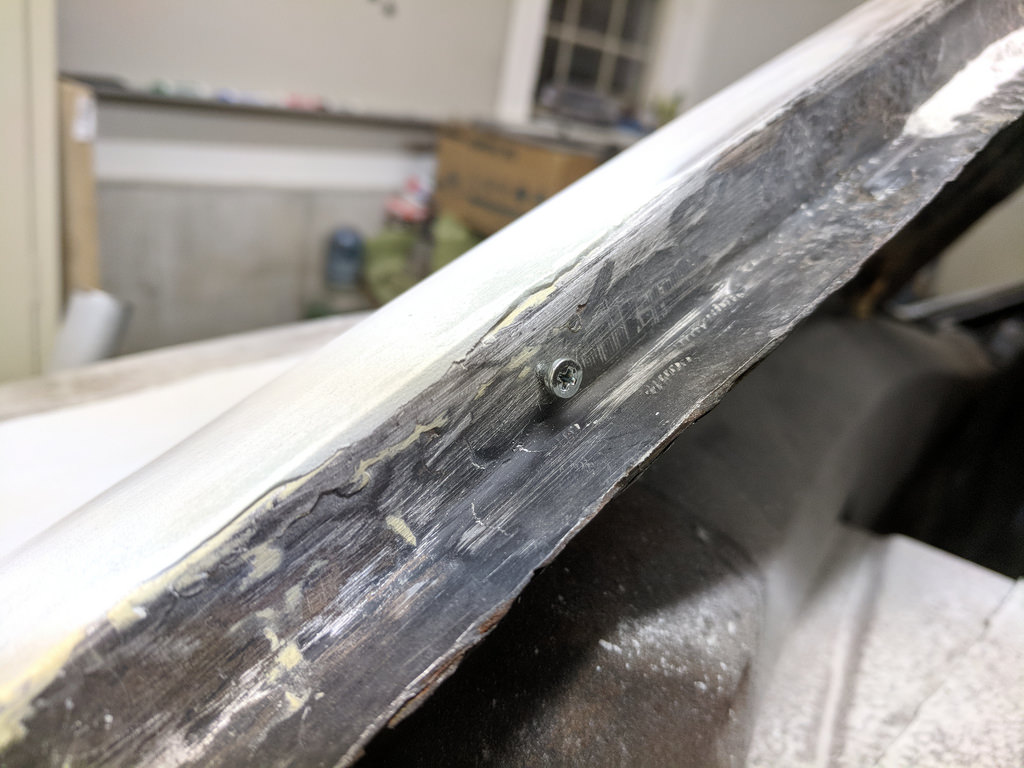
Another little task I needed to do was add some of the trim studs that fell off or were cut out. Pretty easy, just drilled a small hole and screwed them in.
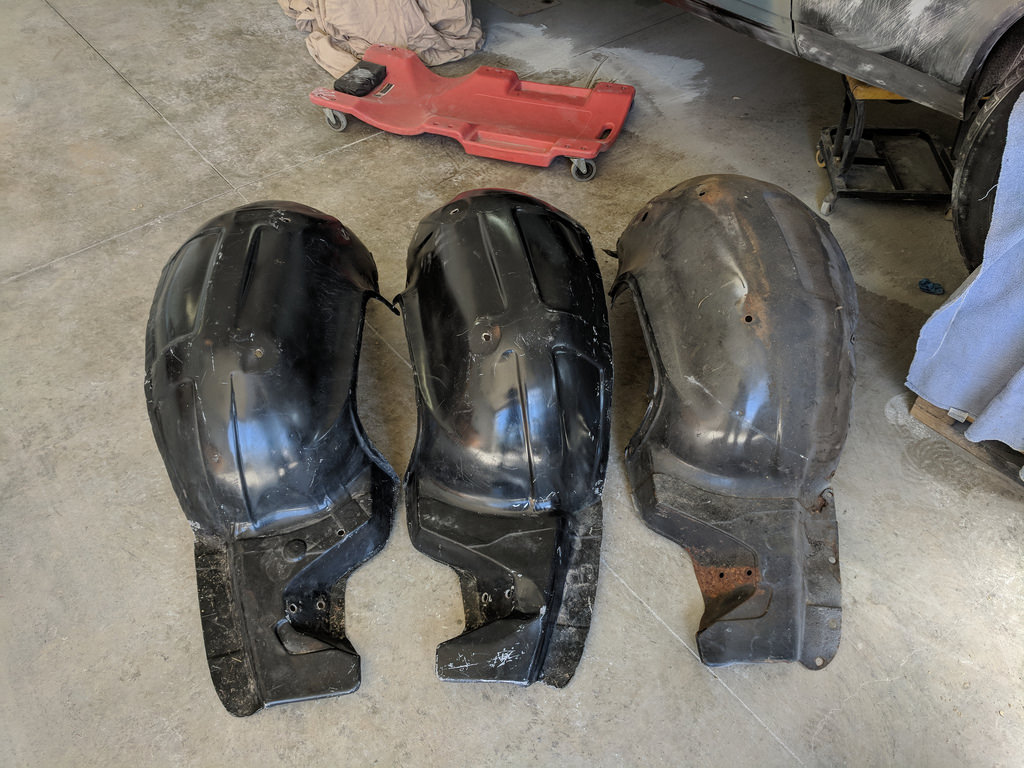
Another cool score that I got was a pair of fiberglass inner fenders. I swapped them even for a set of old Rally wheels I had. It freed up some space in my garage and the metal inner's I have were rusty and needed quite a bit of cleanup. Another benefit is they are about a 1/3 the weight of the steel ones. I should only need to drill some holes for the bolts along the edge, scuff and paint.
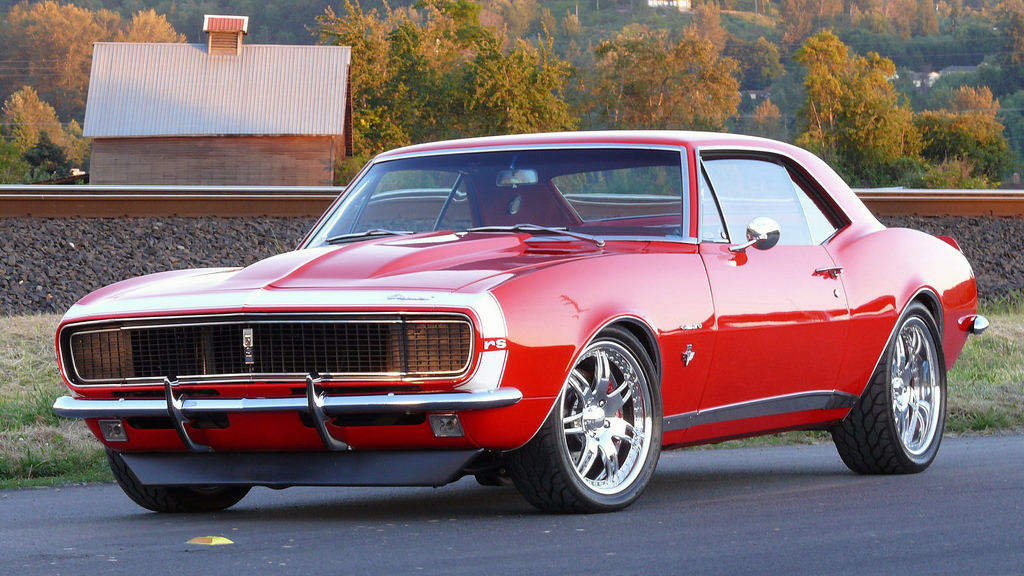
And lastly, and probably most exciting is I finally picked a paint color. The color is GM Torch Red from mid 2000's C5's. Very excited to get this car painted, it has been a long journey. I actually found a car that was for sale a few years ago at Mecum Auctions that was painted the same color. Only difference is this car is a 67, but has the same RS grill. I think I'm going to eventually get a vinyl decal with the nose stripe just like this one. For now it will be a solid color and I'll be picking up the paint this Friday afternoon!
Equally exciting is I talked with my buddy and I am dropping the car off this Saturday to start with the final prepping before primer. Both my Dad and Father-in-Law have offered to help block sand on one of the next Saturday's. So I'm hoping that between the car being as close as it is with filler, and one whole day of blocking and priming with 3 guys we can get the car into final paint very soon. My buddy also agreed to let me spray the car and he would be there to guide me along the way. I'm pretty excited to have that experience as well.
Cheers,
Ryan
1955 Nomad project LC9, 4L80e, C5 brakes, Vision wheels
1968 Camaro 6.2 w/ LSA, TR6060-Magnum hybrid and etc SOLD
1976 T/A LS1 6 Speed, and etc. SOLD
Follow me on Instagram: ryeguy2006a
03-28-2018 #279 Registered User
- Join Date
- Aug 2017
- Location
- SC
- Posts
- 48
Awesome progress Ryan. I enjoy following your thread because of the detailed body work notes. That's where I lack the most in knowledge.
Are you using spray can etch primer as you worked the gaps or shooting the primer with an HVLP gun?
Thanks,
Daniel
03-29-2018 #280
Registered User
- Join Date
- Sep 2009
- Posts
- 2,709
Thanks for the compliments Daniel. I'm not sure this build would qualify for a tutorial as I'm sure there are many body guys here that could point out many things I'm doing wrong. I'm doing the best that I can with the tools I have. The etch primer is just from a rattle can, but is Dupli-color. Once it's at my buddies body shop it will be final sprayed with an HVLP gun.
1955 Nomad project LC9, 4L80e, C5 brakes, Vision wheels
1968 Camaro 6.2 w/ LSA, TR6060-Magnum hybrid and etc SOLD
1976 T/A LS1 6 Speed, and etc. SOLD
Follow me on Instagram: ryeguy2006a

 Reply With Quote


