

Results 21 to 40 of 58
-
10-21-2015 #21

 Registered User
- Join Date
- Nov 2006
- Location
- Ma.
- Posts
- 5,567

There's a lot of real estate between those frame rails. Nice repairs. I can't believe someone let this leave without finishing the wheel wells.
Wayne
Car FINALLY home !!!!!! lol
Project FNQUIK https://www.pro-touring.com/showthre...ghlight=FNQUIK
-
10-21-2015 #22 Registered User
- Join Date
- Dec 2004
- Location
- Midwest
- Posts
- 2,261
There sure is. We add some beef to it in an upcoming update! Originally Posted by Motown 454
 Kevin Oeste
V8 Speed and Resto Shop
V8TV
Muscle Car Of The Week
V8 Radio Podcast
All about us:
https://www.v8speedshop.com
10-24-2015 #23
Registered User
- Join Date
- Dec 2004
- Location
- Midwest
- Posts
- 2,261
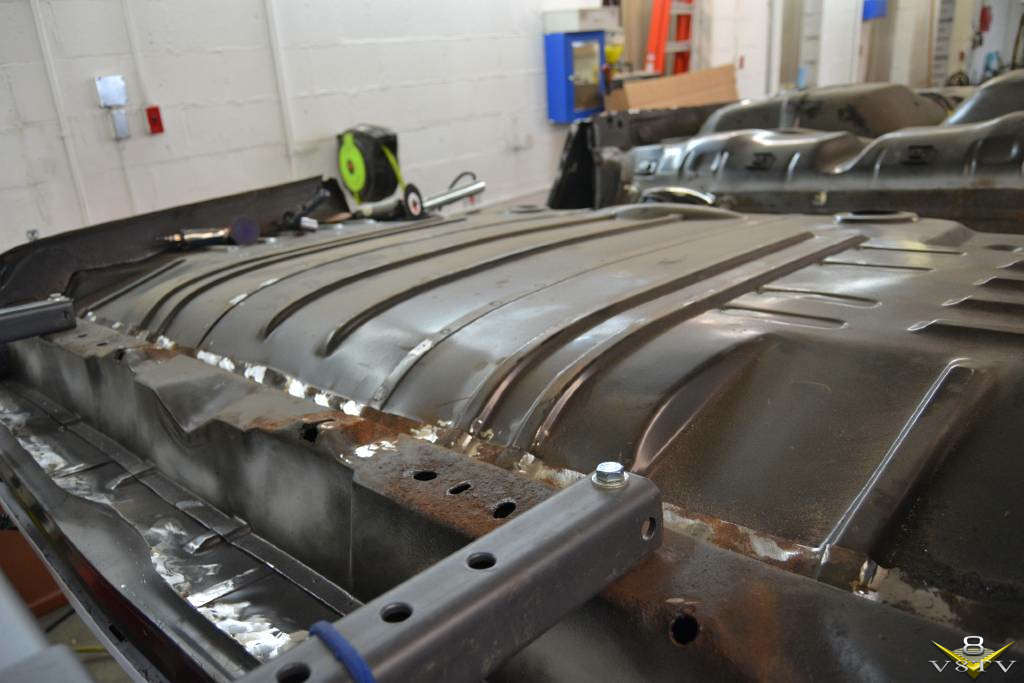
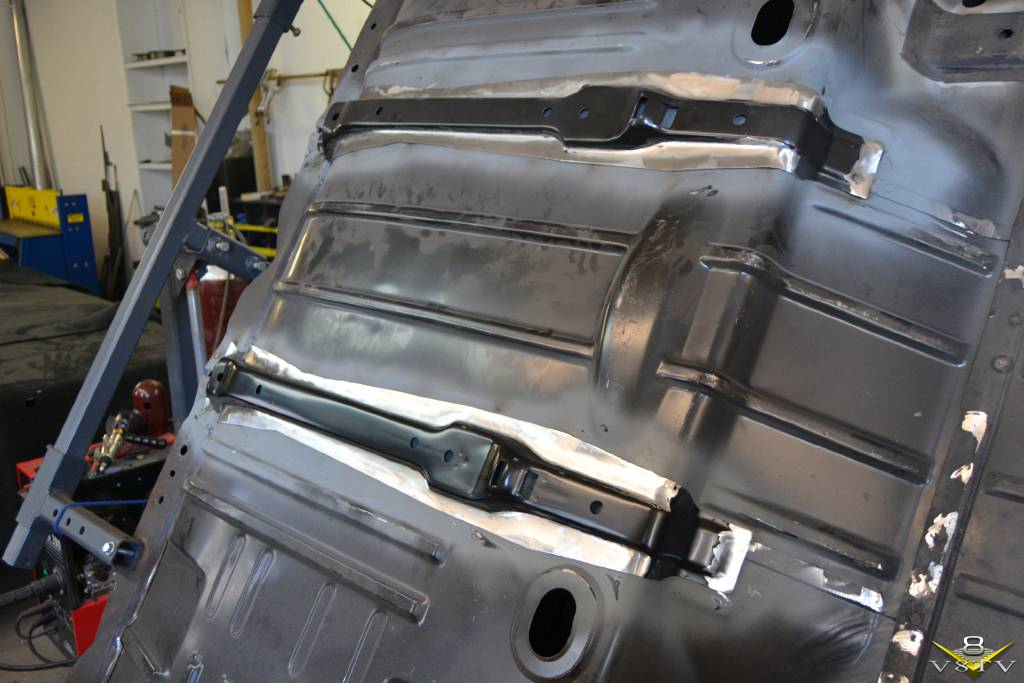
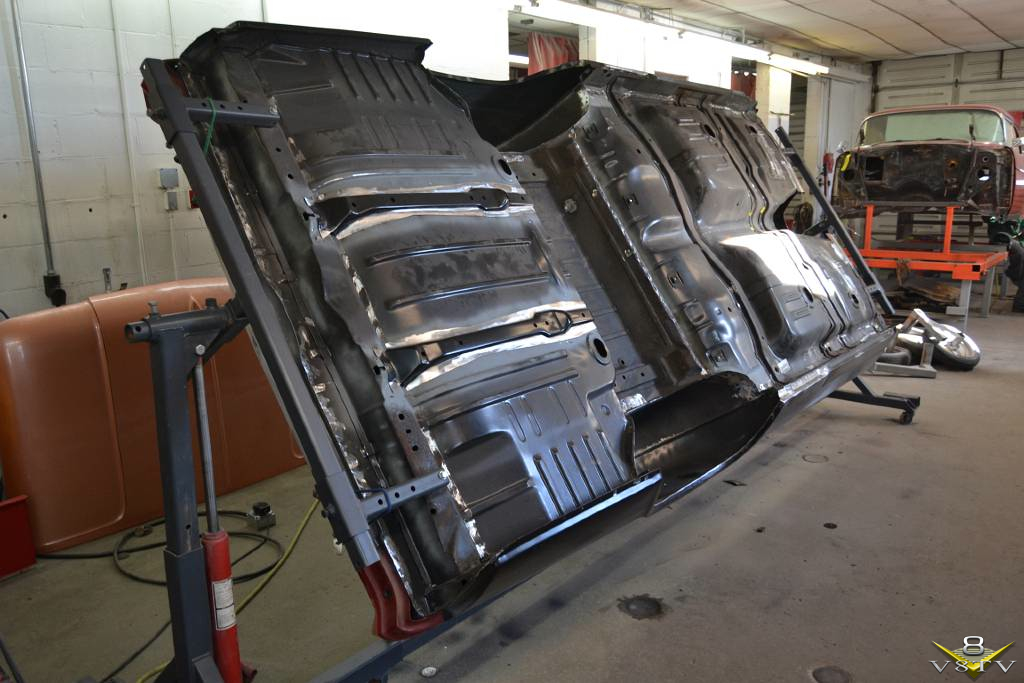
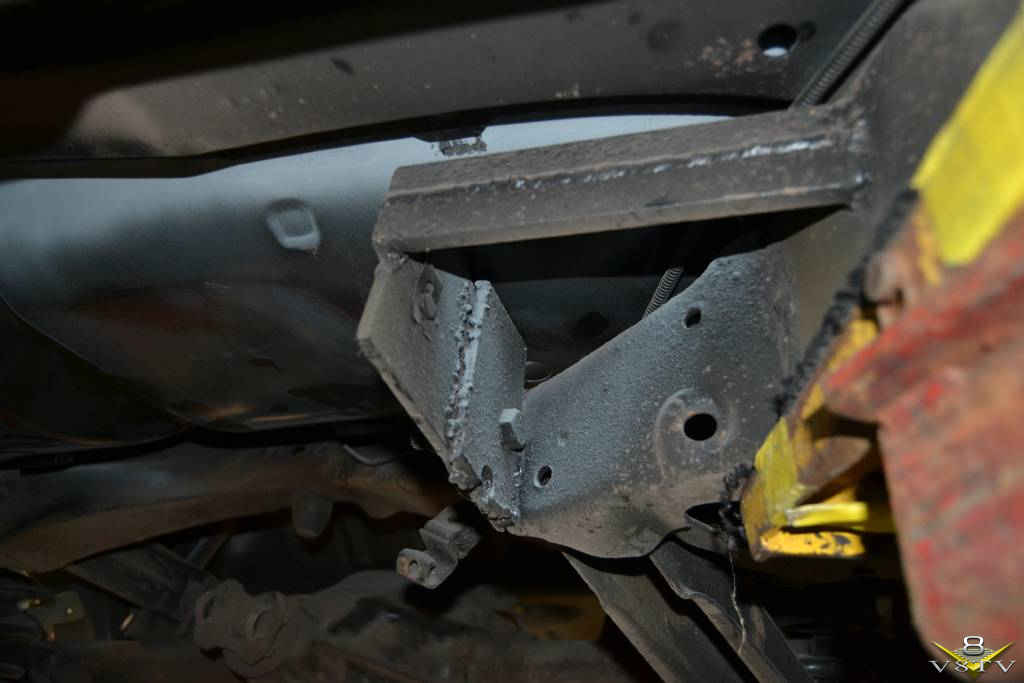
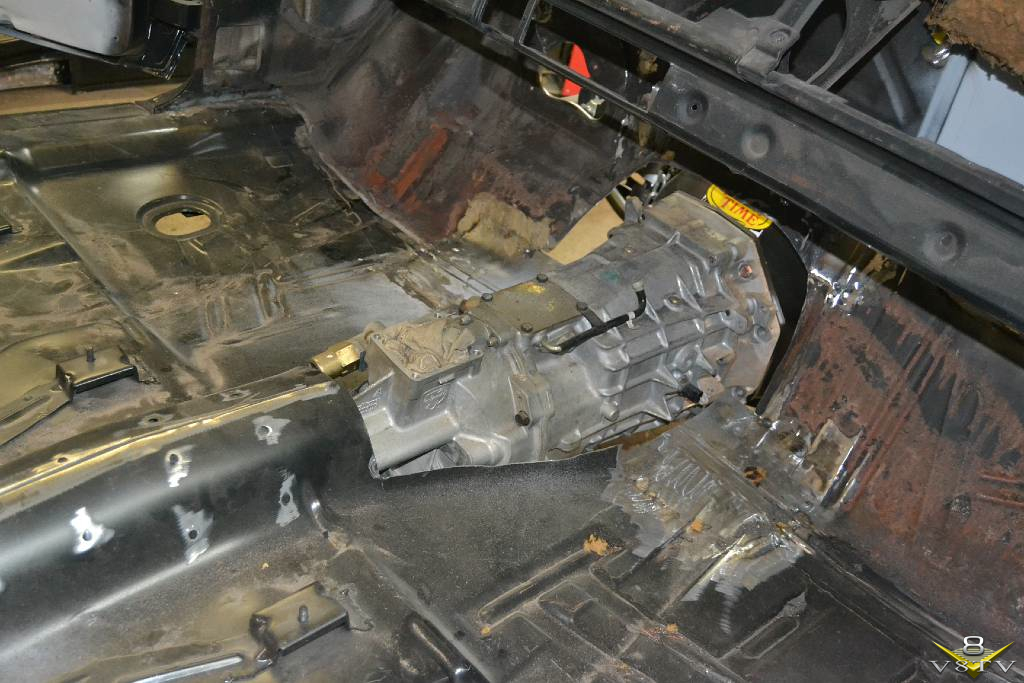
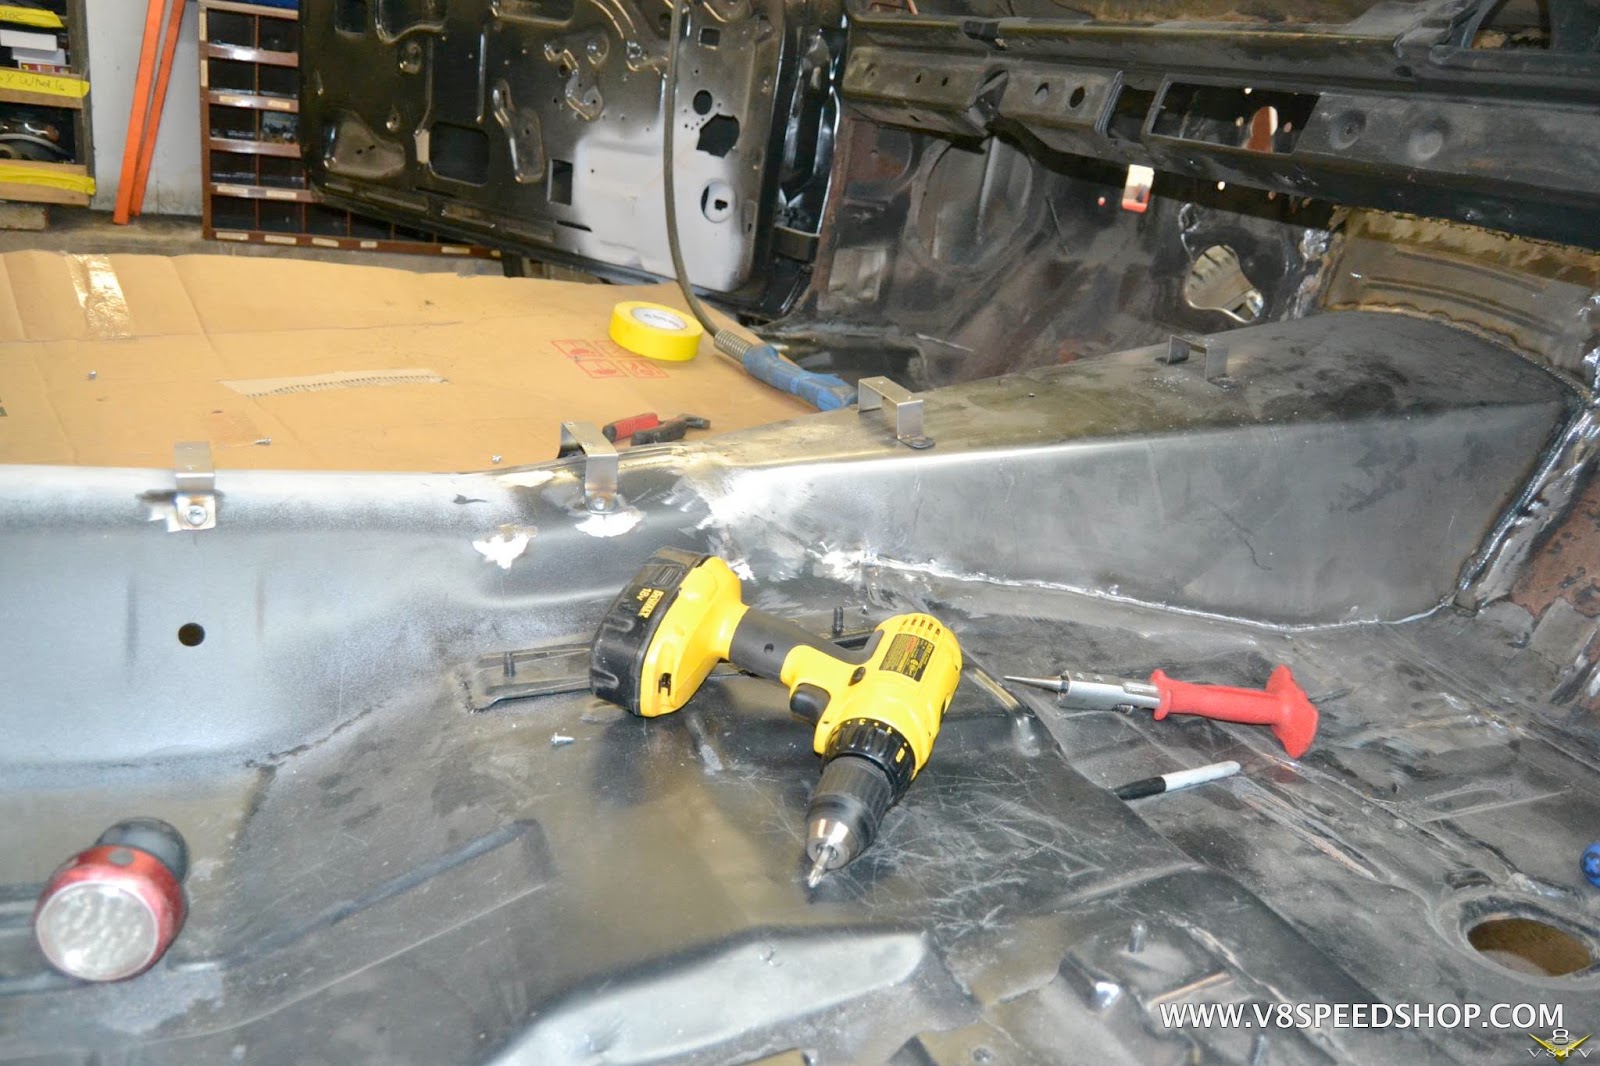
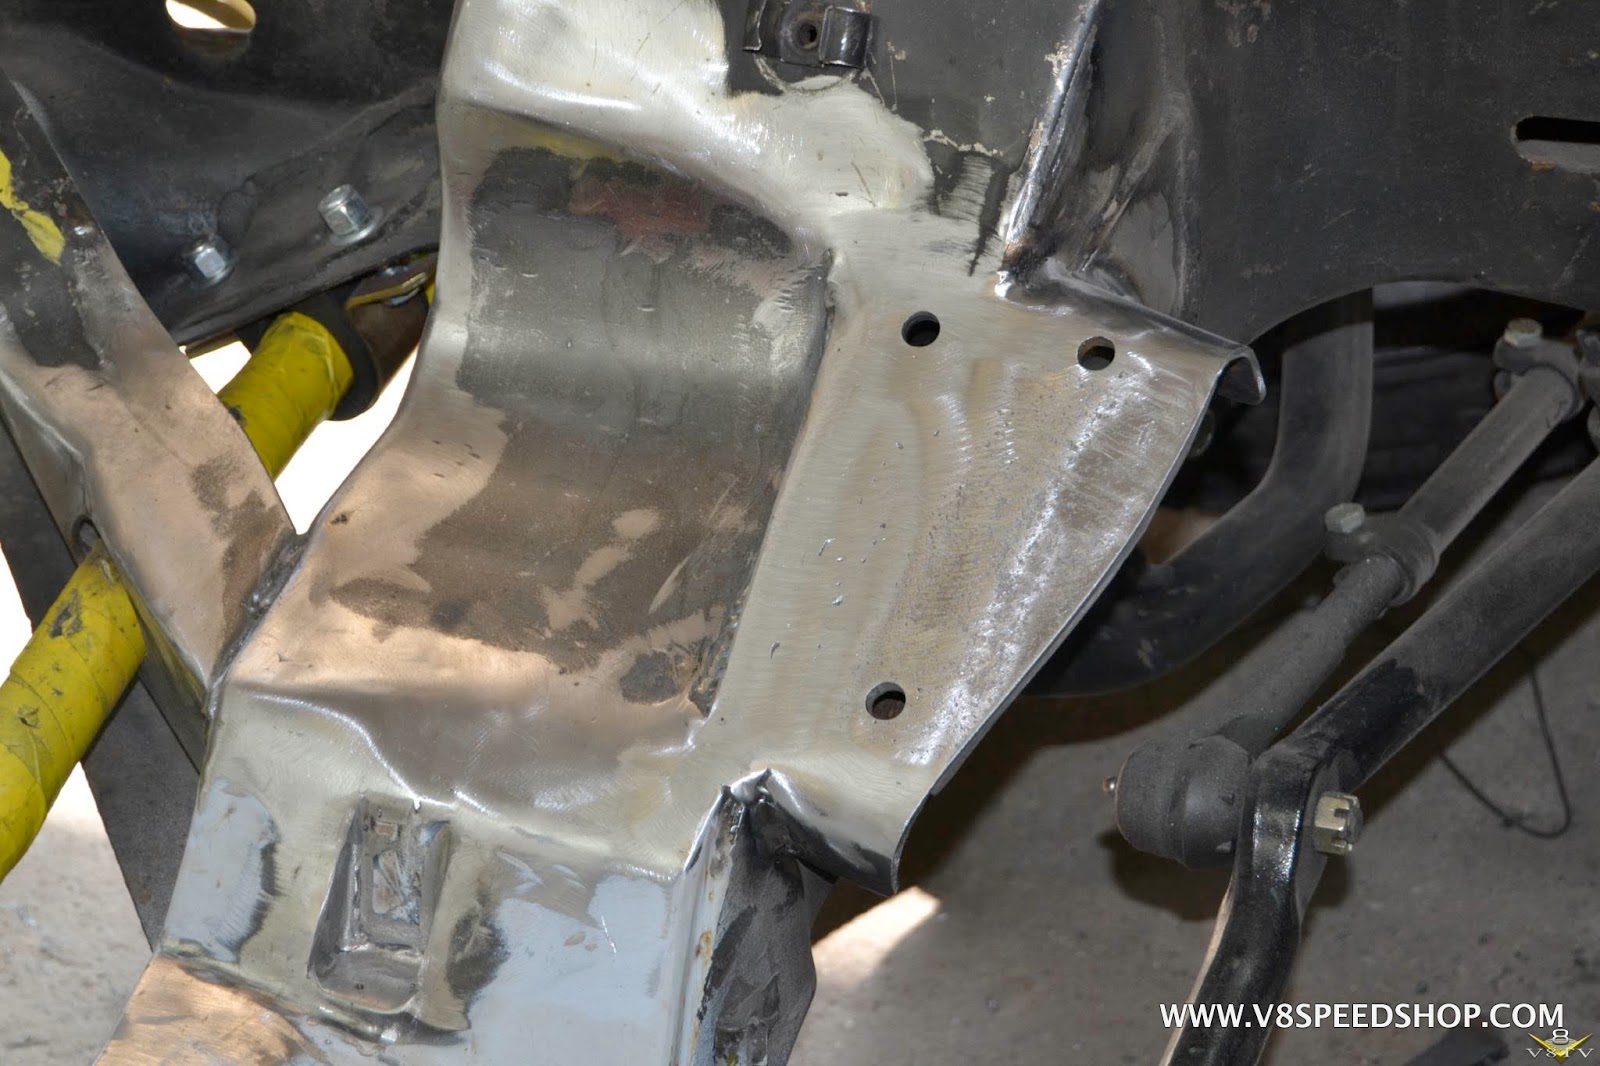
A previous shop welded supports to the floor to make the transmission crossmember. This isn't a good idea, as the engine and transmission are bolted to the frame, which moves independently of the body, albeit slightly. Also, the floor of the car was never intended to support a transmission, much less a manual behind a high horsepower V8. We removed it in favor of a traditional frame-mounted crossmember.
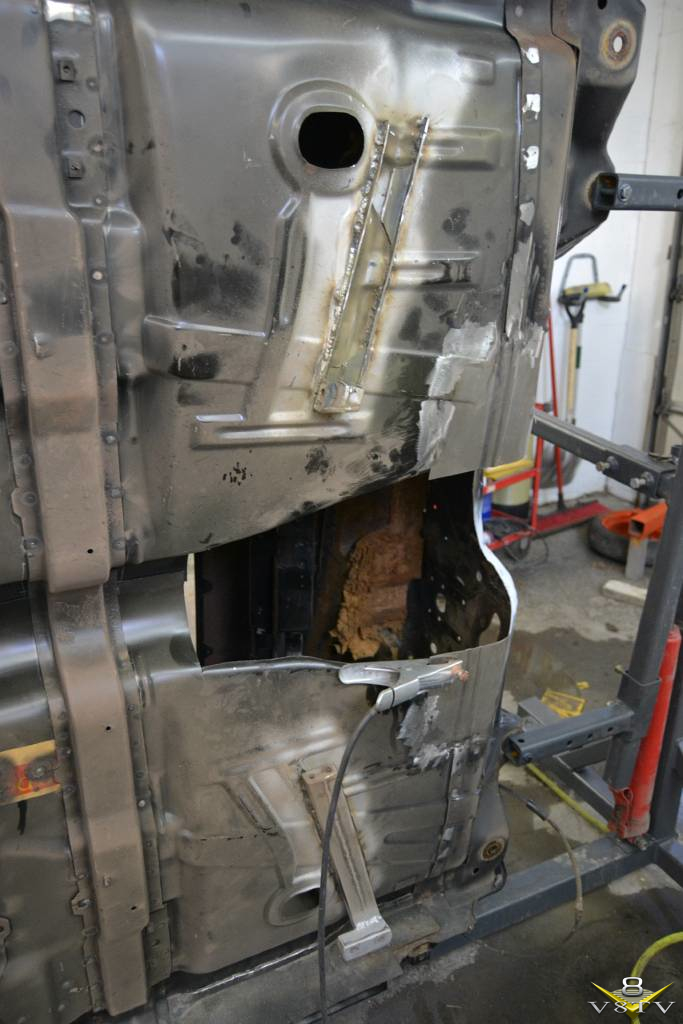
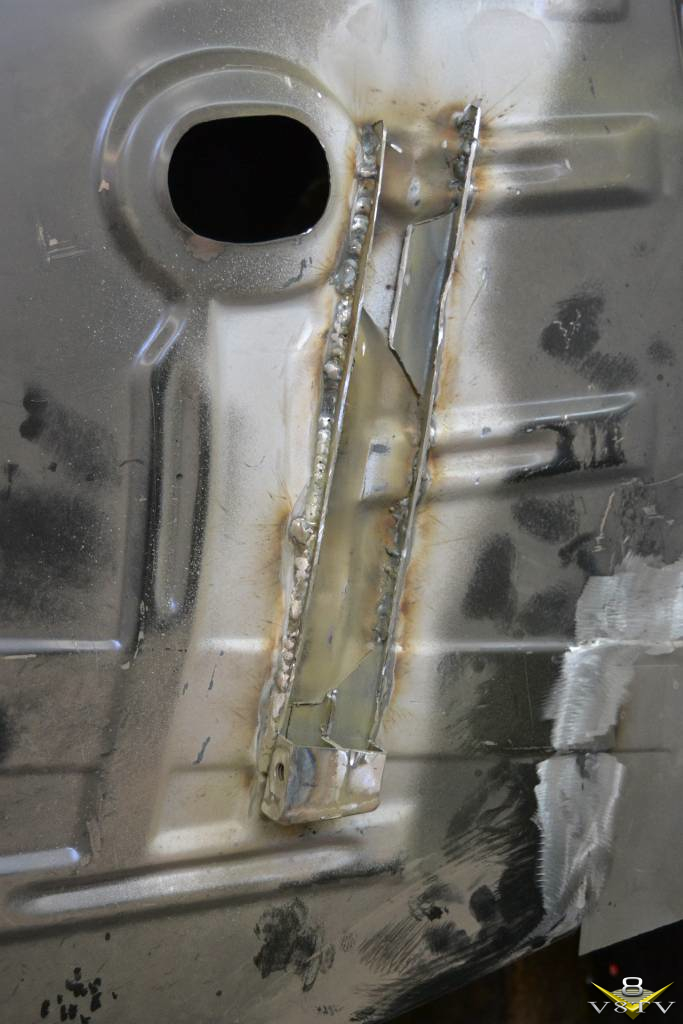
New fuel tank supports were installed, as these were neglected when a previous shop installed the floor pans. We also finished welding and grinding all the floor welds.
 Kevin Oeste
V8 Speed and Resto Shop
V8TV
Muscle Car Of The Week
V8 Radio Podcast
All about us:
https://www.v8speedshop.com
11-12-2015 #24
Registered User
- Join Date
- Dec 2004
- Location
- Midwest
- Posts
- 2,261
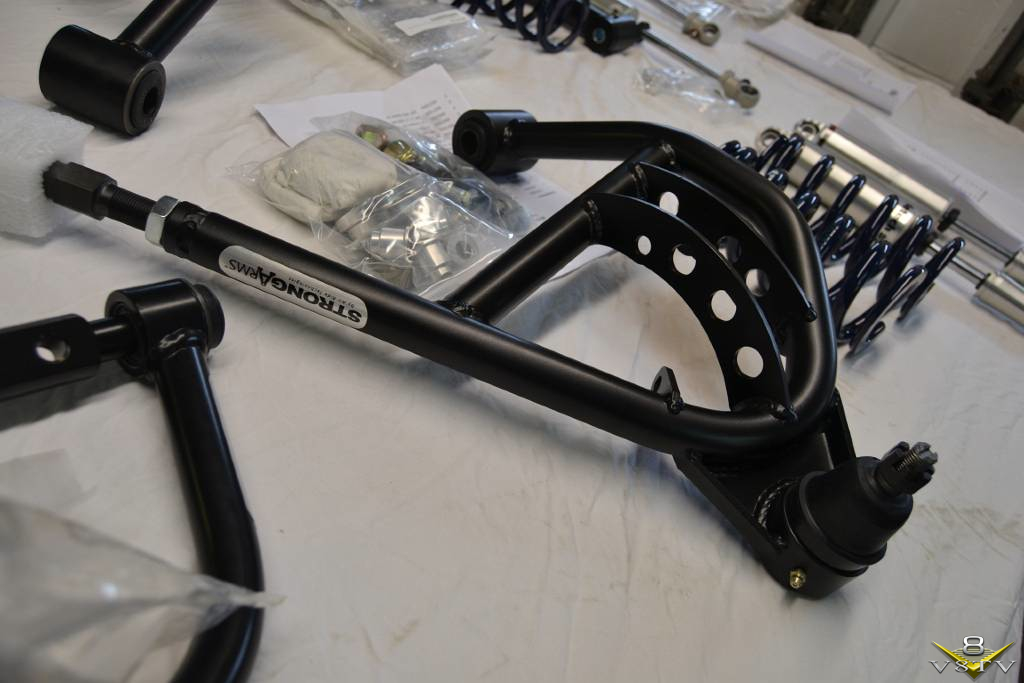
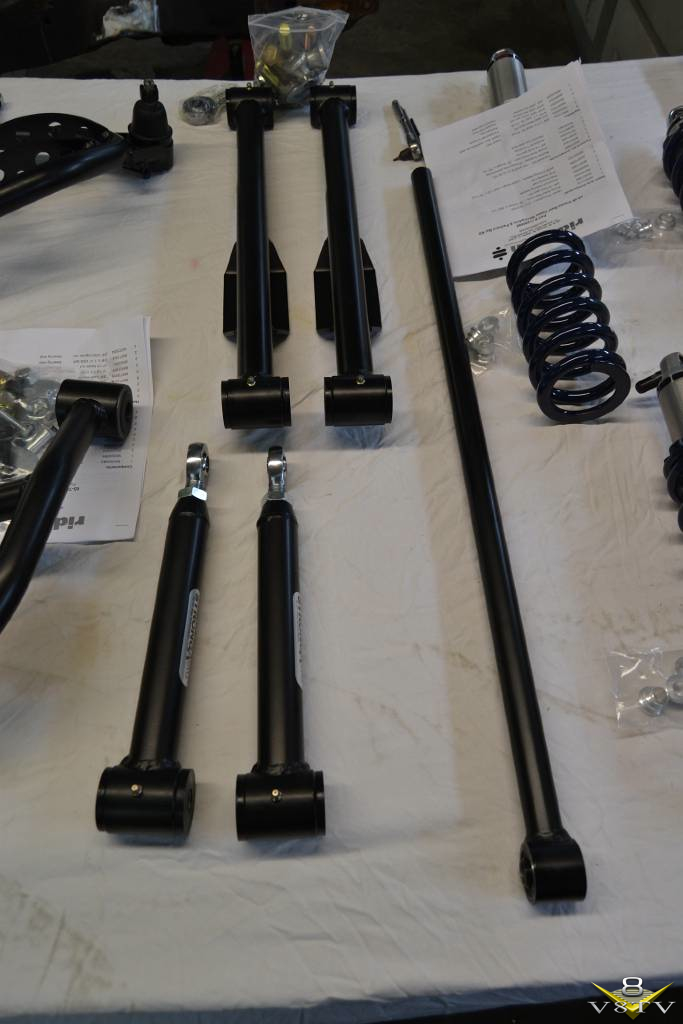
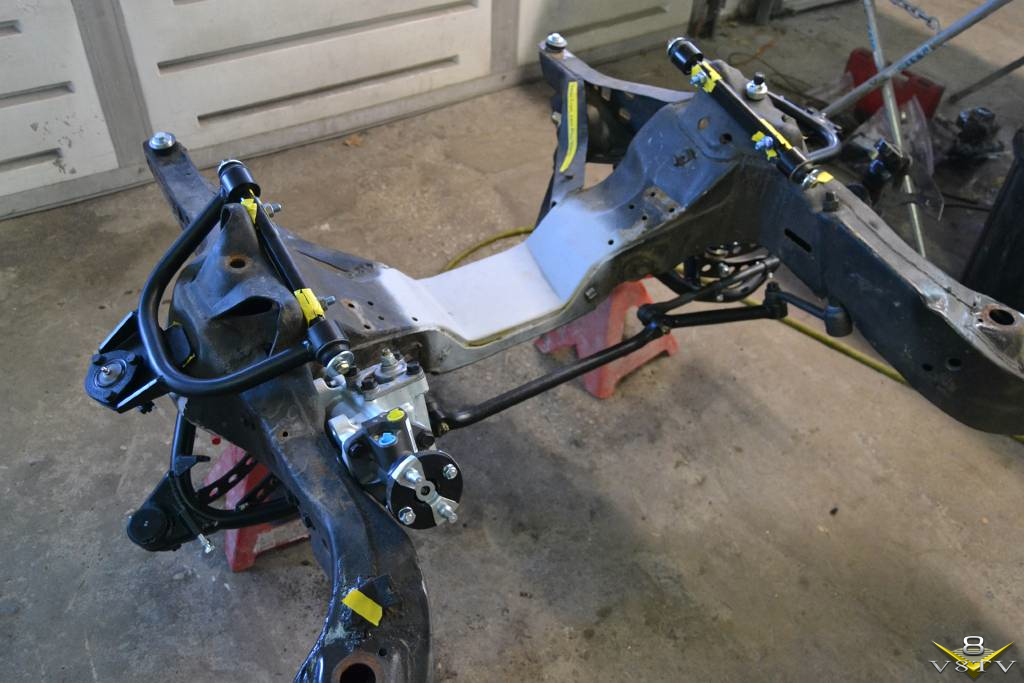
Meanwhile, the crew was preparing to trial fit the ridetech Street challenge suspension system on the Impala’s frame.
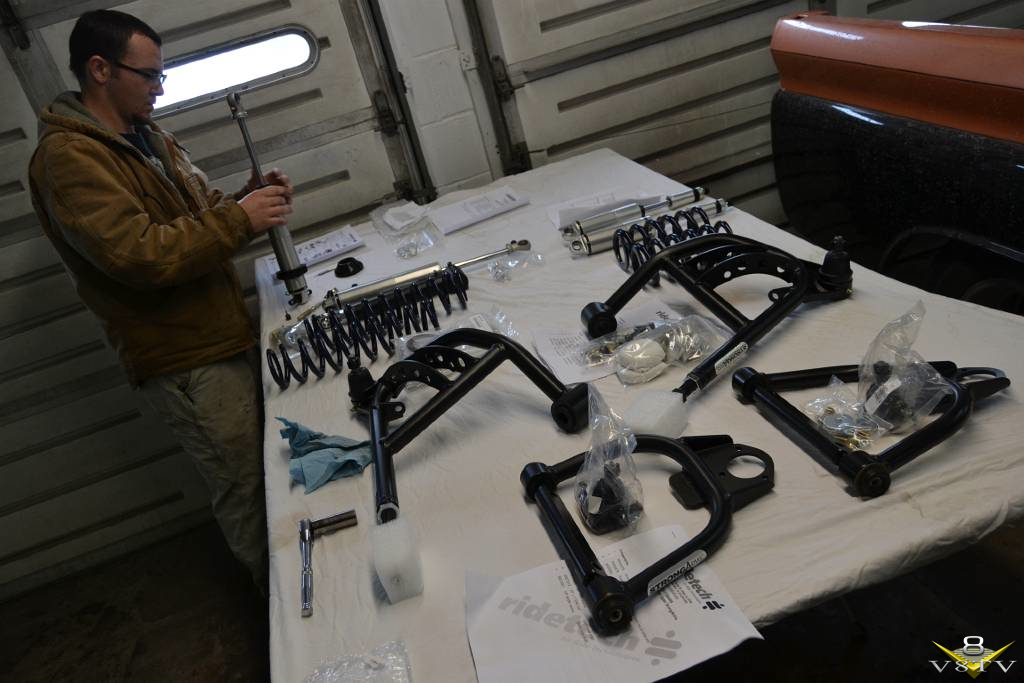
This kit consists of tubular upper and lower control arms, specific rate coil springs and coil over shock assemblies, and an oversized front sway bar. We were also installing an upgraded quick ratio steering box.
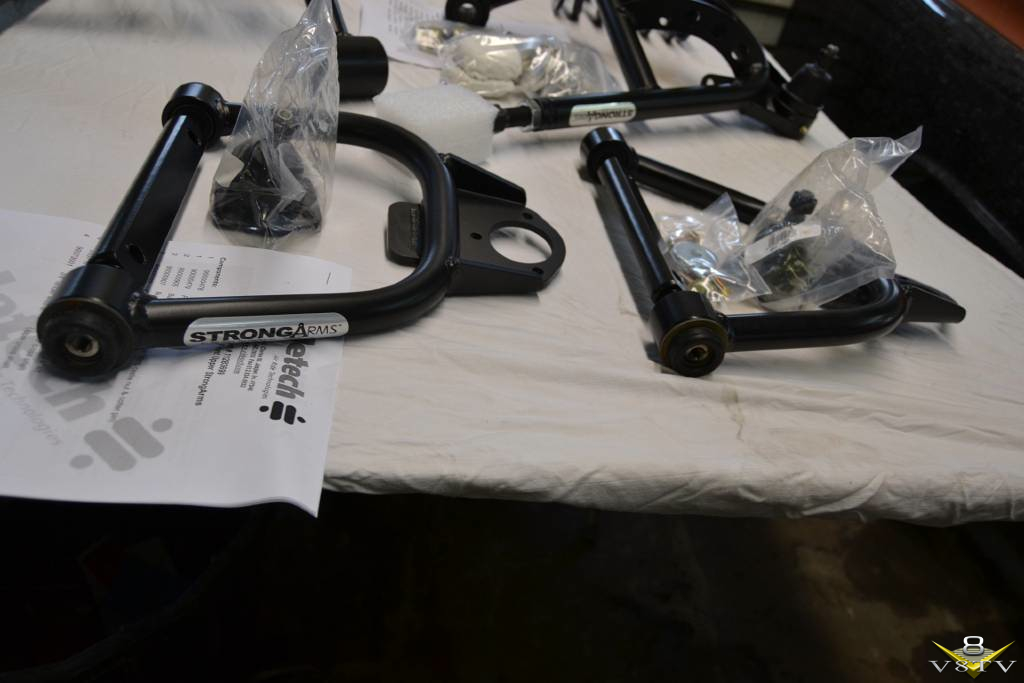
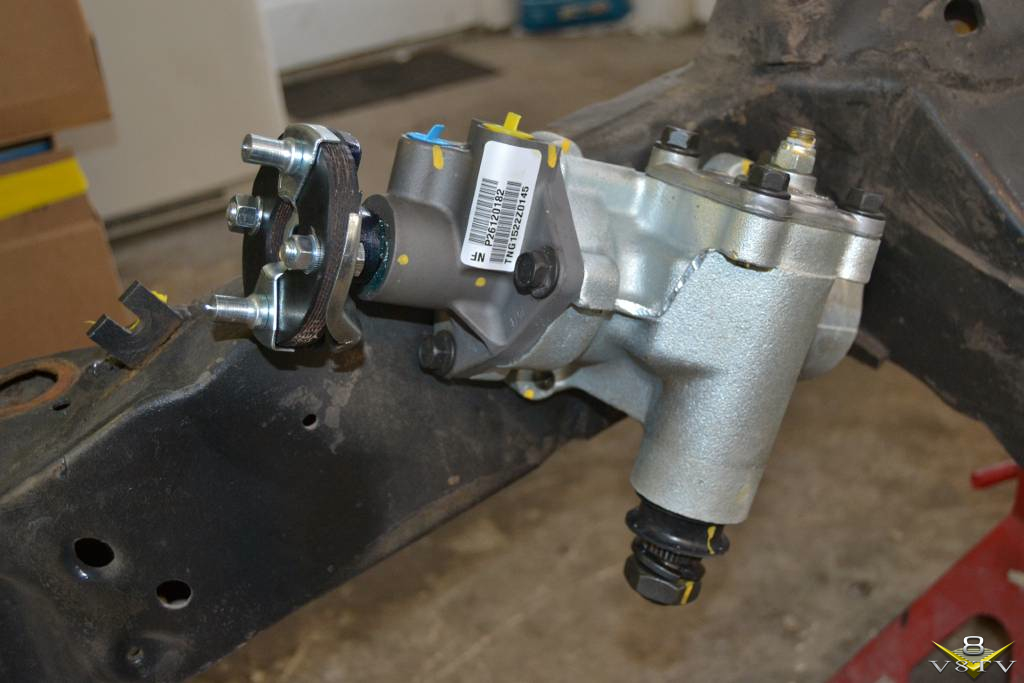
The original front suspension design used a straight lower control arm and a radius rod bolted to it. The ridetech design is a vast improvement, using an “A” shaped tubular lower arm with an articulating end in the forward mount rather than a rubber bushing.
 Kevin Oeste
V8 Speed and Resto Shop
V8TV
Muscle Car Of The Week
V8 Radio Podcast
All about us:
https://www.v8speedshop.com
12-06-2015 #25
Registered User
- Join Date
- Dec 2004
- Location
- Midwest
- Posts
- 2,261
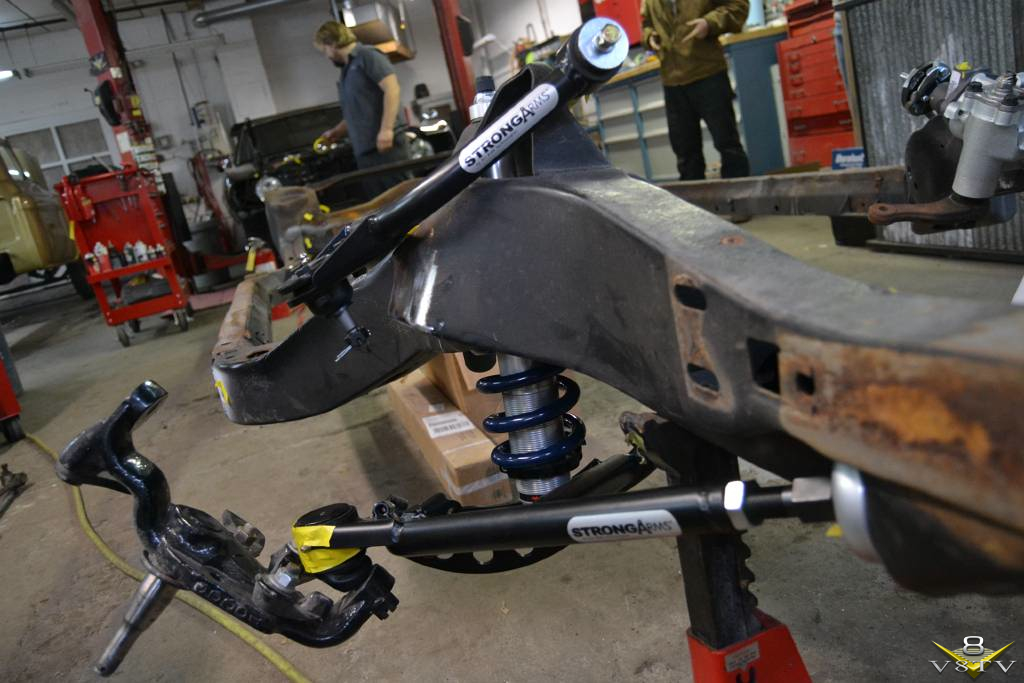
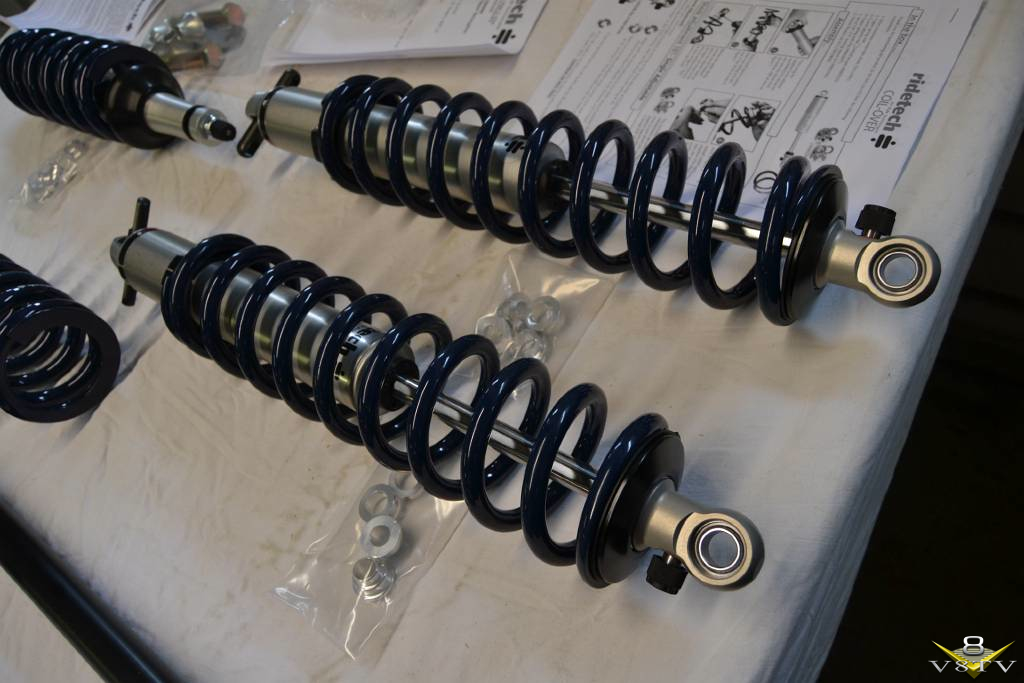
The rear suspension consists of tubular control arms with adjustable upper control arms, and a stronger panhard bar with improved bushings.
This frame had some old-school hot rod tricks, like these control arm support brackets that were stick-welded in. We removed them and reinforced the frame to appear more original.
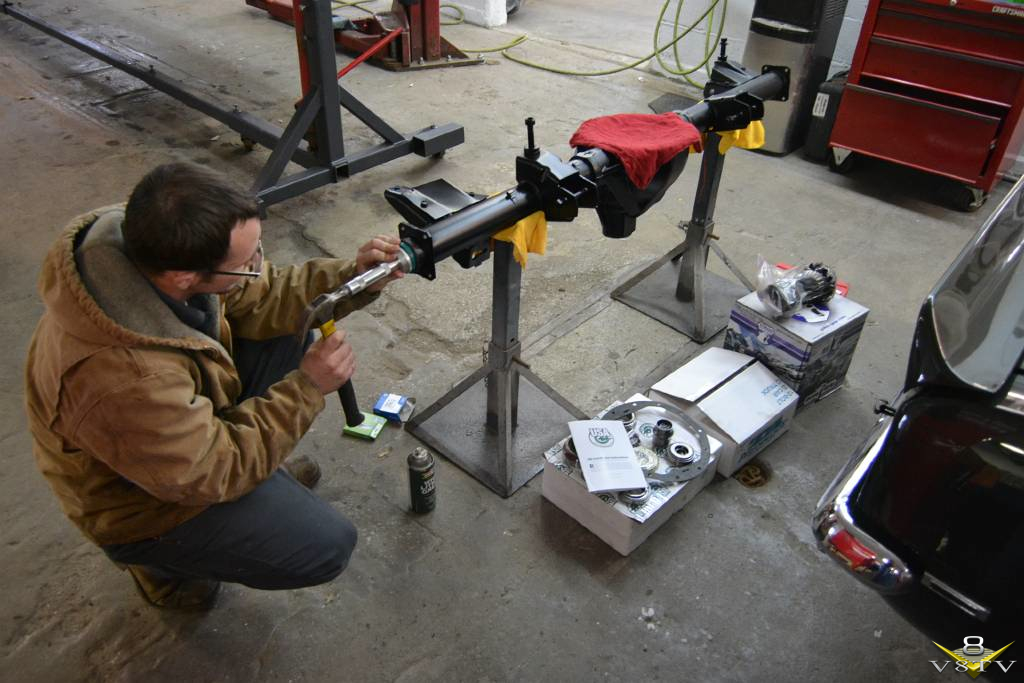
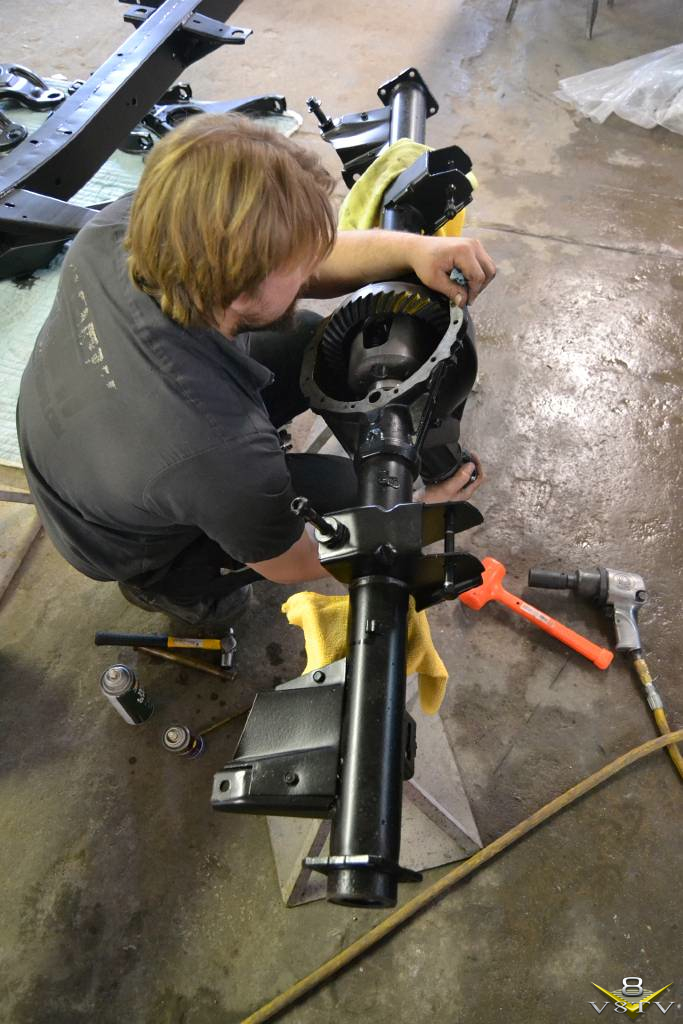
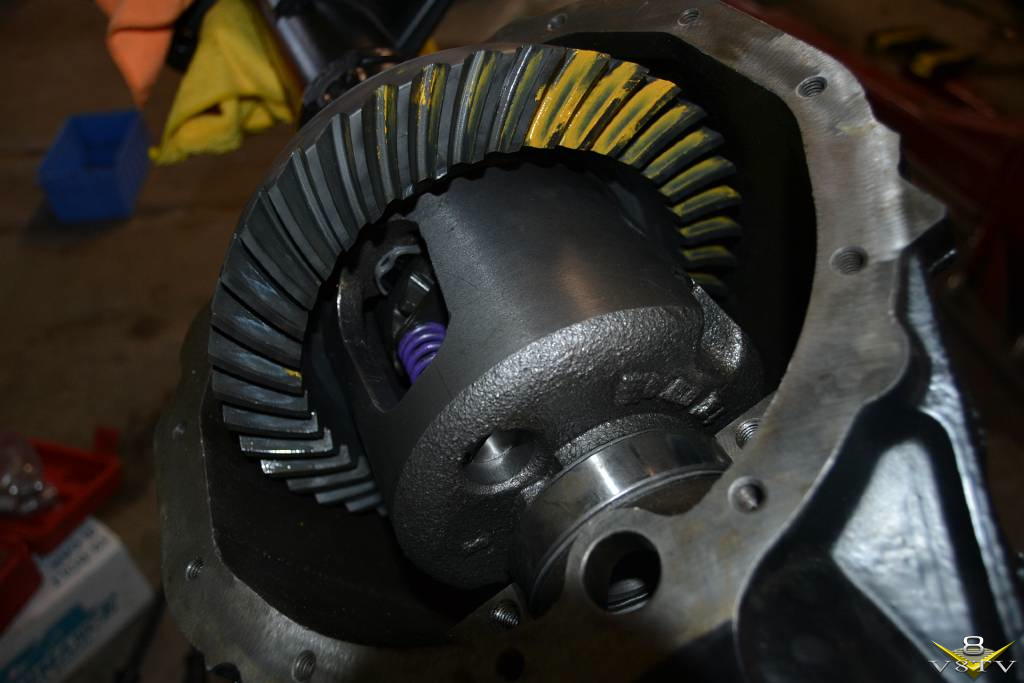
We disassembled the rear axle assembly and media blasted the housing.
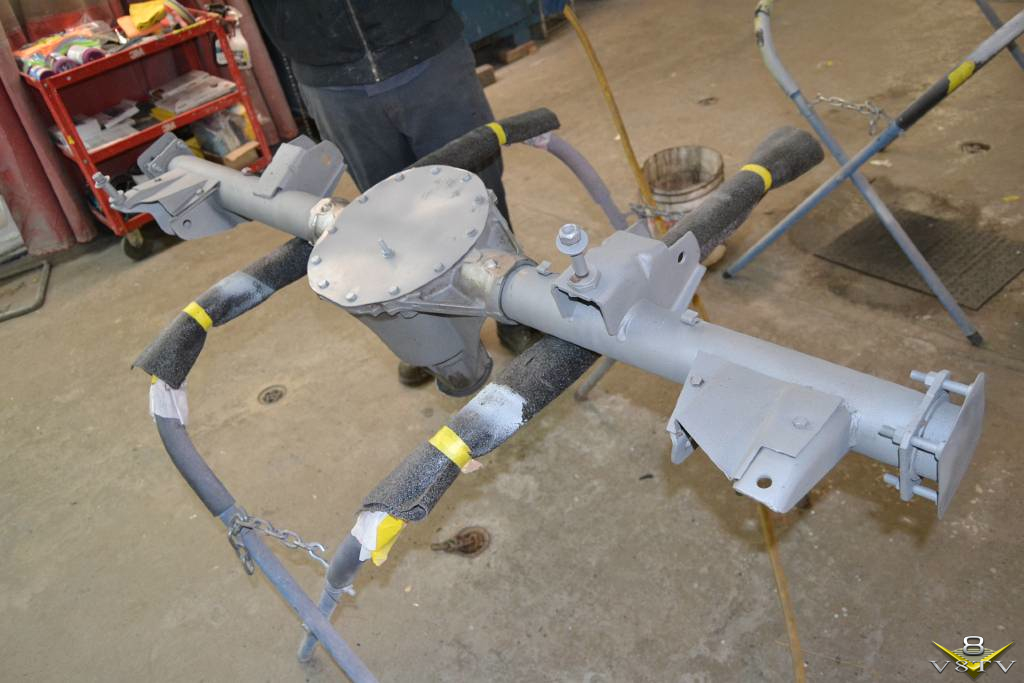
After epoxy and Imron enamel in satin black paint were applied, a new gearset was installed along with bearings and seals to make this 12 bolt rear axle like new again.
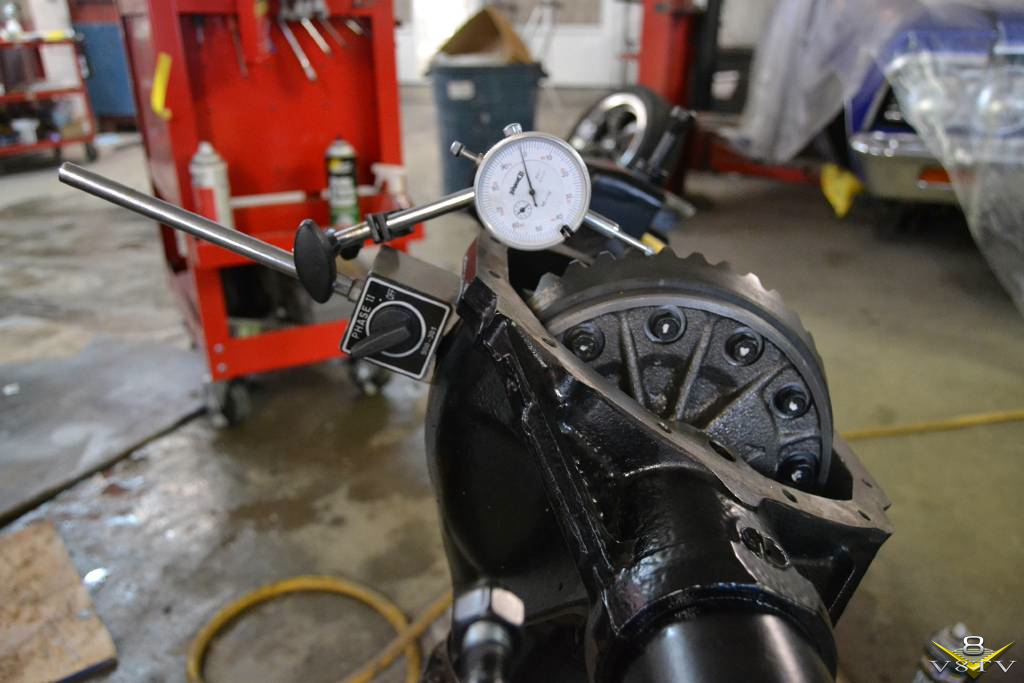
Here, the yellow paint illustrates the proper gear mesh contact pattern ensuring quiet operation.
 Kevin Oeste
V8 Speed and Resto Shop
V8TV
Muscle Car Of The Week
V8 Radio Podcast
All about us:
https://www.v8speedshop.com
12-15-2015 #26
Registered User
- Join Date
- Dec 2004
- Location
- Midwest
- Posts
- 2,261
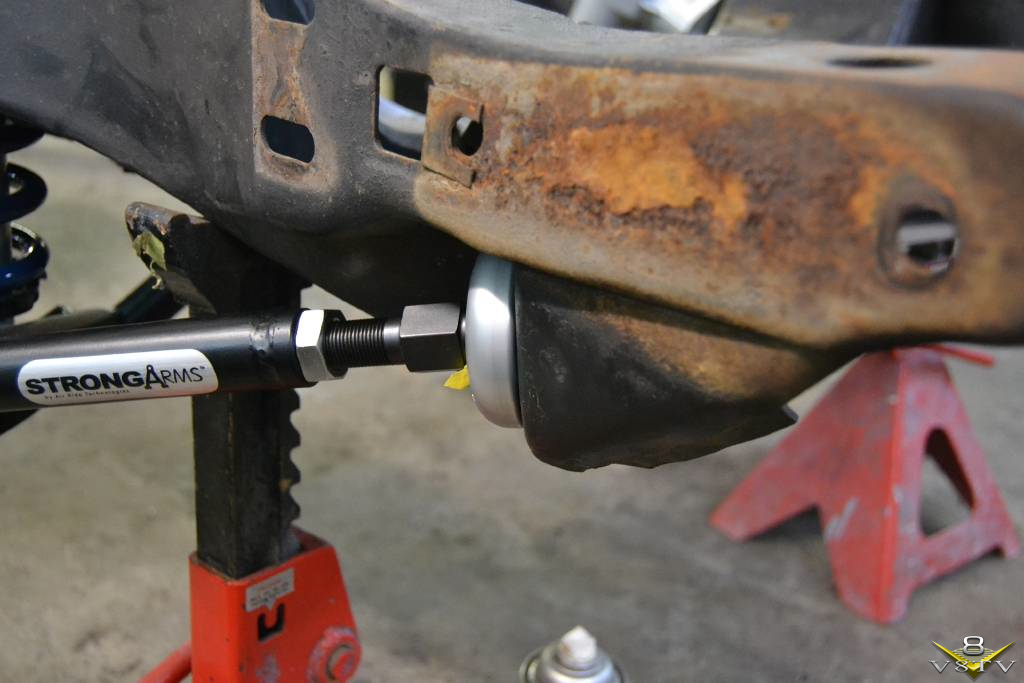
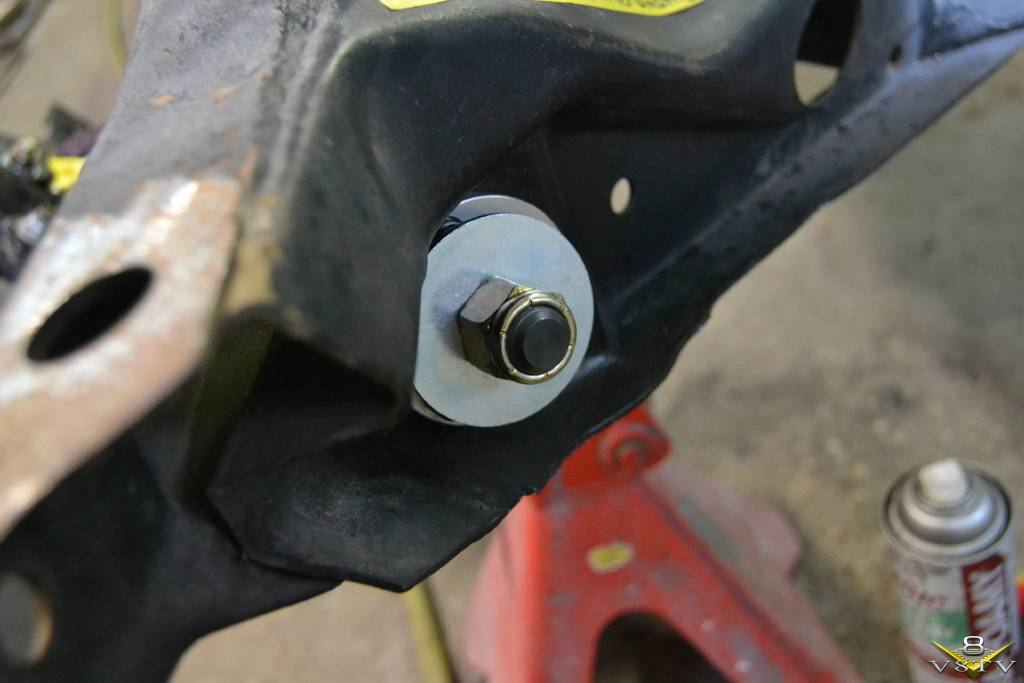
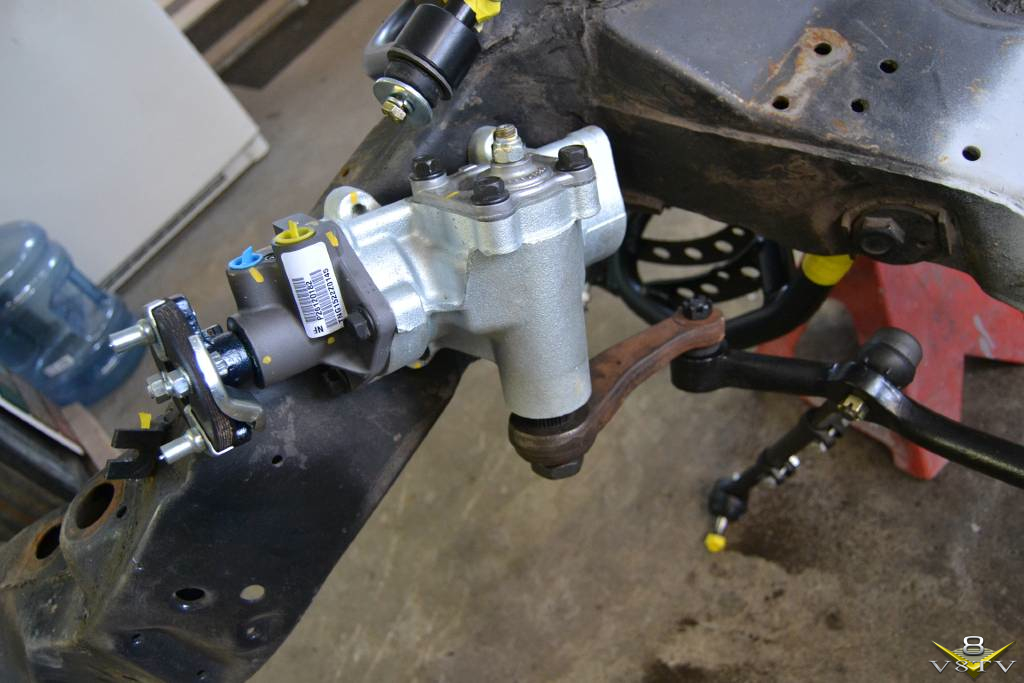
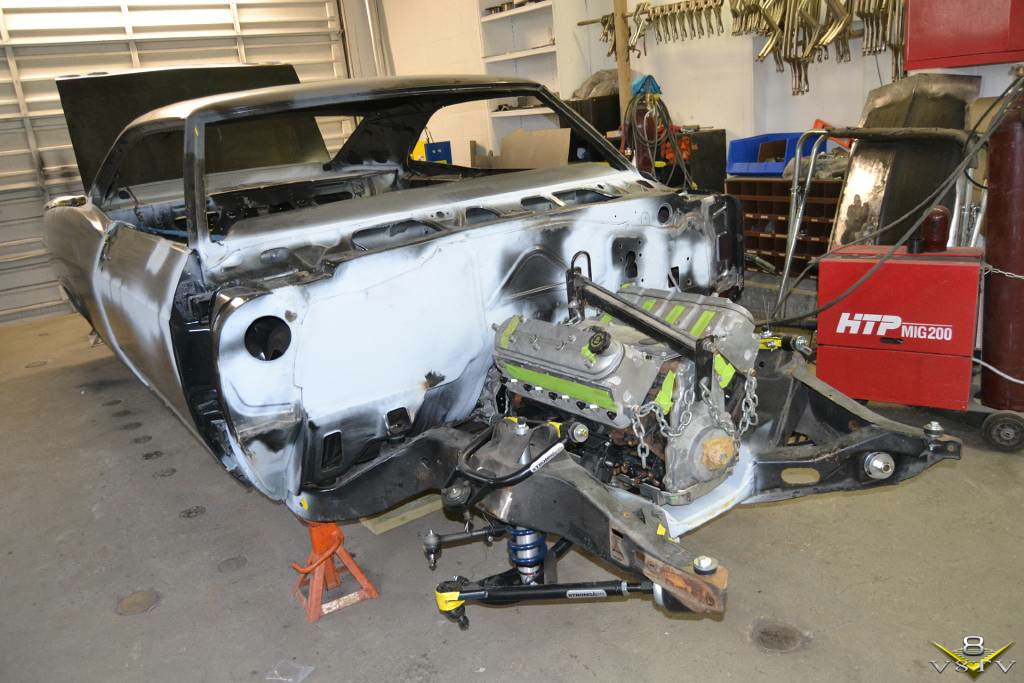
The front suspension parts bolted to the frame. These are obviously not torqued to spec for driving, but in place to mock-up the build.
Quick-ratio steering gear.
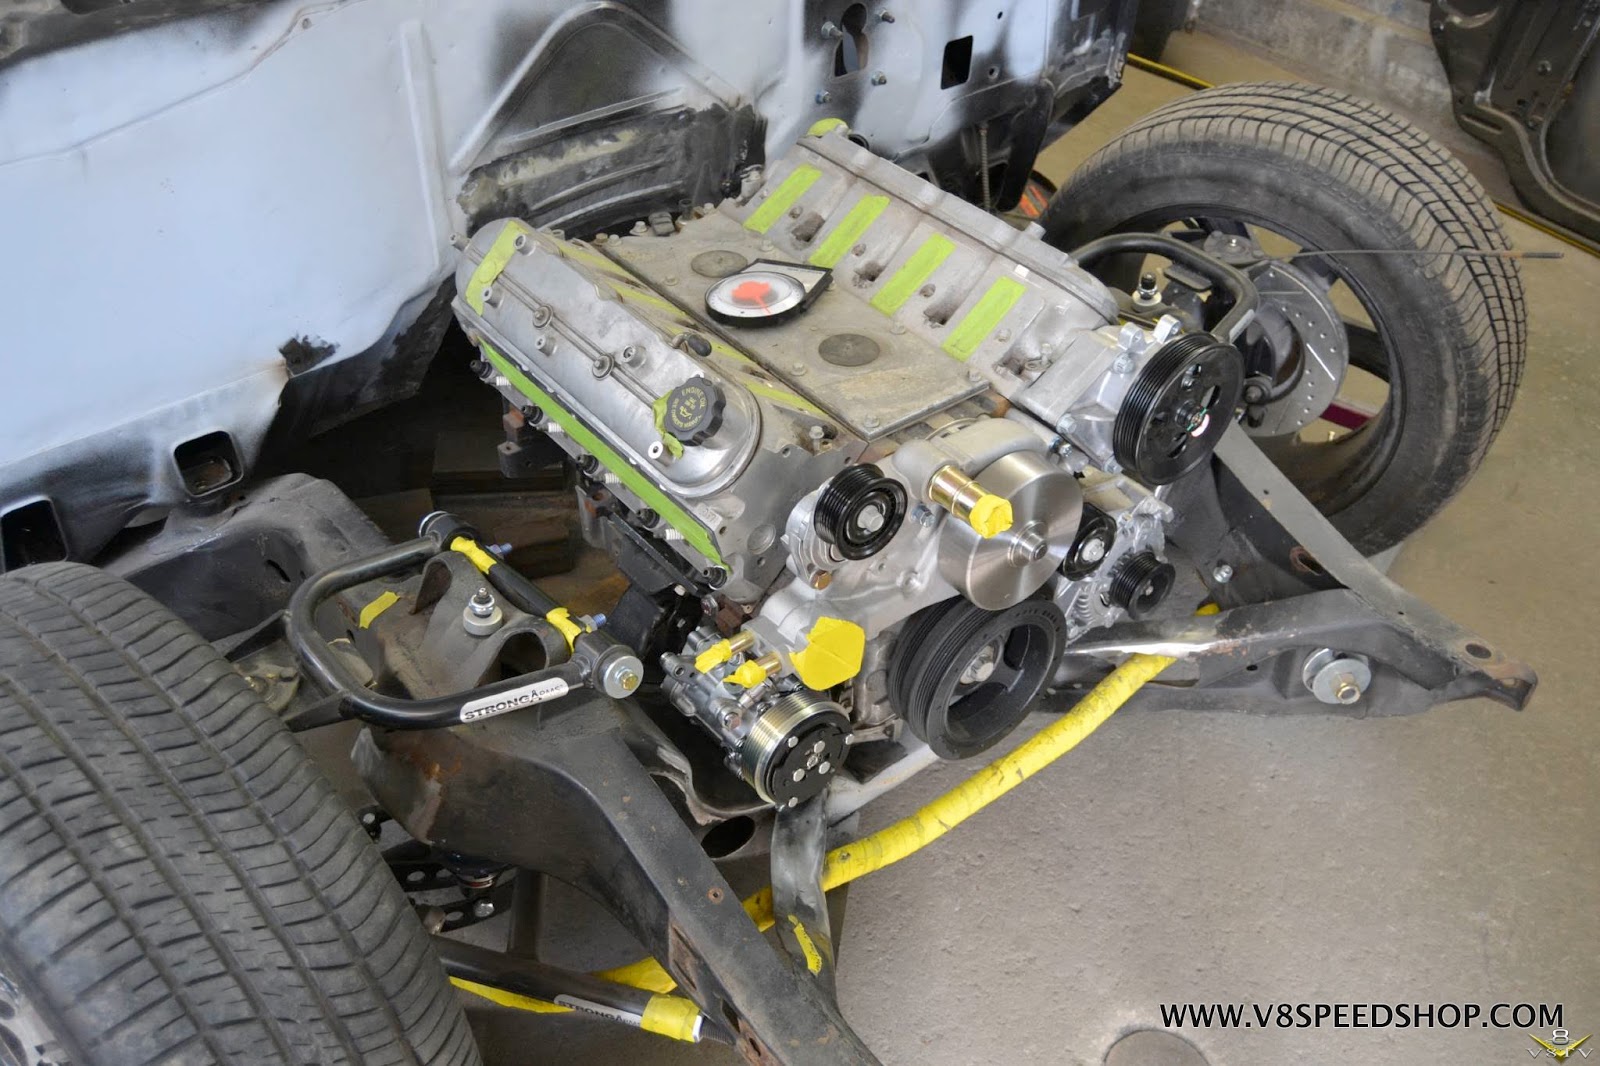
The body was placed back on the frame, and the whole rig was supported on jackstands. It was time to finish fitting the 6.0 LS and T56 transmission in the car.
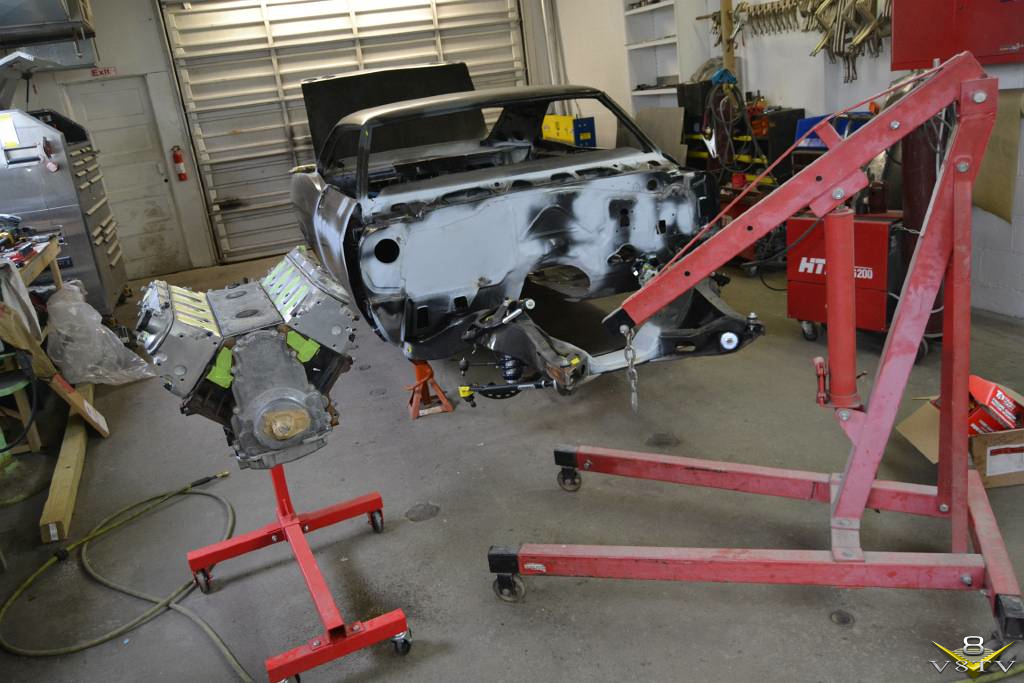
The transmission tunnel would need completion, but theres only one way to know if something really fits, and that is to put it together and measure.

 Kevin Oeste
V8 Speed and Resto Shop
V8TV
Muscle Car Of The Week
V8 Radio Podcast
All about us:
https://www.v8speedshop.com
12-15-2015 #27
Registered User
- Join Date
- Dec 2004
- Location
- Midwest
- Posts
- 2,261
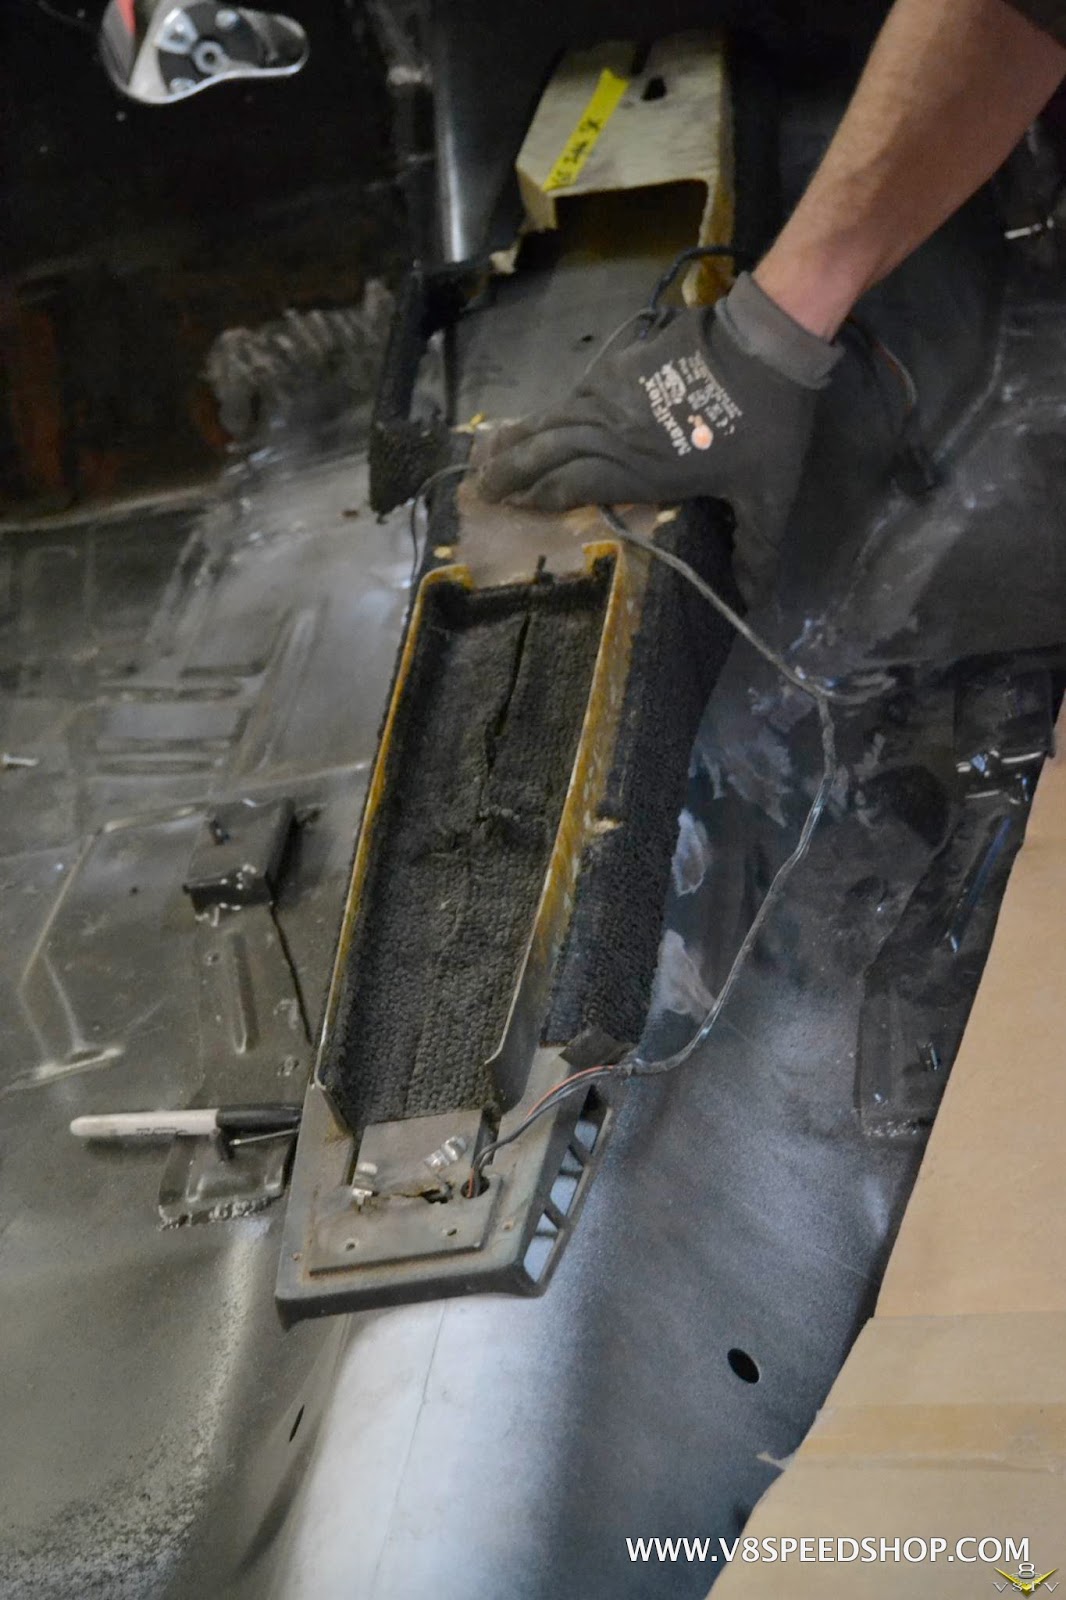
The floor opening was increased for the transmission and Quicktime bellhousing.
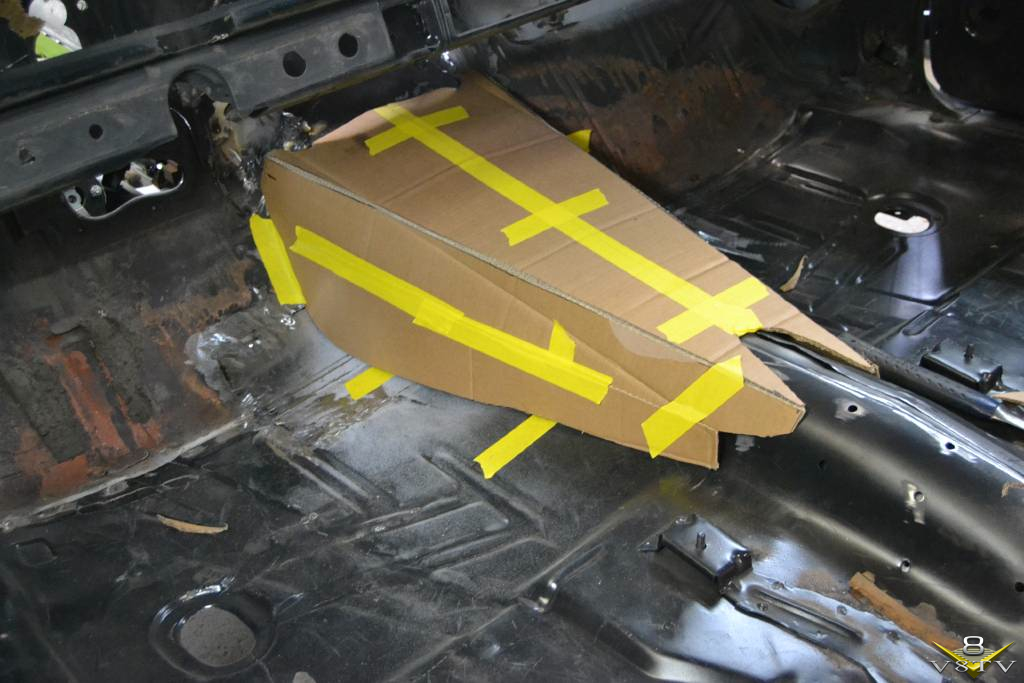
A loose cardboard mock-up was made to get an idea of the shape of the tunnel. This car will be running a stock 1965 Impala console, so a mounting surface was required for that as well.
The new tunnel was made and welded in place.
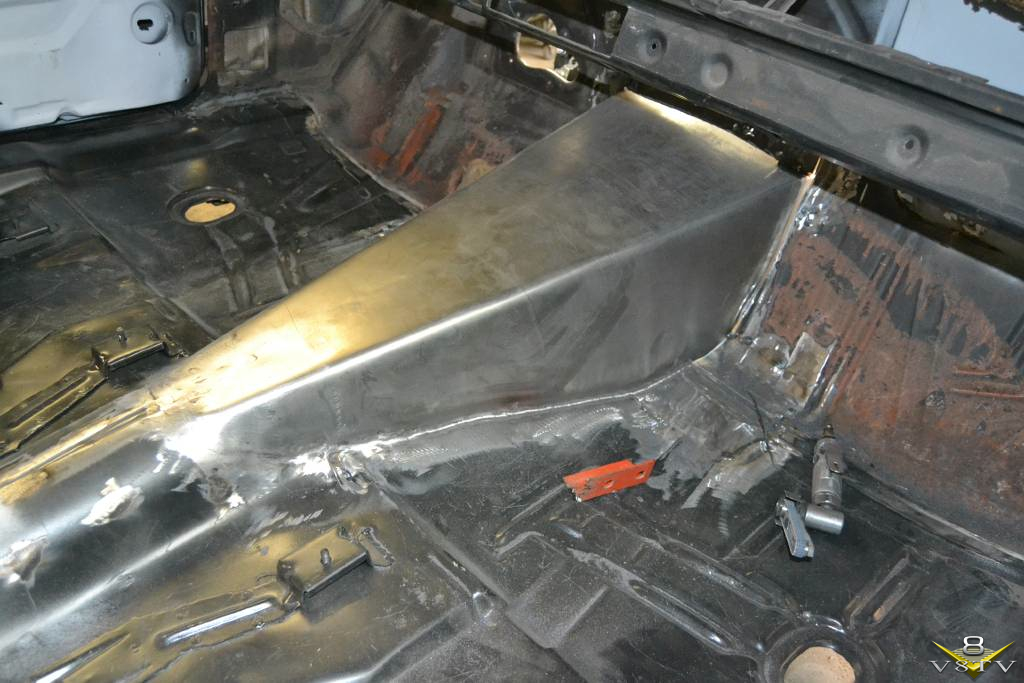
A few ribs were added to strengthen the firewall at the tunnel.

Now we had plenty of clearance for the transmission.
 Kevin Oeste
V8 Speed and Resto Shop
V8TV
Muscle Car Of The Week
V8 Radio Podcast
All about us:
https://www.v8speedshop.com
12-15-2015 #28
Registered User
- Join Date
- Nov 2006
- Location
- Ma.
- Posts
- 5,567
Nice job on the tunnel. The car is coming along nice.
Wayne
Car FINALLY home !!!!!! lol
Project FNQUIK https://www.pro-touring.com/showthre...ghlight=FNQUIK
12-16-2015 #29
Registered User
- Join Date
- Dec 2004
- Location
- Midwest
- Posts
- 2,261
Thanks Wayne! Originally Posted by Motown 454
Kevin Oeste
V8 Speed and Resto Shop
V8TV
Muscle Car Of The Week
V8 Radio Podcast
All about us:
https://www.v8speedshop.com
12-18-2015 #30
Registered User
- Join Date
- Aug 2004
- Location
- north central Iowa
- Posts
- 503
looks nice. I didn't see it mentioned but what engine mounts did you end up with and what pan are you using? Any clearance issues with the pan etc... after notching the crossmember?
72 Nova SS, on the back burner for now.
current cruiser: "The green machine"
'70 Impala 4drht, 26K original miles, 2" drop springs and large swaybars, drives pretty good for a land yahct in the middle of an ls1 swap, but thinking about changing directions to a duramax diesel swap.
01-10-2016 #31 Registered User
- Join Date
- Dec 2009
- Location
- Naperville, IL
- Posts
- 55
Wow, what familiar looking progress. I'm doing a '66 Caprice with a very similar build thread. Great work so far. Subscribing for updates.
1966 Caprice - L92/4L80e, Ridetech/Hotchkis Suspension
Build Thread: https://www.pro-touring.com/showthre...Big-Black-quot
1989 Camaro Iroc Z G92 5-Speed (one of 300 as optioned). Bone Stock.
01-19-2016 #32
Registered User
- Join Date
- Dec 2004
- Location
- Midwest
- Posts
- 2,261
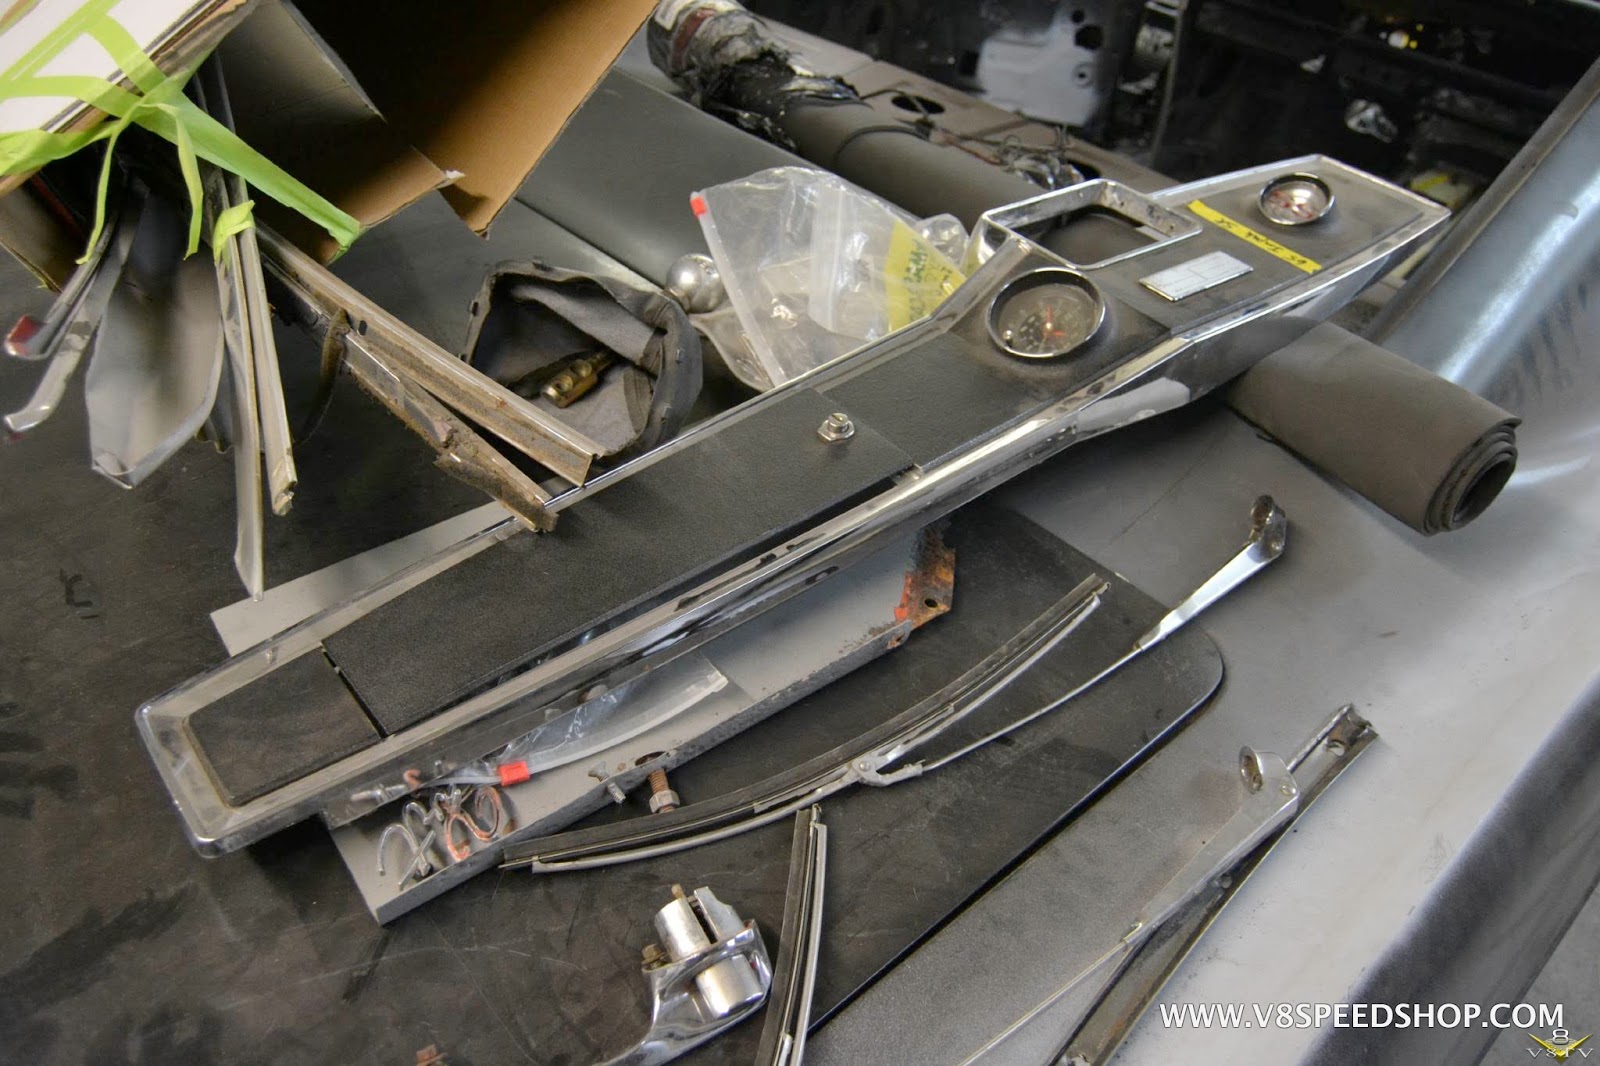
Next, the new transmission tunnel was fit to the original SS floor console.
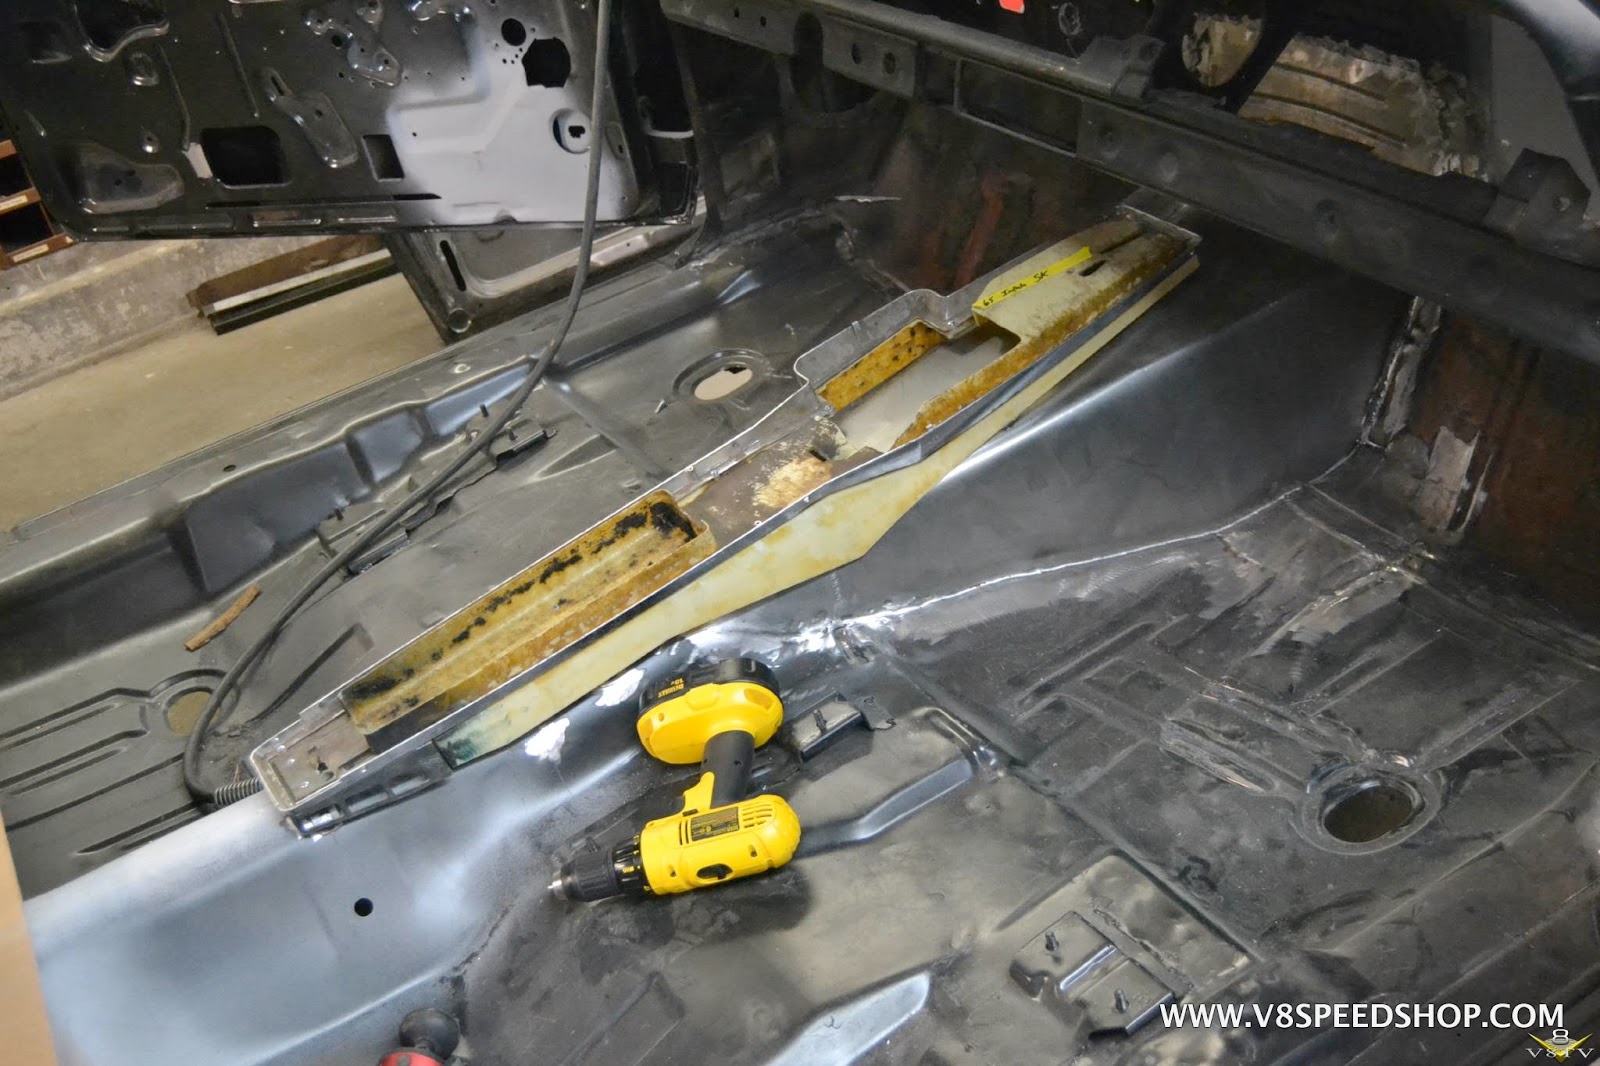
After the new console mounting brackets were made and installed, a considerable gap existed between the side of the console and the transmission tunnel, so a new base was made out of fiberglass to fill the void.
Wire framing was used to form the shape.
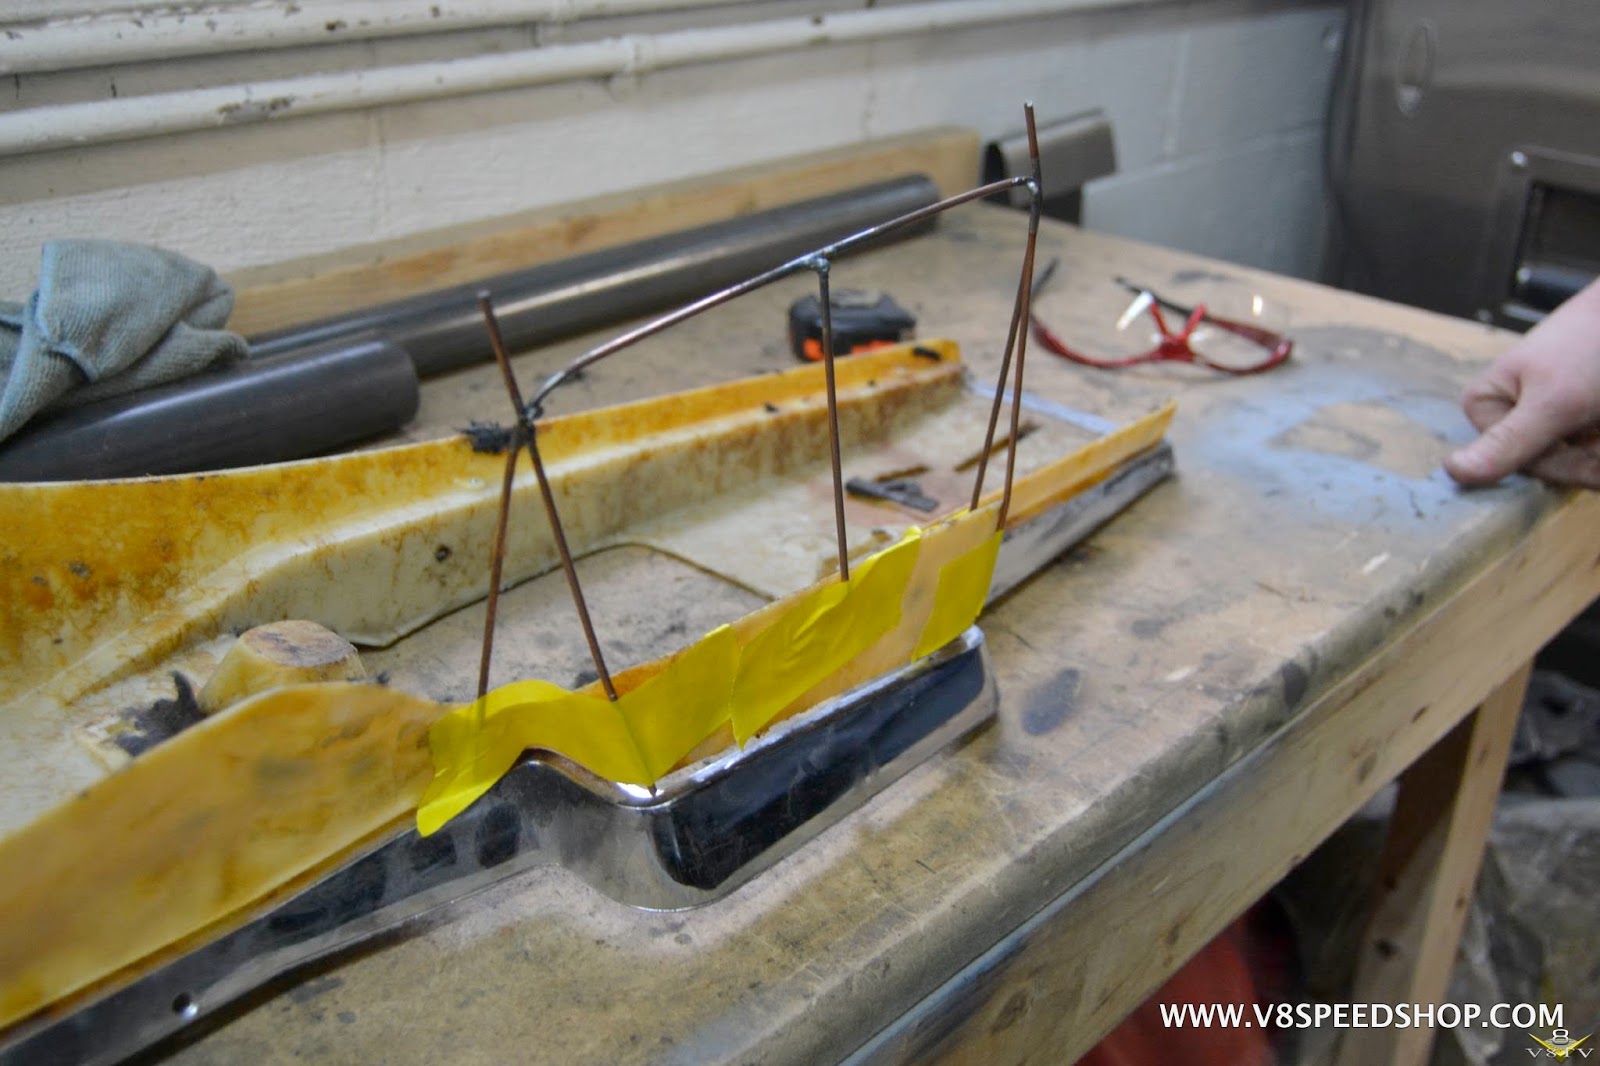
Fiberglass matting and resin was used to make the structure.
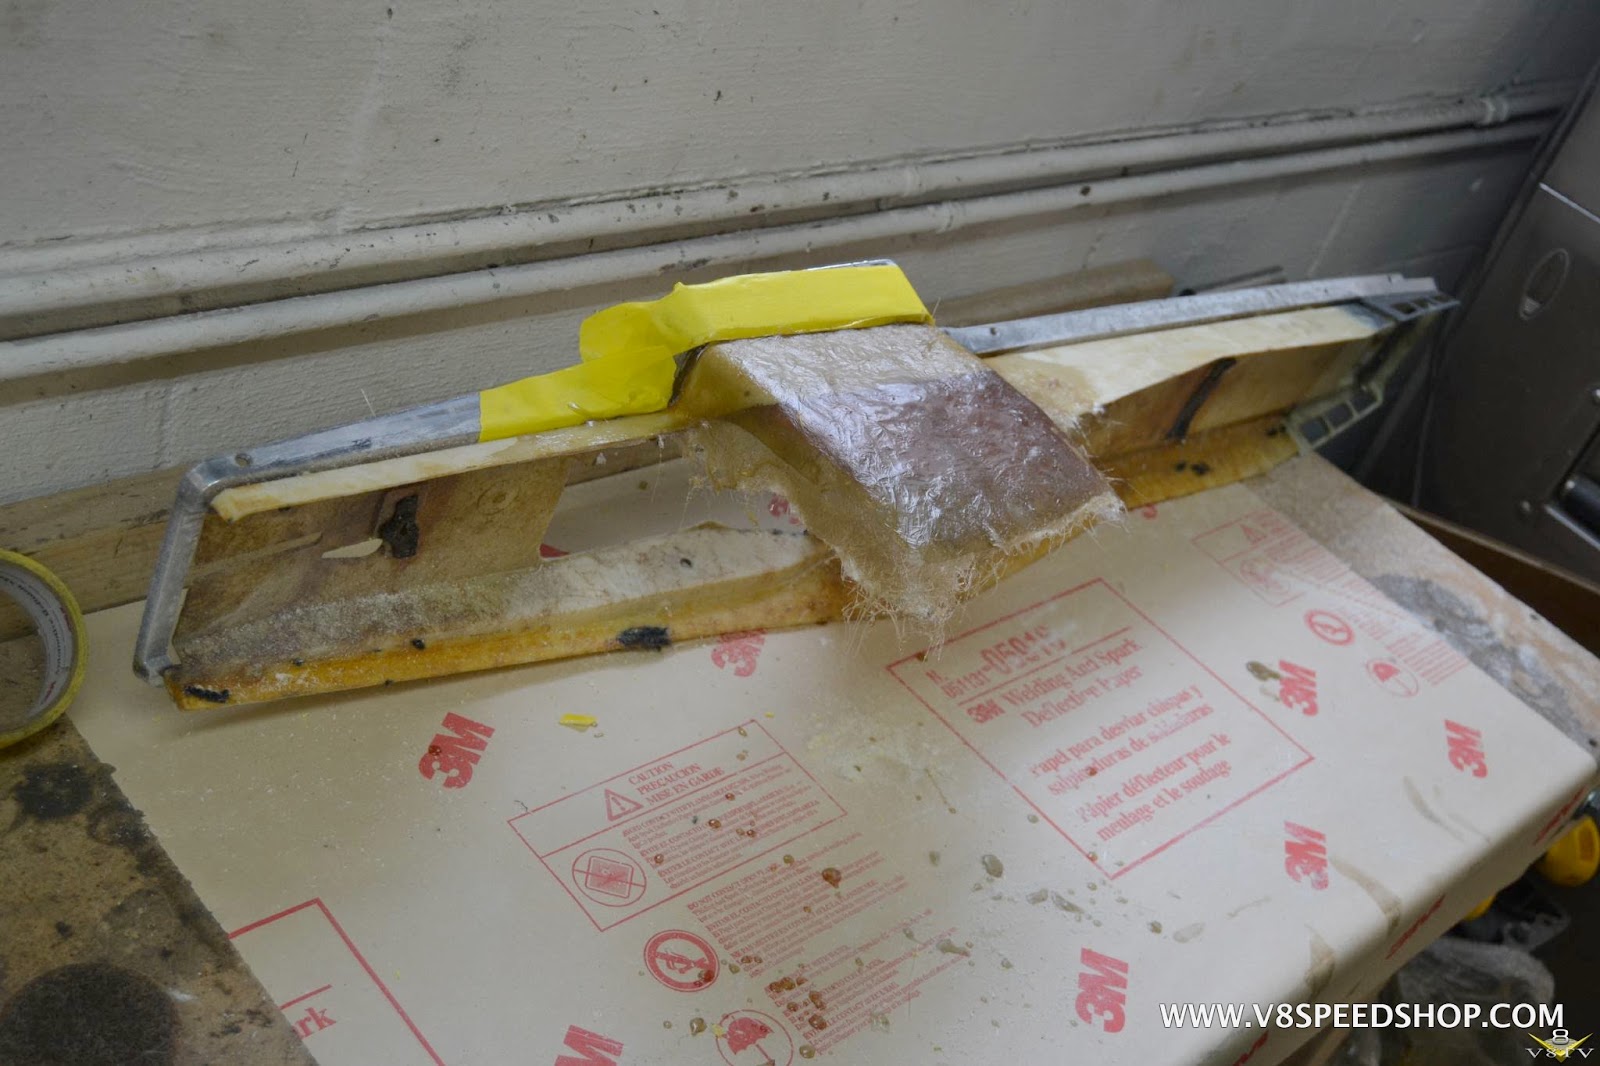
With the seats in place, and the new base sanded and primed, the gap is now filled.

This will be covered with carpet when finished.Kevin Oeste
V8 Speed and Resto Shop
V8TV
Muscle Car Of The Week
V8 Radio Podcast
All about us:
https://www.v8speedshop.com
05-14-2016 #33
Registered User
- Join Date
- Dec 2004
- Location
- Midwest
- Posts
- 2,261
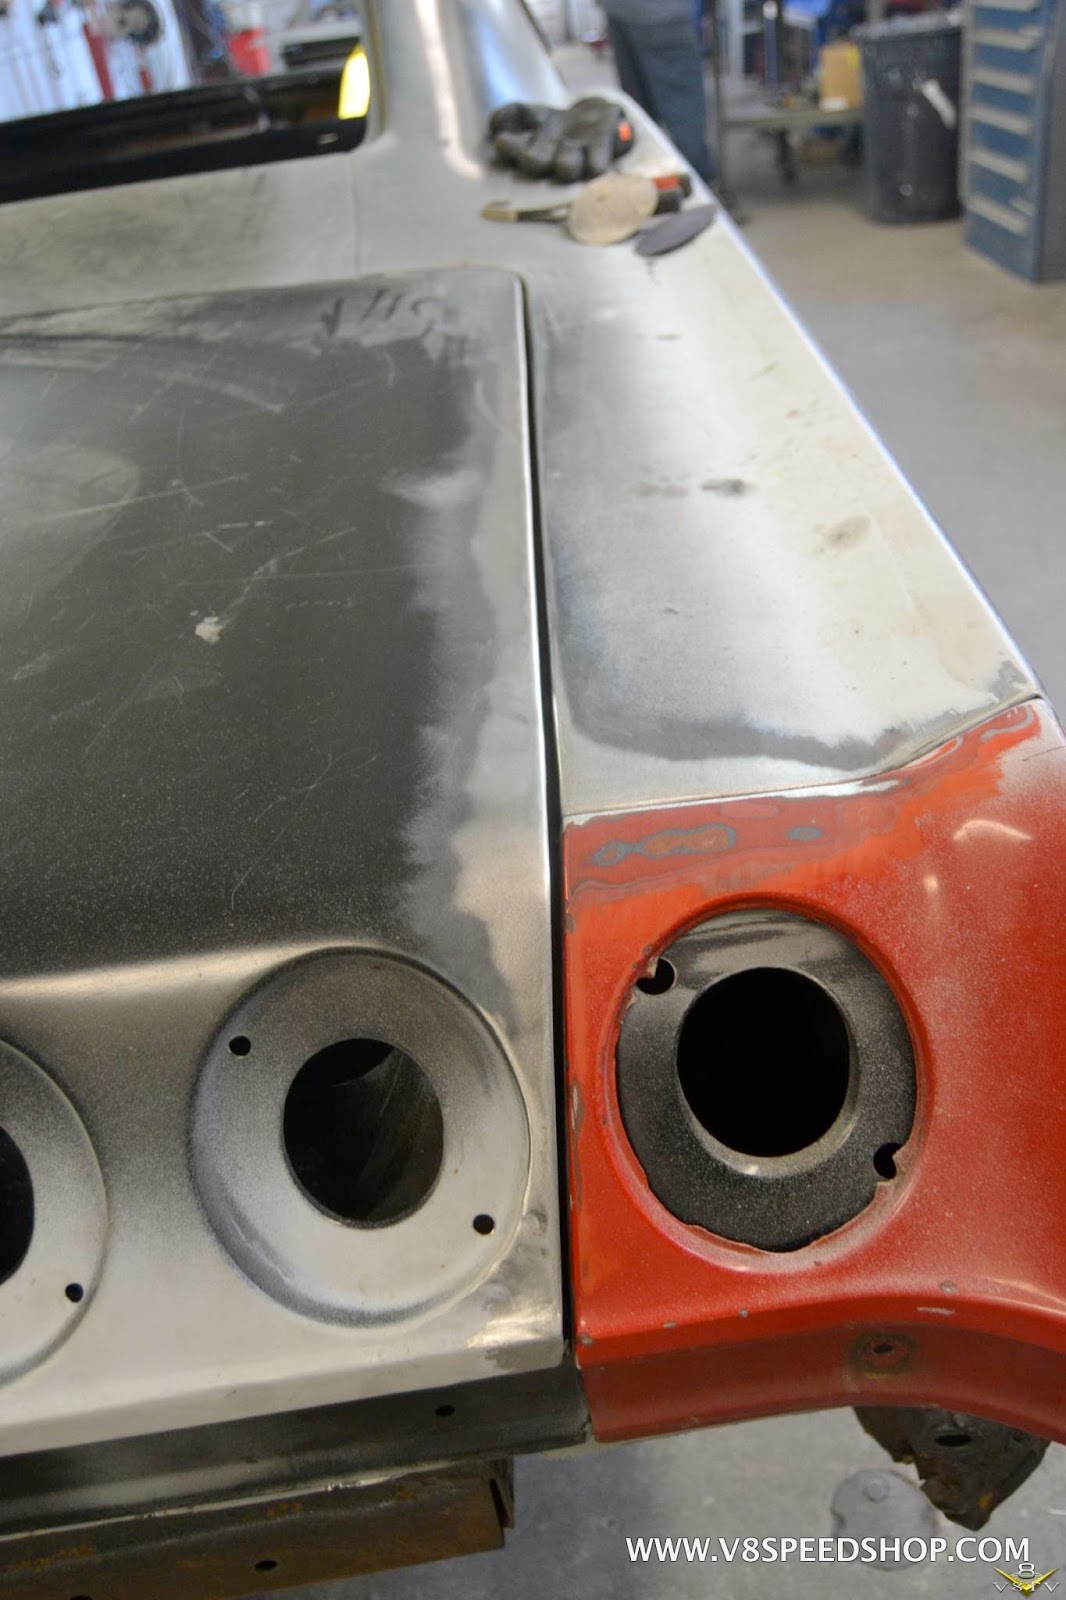
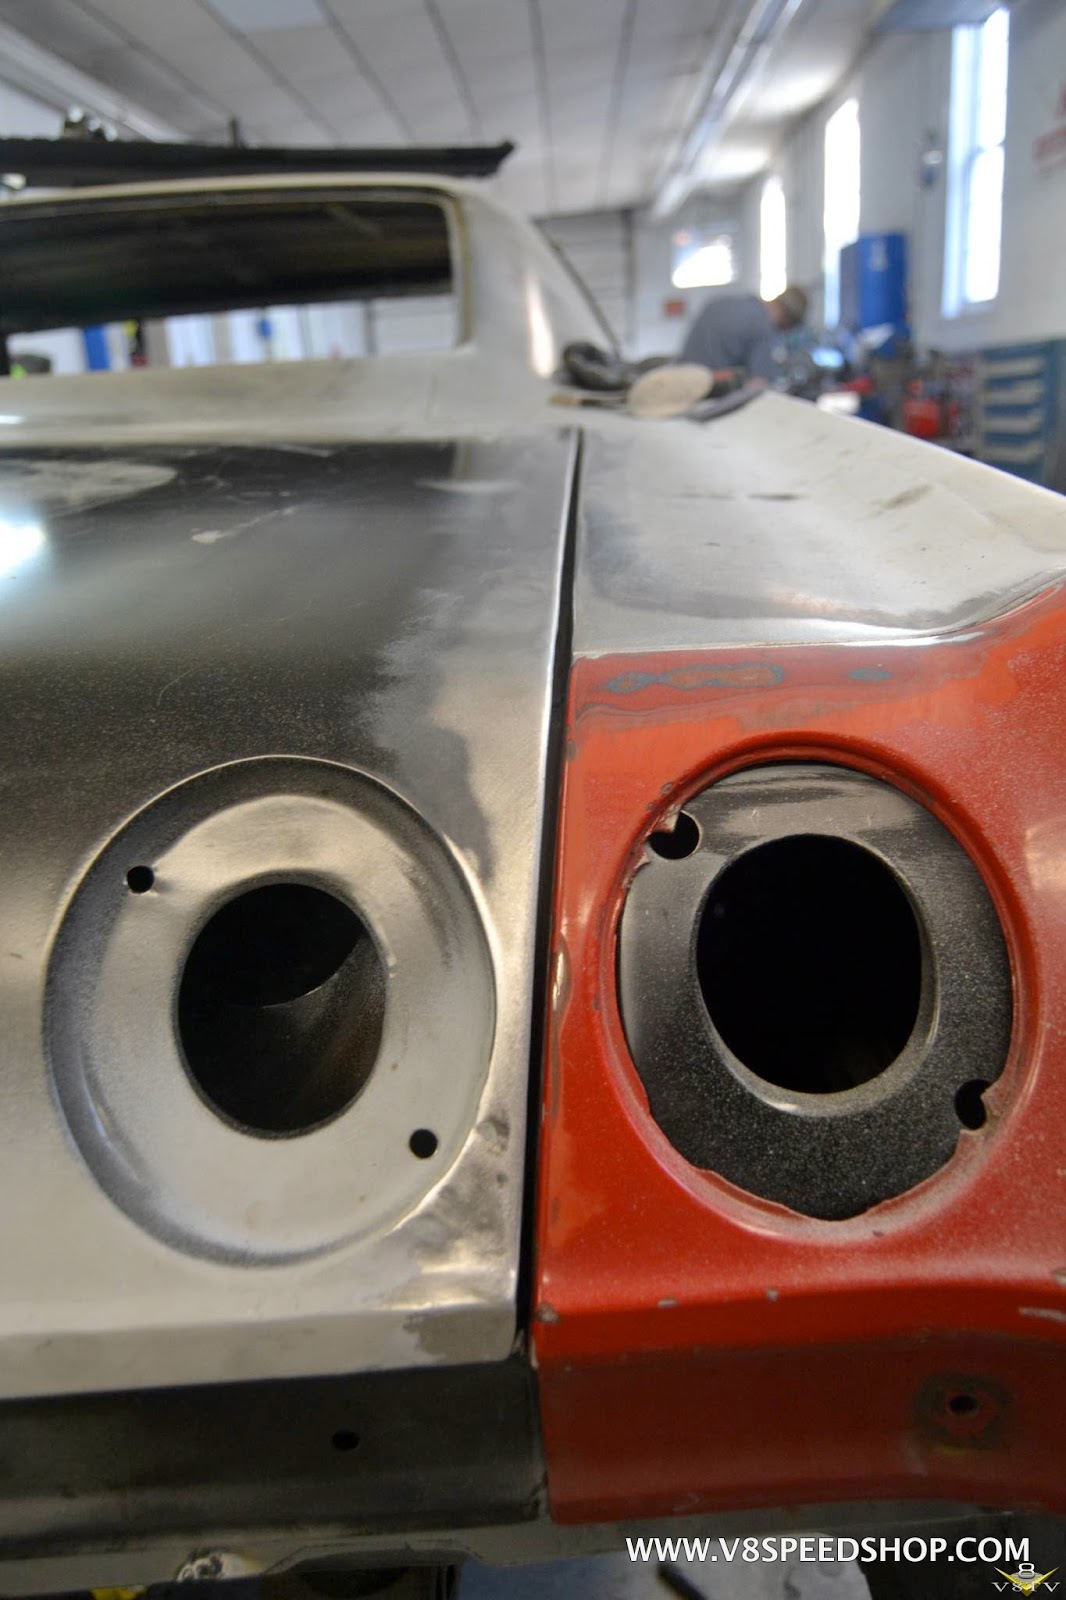
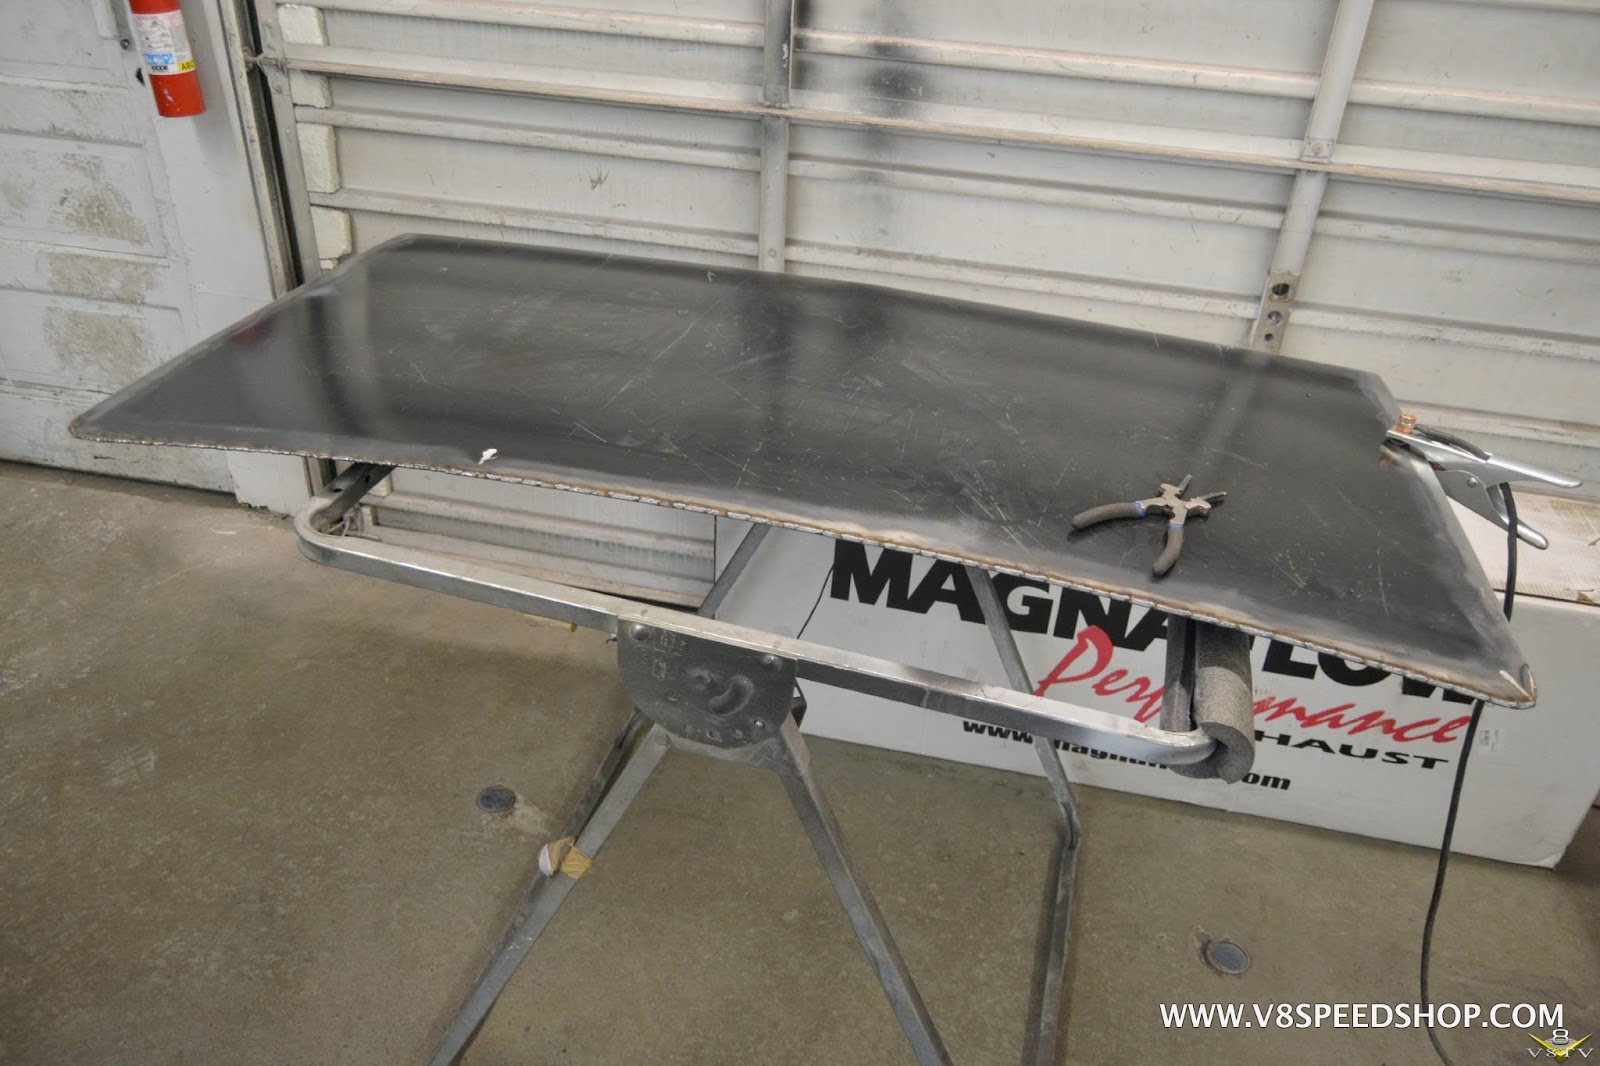
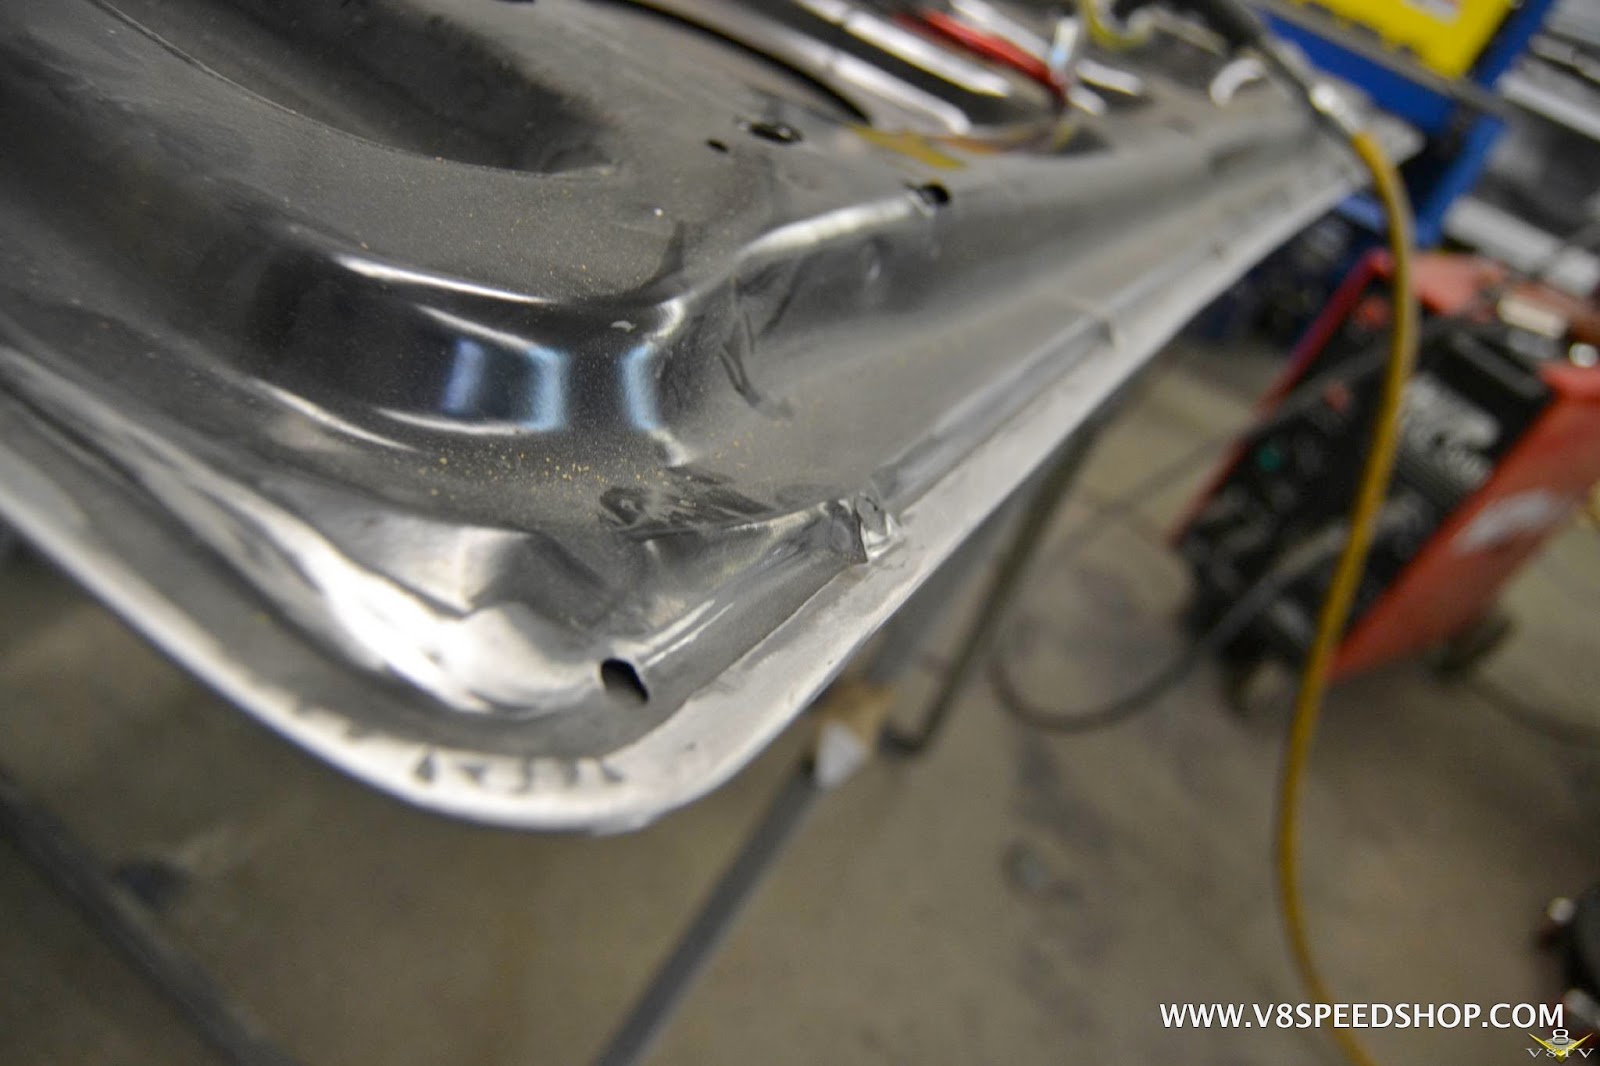
The sheet metal work continued, as our team addressed rust holes in the fenders. Our goal was to use as much of the original GM panels as possible.
 Kevin Oeste
V8 Speed and Resto Shop
V8TV
Muscle Car Of The Week
V8 Radio Podcast
All about us:
https://www.v8speedshop.com
05-14-2016 #34
Registered User
- Join Date
- Dec 2004
- Location
- Midwest
- Posts
- 2,261
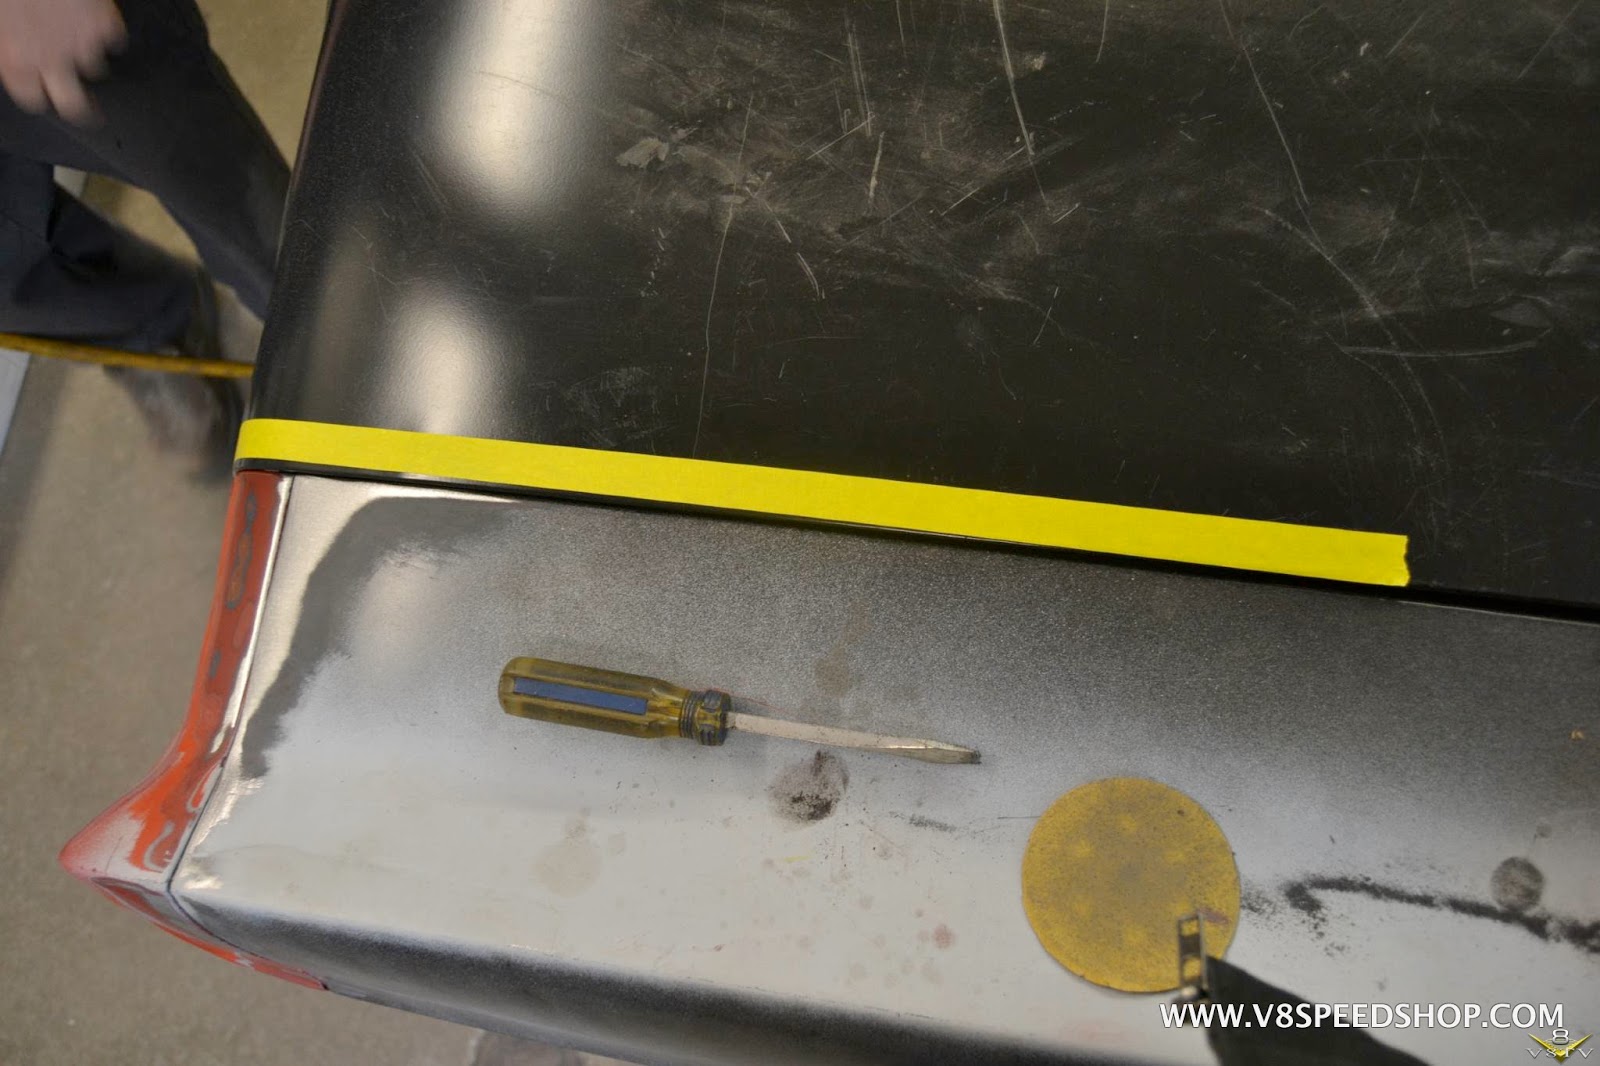
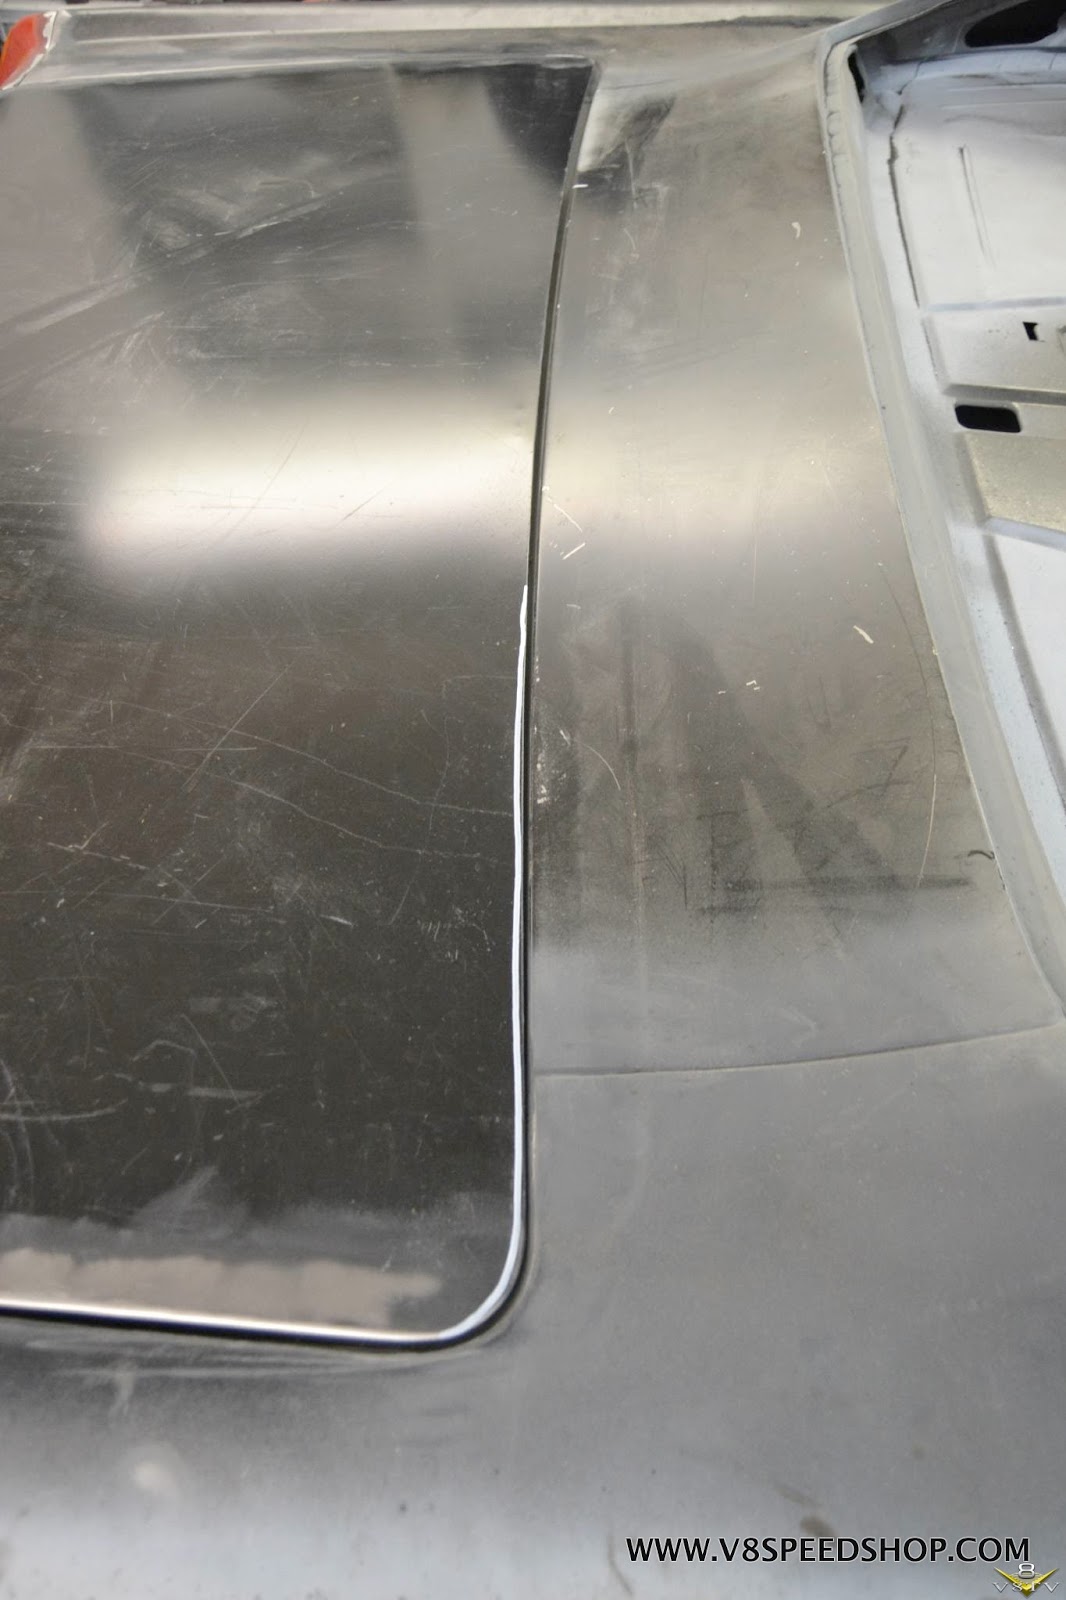
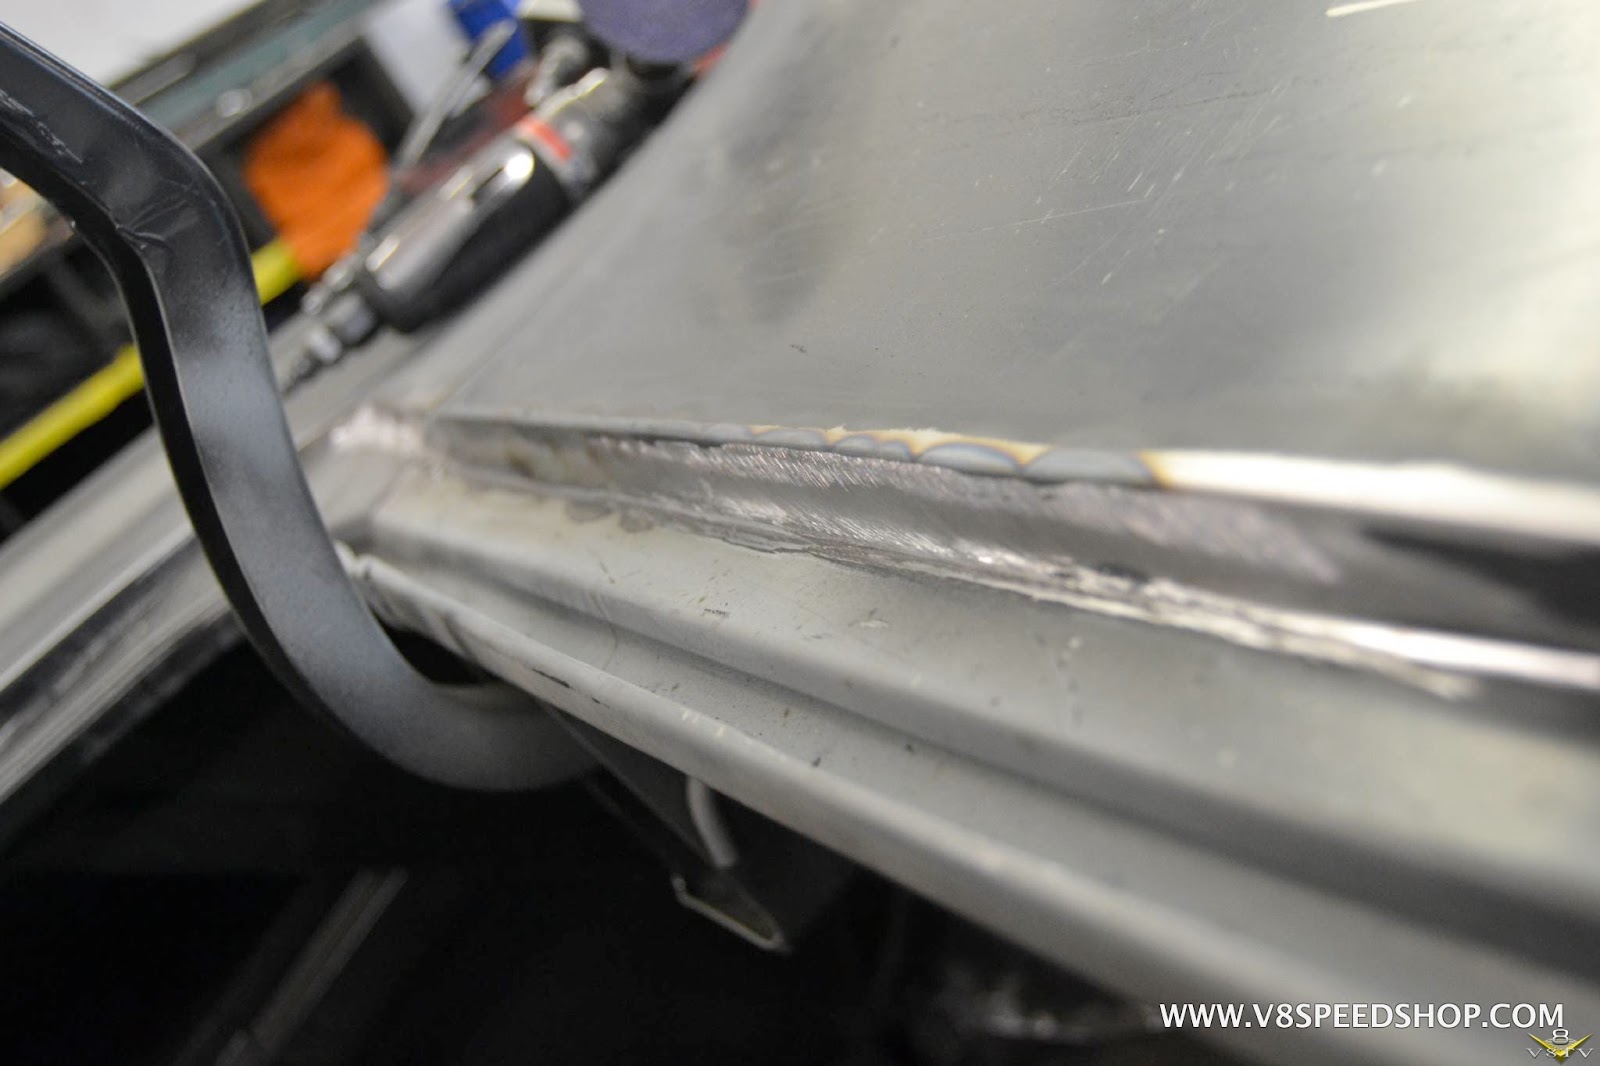
Next, the crew worked on fitting the quarter panel extensions and rear decklid to achieve a better fit.
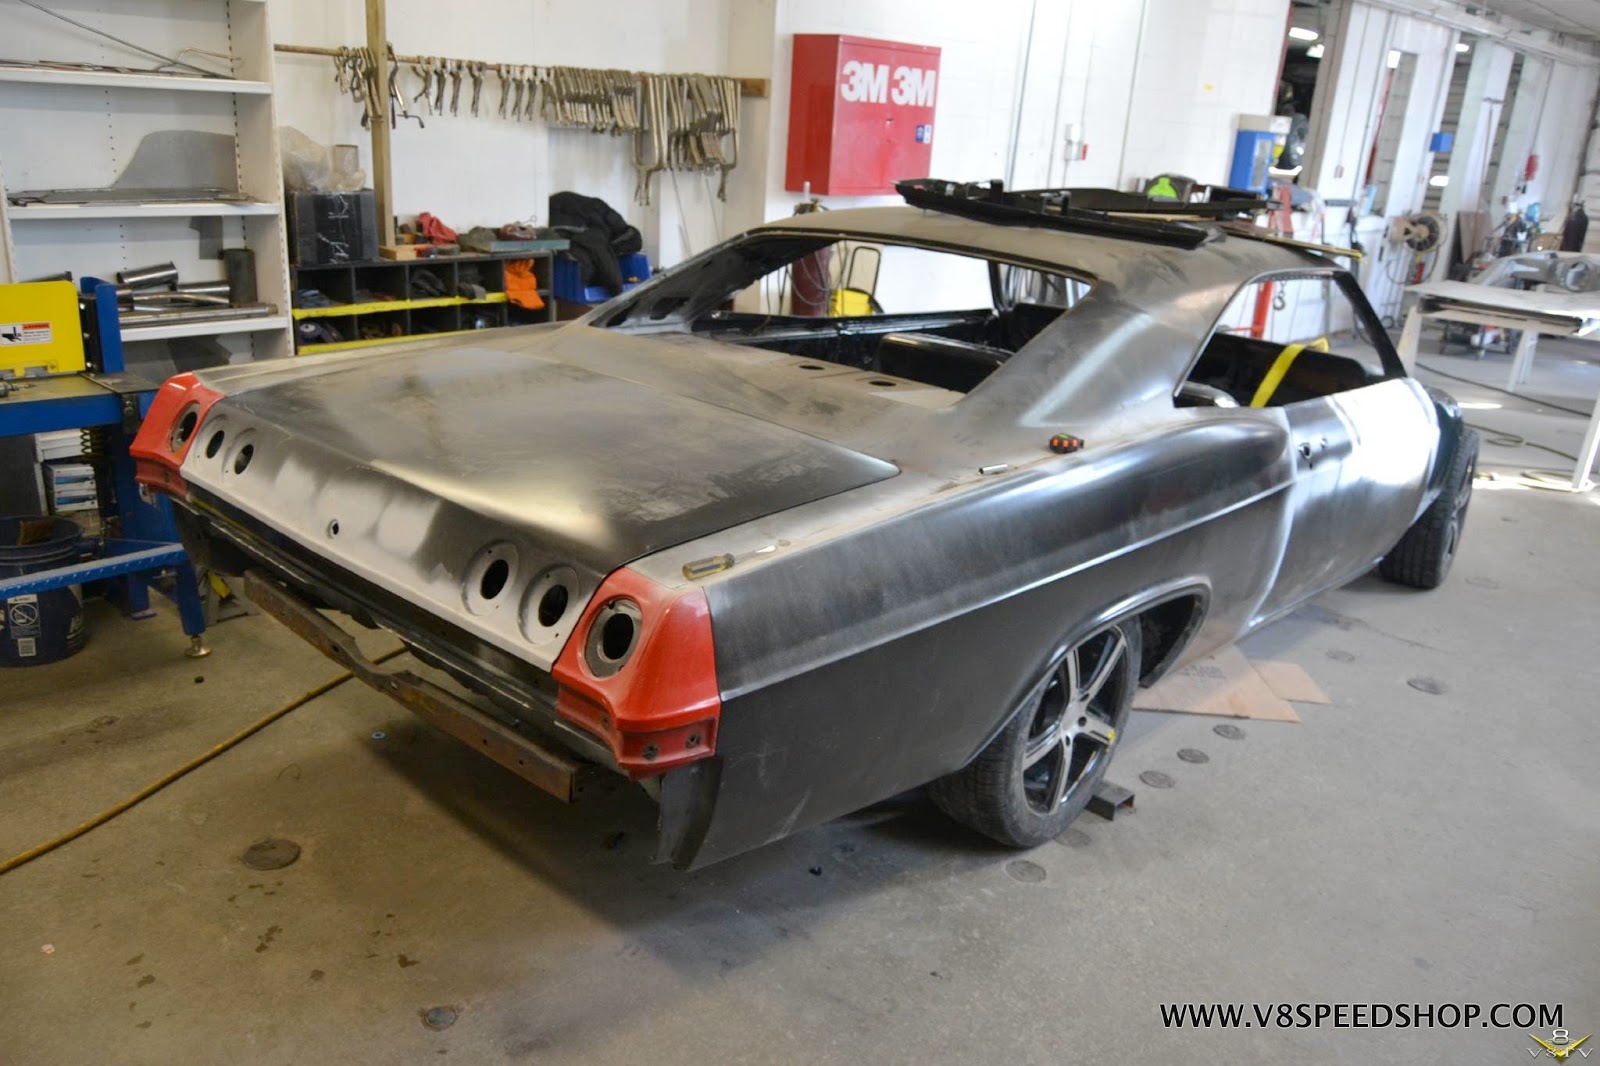
A little cutting, welding, and grinding were all needed to achieve consistent panel gaps.

After…
 Kevin Oeste
V8 Speed and Resto Shop
V8TV
Muscle Car Of The Week
V8 Radio Podcast
All about us:
https://www.v8speedshop.com
05-14-2016 #35
Registered User
- Join Date
- Dec 2004
- Location
- Midwest
- Posts
- 2,261
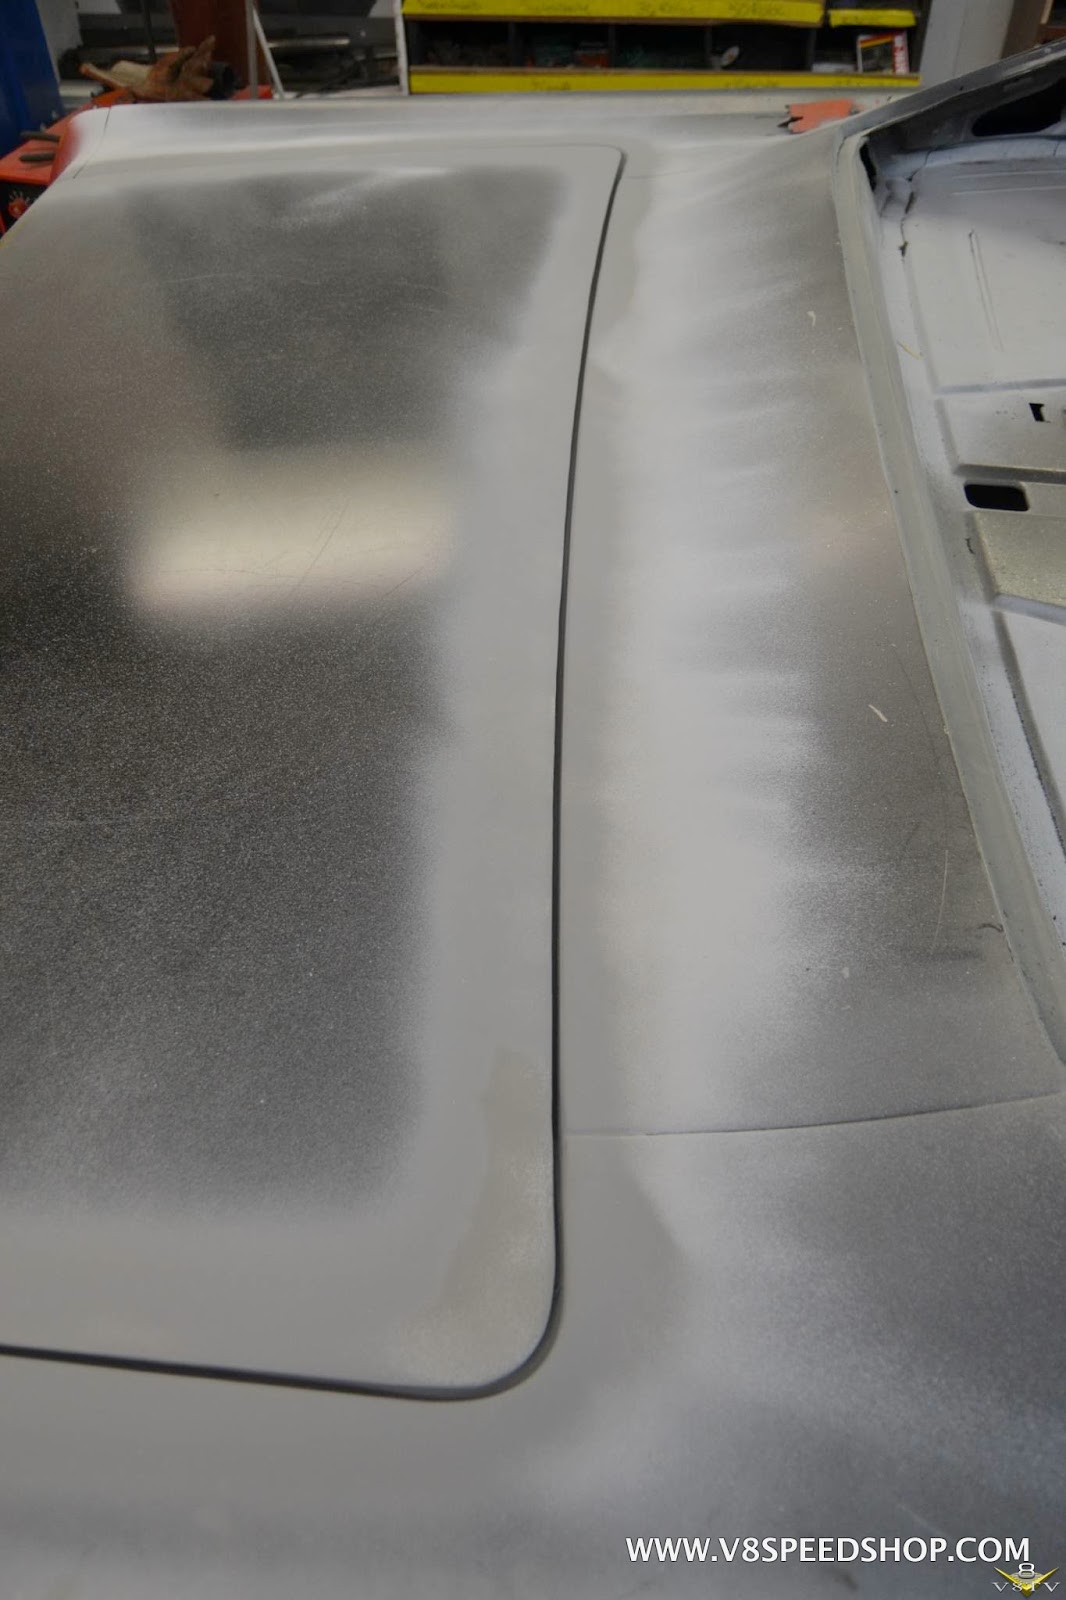
The trunk edge radius was also refined.

 Kevin Oeste
V8 Speed and Resto Shop
V8TV
Muscle Car Of The Week
V8 Radio Podcast
All about us:
https://www.v8speedshop.com
09-29-2016 #36
Registered User
- Join Date
- Dec 2004
- Location
- Midwest
- Posts
- 2,261
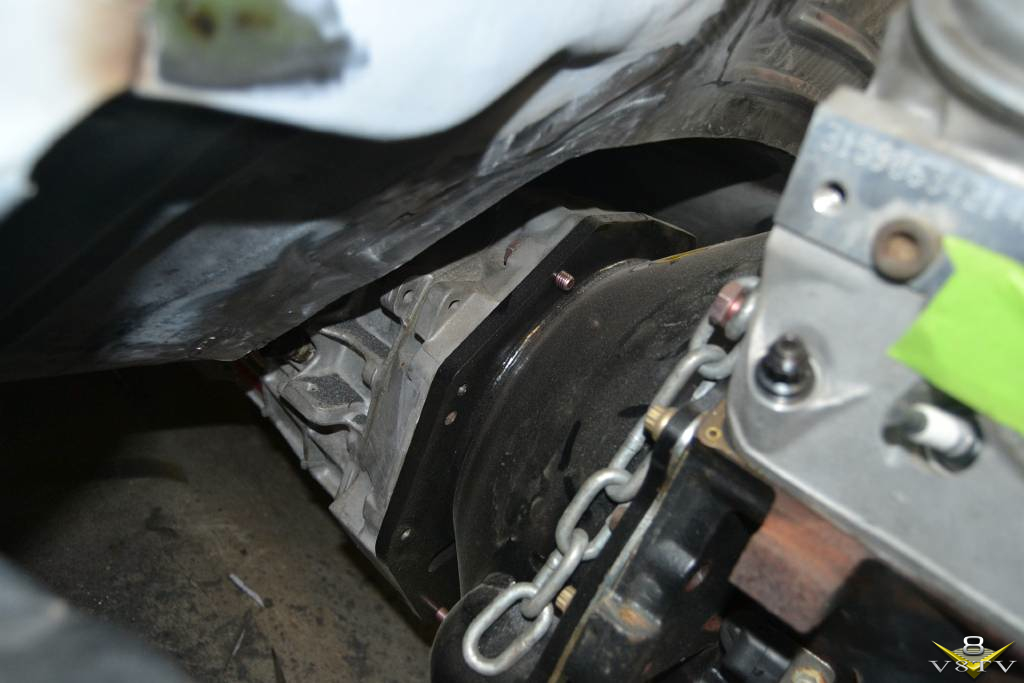
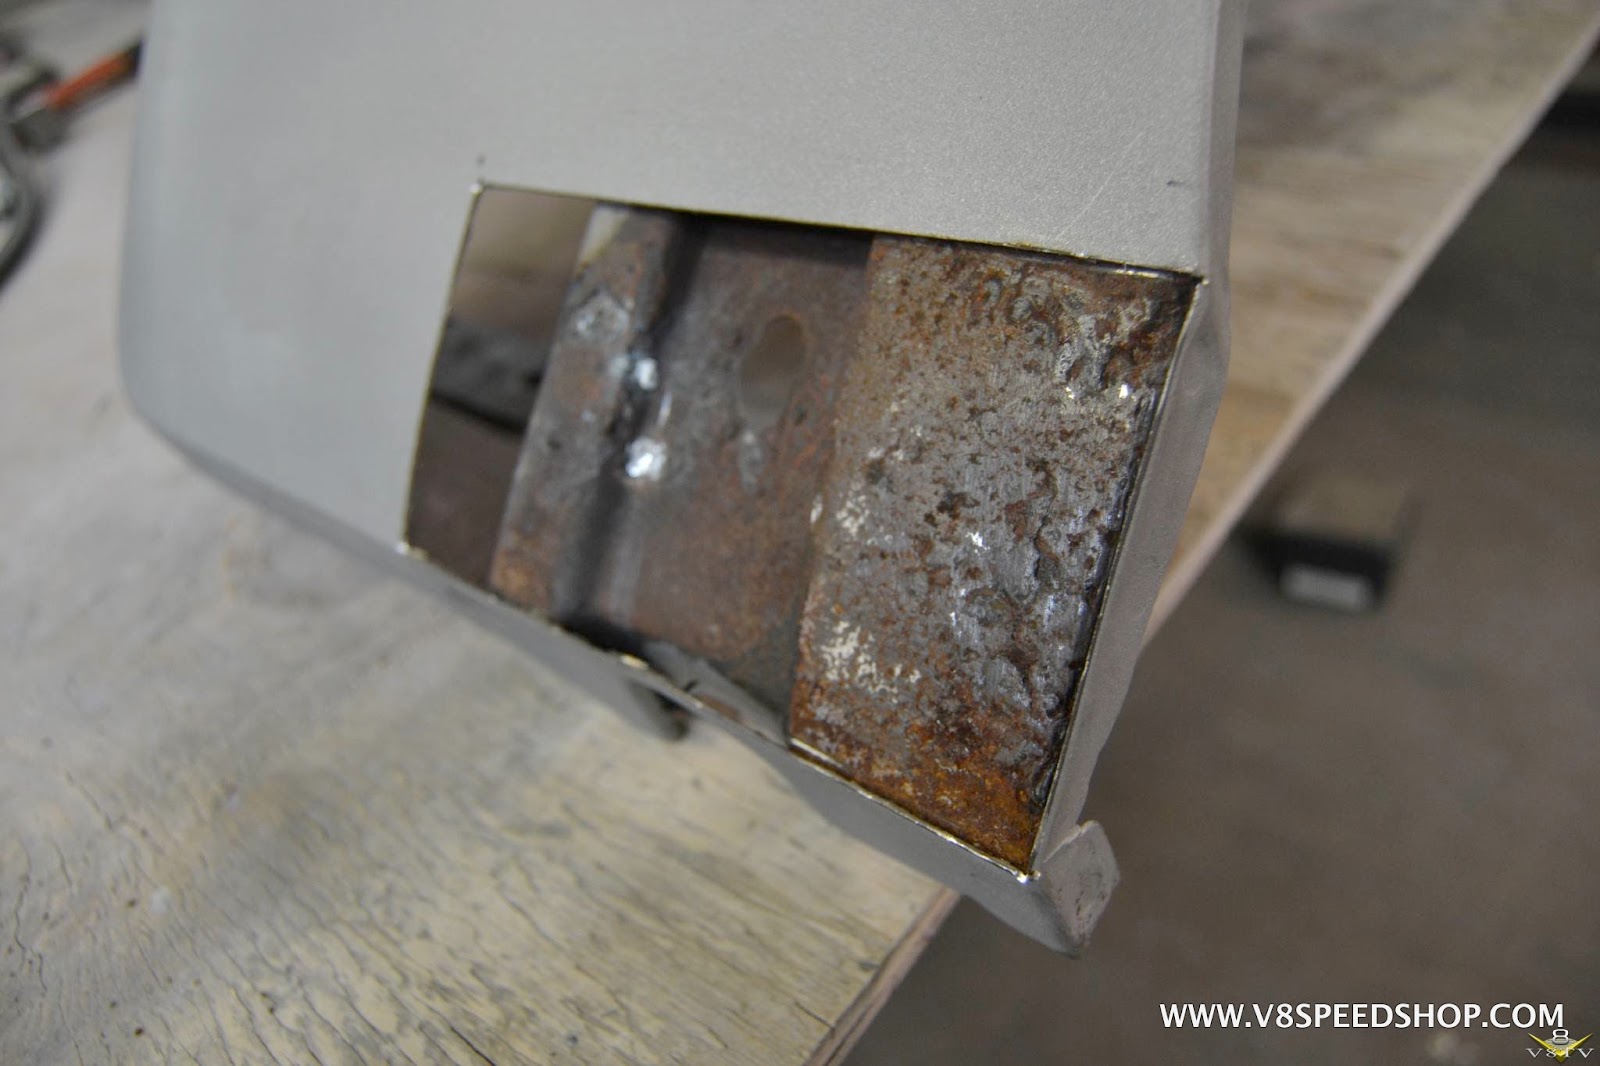
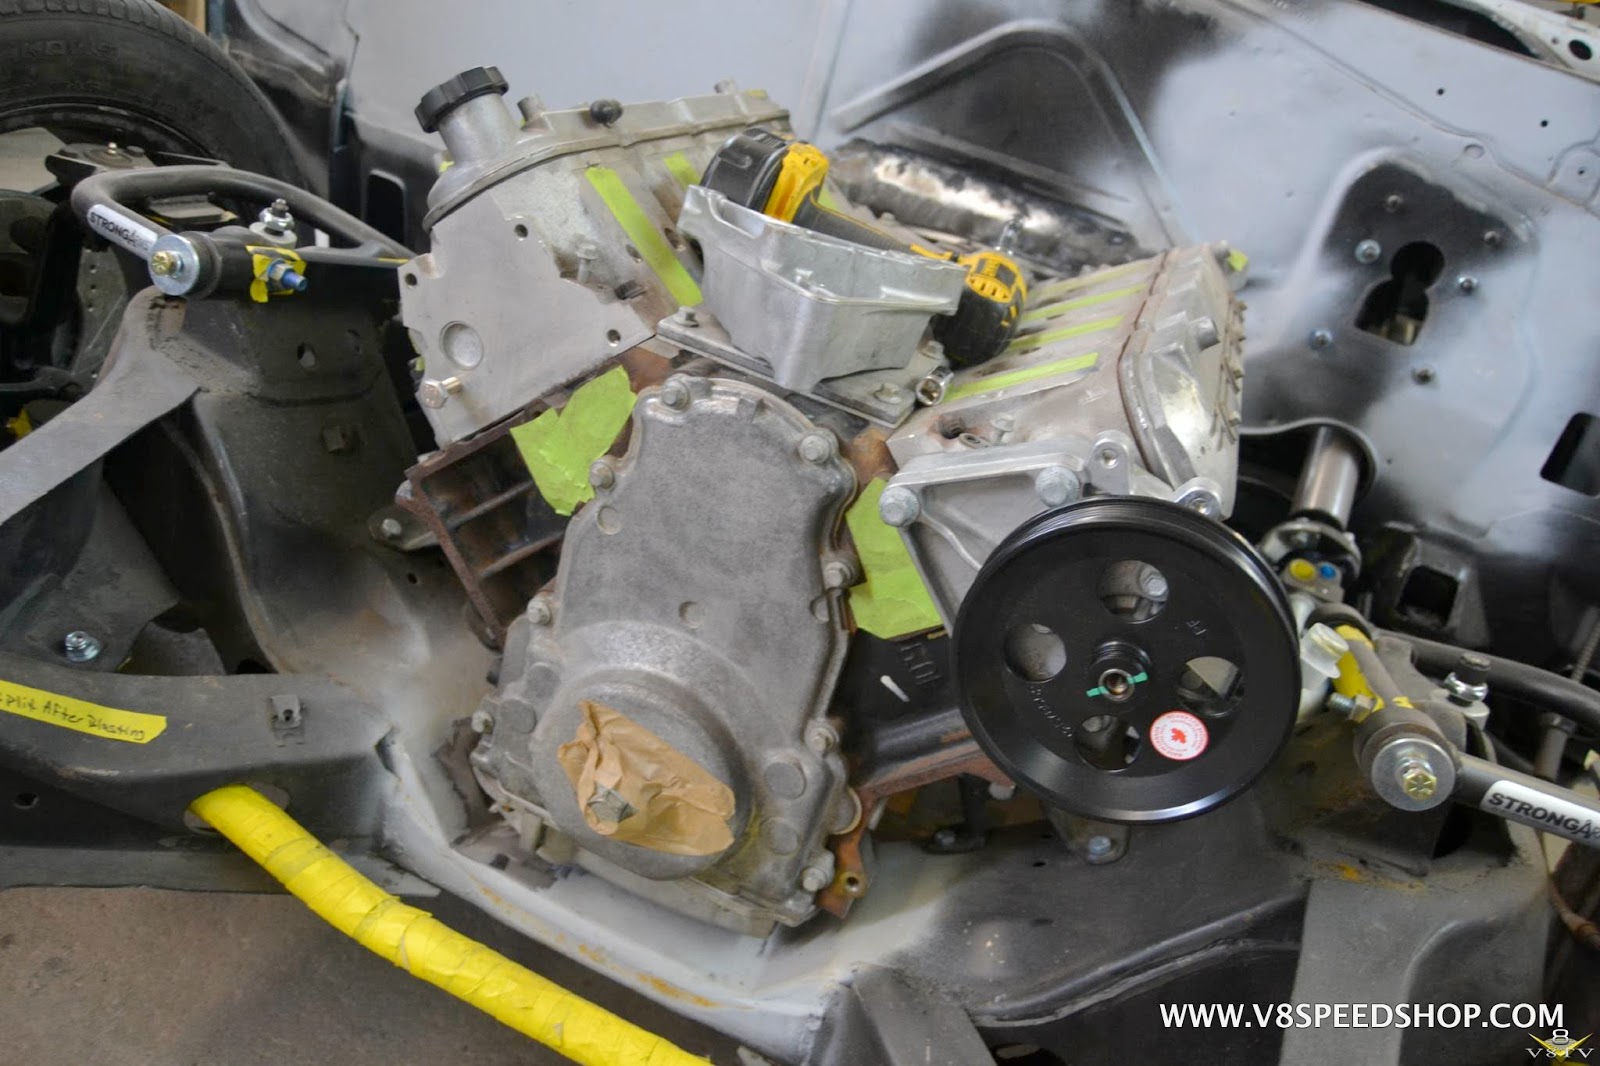
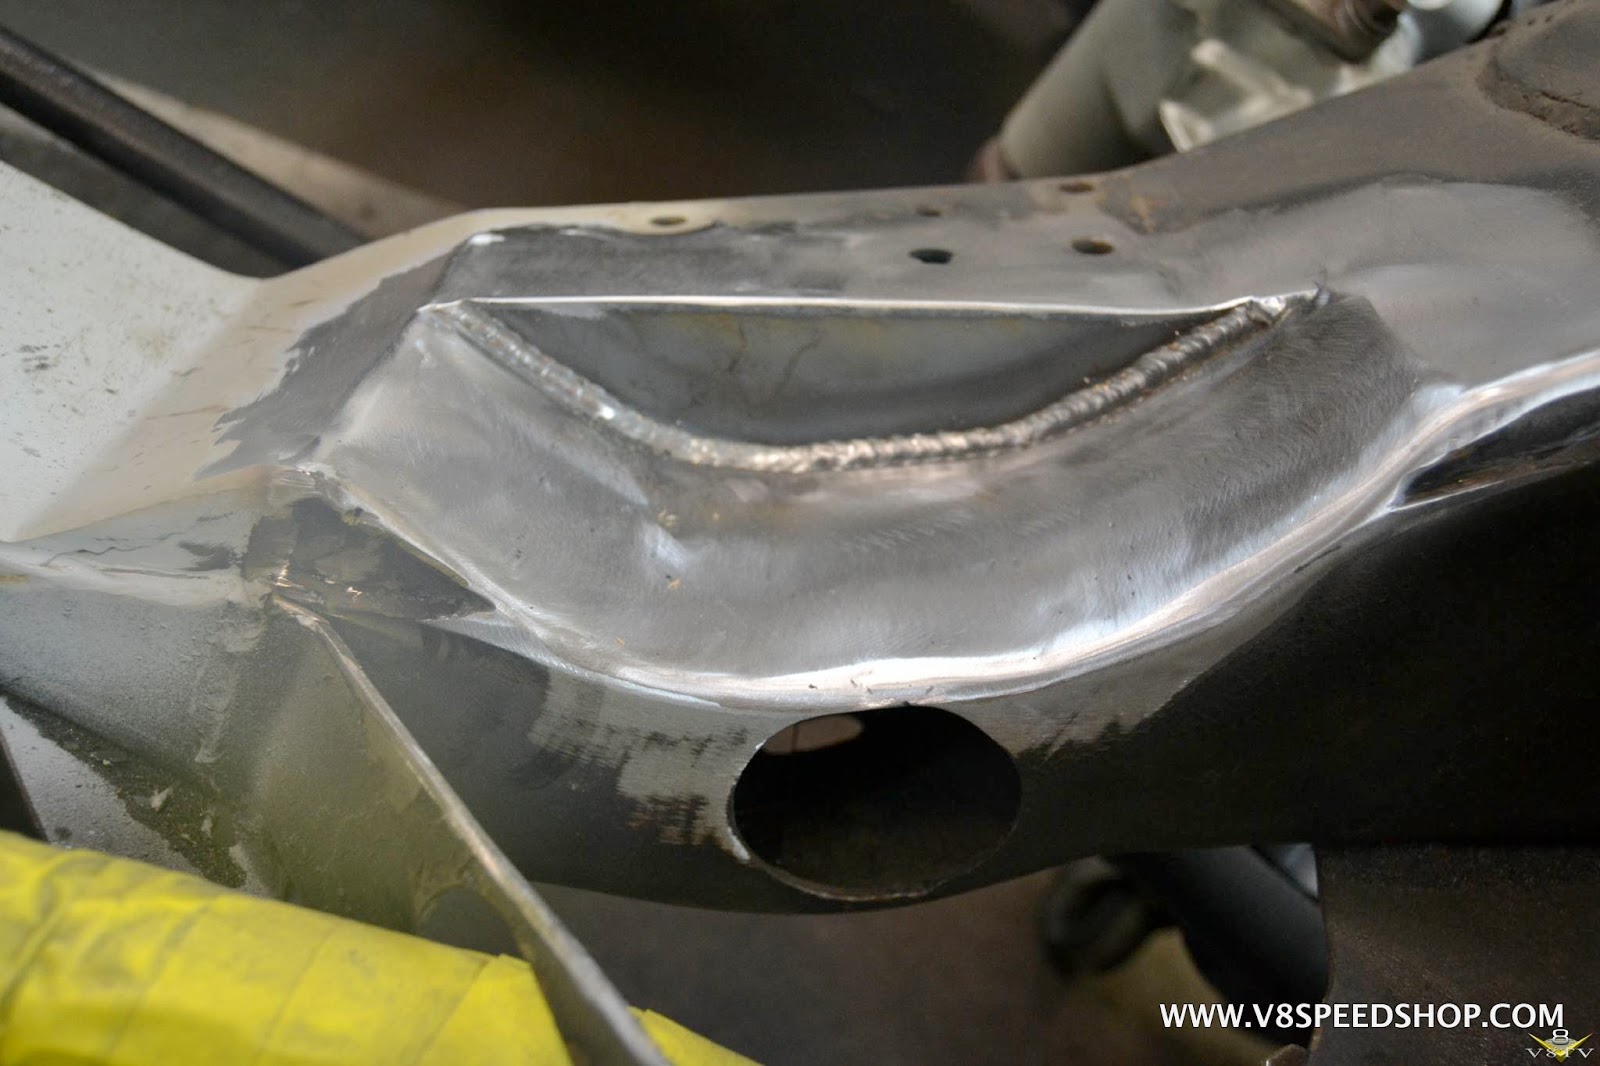
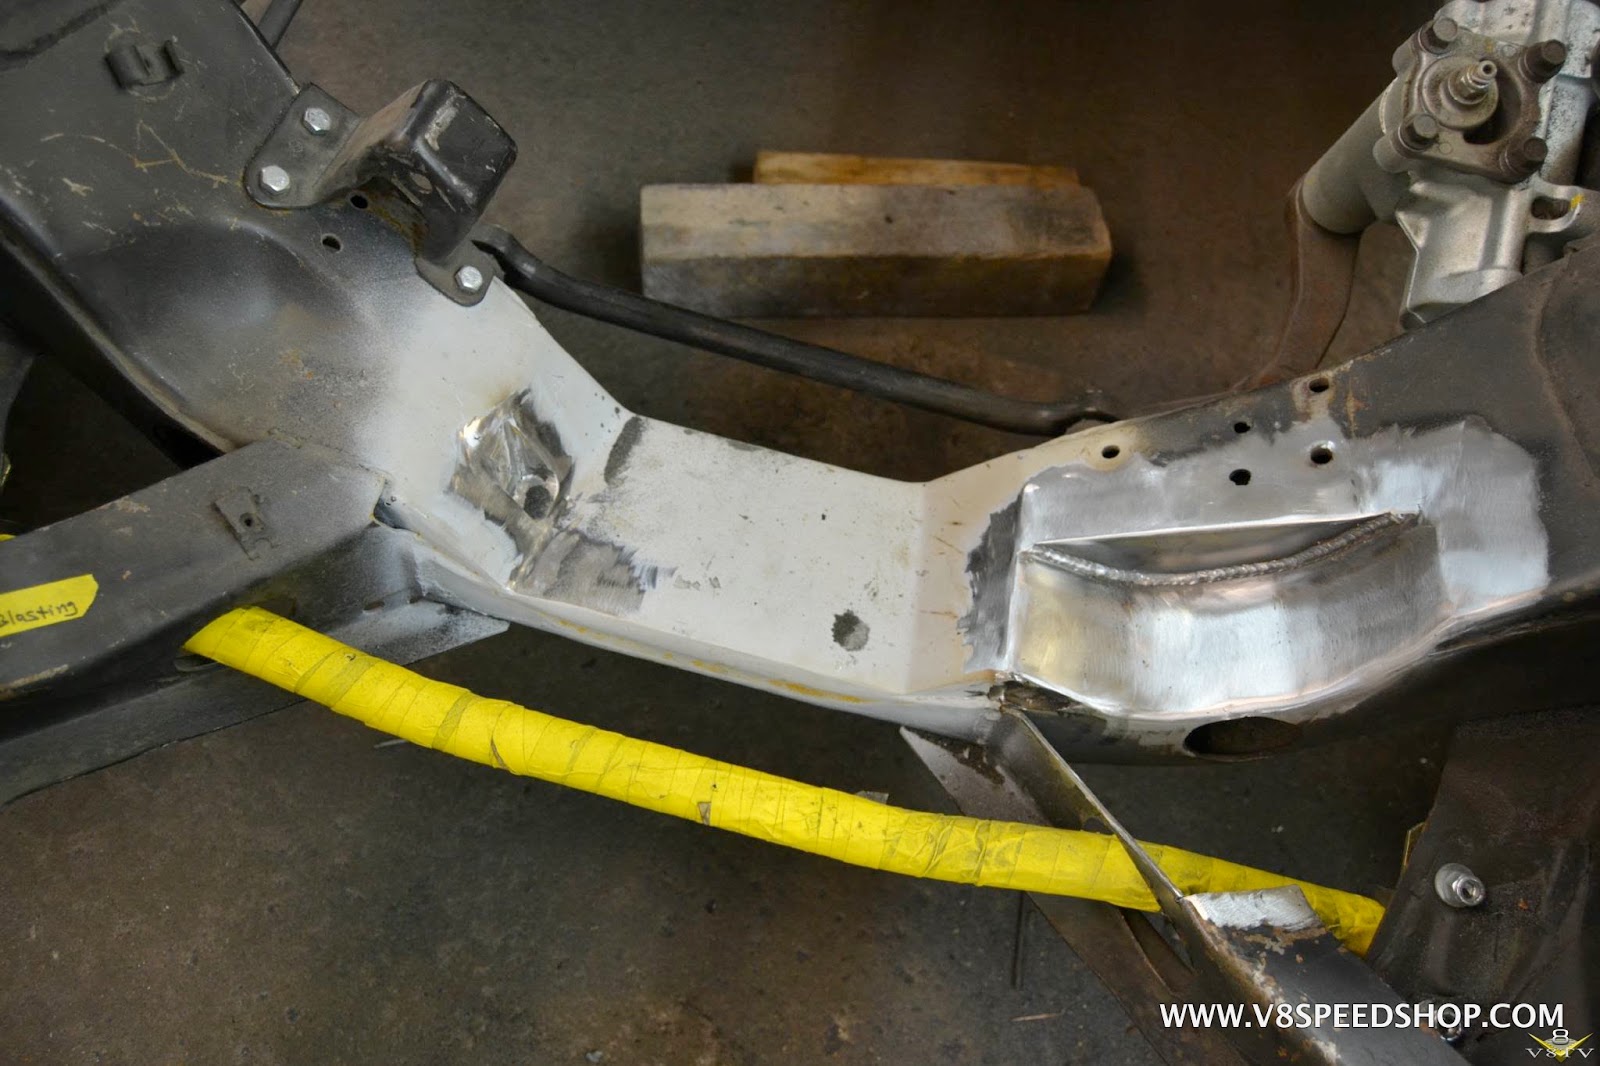
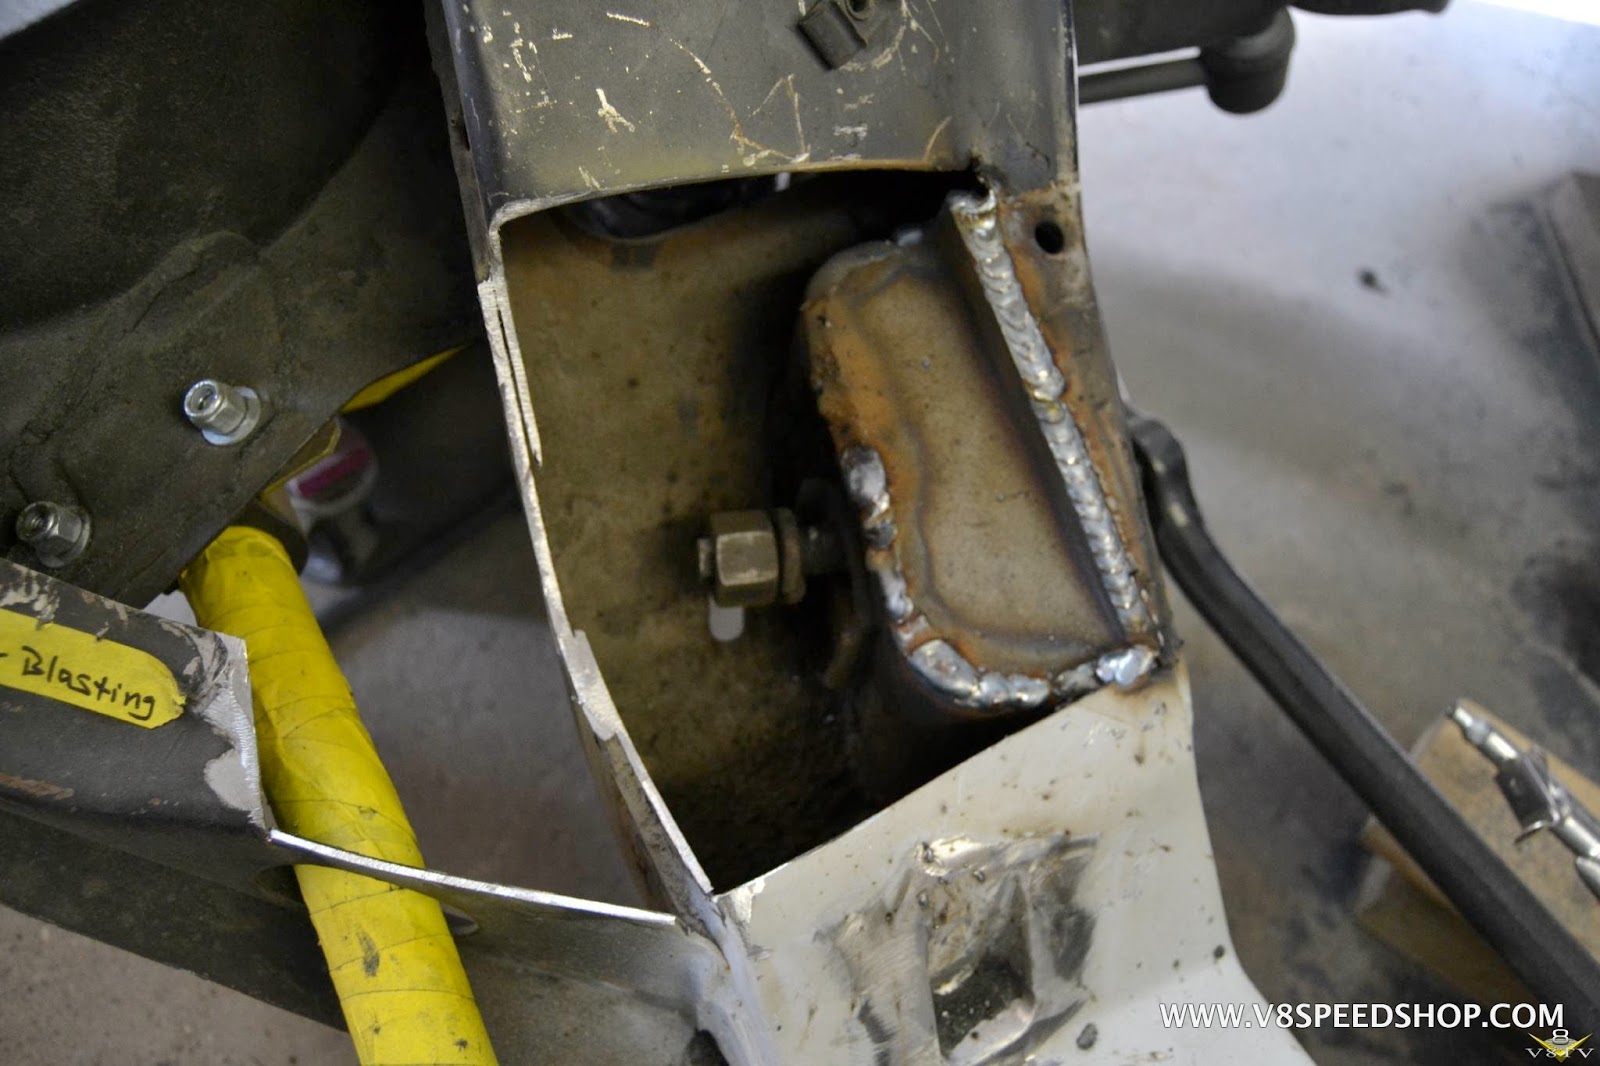
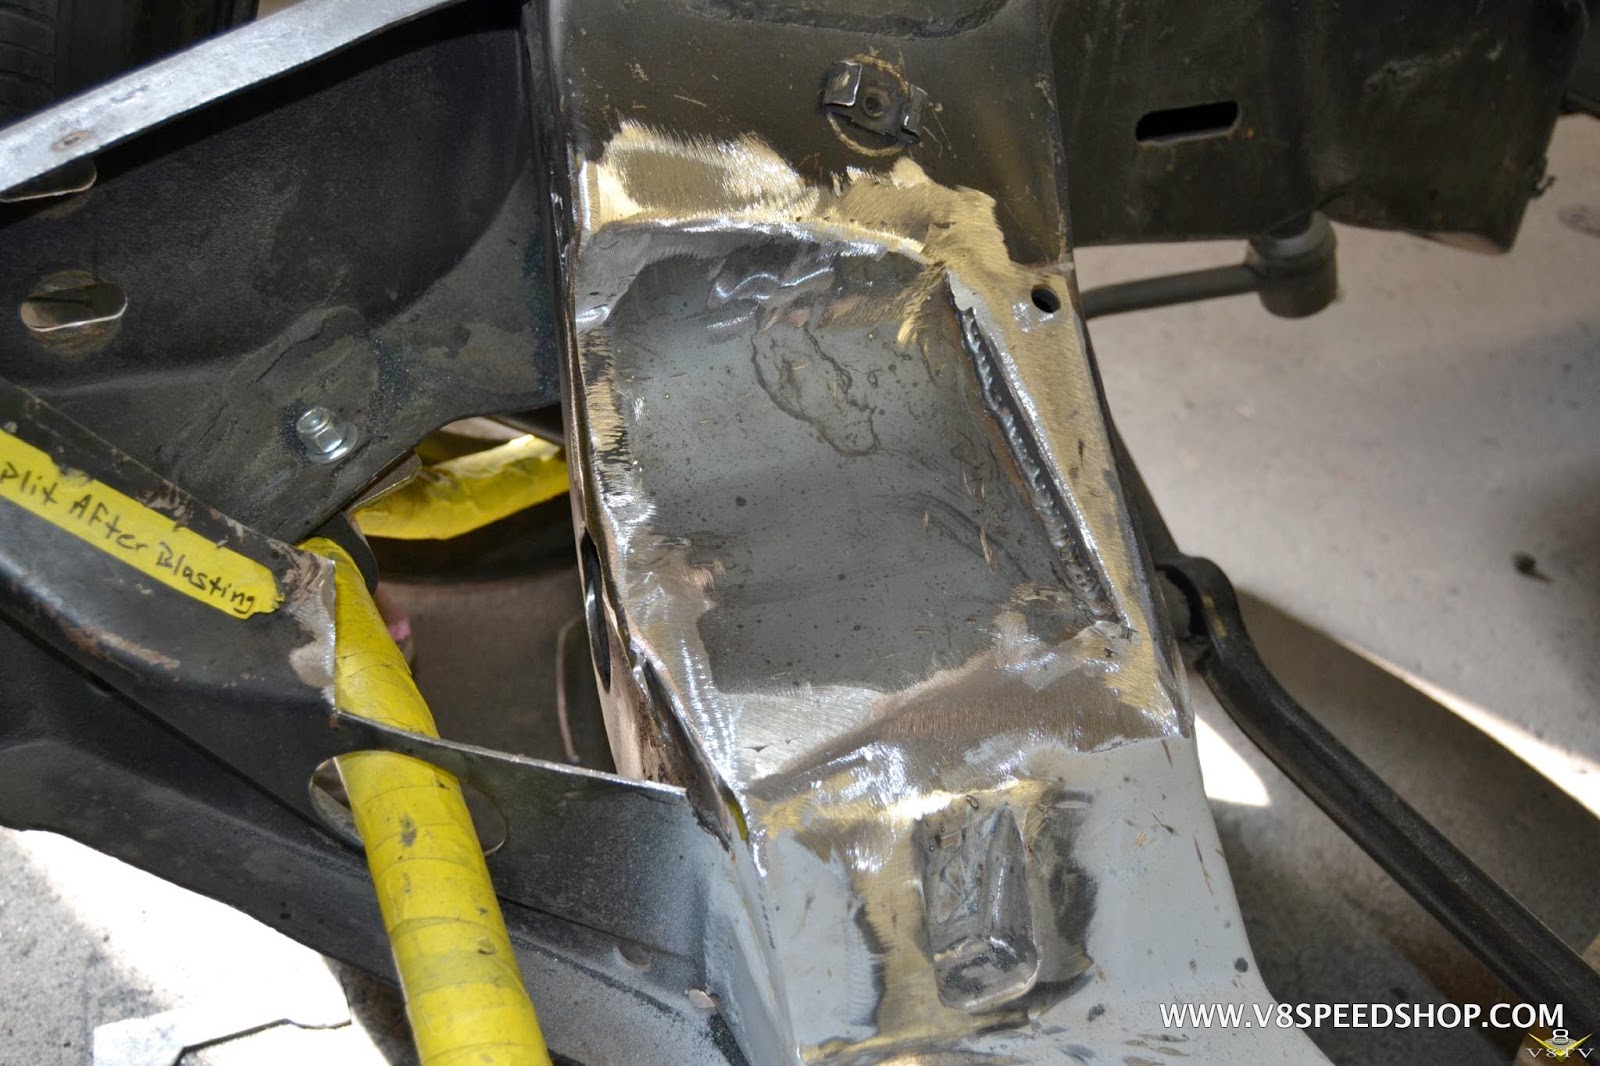
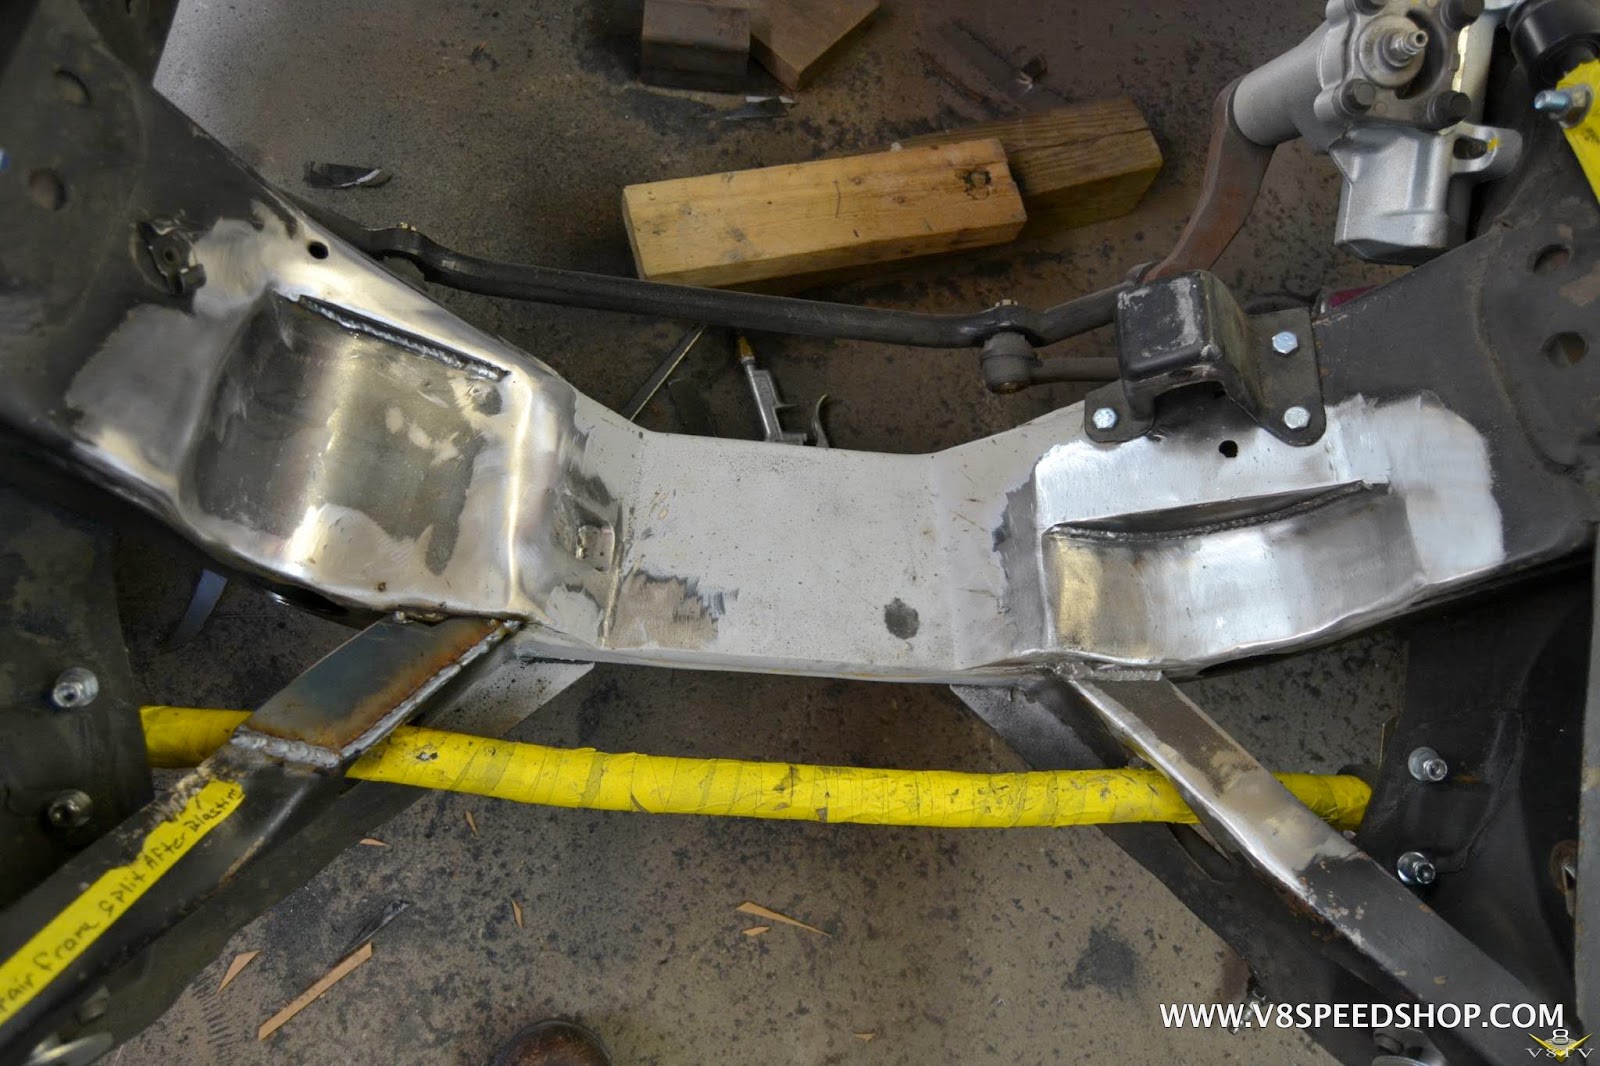
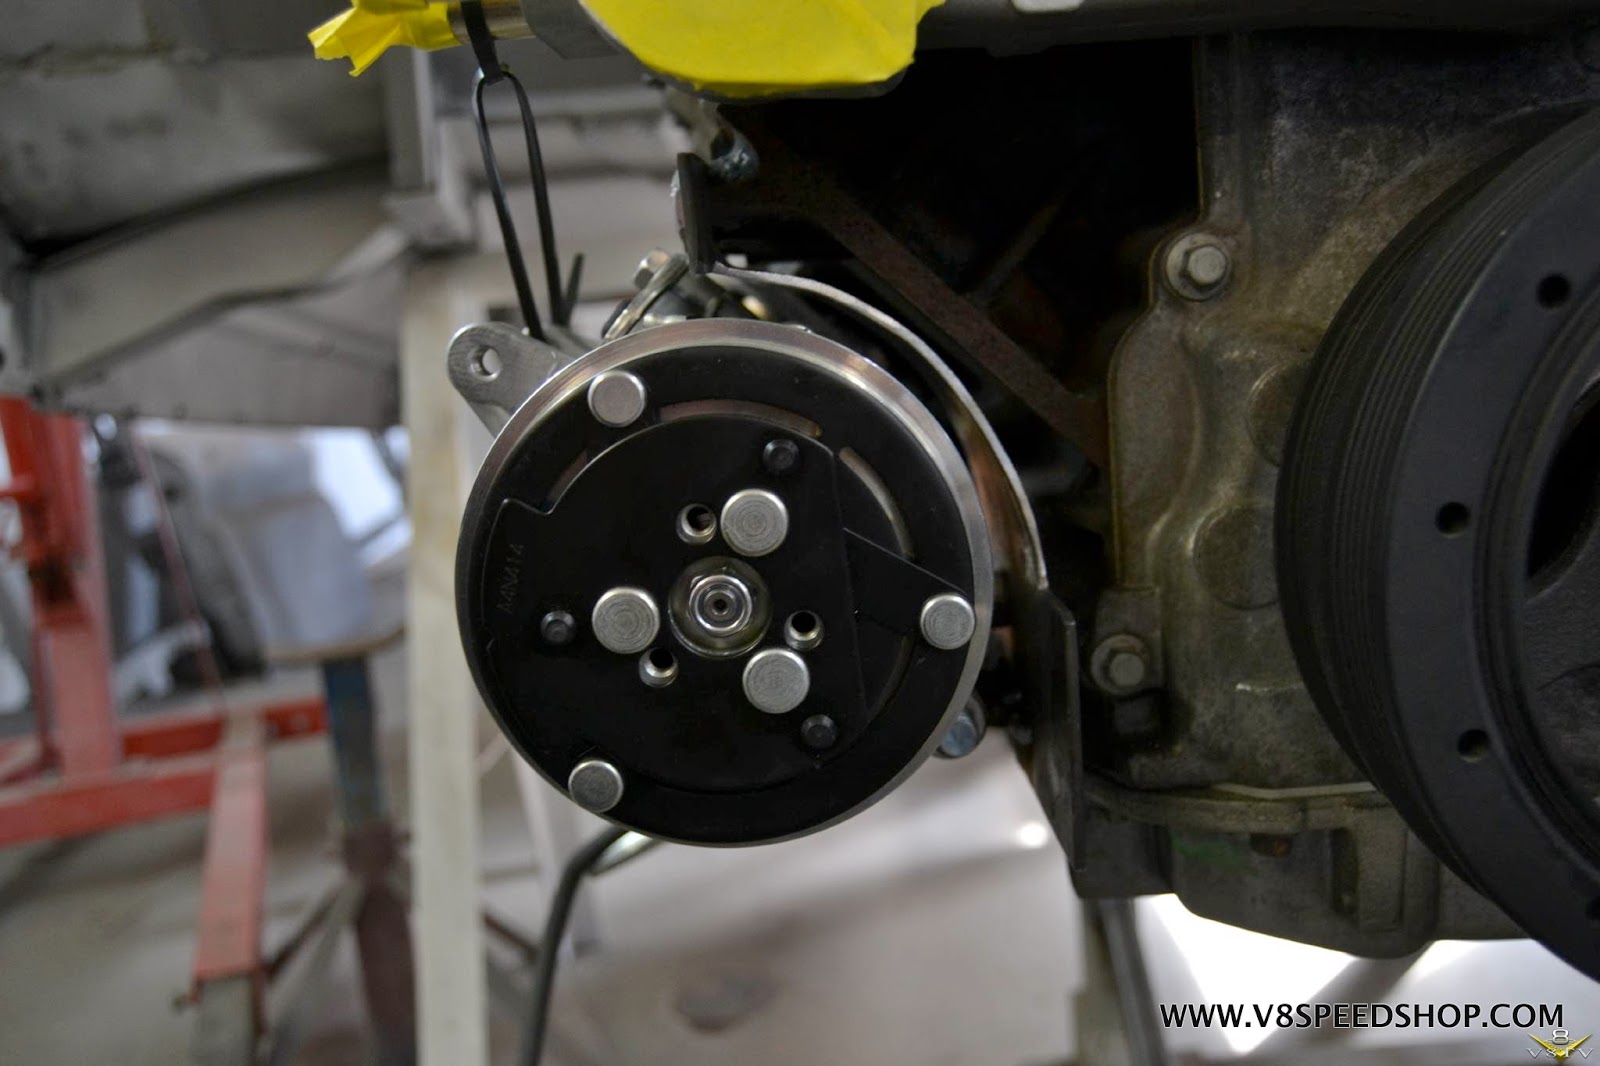
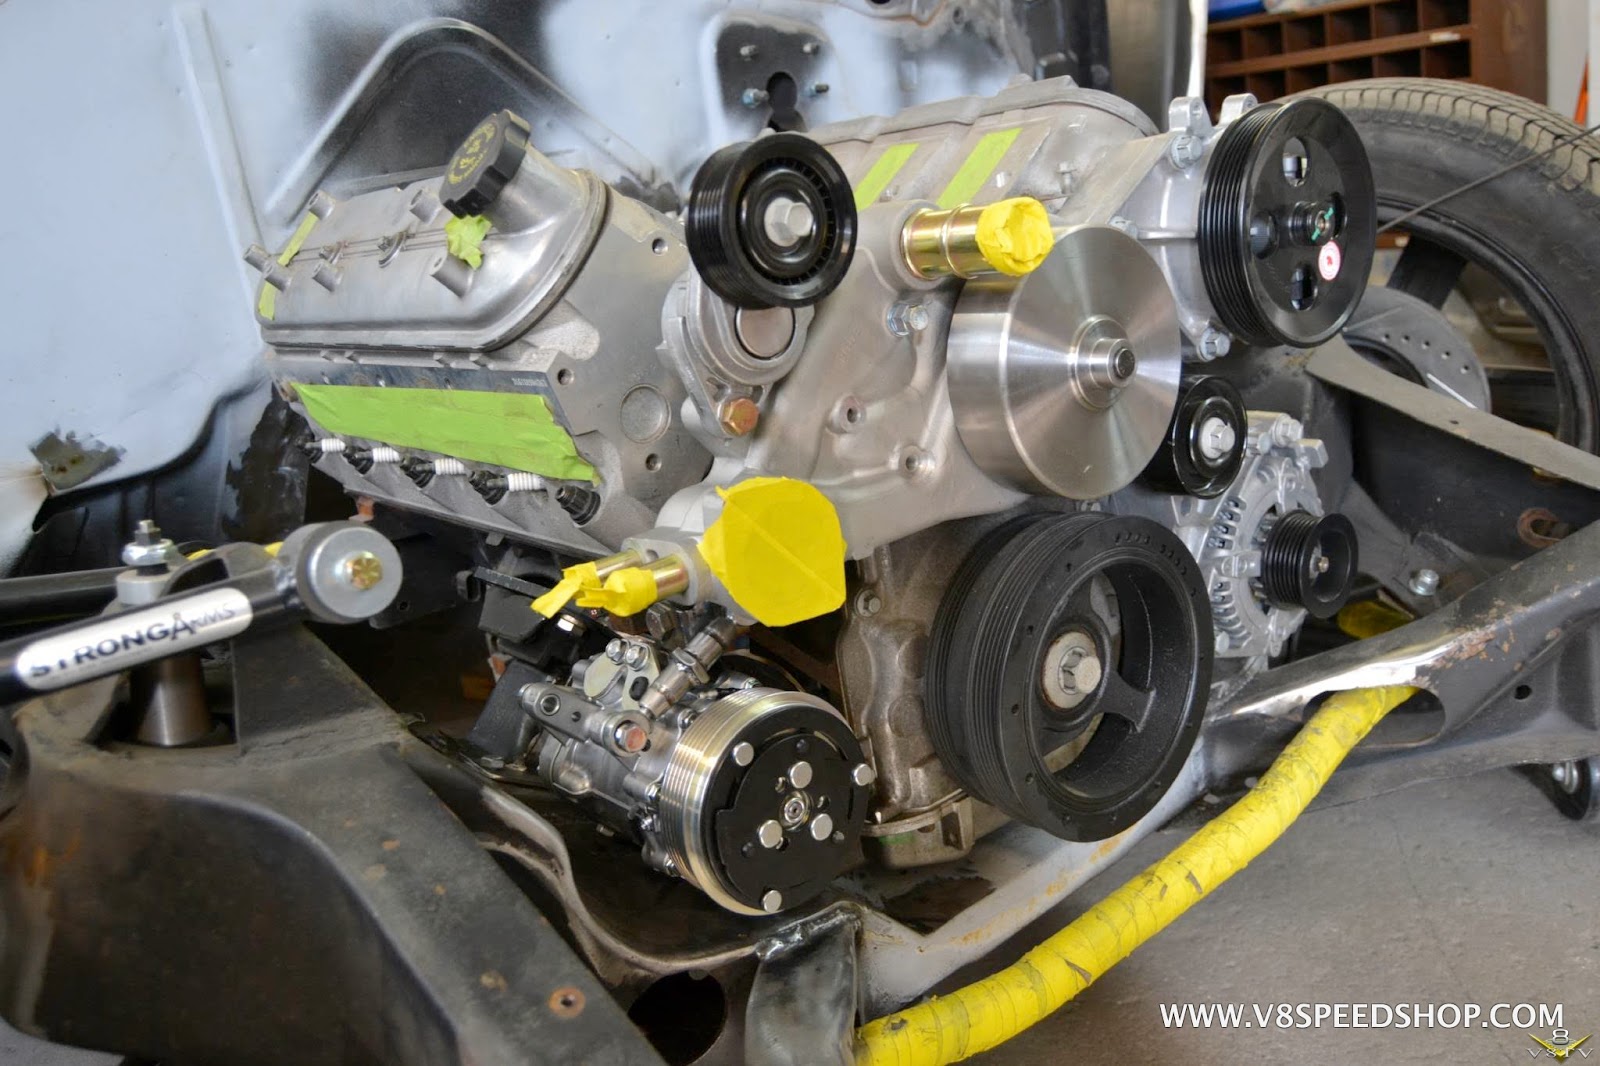
Meanwhile, a notch was cut in the lower front crossmember for the alternator and air conditioning compressor clearance.

 Kevin Oeste
V8 Speed and Resto Shop
V8TV
Muscle Car Of The Week
V8 Radio Podcast
All about us:
https://www.v8speedshop.com
09-29-2016 #37
Registered User
- Join Date
- Dec 2004
- Location
- Midwest
- Posts
- 2,261
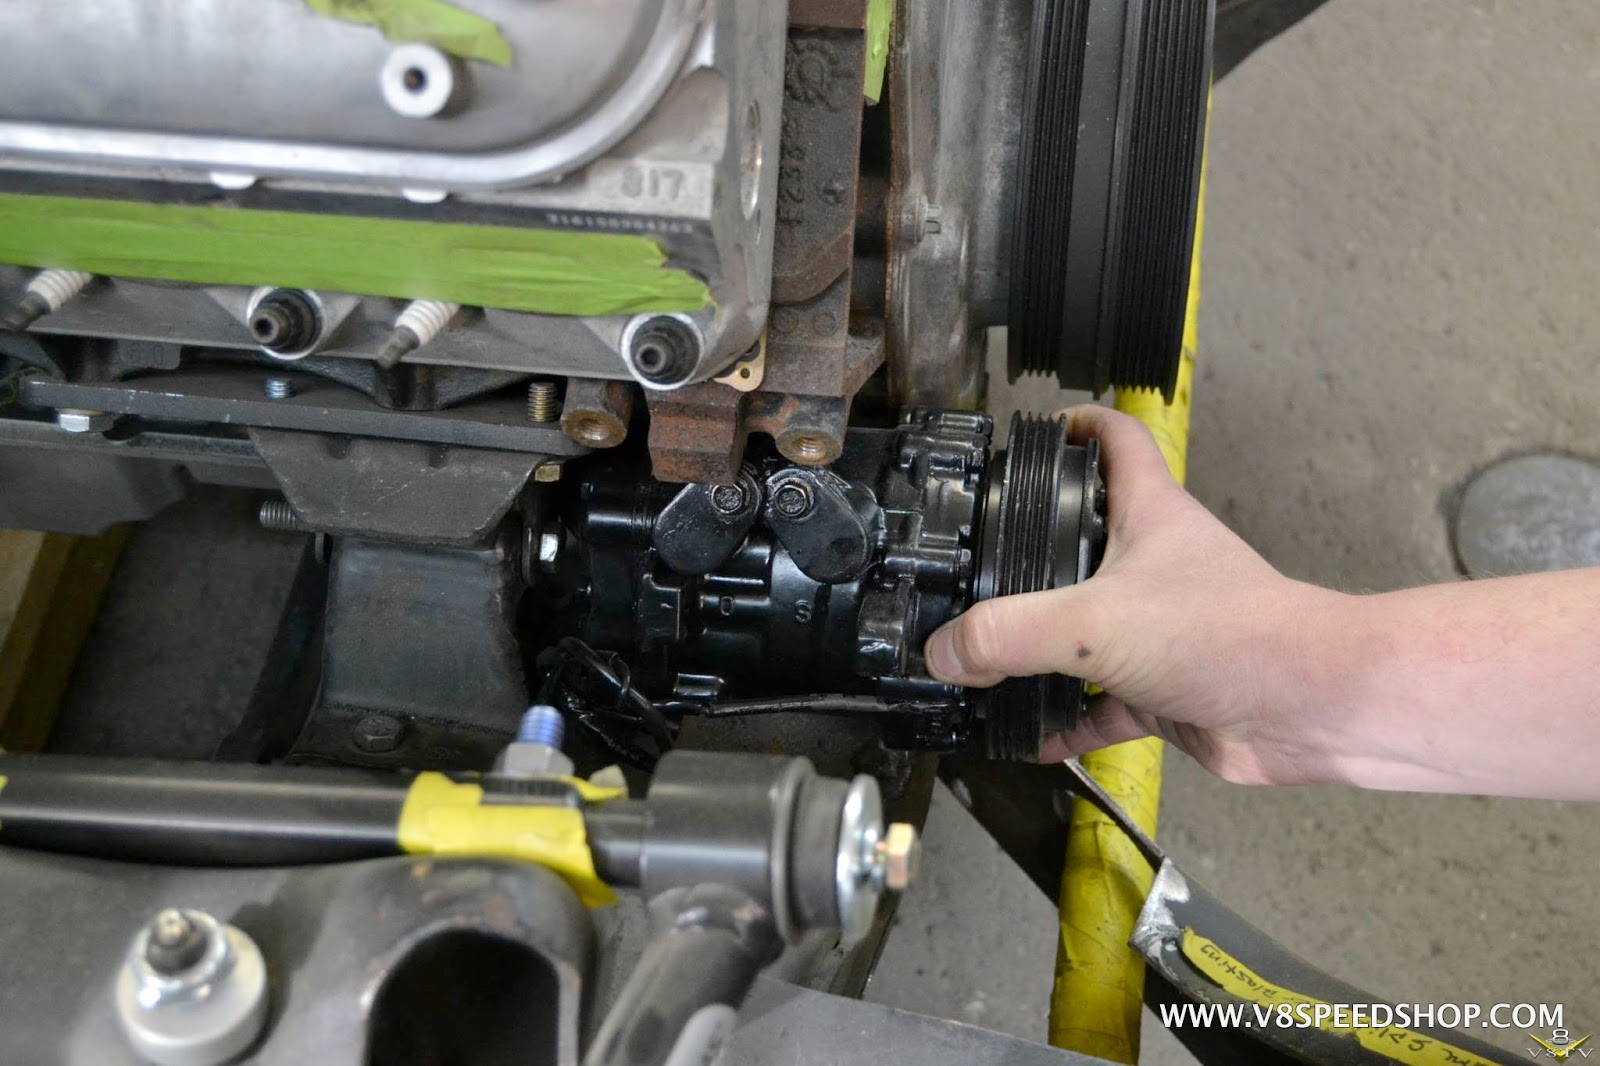
The A/C compressor mounts low on an LS engine, and it is not adjustable as it mounts solidly to the block. We needed space for ours.
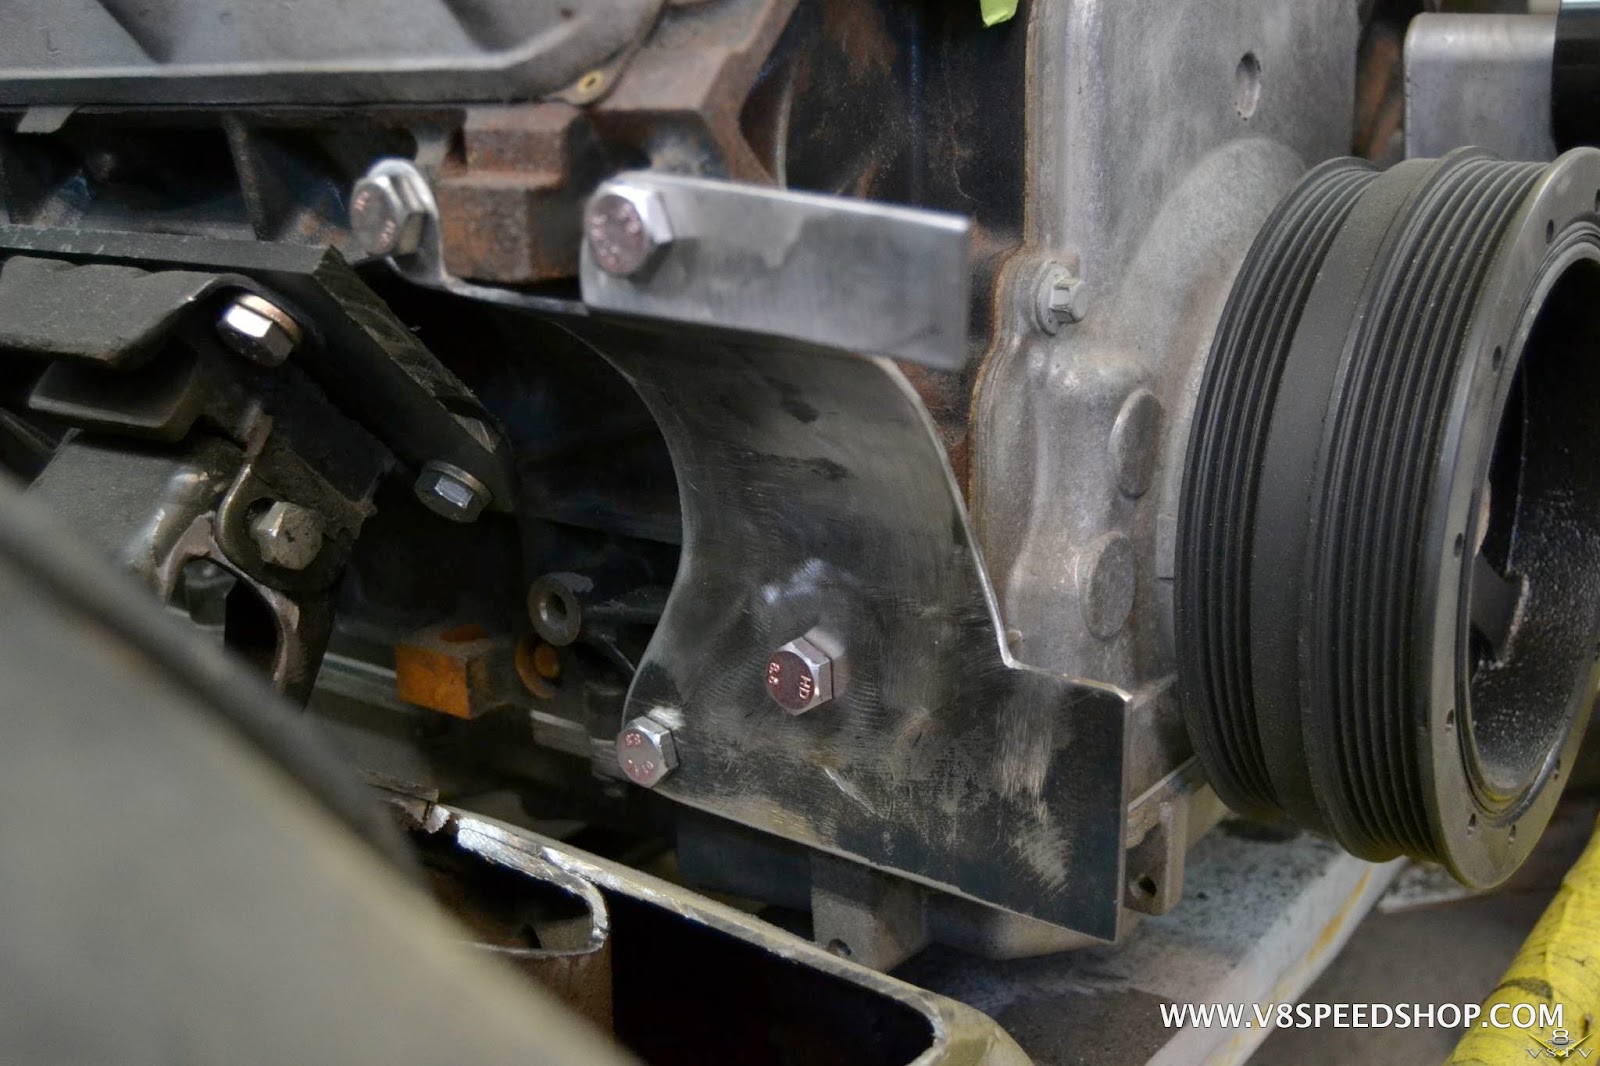
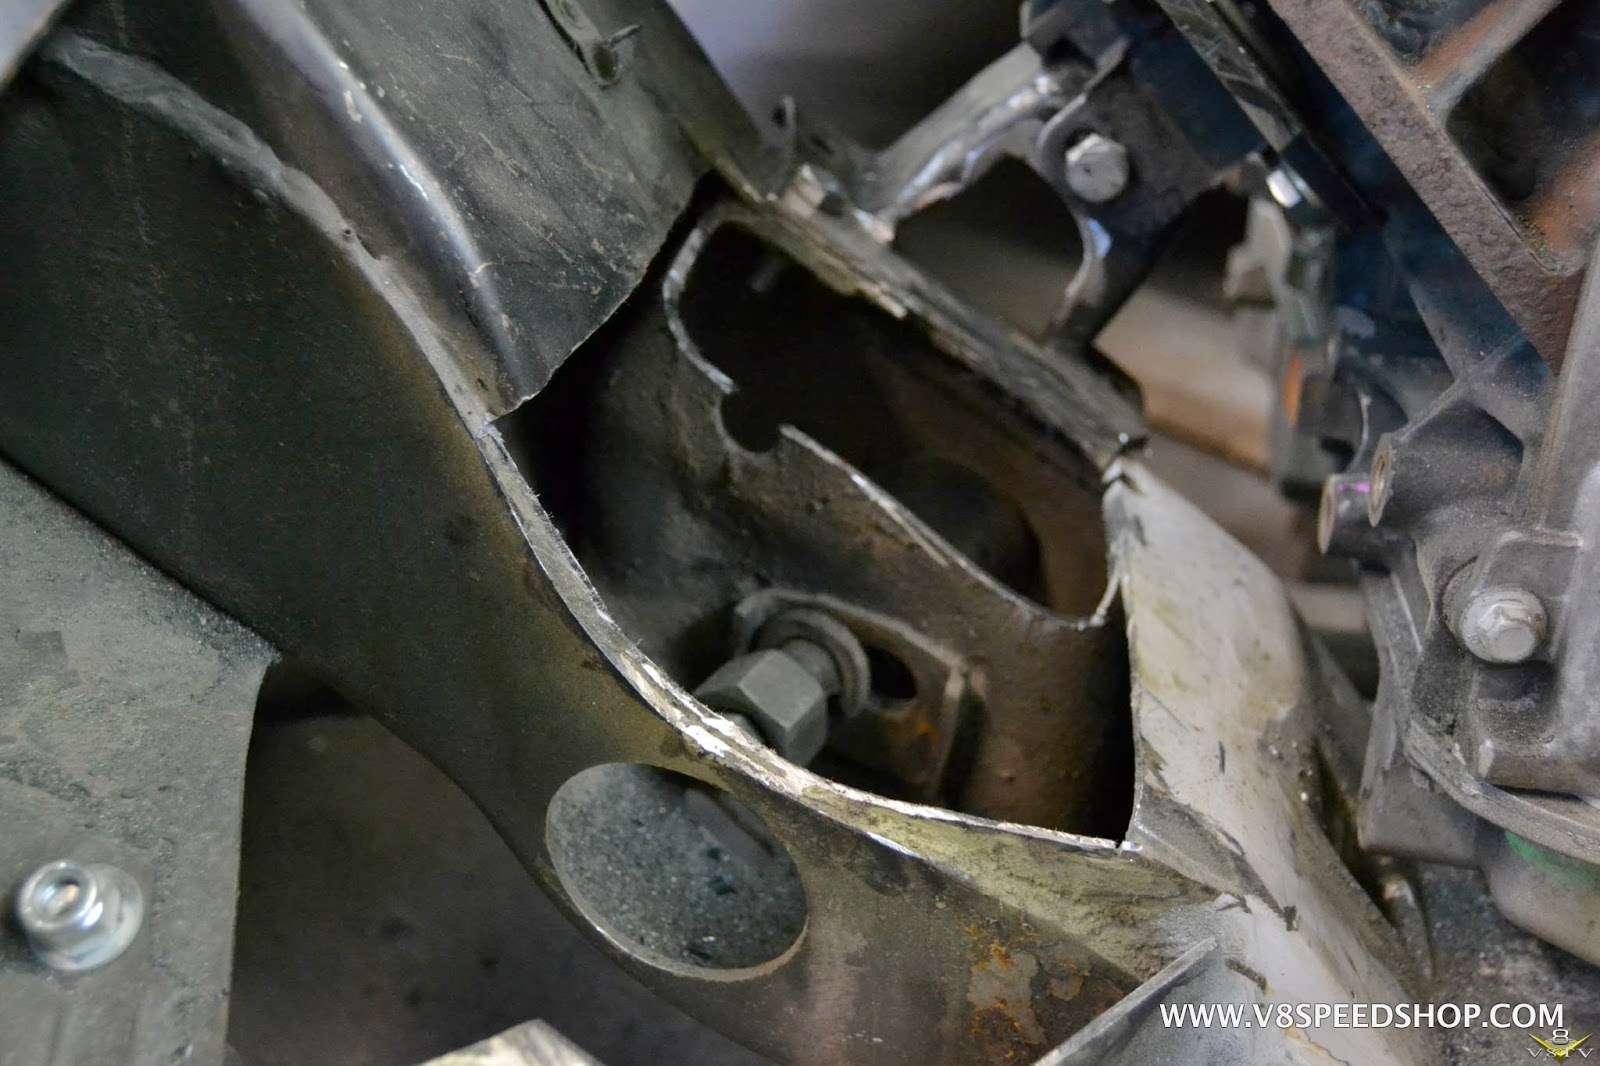
The inside structure was reinforced while the cutout was opened.
 Kevin Oeste
V8 Speed and Resto Shop
V8TV
Muscle Car Of The Week
V8 Radio Podcast
All about us:
https://www.v8speedshop.com
03-21-2017 #38
Registered User
- Join Date
- Dec 2004
- Location
- Midwest
- Posts
- 2,261
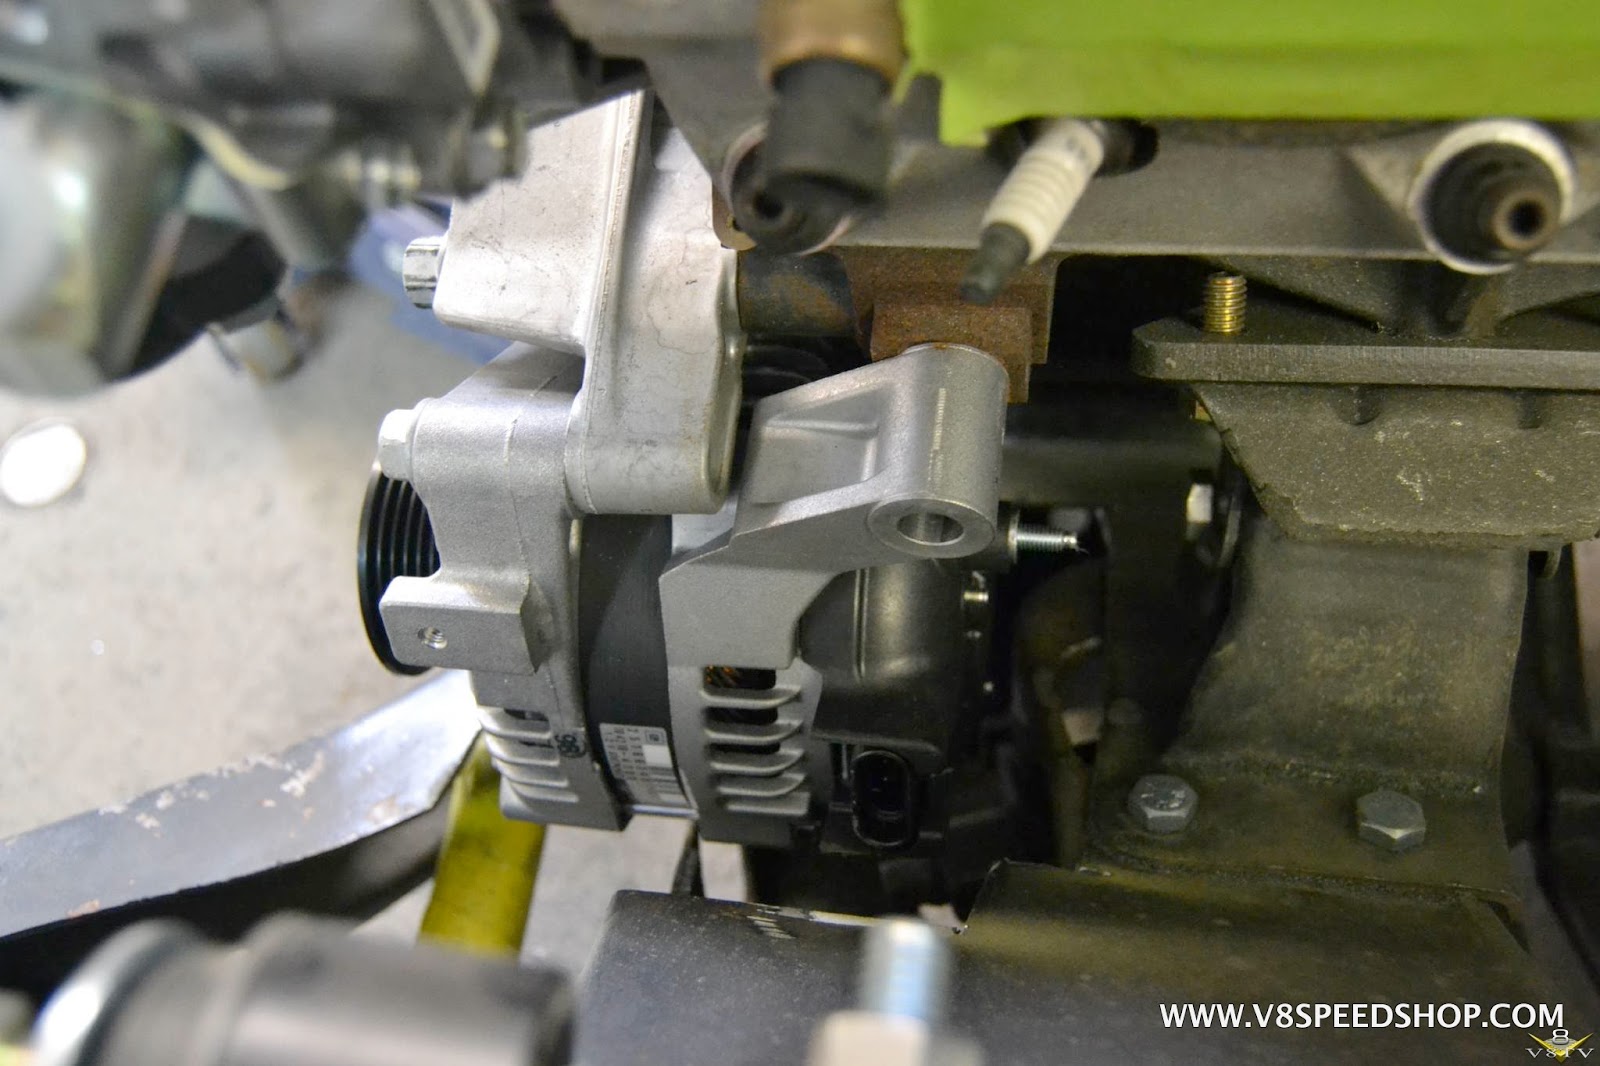
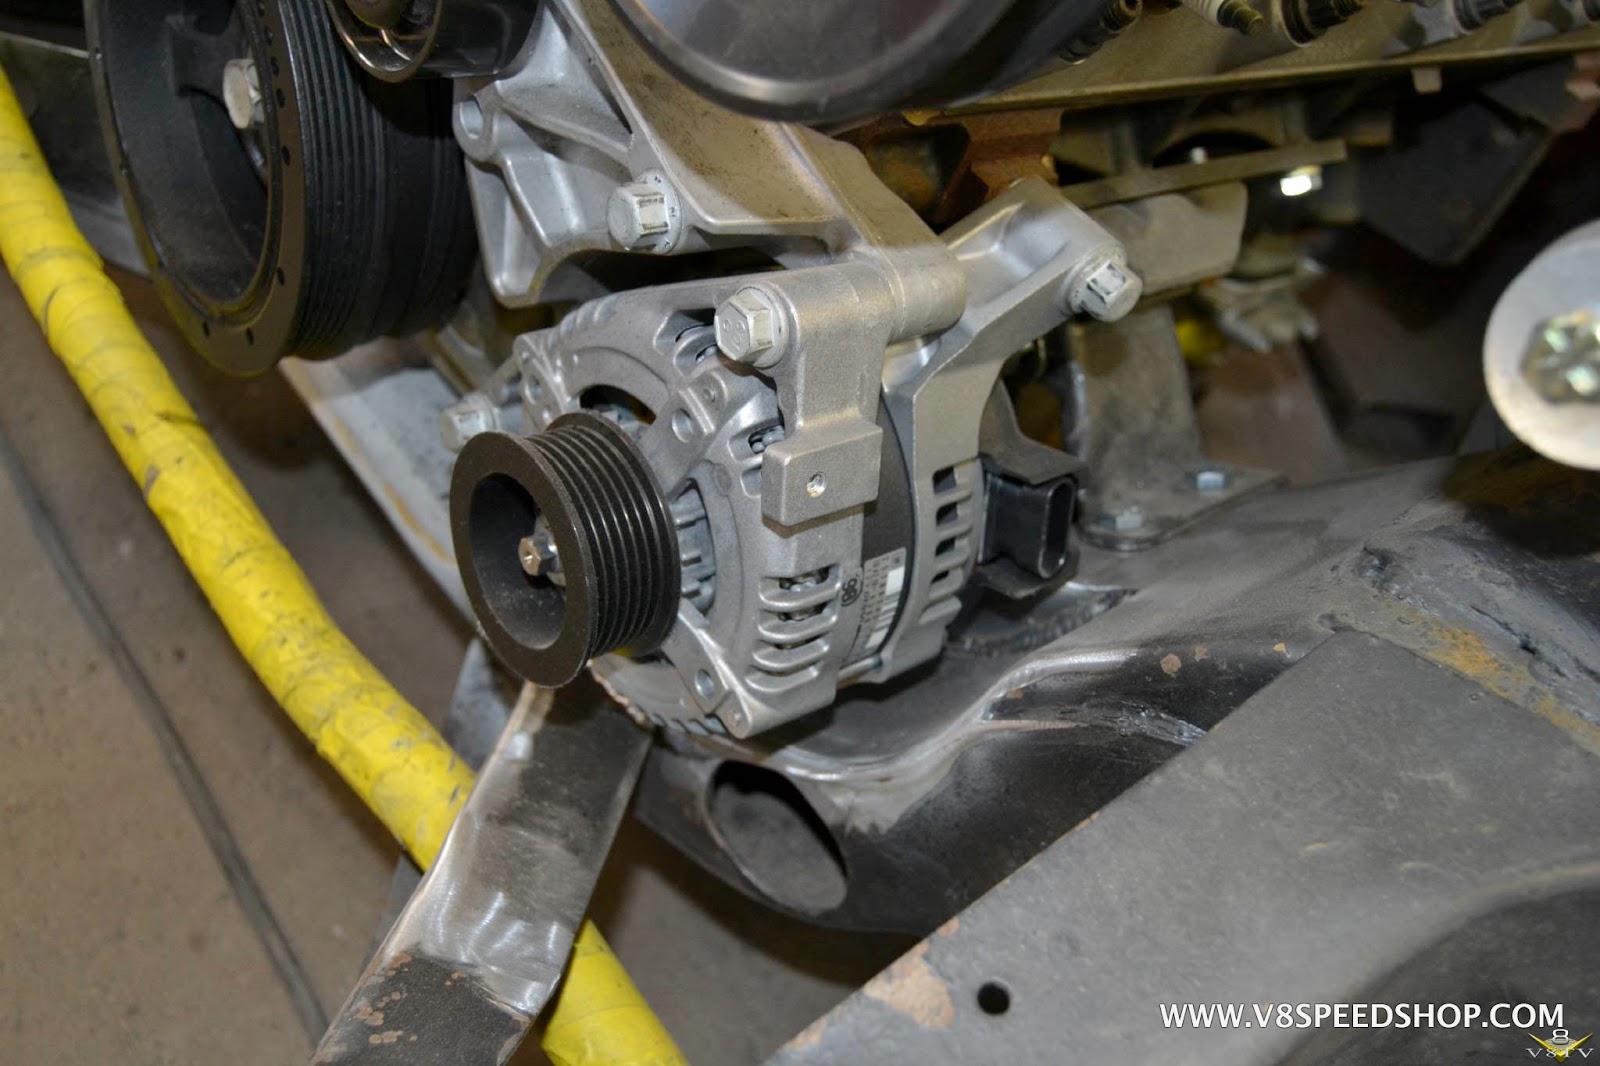
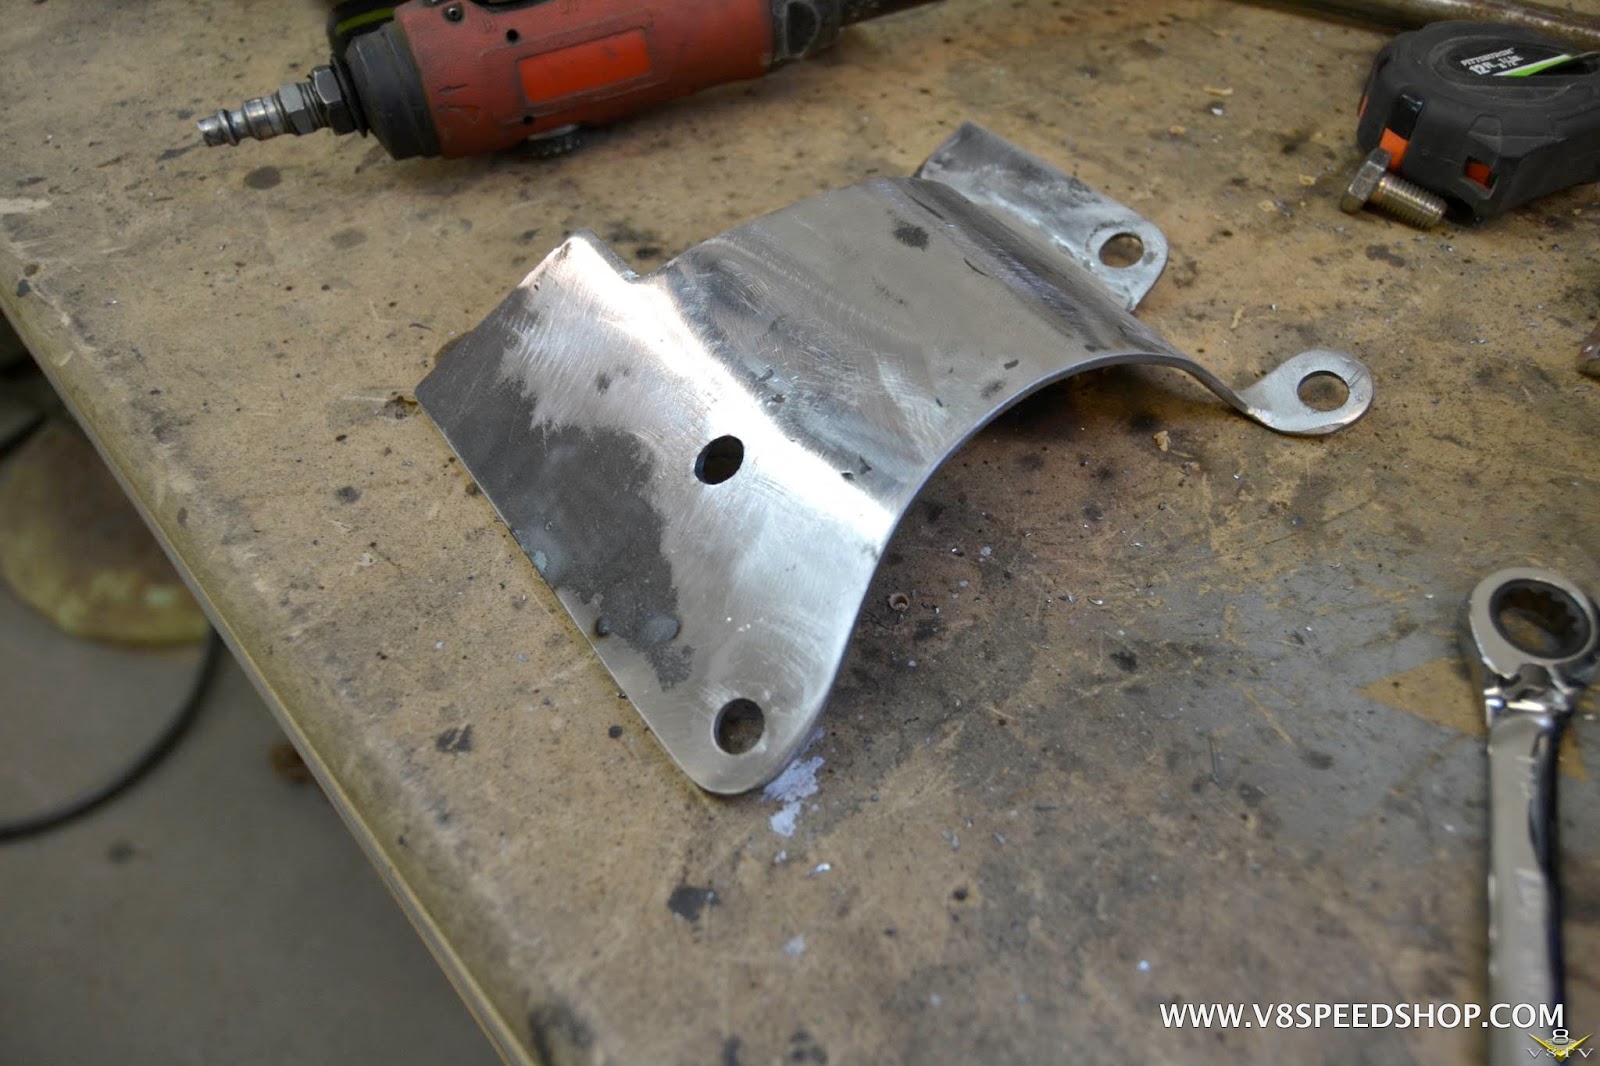
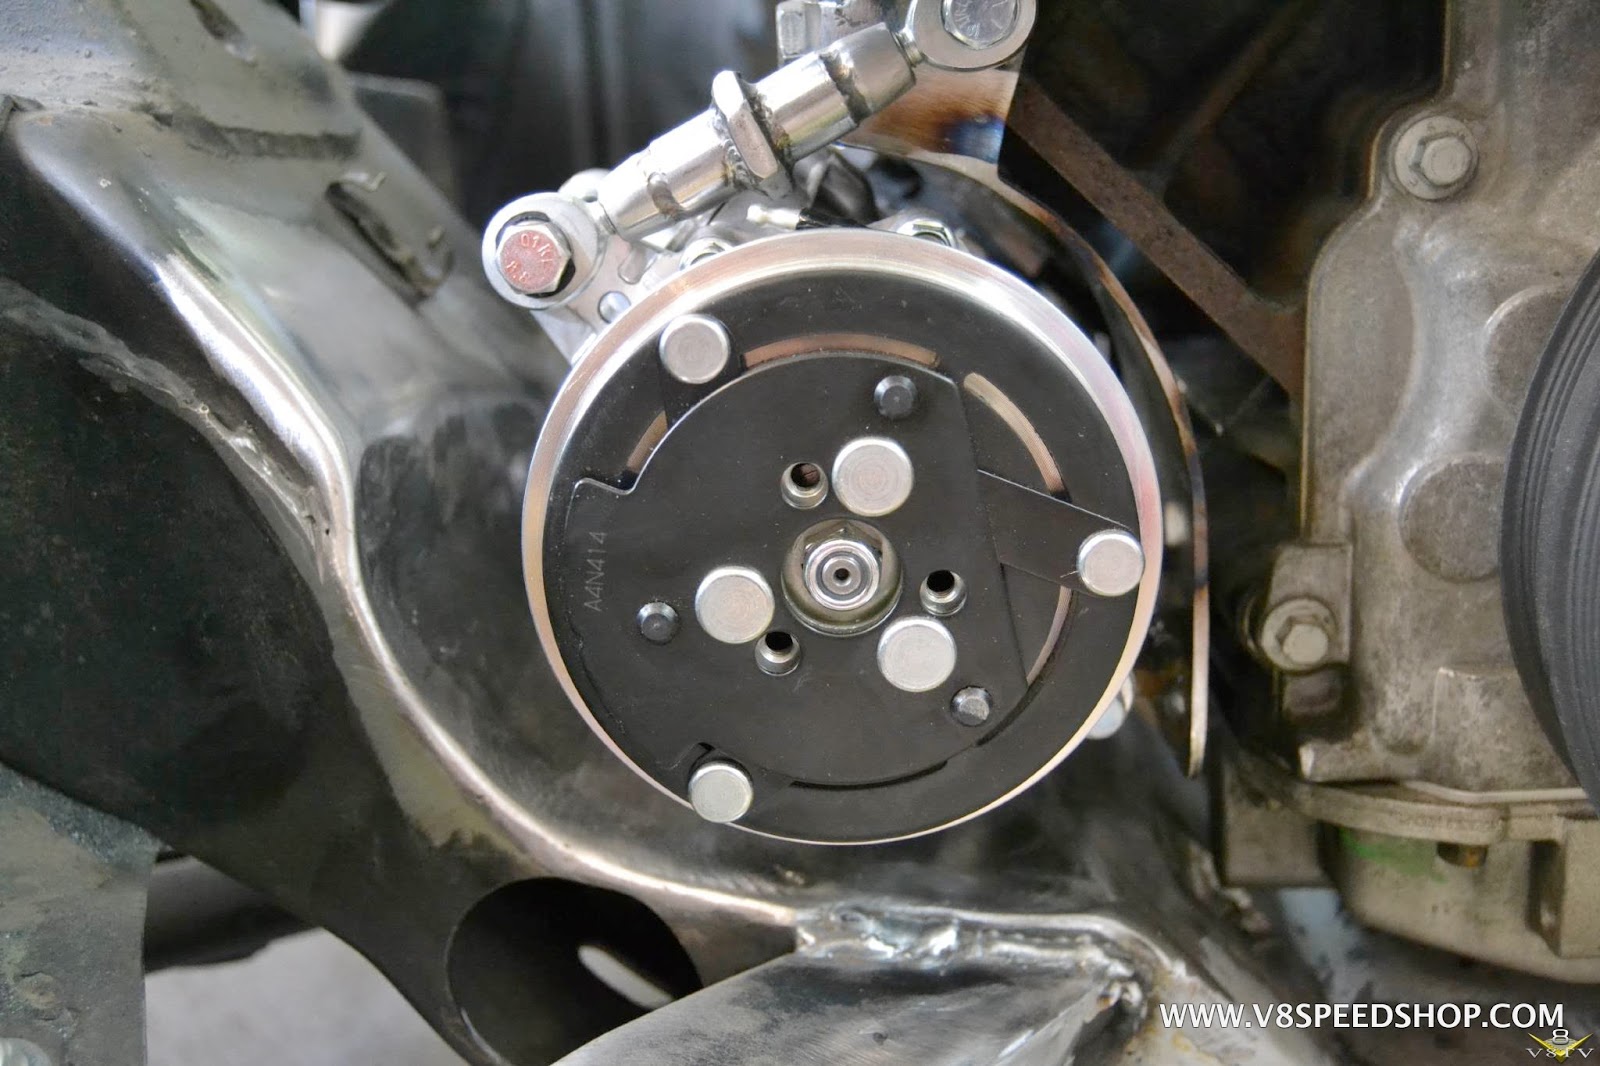
Next, we had to make a bracket to keep the A/C compressor and belt happy.
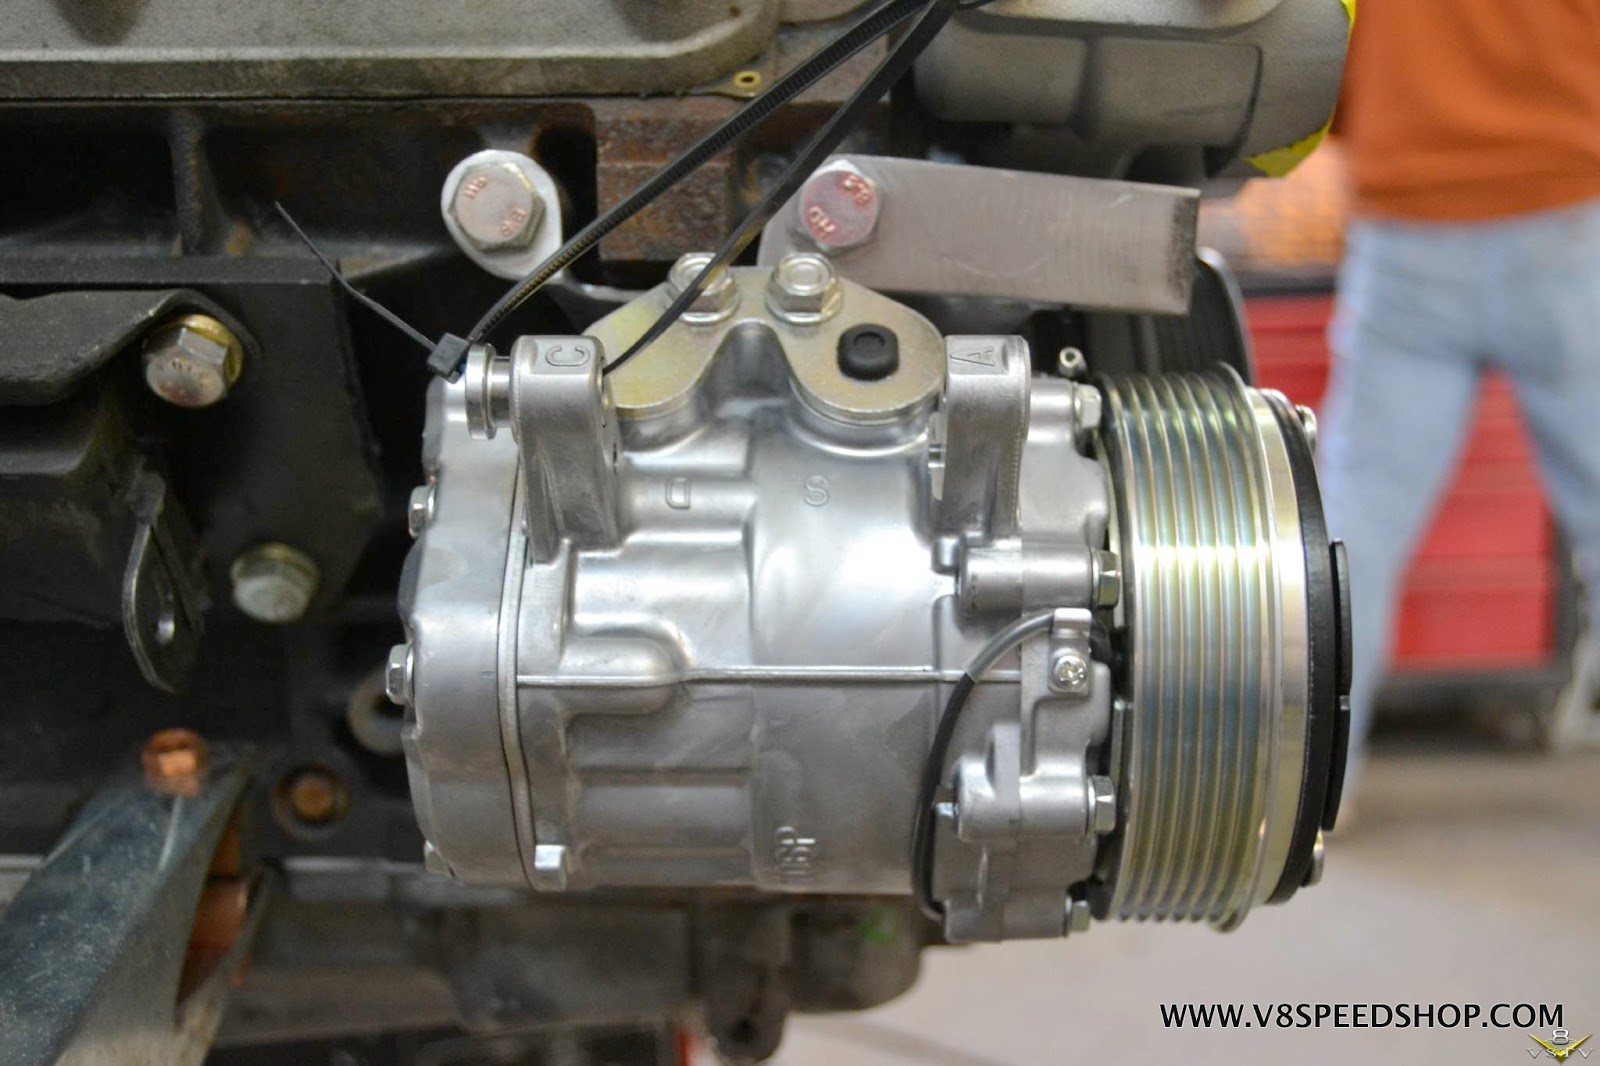
Weve changed the compressor to a Sanden unit and made the belt tension adjustable.
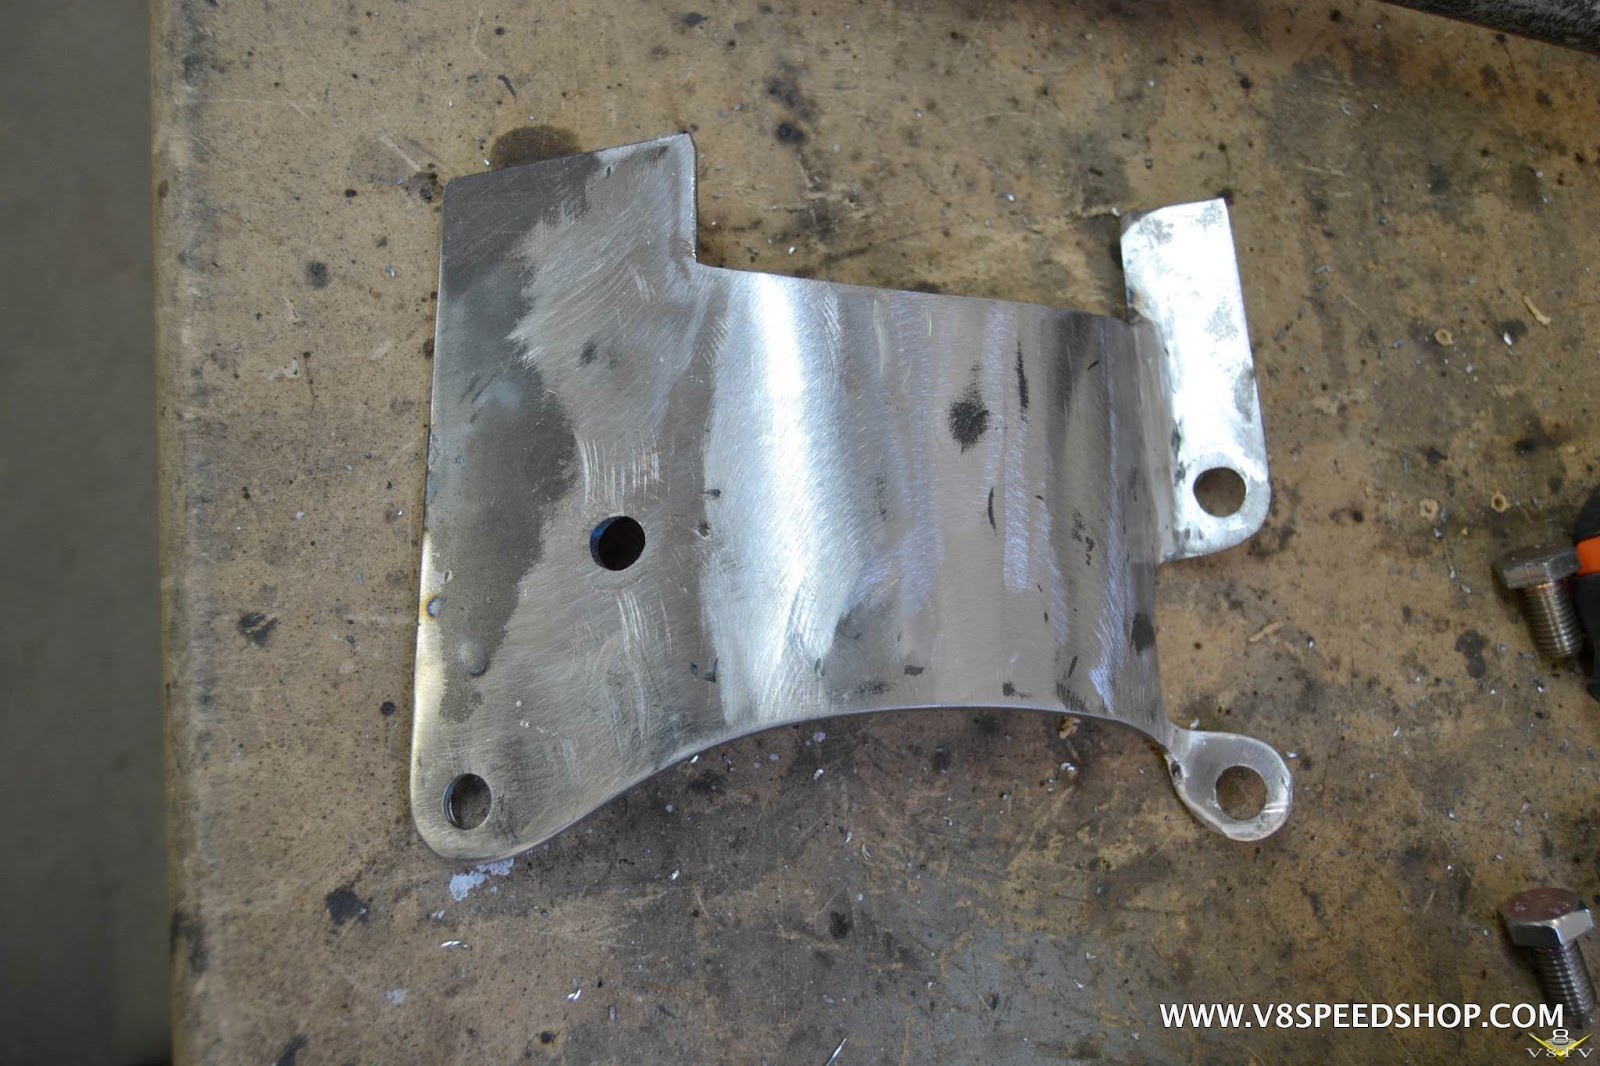
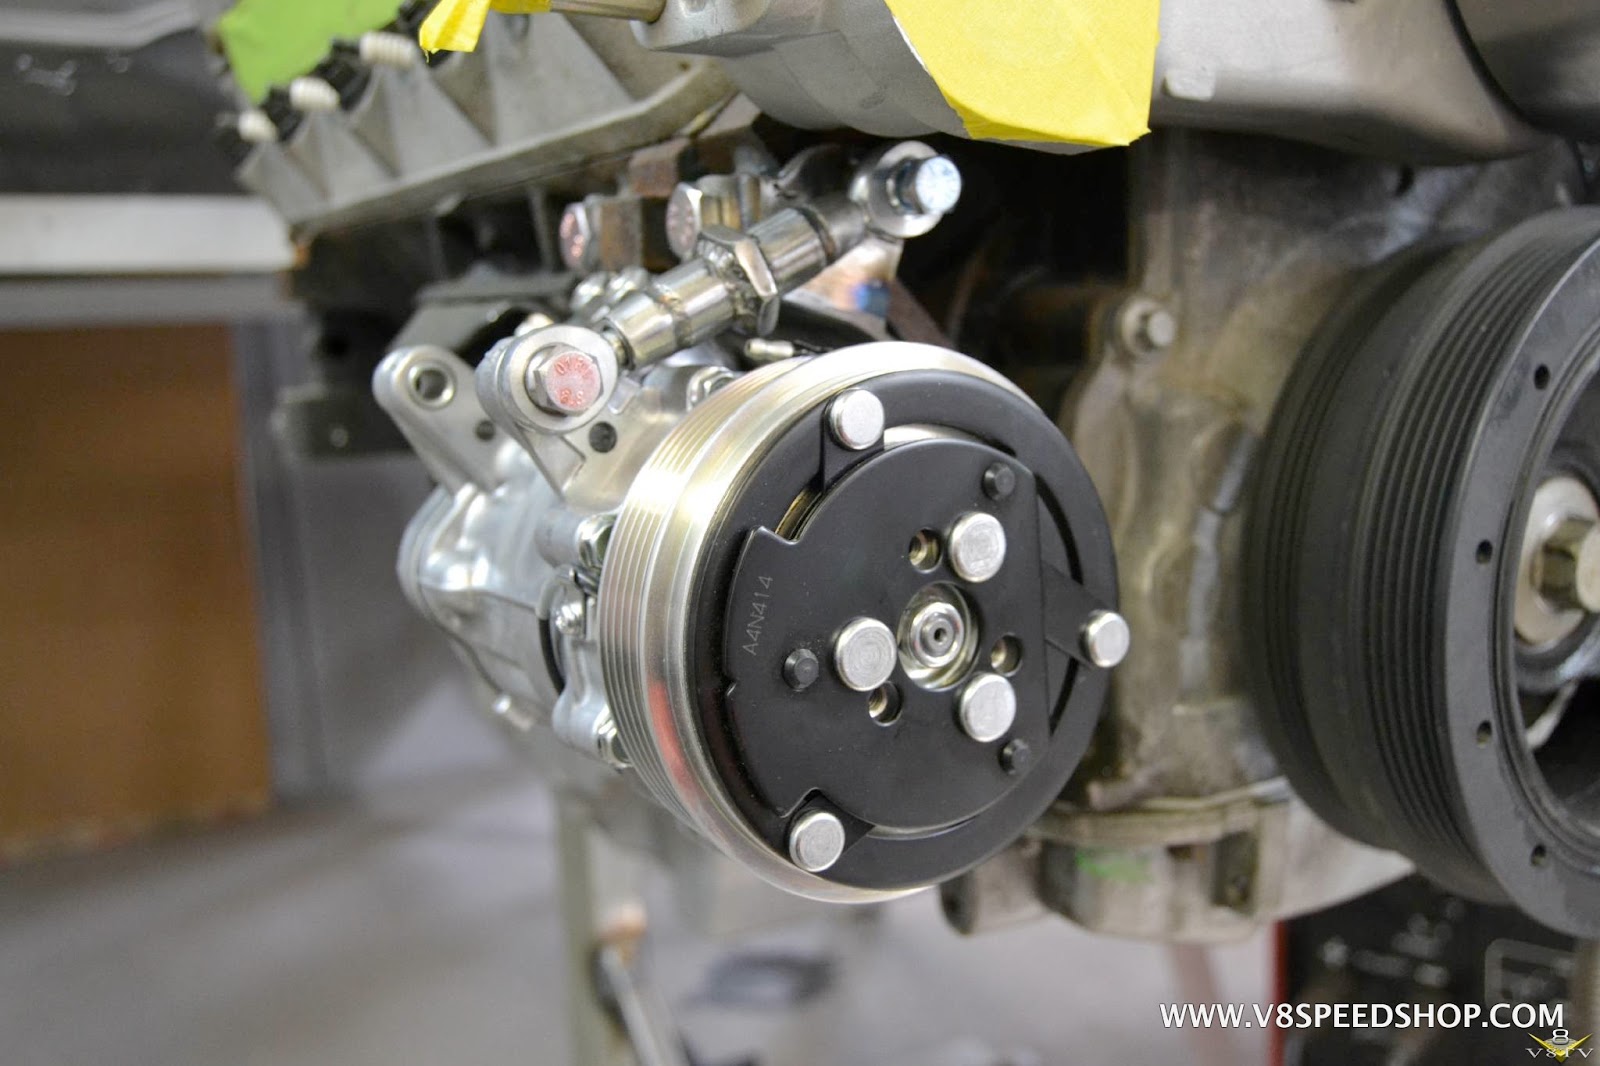
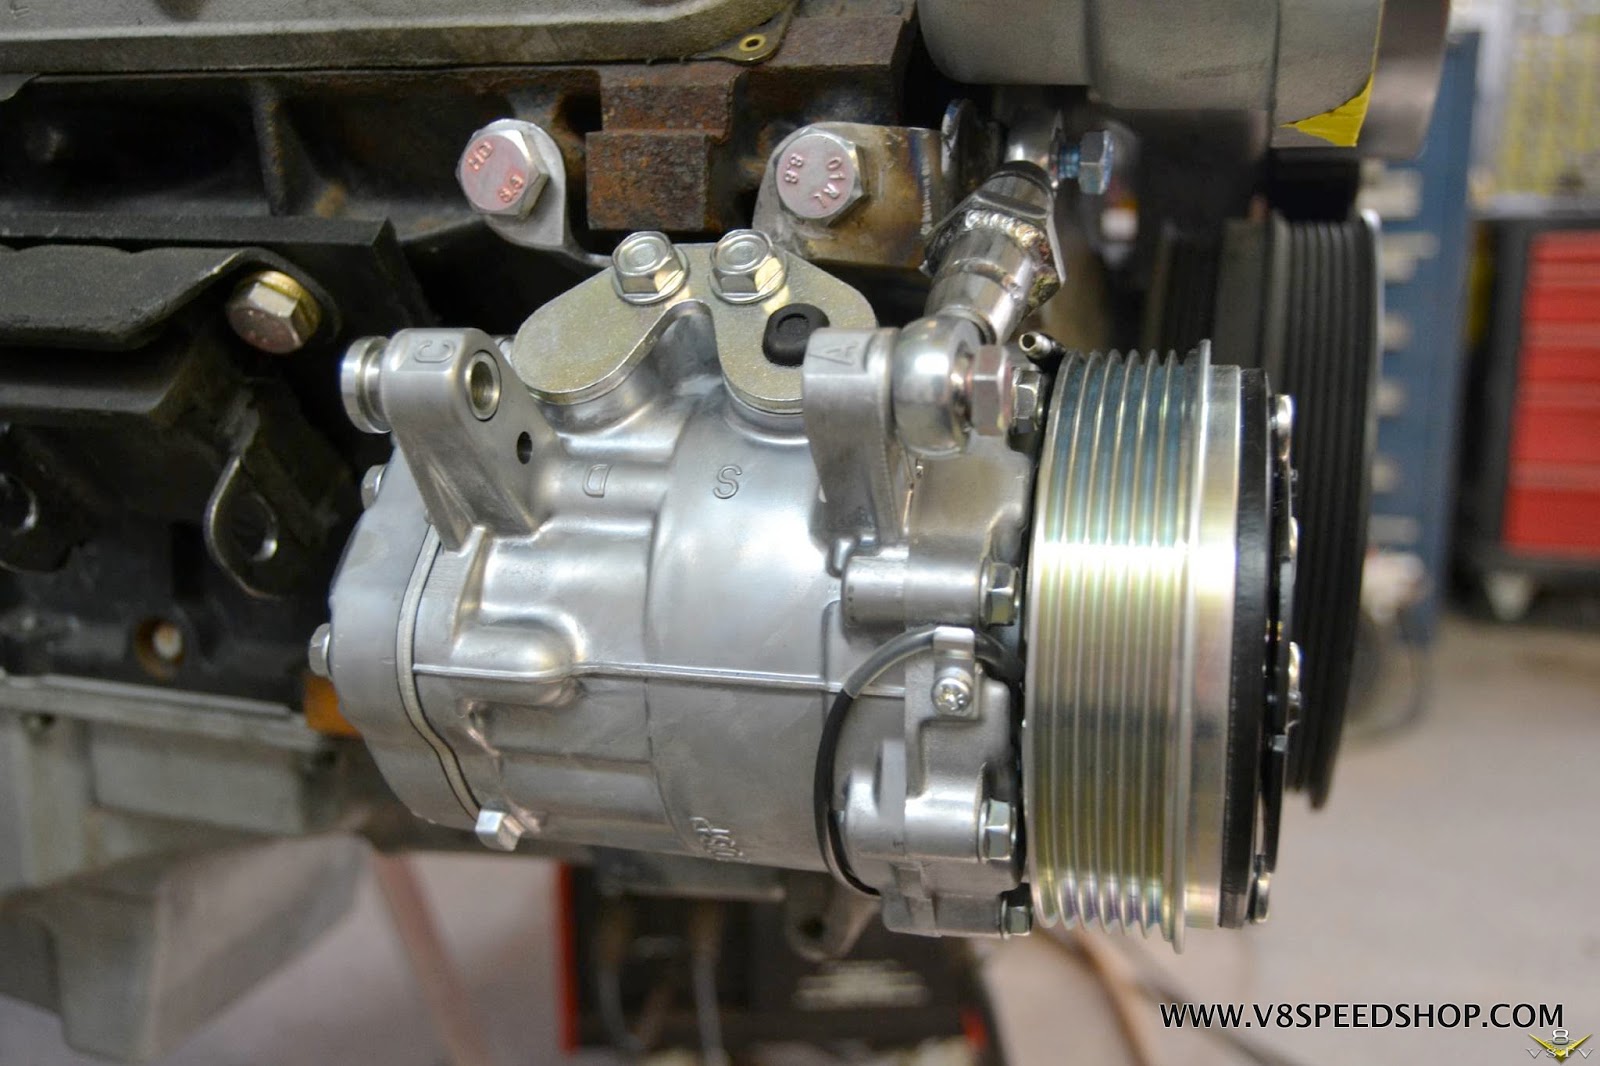
Now it all fist tightly to the block and still in the down-low position.
 Kevin Oeste
V8 Speed and Resto Shop
V8TV
Muscle Car Of The Week
V8 Radio Podcast
All about us:
https://www.v8speedshop.com
03-21-2017 #39
Registered User
- Join Date
- Dec 2004
- Location
- Midwest
- Posts
- 2,261
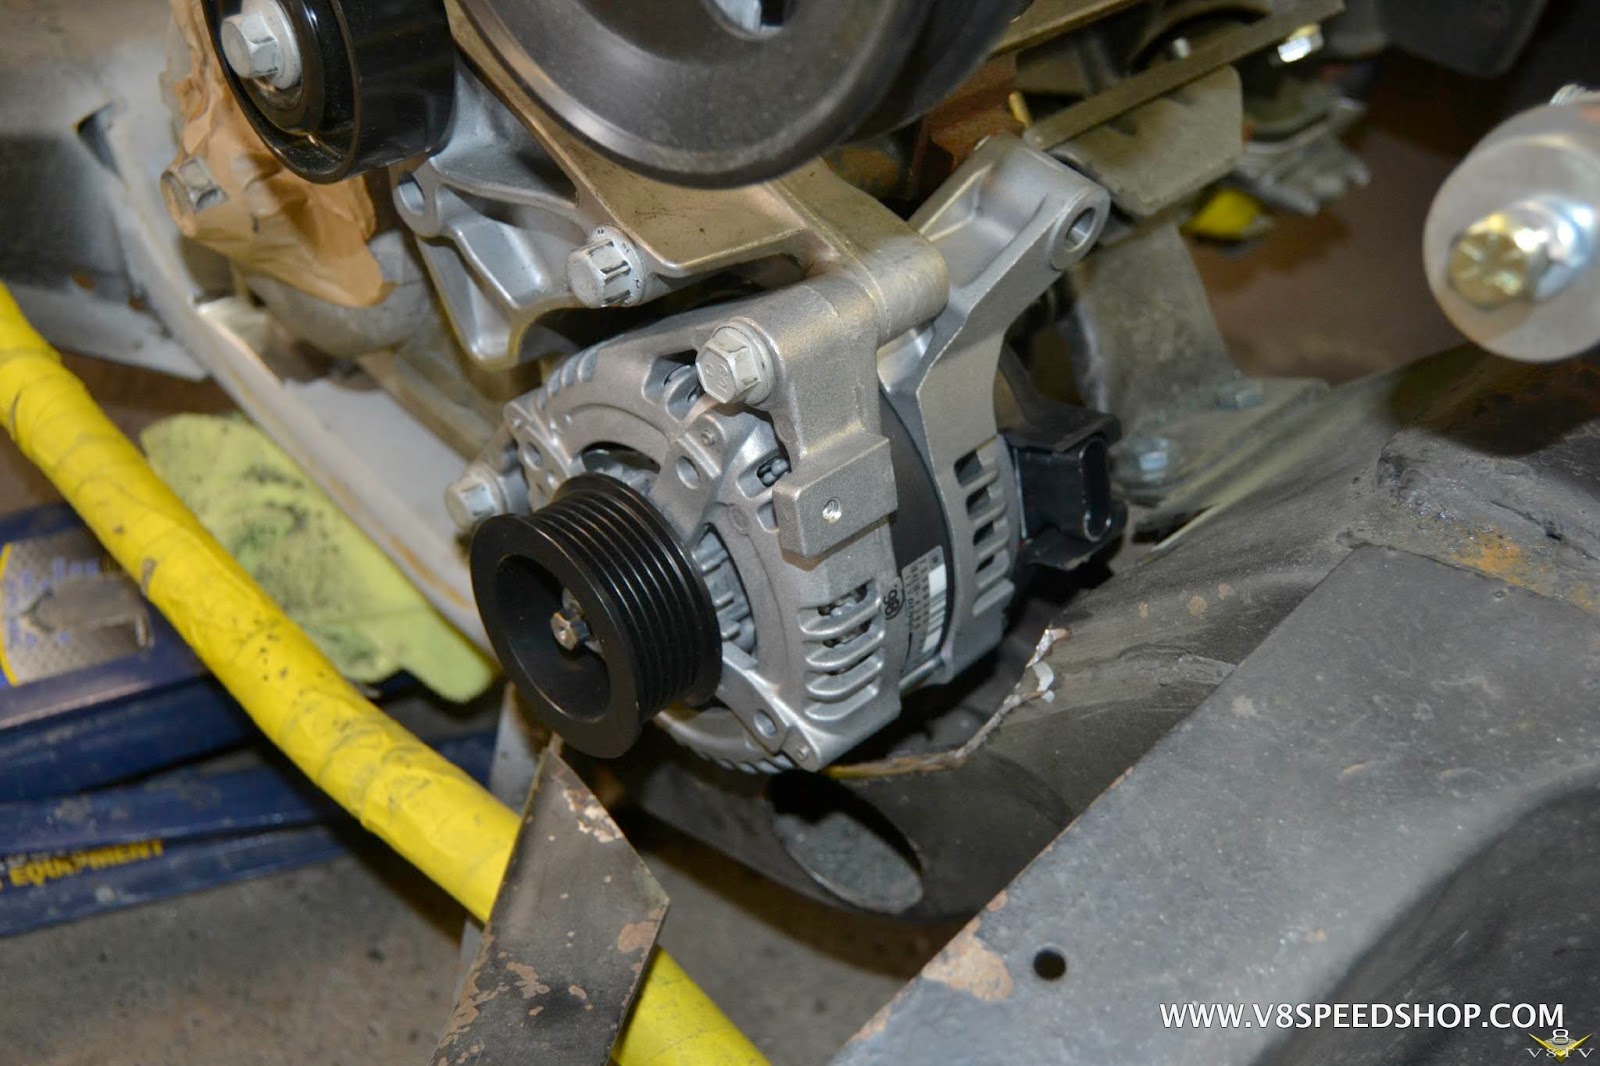
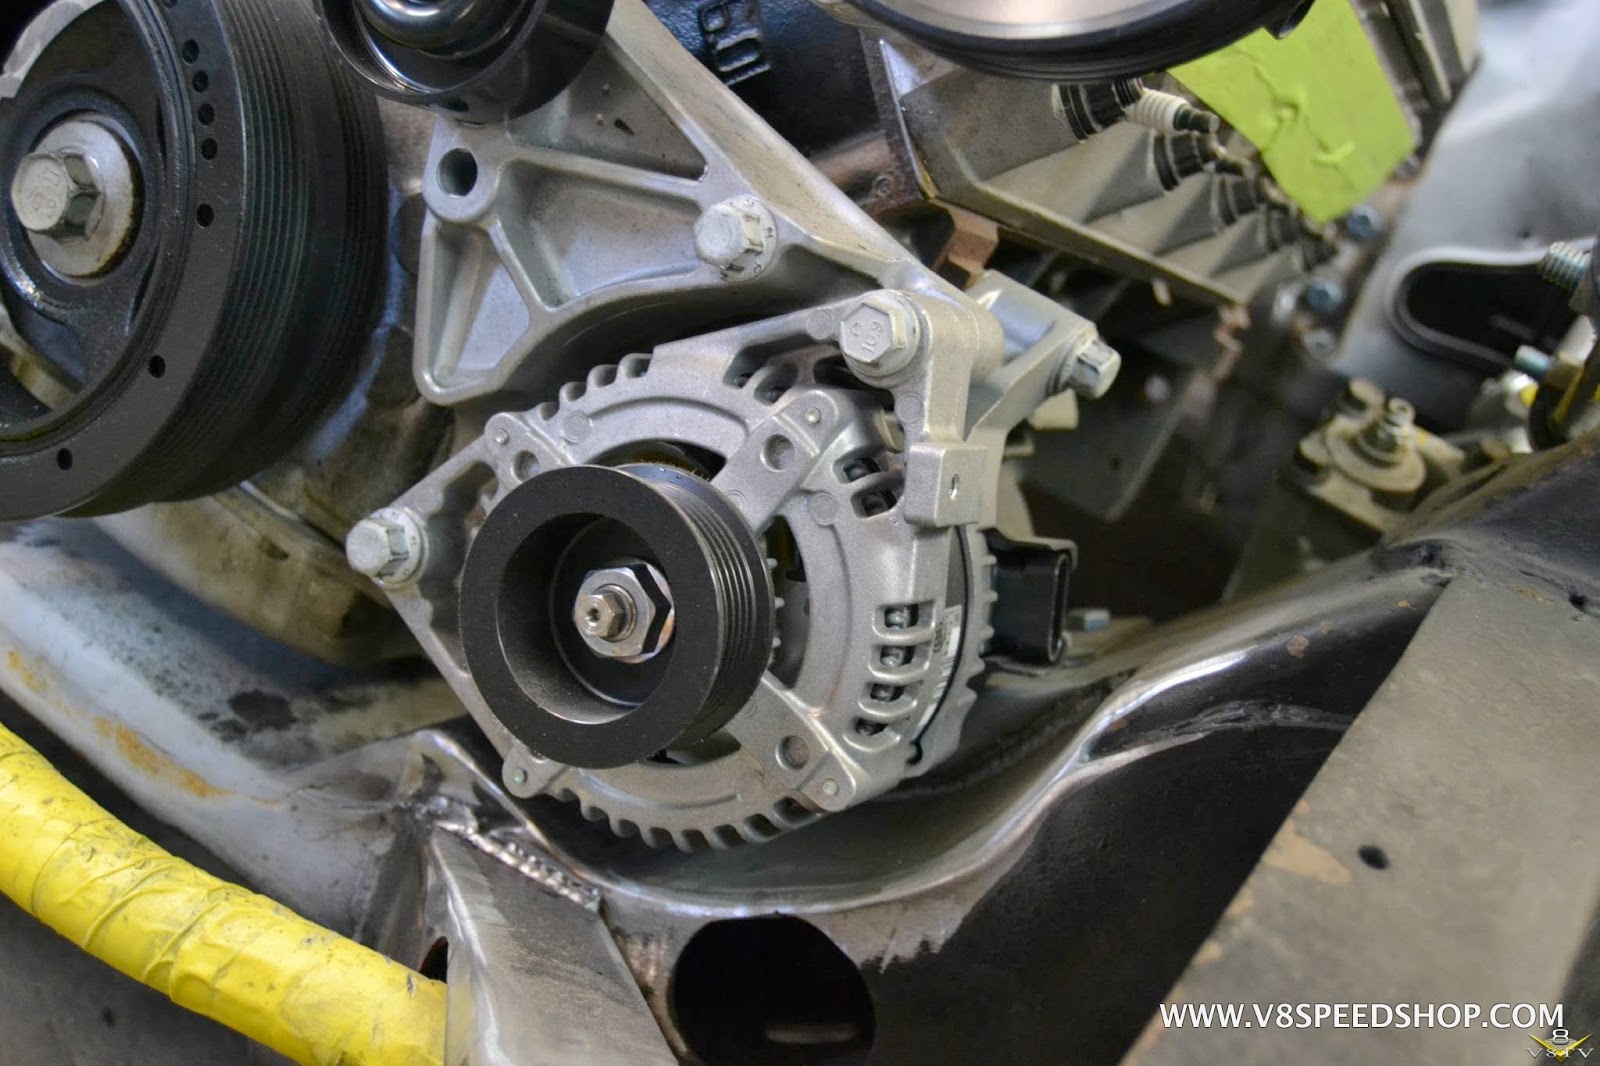
Alternator fit on the other side.
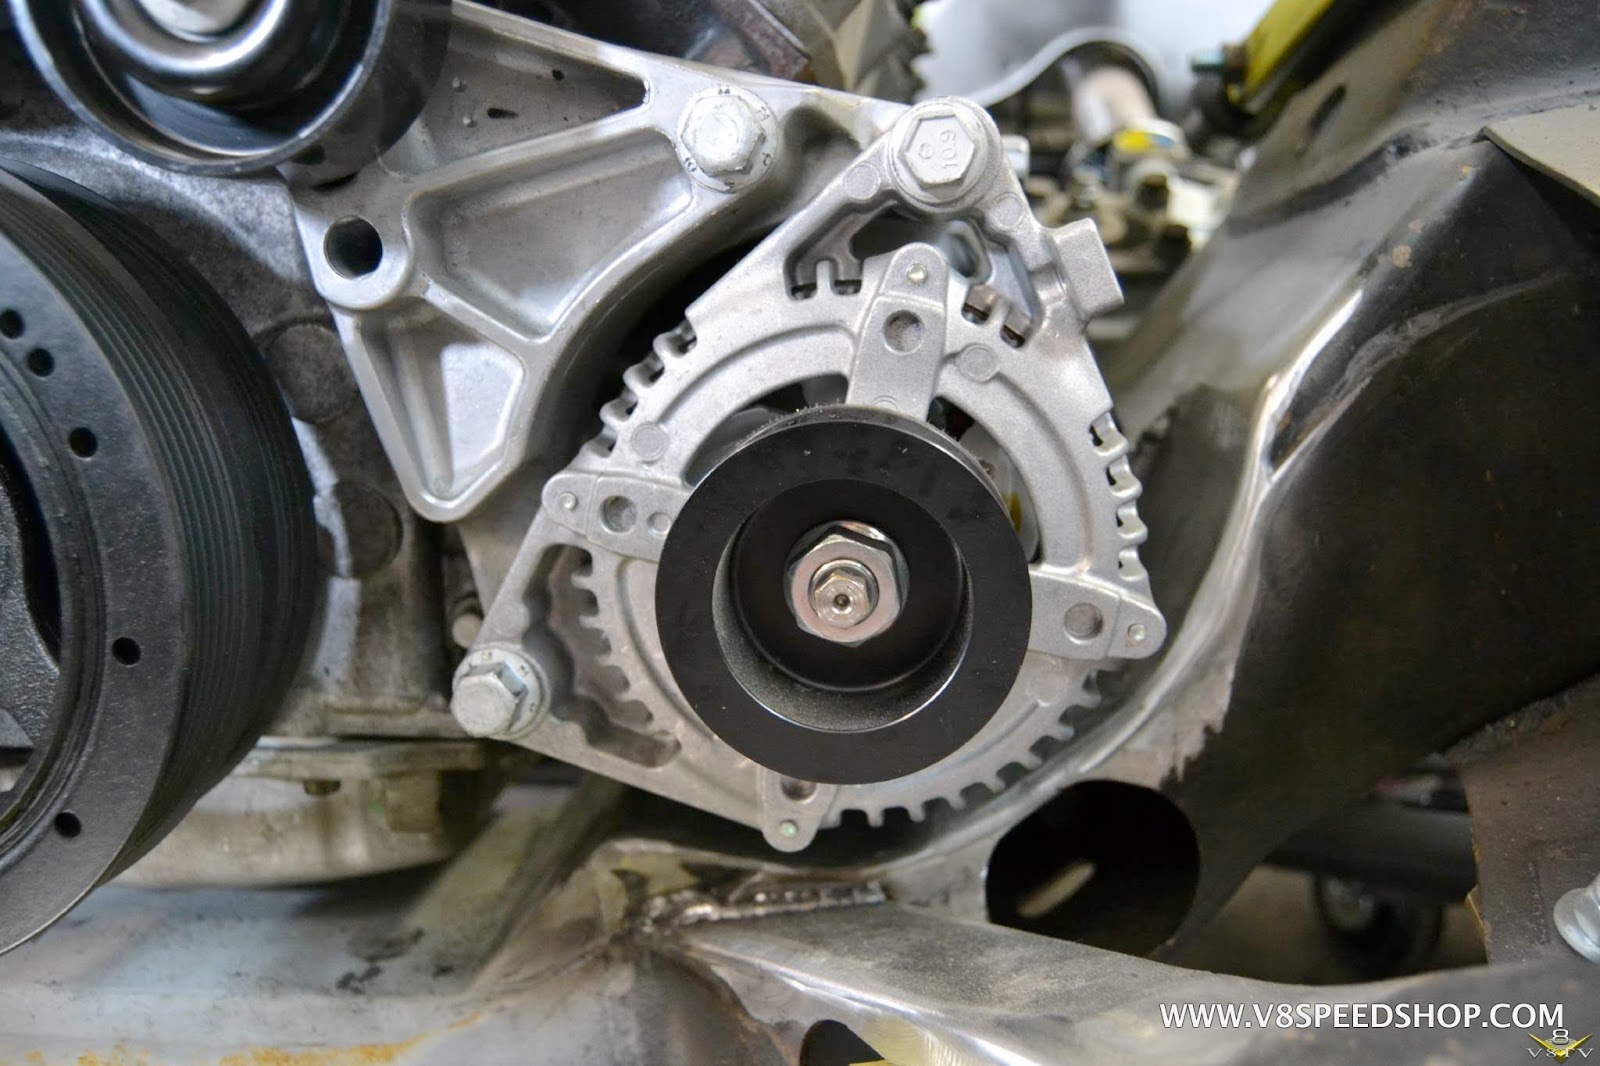
We moved the passenger side motor plate back a scoshe to make room for the compressor as well.
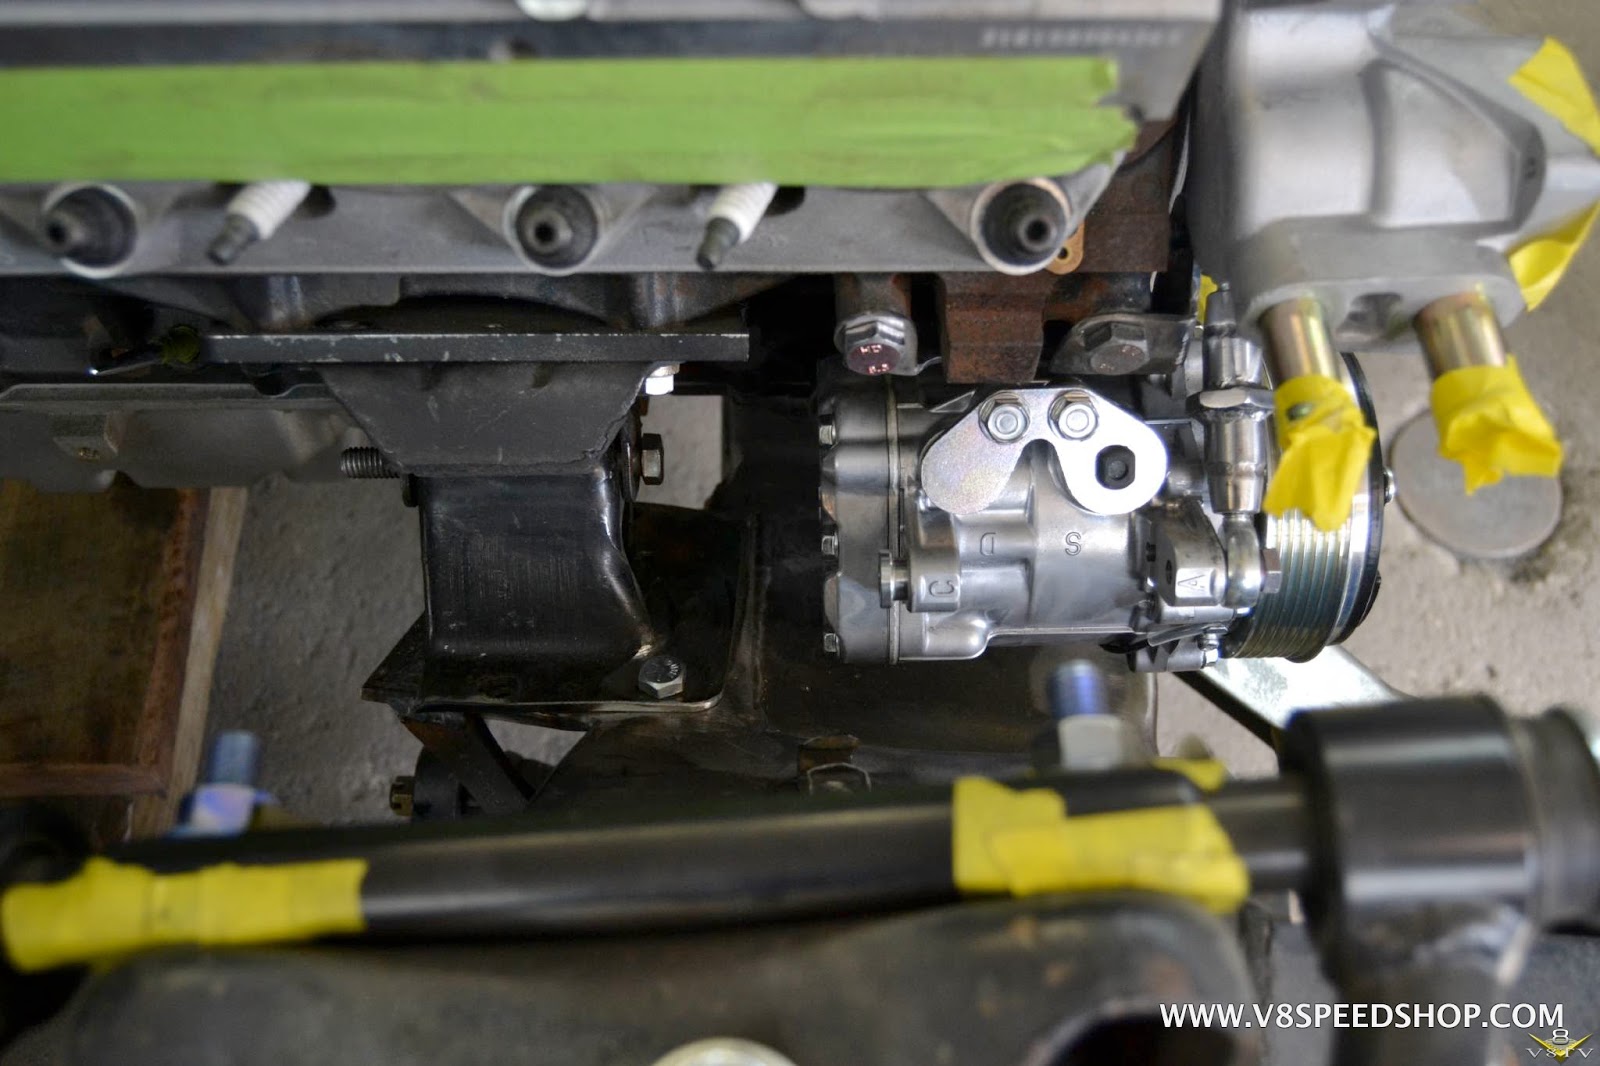
This will be reinforced to handle the load.Kevin Oeste
V8 Speed and Resto Shop
V8TV
Muscle Car Of The Week
V8 Radio Podcast
All about us:
https://www.v8speedshop.com
03-21-2017 #40 Registered User
- Join Date
- Aug 2007
- Location
- Jonesboro, Arkansas
- Posts
- 2,506
I'm impressed with all the fabrication being done. Great job Kevin!
Carl Wilson
1968 Camaro - T-56 6 speed - 383 Stroker, 2014 Mustang GT seats. FiTech EFI, Tanks Inc. Tank with Deutschwerks fuel pump.

 Reply With Quote


