

Results 21 to 40 of 66
Thread: Eric's Project "Grifter"
-
10-12-2014 #21
 Registered User
- Join Date
- Jun 2005
- Posts
- 436
More updates can be found on www.gearheaddaily.com too if I don't always post on the build threads. Just throwing it out there

Well folks, fall is officially here in Minnesota and it’s starting to get colder. I hope you enjoyed summer because completely over with. Kaput.
I’ve been working a couple hours per night on the car whenever I get a chance. I’m not that confident with fiberglass so this has been a decent learning experience. Let’s get down to it.
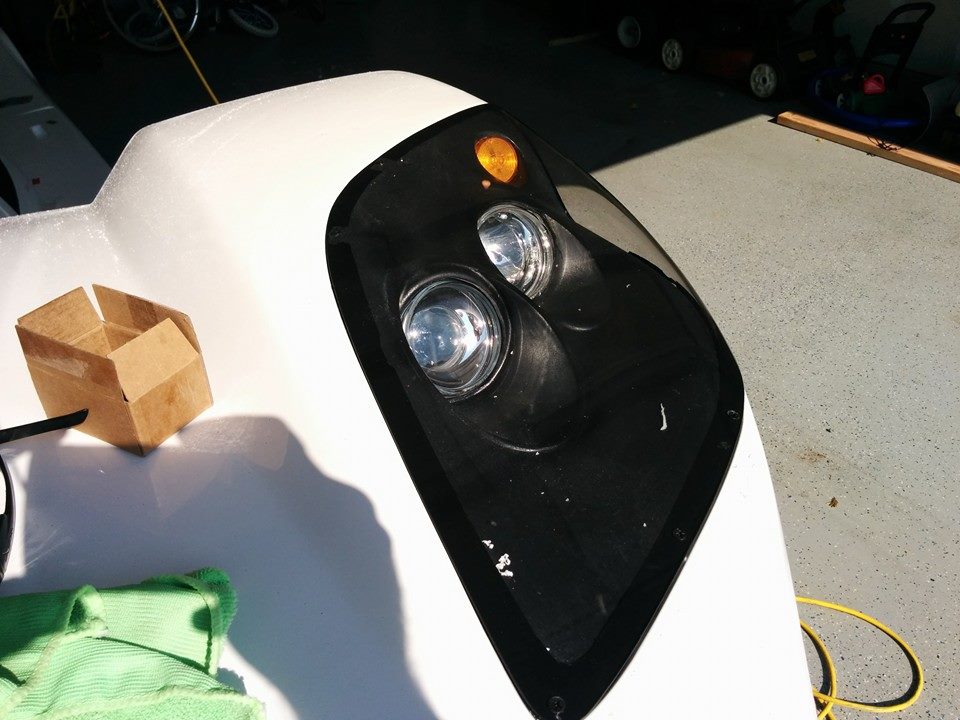
I was able to finish installing the lights and lens cover on the passenger side of the from clam. This is a bit of work to get everything just right. I know it looks a bit chaotic from some of the previous pics, but if you take it slow and take it in small chunks, it makes life a lot easier.
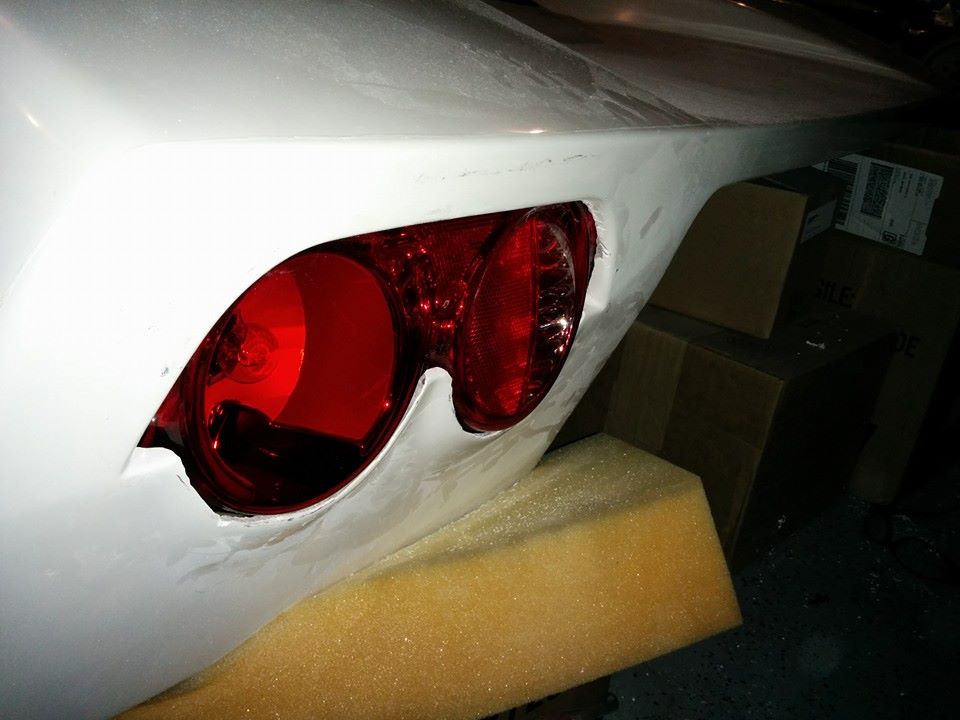
The tail lights provided their own challenge as there isn’t a clear way to attach the lenses (borrowed from a Dodge Dakota, seriously, take a look at one some time!). I took the better part of an afternoon to make sure these fit tight and as close as possible. I will have to back fill them with fiberglass at some point, but that point isn’t now.
Now, as parts get put on the car, so does my list of custom tools. This is the first “fun car” that I have owned that will have AC so I’ve had no need for an AC hose crimper.
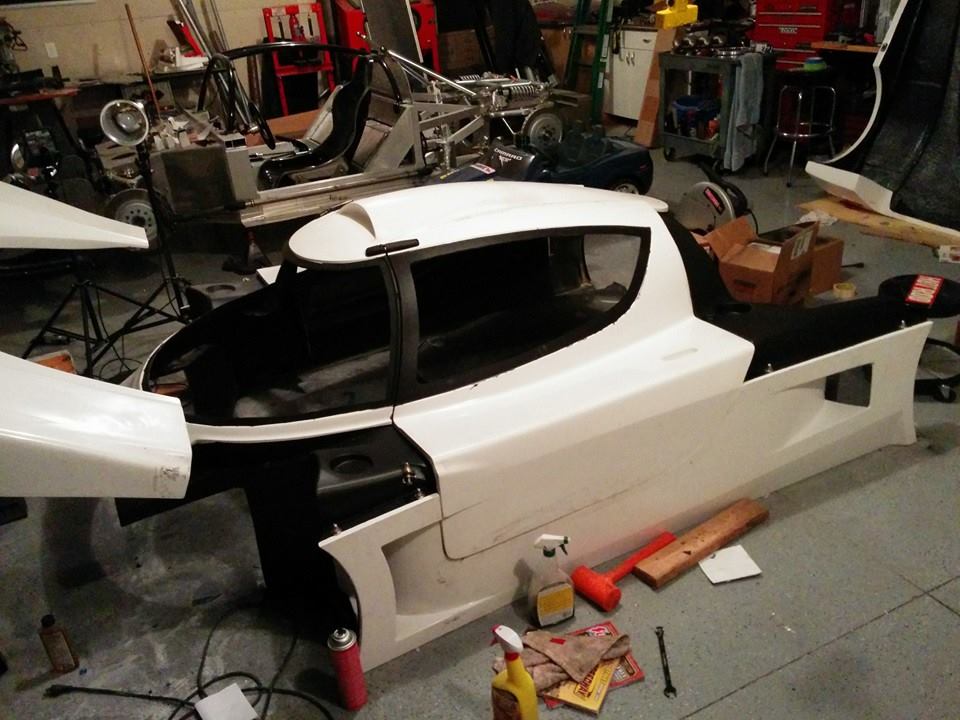
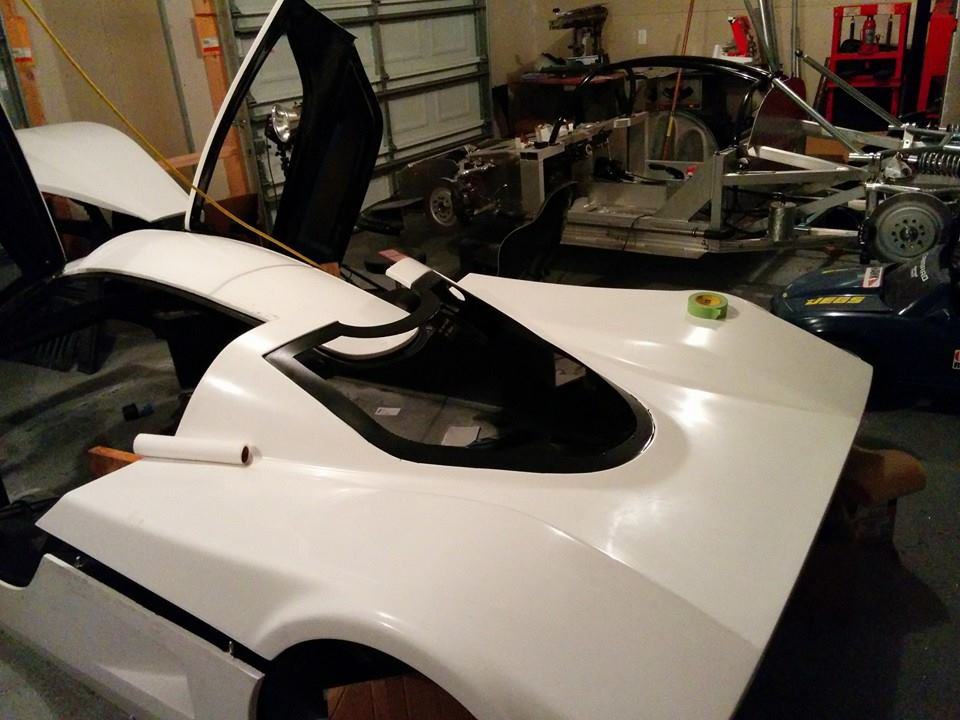
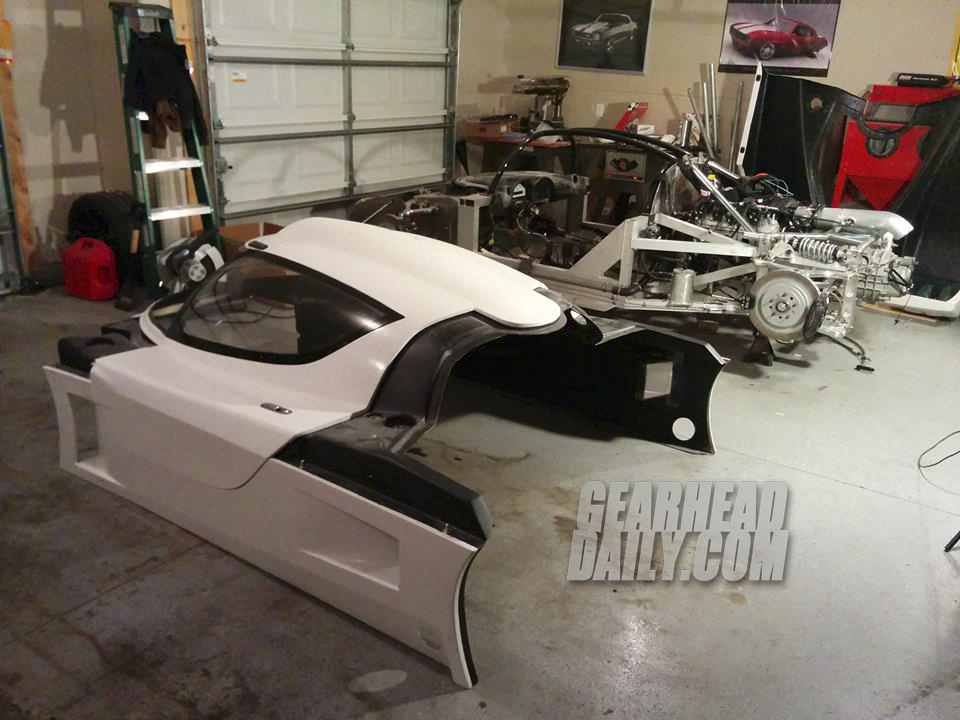
I decided that since the name “Stormtrooper” came up a bunch lately, it made sense to add a few black accents to the body. When the doors are closed you won’t be able to see much of the black, but when you open that and the front and rear clam you’ll see the accents to the color. I had some issues with tape sticking to the body after using some “Goof-Off” sticker remover so that’s why I have all the over spray issues. I tried several kinds of tape and had come to the conclusion that there was some residue on the body keeping it from sticking. I tried a couple solvents with no avail. I reinstalled the doors and will attack the overspray soon. I’ve found that brake cleaner eats right through this type of paint! Easy and cheap fix!
I think I may have figured out the engine situation for “Griftrooper”, here’s a small hint…. Giggity.
-
10-24-2014 #22
Registered User
- Join Date
- Jun 2005
- Posts
- 436
I've been making some videos that I've uploaded to my channel if people are interested
https://www.youtube.com/channel/UCac...uEfISr3ktwQW-A
-
11-18-2014 #23
Registered User
- Join Date
- Jun 2005
- Posts
- 436
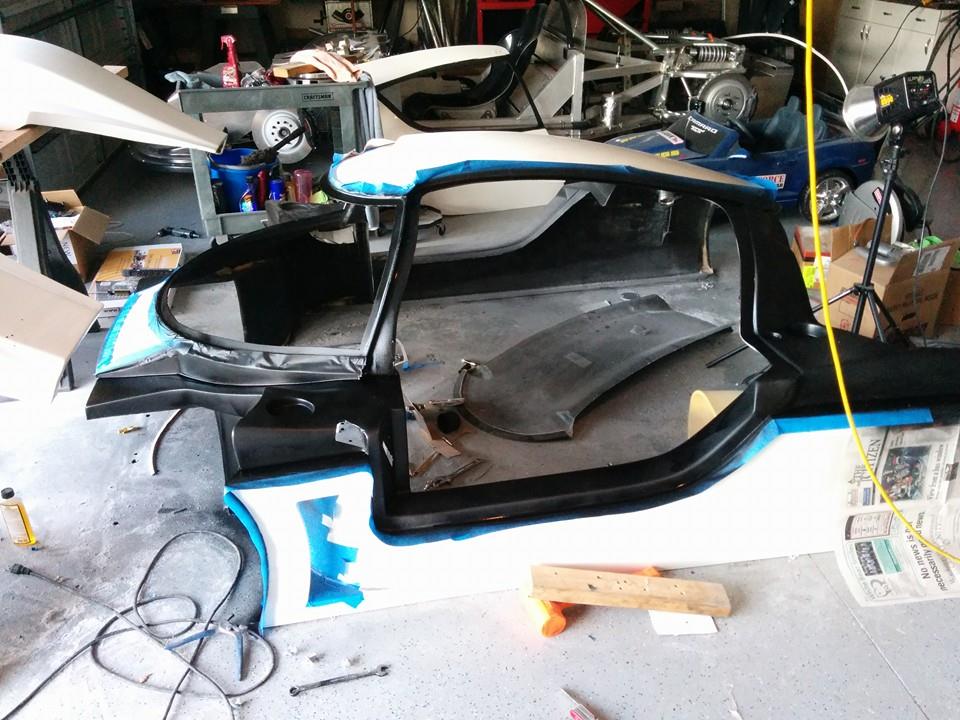
Hey hey say hey sports fans! We’re back with some progress on some of our projects on Grifter.
Pictured above is what the car looks like right at this current moment. I was able to finish the passenger side head lights and light cover. I finished off the masking the body for the black accent pieces. It should look pretty good when I finally get around to taking care of the overspray (don’t ask). Ugh.
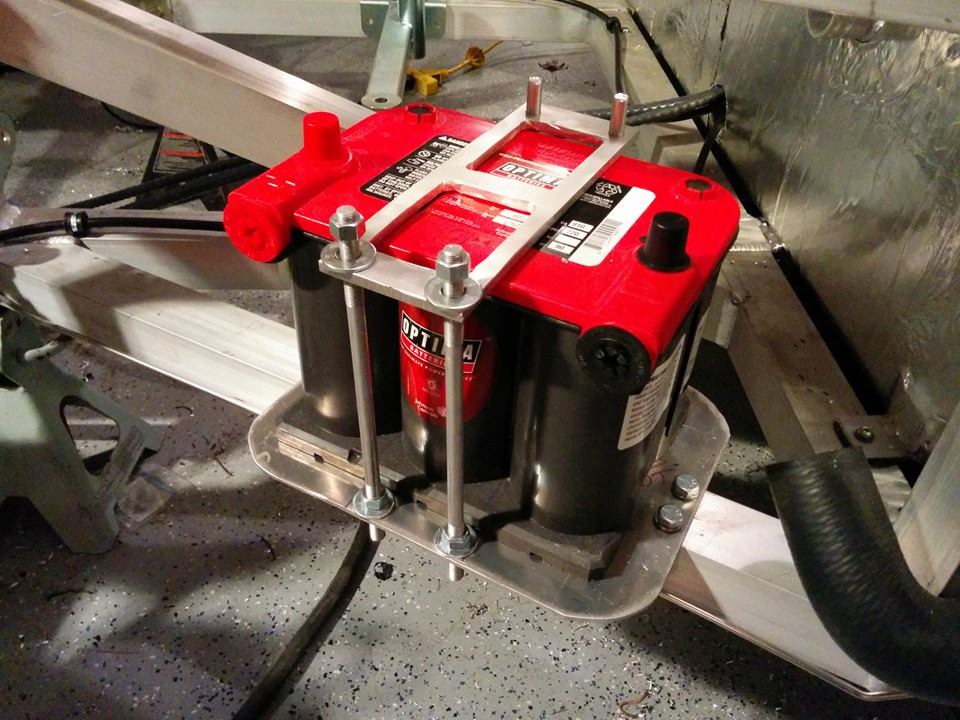
I also added a battery box I made with some left over aluminum pieces I had laying around (you can see going here to YouTube!)

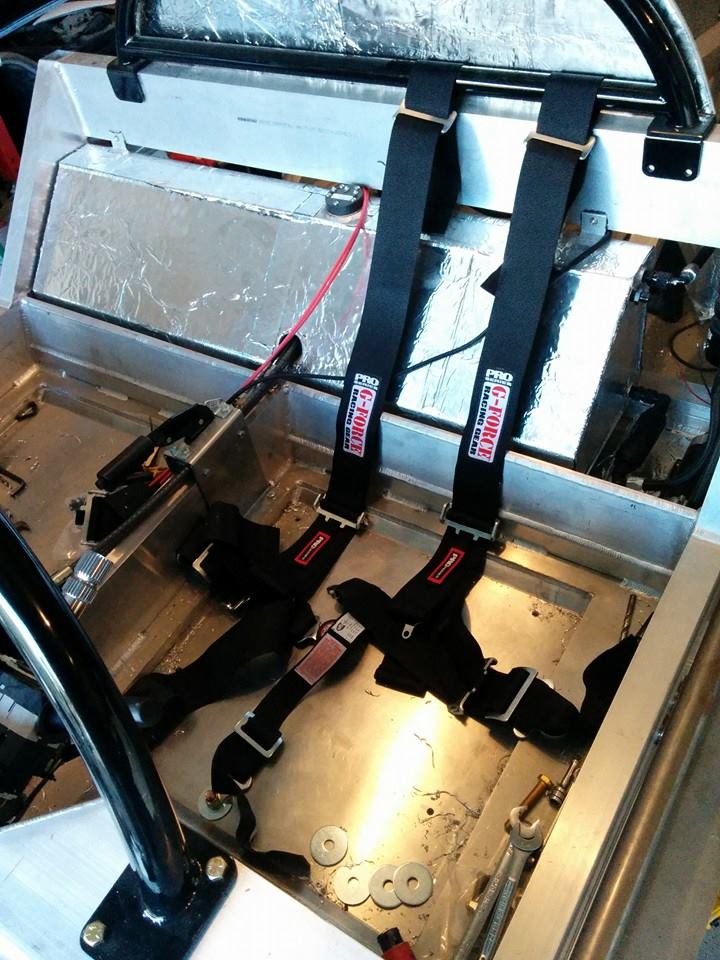
The seats needed seat belts so I made sure to get some stout ones and mount them to the frame with grade 8 bolts and 1/4 thick plates holding the belts in place.
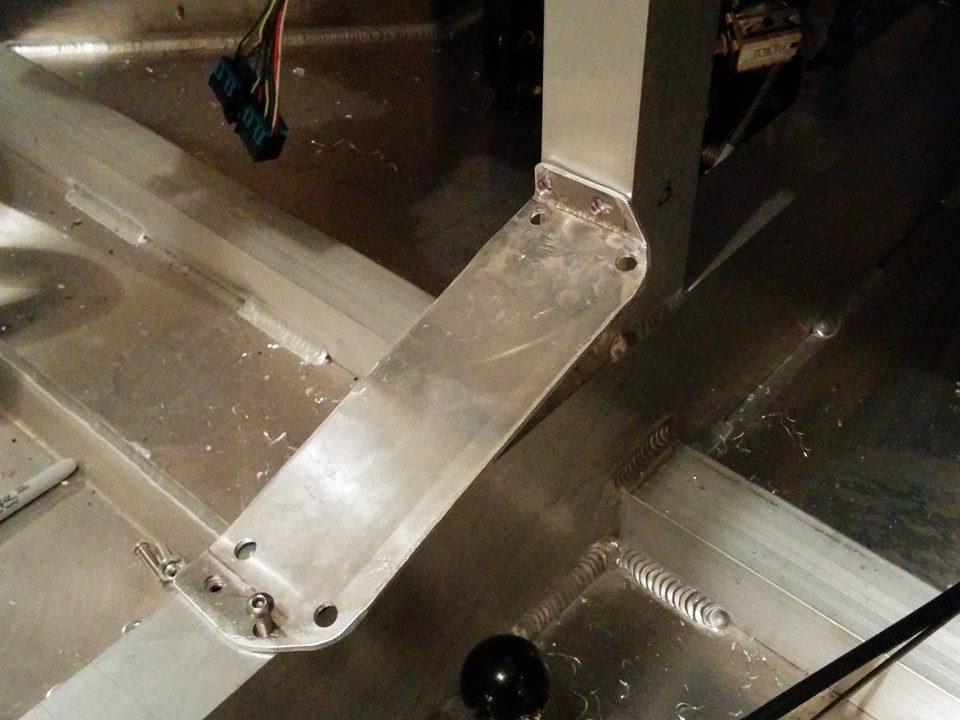
The shifter needs a bracket made and installed. It’s ugly, but it works. Shrug.
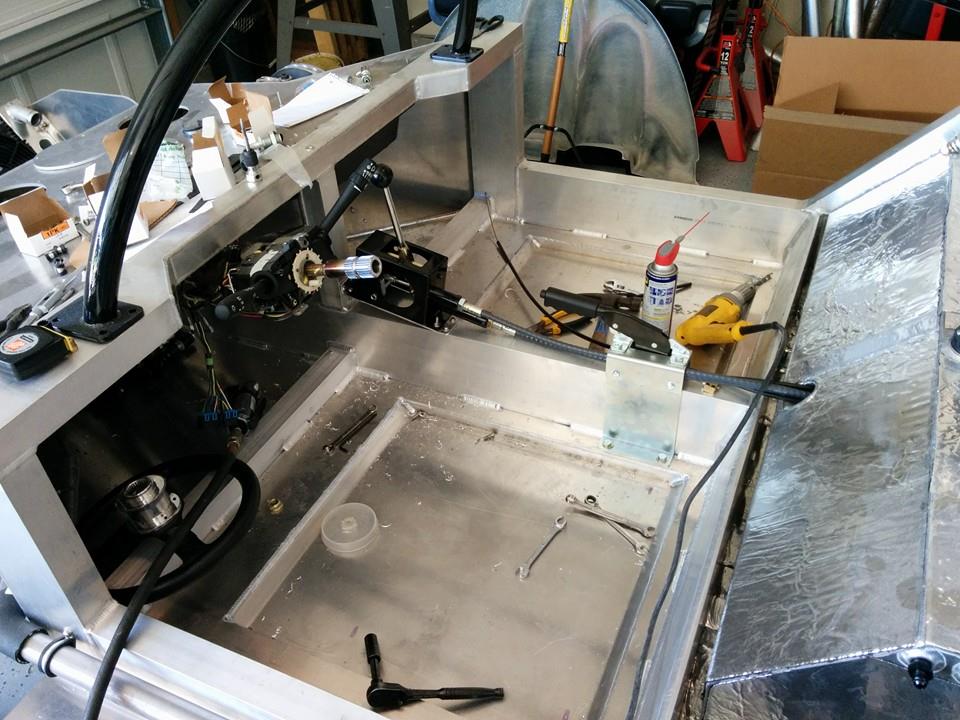
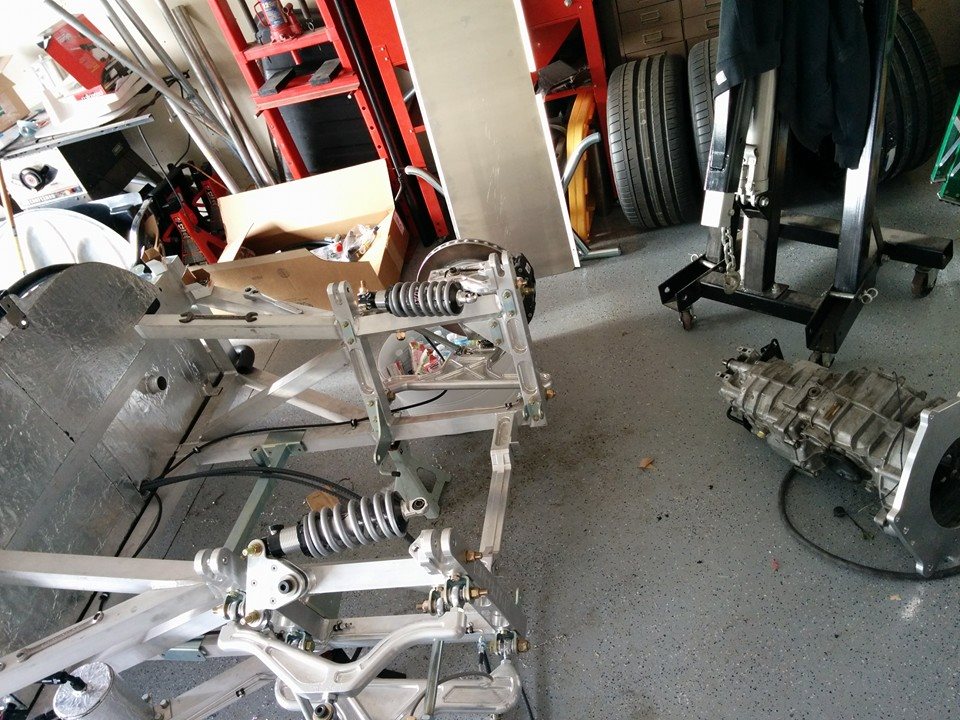
I had to pull the transmission out to get at some of the points in the chassis to do some minor work. It had to come out regardless to fit the engine so I just went ahead and did it.
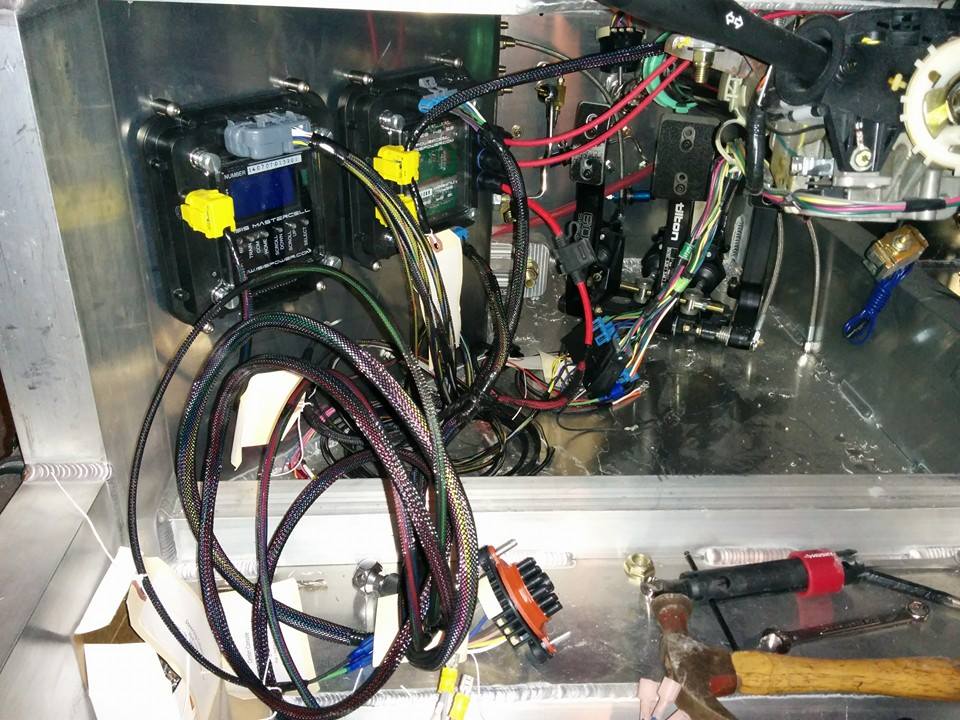
I’m no good at wiring but this ISIS system makes this fairly straight forward. Pigtails for the lights already built in and minimal connection points makes this one of the most straight forward systems I’ve used.
Finally, I picked up a STACK 8130-B unit with the GPS Speedo, it’s a bit of a tight fit into the dash, but holy macaroni is it going to be Awwwwesssoomme!

-
11-18-2014 #24
Registered User
- Join Date
- Apr 2014
- Location
- Shoals, IN
- Posts
- 13

Man that car is awesome.
-
11-19-2014 #25
Registered User
- Join Date
- Jun 2005
- Posts
- 436
Thanks! Should be really fun when it's done
-
12-07-2014 #26
Registered User
- Join Date
- Jun 2005
- Posts
- 436
Too tired to repost all this into forum format. Sorry fella's.
This'll have to do.
http://gearheaddaily.com/grifter-dec...-ye-gearheads/
-
01-11-2015 #27
Registered User
- Join Date
- Jun 2005
- Posts
- 436

Straight up for reals player, it's damn cold in our home state of Minnesota. We've seen temps well below zero and not having a garage heater has frankly gotten in the way of making decent progress on the car.
I've resorted to finding things to bring into the basement and shuttling tools one at a time from the garage. It's not all that efficient and frankly, slow work. Regardless, I've been trying my best with a small space heater and finding other projects to do. My motto through this whole build is:
It's all gotta get done, so any work, even not %100 on task gets us closer to a finished product

This is of Jim Hall who works at TPIS in Chaska. He helped us get the motor to and from his shop.

The dyno went pretty well all things considered. If you missed our dyno video, it can be seen below.
https://www.youtube.com/watch?v=KVFA8TUqvmM
Our motor made the "as advertised" 525hp on the dot and 461 ft-lbs of torque. No fiddling, no adjustments, no "corrections" to the tune or anything. It was spot on. No complaints from us! We will dyno the motor again once it's in the car and running so we can make some tuning adjustments with a load on the tires.


Next up, I started to attack the interior. We mocked up the dash board to see what needed trimming and what needed to be done. The more stuff we put on the better it gets! I then opted and purchased a new steering wheel and adapter. Planning ahead, I noticed that we would have to weld the stock shaft onto the steering column which didn't allow much wiggle room down the road.


I finished up some little piddly bits such as the door latches and a couple turnbuckles for the front splitter. I installed the inner door latches too, but still have to figure out how to attach them all together. That said, I'm are going to wait to see how the body lines up before installing the door strikers.


This could be called "before and after". This is a job we were able to do while it was -35* outside. Think I'm joking? I sadly am not.We trimmed the vents and cut out the holes, it's an odd shape so it took some doing to get it just right. We opted to pop-rivet them in place rather than graft them in because it's quite possible that they will break from a rock or something stupid, we do want to be able to fix them easily in the future.


If the padding on the seat pictured above looks familiar, it's probably because we stole our wife's yoga mat and cut it up to make some padding for our seats. It made a world of difference.

We'll see if that's enough belt wrap for the alternator, we will ad a pulley later if it's not sufficient. The alternator is a stock GM 105amp unit with the stock number of 8247. These come on Tahoe's, Silverado's and GM trucks with the 5.3L engine in the mid 2000's. You'll need a couple 1/2" spacers and 2 - 90mm 10x1.50 bolts to finish it up.

The motor was put into place, despite the cold weather we soldered on.
Catch'ya on the flip side!
-
01-18-2015 #28
Registered User
- Join Date
- Jun 2005
- Posts
- 436
Well, the weather broke and man it's like summer! WHOOOWEEE!!
I took the chance to put the transmission in


-
01-18-2015 #29
 -Moderator/Sponsor-
- Join Date
- Apr 2001
- Location
- The City of Fountains
- Posts
- 15,975
I just watched the fuel system video. It seems like a very complicated system that uses two pumps and a surge tank. Have you considered modifying the stock fuel tank to mount an in-tank pump? This would make life so much easier and give you fewer points of failure.
Andrew1970 GTO Version 3.0
1967 Cougar build
GM High-Tech Performance feature
My YouTube Channel Please Subscribe!
Instagram @projectgattago
Dr. EFI
I deliver what EFI promises.
Remote Holley EFI tuning.
Please get in touch if I can be of service.
"You were the gun, your voice was the trigger, your bravery was the barrel, your eyes were the bullets." ~ Her
-
01-18-2015 #30
Registered User
- Join Date
- Jun 2005
- Posts
- 436
I've considered it, but also taking into account that I'd have to rip apart the tank and rework it... and that I suck at welding aluminum... Kinda limits my options LOL Originally Posted by andrewb70

-
01-18-2015 #31
-Moderator/Sponsor-
- Join Date
- Apr 2001
- Location
- The City of Fountains
- Posts
- 15,975
I suck at welding aluminum too, but I think in the long run you might be better off to bite that bullet now. The stock tank looks to be tall enough to accommodate an in-tank module. I am surprised that RCR doesn't do that to begin with. Originally Posted by maxharvard
Andrew1970 GTO Version 3.0
1967 Cougar build
GM High-Tech Performance feature
My YouTube Channel Please Subscribe!
Instagram @projectgattago
Dr. EFI
I deliver what EFI promises.
Remote Holley EFI tuning.
Please get in touch if I can be of service.
"You were the gun, your voice was the trigger, your bravery was the barrel, your eyes were the bullets." ~ Her
-
01-20-2015 #32
Registered User
- Join Date
- Jun 2005
- Posts
- 436
No real update, just liked this view.... Mmmm... Dat ass.

-
01-20-2015 #33
 Registered User
- Join Date
- Apr 2005
- Location
- IN/MI border
- Posts
- 1,904
Wow, that's a ton of work!!! Lookin pretty cool though!
-
01-29-2015 #34
Registered User
- Join Date
- Jun 2005
- Posts
- 436
Here's the latest video... Nothing fancy.
https://www.youtube.com/watch?v=4pbt...ature=youtu.be
-
01-29-2015 #35
-Moderator/Sponsor-
- Join Date
- Apr 2001
- Location
- The City of Fountains
- Posts
- 15,975
Why are you installing extra sensors for the Stack gauges? Can't they interface with the OEM gauges via CAN bus? Originally Posted by maxharvard
Andrew1970 GTO Version 3.0
1967 Cougar build
GM High-Tech Performance feature
My YouTube Channel Please Subscribe!
Instagram @projectgattago
Dr. EFI
I deliver what EFI promises.
Remote Holley EFI tuning.
Please get in touch if I can be of service.
"You were the gun, your voice was the trigger, your bravery was the barrel, your eyes were the bullets." ~ Her
-
01-31-2015 #36
Registered User
- Join Date
- Jun 2005
- Posts
- 436
I've done two of these STACK unit's with LS motors, one from MAST and one from GM Performance. Originally Posted by andrewb70
The STACK unit has a special set of connectors that don't easily work with any of the CAN BUS or loose wires. I'm sure it could be done, but the weather connectors that come with the STACK system go together so easily, it's not worth the extra effort.
Besides, the STACK system uses it's own solid state pressure senders, which are tough as hell. It makes for easy work with fuel pressure/oil pressure...etc.
02-28-2015 #37
Registered User
- Join Date
- Jun 2005
- Posts
- 436
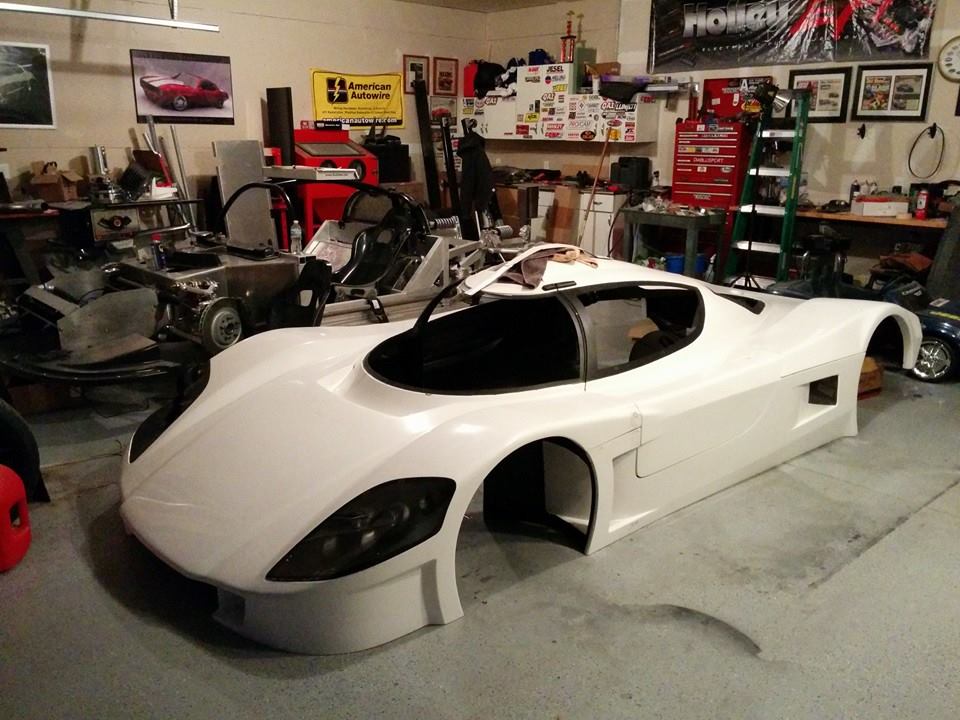
Well, the cold weather continues and work on the SLC has been in a word: Slow.
We were able to get some work done and here's where she stands.
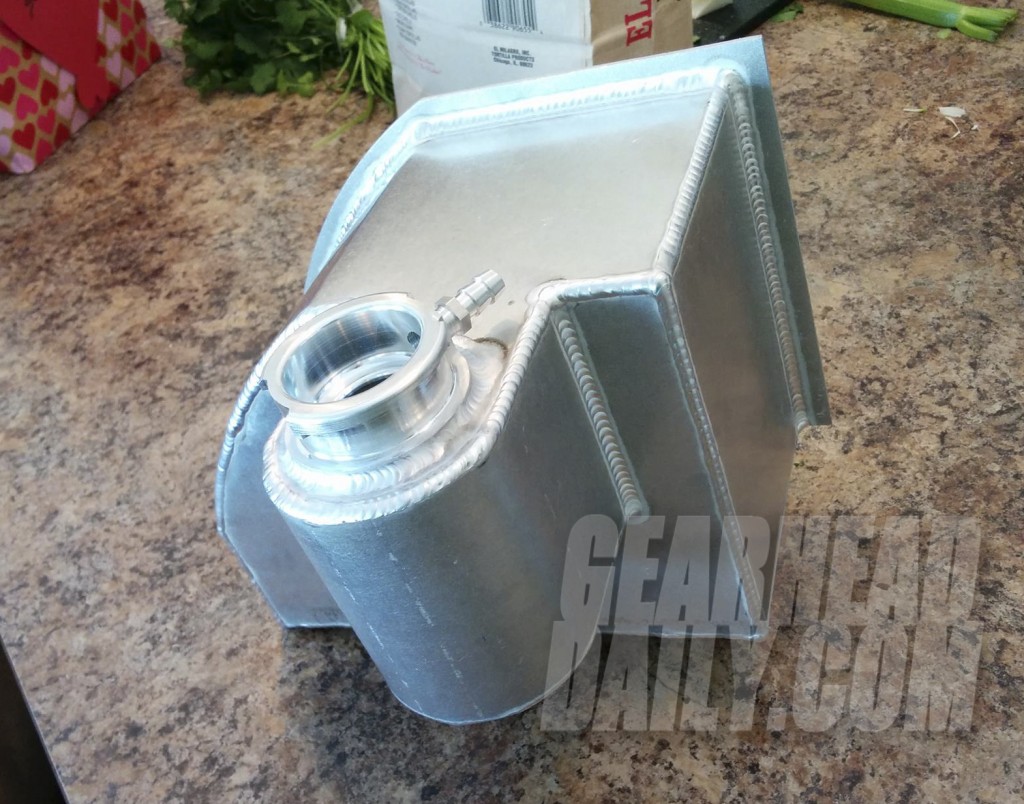
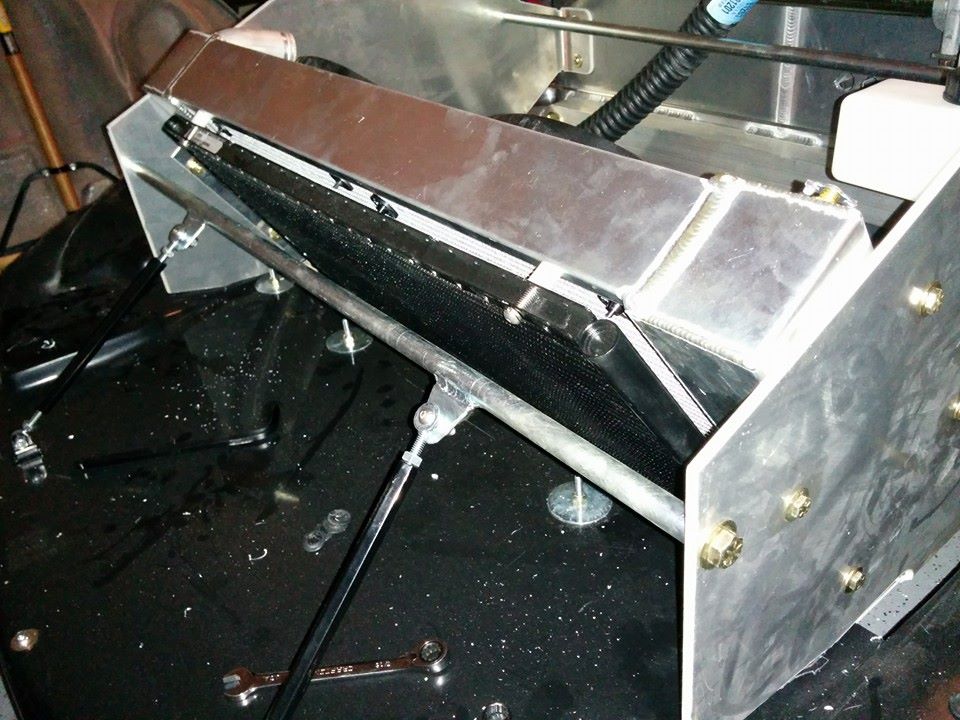
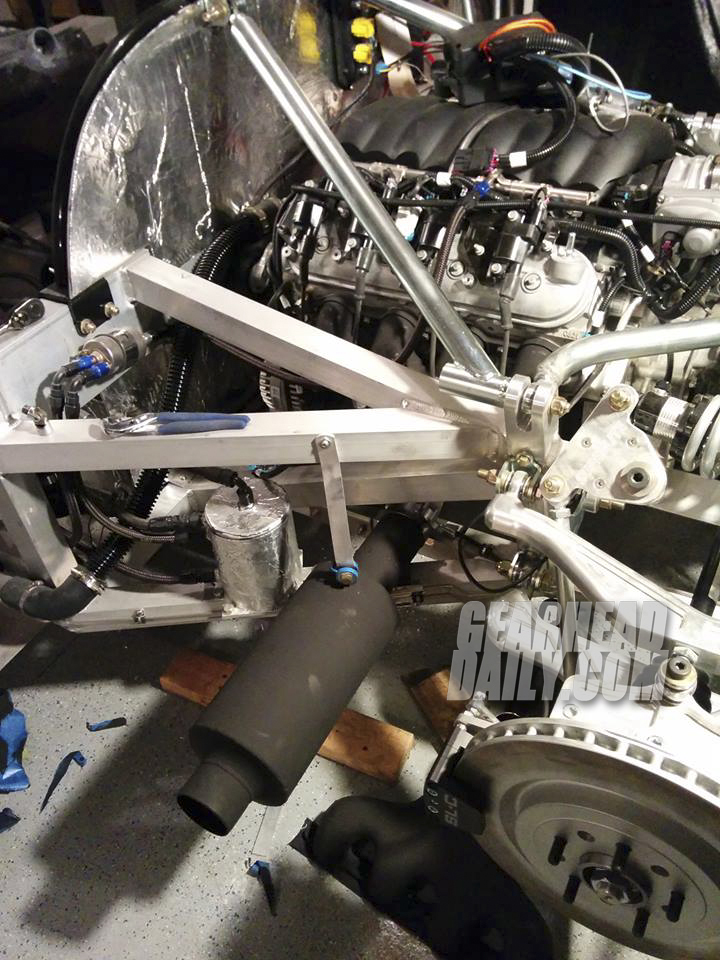
Who doesn't love finely welded aluminum custom pieces? A while back one of the members on the SLC specific forum made a very limited run of these coolant overflow tanks. I completely missed that by a good year or more, but thankfully one of the lucky recipients decided to sell me his because he was going another direction. This is a killer piece and totally worth the extra bucks. This one is sooooo nice, dontcha think?
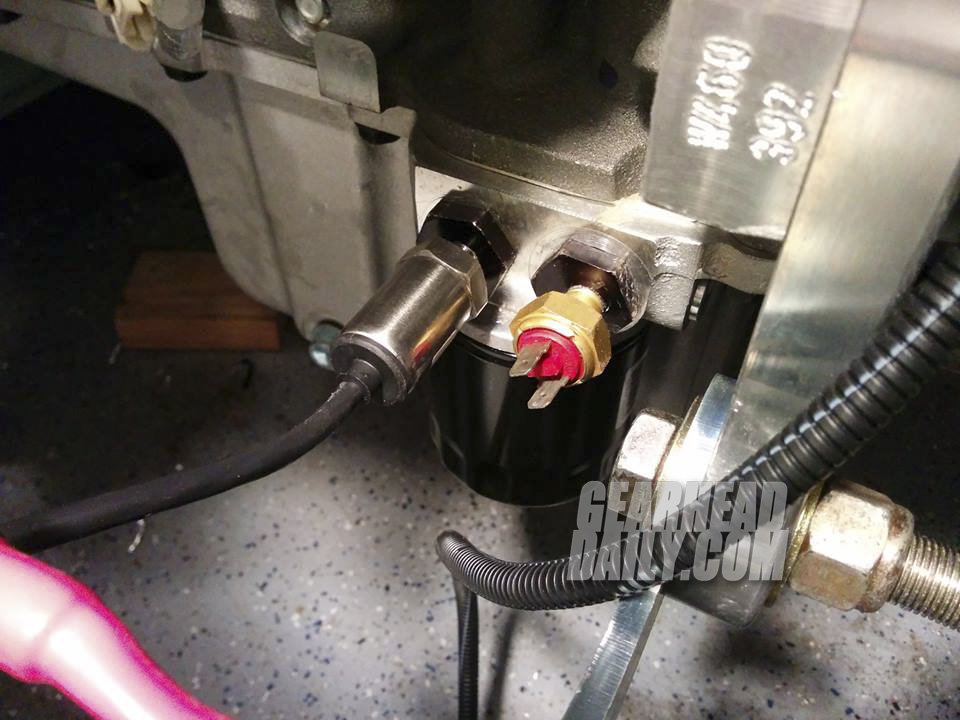
The Mast Motorsports oil pan that we reviewed recently comes with two plugged ports on the pan for an oil cooler (which we will add at a later date). These are perfect for an oil pressure sending unit (left) and an oil temp sending unit (right) that are specific to our STACK gauge cluster. For those who know how the LS oil pan is routed, this one is slightly different. The oil in the stock pan recirculates via the external piece, this one recirculates the oil internally, so no worries about oil starvation.
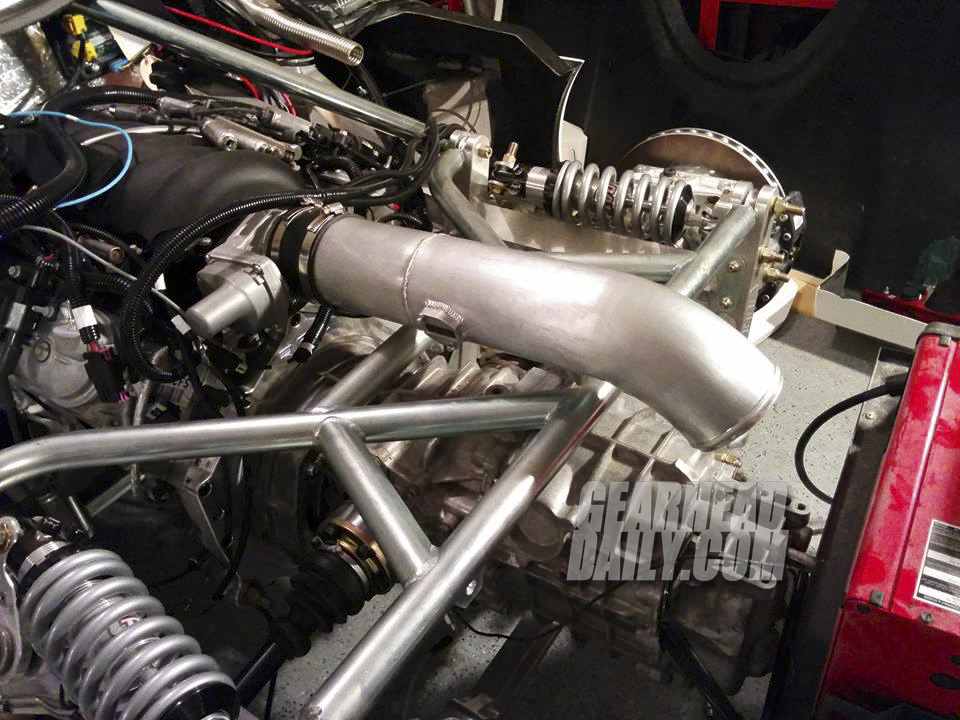
We got our air inlet tube from Nate at One Guy's Garage (http://www.one-guys-garage.com/). He made it a tad long in case it needs to be trimmed when the rear clam is installed. More custom aluminum pieces! Baller status has been achieved!
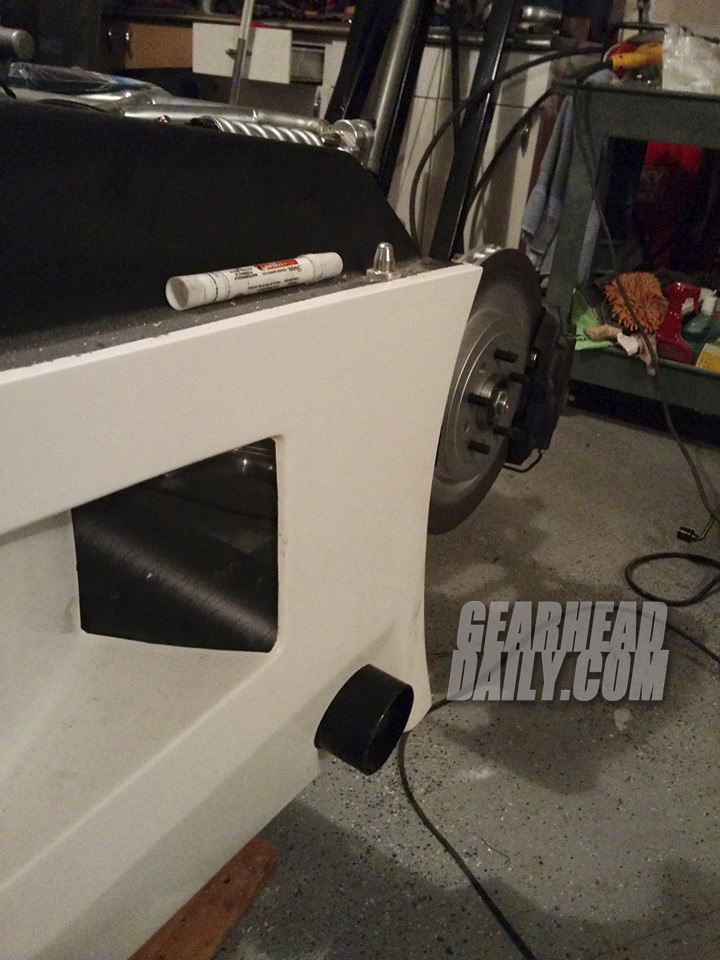
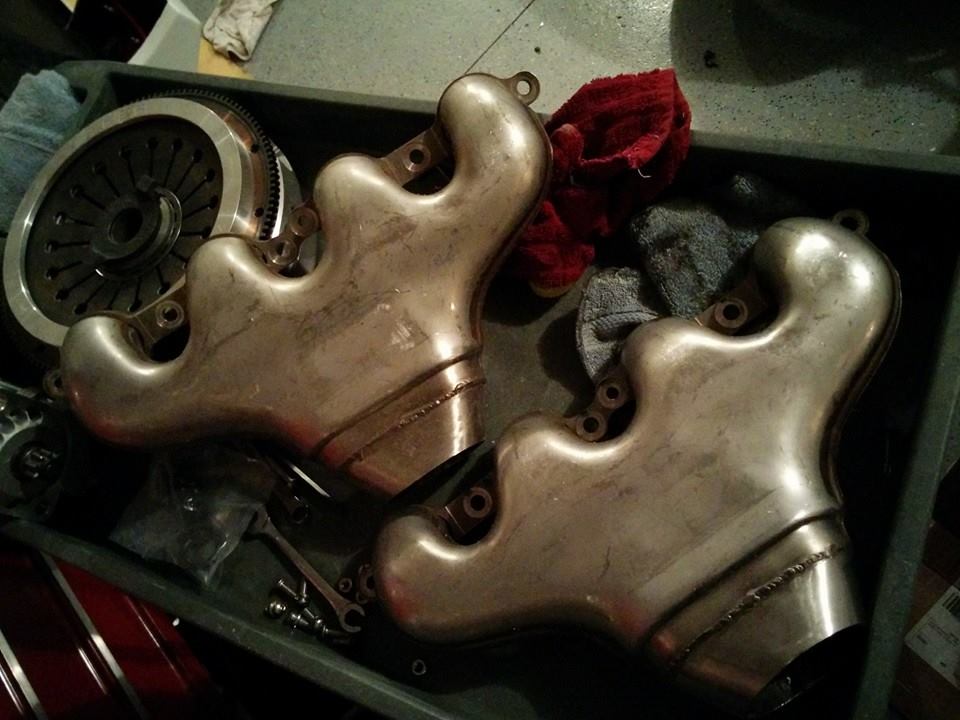
Moving to the exhaust side of things. We decided a long time ago that the exhaust had to exit out the side. We found our exit location first and worked backwards towards the LS7 exhaust manifolds bolted to the engine. We promised a friend that we would do our damnedest to get some pics of the car shooting flames.
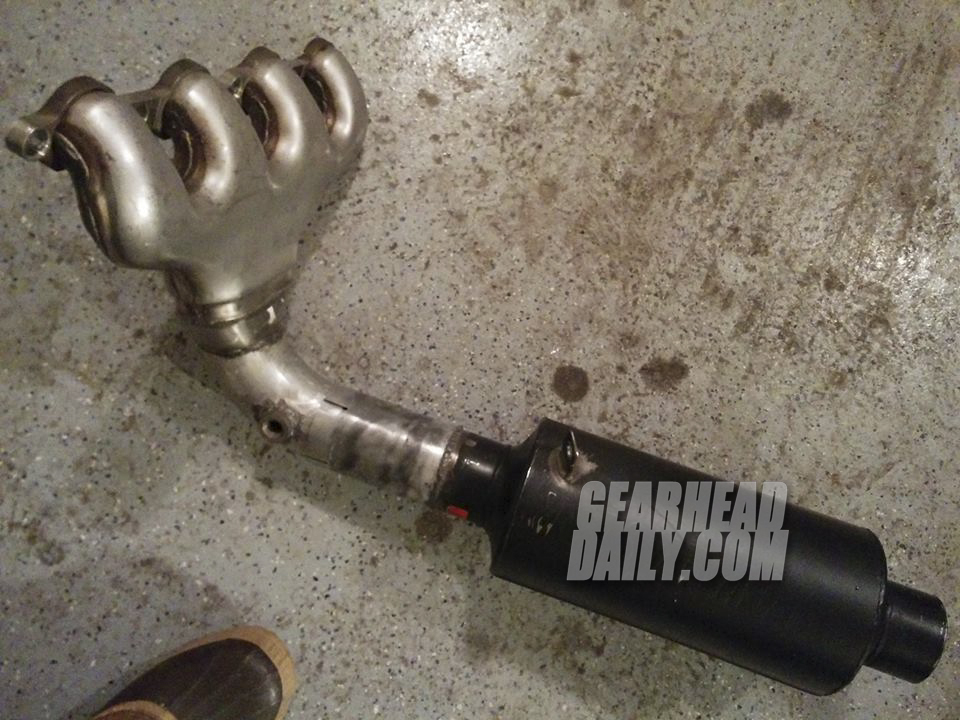
Here's what we eventually came up with this for both sides of the car. It's two pieces and slips on with a thick band clamp. A one piece system wasn't going to fit, so that kinda sucked.
We added some VHT high temp exhaust paint to the whole tube and manifold. It should look decent after a few heat cycles for the paint to cure.
Our neighbor came by to help remove the body. There's really only a few ticky-tack things left like wiring up the gauge cluster, adding fluids and doing the finish wiring. Hopefully we'll be posted a first start video soon!
My god this thing looks so badass. Dat'ass y0!
03-01-2015 #38
-Moderator/Sponsor-
- Join Date
- Apr 2001
- Location
- The City of Fountains
- Posts
- 15,975
Good progress. Are you going for a particular look in the engine bay?
Andrew1970 GTO Version 3.0
1967 Cougar build
GM High-Tech Performance feature
My YouTube Channel Please Subscribe!
Instagram @projectgattago
Dr. EFI
I deliver what EFI promises.
Remote Holley EFI tuning.
Please get in touch if I can be of service.
"You were the gun, your voice was the trigger, your bravery was the barrel, your eyes were the bullets." ~ Her
03-01-2015 #39
Registered User
- Join Date
- Jun 2005
- Posts
- 436
Umm... functional? LOL Originally Posted by andrewb70
I'm hoping to pick up some orange LS376 or LSX valve covers some day to make it pop a bit, but that's really all I have planned at the moment. Got any ideas?
03-02-2015 #40
-Moderator/Sponsor-
- Join Date
- Apr 2001
- Location
- The City of Fountains
- Posts
- 15,975
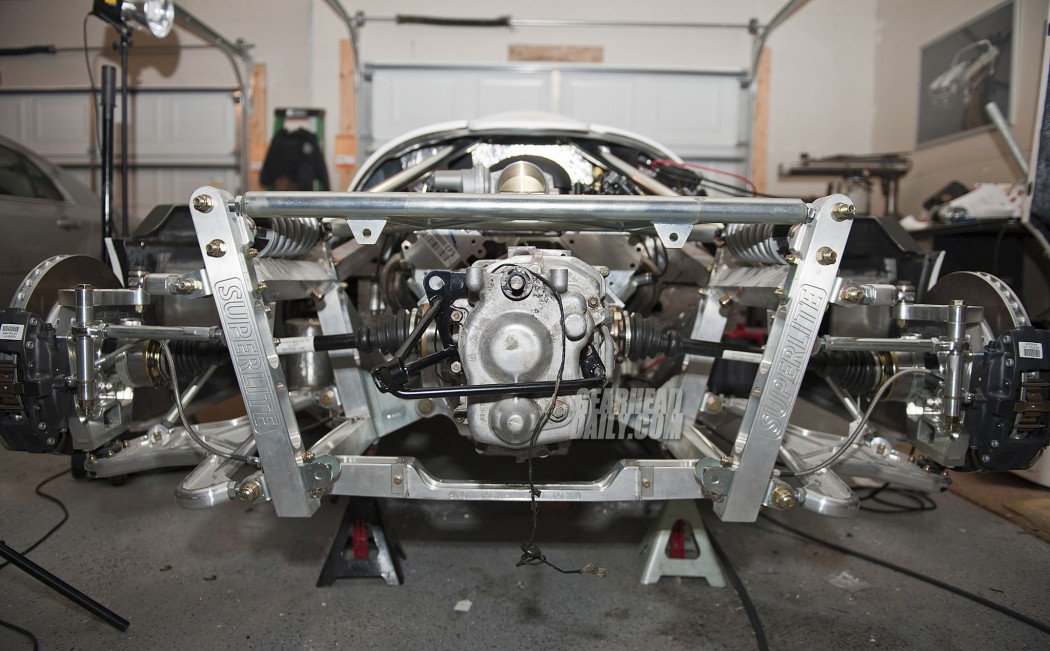
Well, it all depends on how crazy you want to get. If it was me, I would start by getting some Holley valve covers and ditching the coil brackets. I am also not a fan of the "fabricated" aluminum look, so I would do something with that overflow tank. You can media blast it, which will make it look cast. You can wrinkle paint it. You can blast it and have it anodized. Hell, you can just paint it flat black. The natural aluminum will look like doody in short order. Same goes for that intake tube. Originally Posted by maxharvard
I'd also reloom the injectors. I wish I would have done that when I did my GTO swap. Redoing some of the more visible parts of the harness will make for a much neater appearance.
In the above picture, see the bolt that is attaching the right shock to the bell crank? The bolt is too long and it is also going in the wrong direction. As it is, if the nut backs out, the bolt falls out. If you have the bolt coming in from the top, should the nut back off, the bolt stays in place.
I'd would also strongly consider painting the aluminum frame and having all of the other aluminum parts hard anodized. It's surprisingly affordable and will wear much nicer.
Andrew1970 GTO Version 3.0
1967 Cougar build
GM High-Tech Performance feature
My YouTube Channel Please Subscribe!
Instagram @projectgattago
Dr. EFI
I deliver what EFI promises.
Remote Holley EFI tuning.
Please get in touch if I can be of service.
"You were the gun, your voice was the trigger, your bravery was the barrel, your eyes were the bullets." ~ Her

 Reply With Quote


