Results 1 to 20 of 429
-
05-10-2014 #1

 Registered User
- Join Date
- Aug 2004
- Location
- Västerås, Sweden
- Posts
- 332

"Mechanix Menace": An LS7-motivated, chopped and heavily modified 1973 Datsun 240Z
This thread describes what has taken up a lot of my free time (on and off) for more than 30!!!! years, my Datsun 240 Z. The relationship with the car is really of the love/hate type! Well, for better or worse, here's some documentation of what you can do if you really are a freak, like me!
I initially had this build thread at CarDomain, beginning in 2004. All those old posts have been copied over to Pro-Touring. So, while the posting date is new, a lot of it happened a long time ago. I will of course continue updating the project here.
Note: Some of the pictures are clickable for higher resolution.
I've owned the car since 1988. I ran it in stock condition in the summer of -89. After a few years, I put it on the street again with a Chevy 350 and a Muncie M21. The engine has been dynoed to 410 hp.
If you're interested in all the details of the car, please keep on reading! I am going to update my page continuously, so please check back. Questions and comments are welcome!
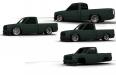
This is one of the first stumbling attempts in Photoshop!
This is how the photo looked before doctoring it. As you can see, the Torque Thrusts are placed in front of the car, and I've put boards under the car to simulate the ride height I'm hopefully going to be able to attain, with quite a few mods to the suspension and floor pan.
Here you can see the status of the car as of October 2004, when I started the Car Domain build thead. The car is seeing daylight for the first time in two and a half years!
 P1010001liten by ChevyZ240
Follow along to see the development of the car since I bought it on 12/20/88!
This is what I brought home a few days before Christmas! The car was imported from California the summer before, by the guy that I bought it from. It had a 260 Z motor in it. It had almost no rust, except for the floor pan, that had been repaired terribly. I guess that the dried-out weather-stripping made the car leak in a lot of water that collected on the floor.
After some work during the winter, this is what the car looked like in the summer of -89. Back then it was my everyday car. It ran OK, and I and a friend went on a road trip to Paris, France. I also made a lap on the Nürburgring Nordschleife!
-
05-11-2014 #2
Registered User
- Join Date
- Aug 2004
- Location
- Västerås, Sweden
- Posts
- 332
Since I had taken on too big a project in building a tube framed, chopped top, Chevy SB motivated, Volvo 122 Amazon, which never seemed to be finished, I made the decision to drop the Chevy SB in the Datsun to have a fun car to drive the next summer, while work commenced on the Amazon. Yeah right... Some people never learn, eh, Mister Positive Thinking?
This is what the Volvo should have looked like, when finished. That unfortunately never happened, as I parted the project out in pieces. The guy who bought the body was going to build a caravan of it, towing it behind the chopped Volvo 122 Amazon he already had!!!!
What ended up in the Z's spacious engine compartment was this Chevy 350 with AFR 220 heads, Victor Jr, Holley 750 DP, Crower roller rockers, among other parts. The headers I built have 35" long 1 3/4" primaries dumping into 3" collectors, which in turn are connected to a custom built dual 3" exhaust system with custom mufflers. If you look carefully, you can see part of the block lightening that I did. This was inspired by Smokey Yunick's (RIP, you old cheater!) book Power Secrets. The block was relieved of 10 pounds of cast iron.
The engine installed in the car, after initial start up, with everything temporarily hooked up. After a lot more work than I had anticipated, the car was back on the road again in -96. I ran it with the V8 for two years, before deciding on chopping the roof (a disease caught when doing the Volvo), and putting a roll cage in. Again, this was supposed to be done during one winter. Hrrrmmppff...
After having made hundreds of renderings of the car in chopped mode (a few of them can be seen here), both cutting, pasting and drawing on real photos, and doing simple CAD sketches, I had a pretty good idea of how I wanted the car to look. I wanted it to look like it was meant to be that way from the factory, not to look like it had actually been chopped.
In order to get the sleek lines I was looking for, the windshield had to be laid back. Using my "ideal" rendering, see pic, I cut the entire roof off, lowered it about 3" and shortened it at the top of the windshield to get the windshield slope I was looking for. (In this sketch, the car has also been sectioned, in a way; the rockers have been made lower by raising the floor, and the suspension has been radically lowered. While this is the way I really like the car to look, it involves way to much work. All the suspension pickup points have to be moved, the motor needs a super shallow dry sump oil pan, there is no space for the exhaust system (or me, the height of the car being around 41") and so on. In reality the car will have to be slightly higher. Oohh, the agony I have gone through contemplating all this!
05-11-2014 #3
Registered User
- Join Date
- Aug 2004
- Location
- Västerås, Sweden
- Posts
- 332
After positioning the roof where I wanted it to be, and shortening it to get the windshield slope I was looking for, I made a simple windshield template out of some tubing. I then searched the wrecking yards to try to find a windshield with the correct curvature. I ended up using one from a Peugeot 309. (You Americans probably have never seen one, which is no great loss!) The beauty of it was that, not only did it have the correct curvature, but if I let the base of it stick down in the cowl, I didn't even have to cut it to shape! This is wonderful, since cutting a windshield usually means breaking a few, before you get one that stays in one piece.
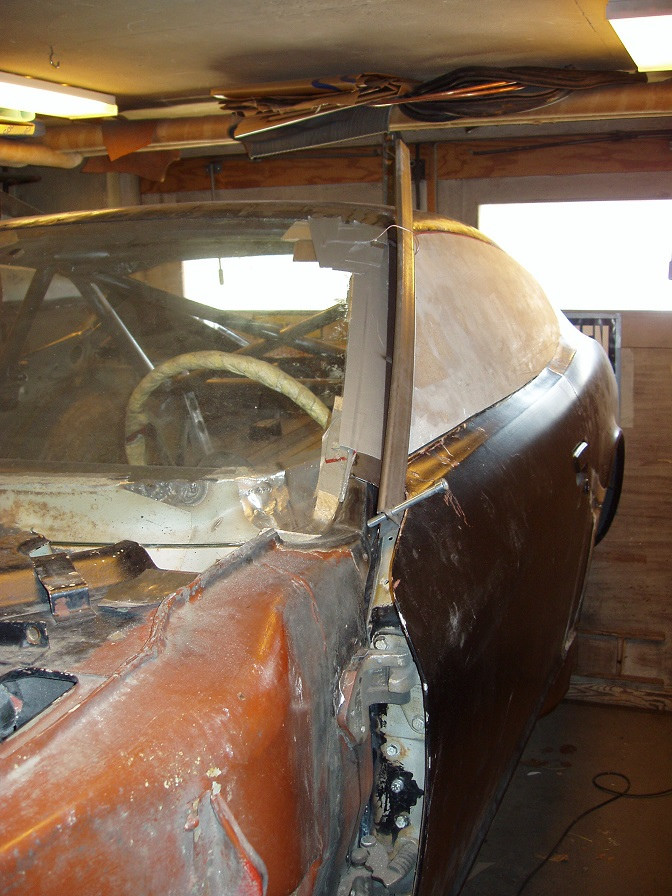
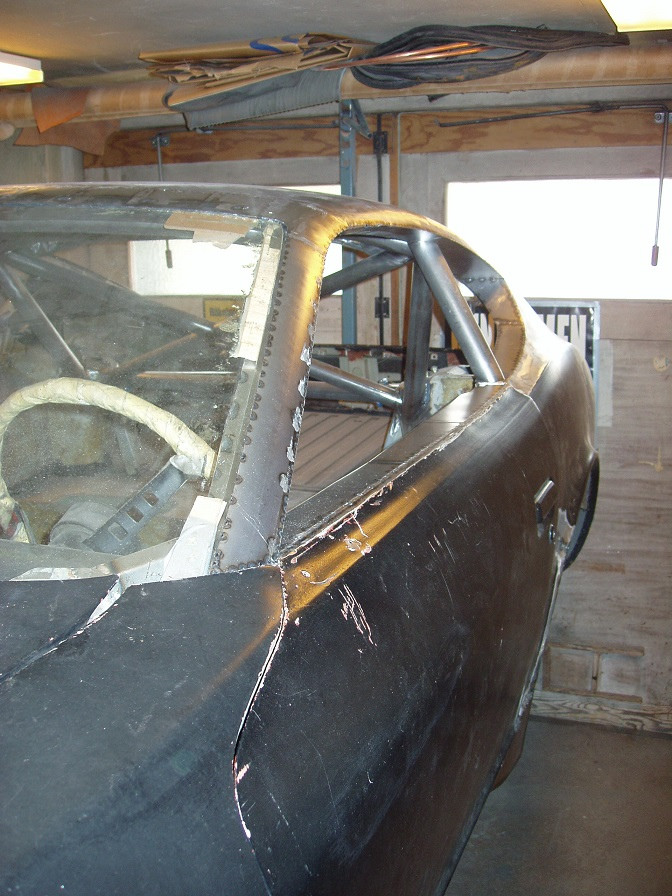
I then made a new windshield frame to place the glass flush with the sheet metal. The glass will be glued to the body, instead of using weather-stripping. The front of the roof also had to be modified to get a smooth transition to the windshield. As I want the roll cage to be as invisible as possible, plus being placed as far out against the body as possible, due to strength and stiffness issues, all stock roof pillars and beams are discarded. Instead, the roof is welded directly on the roll cage tubing.
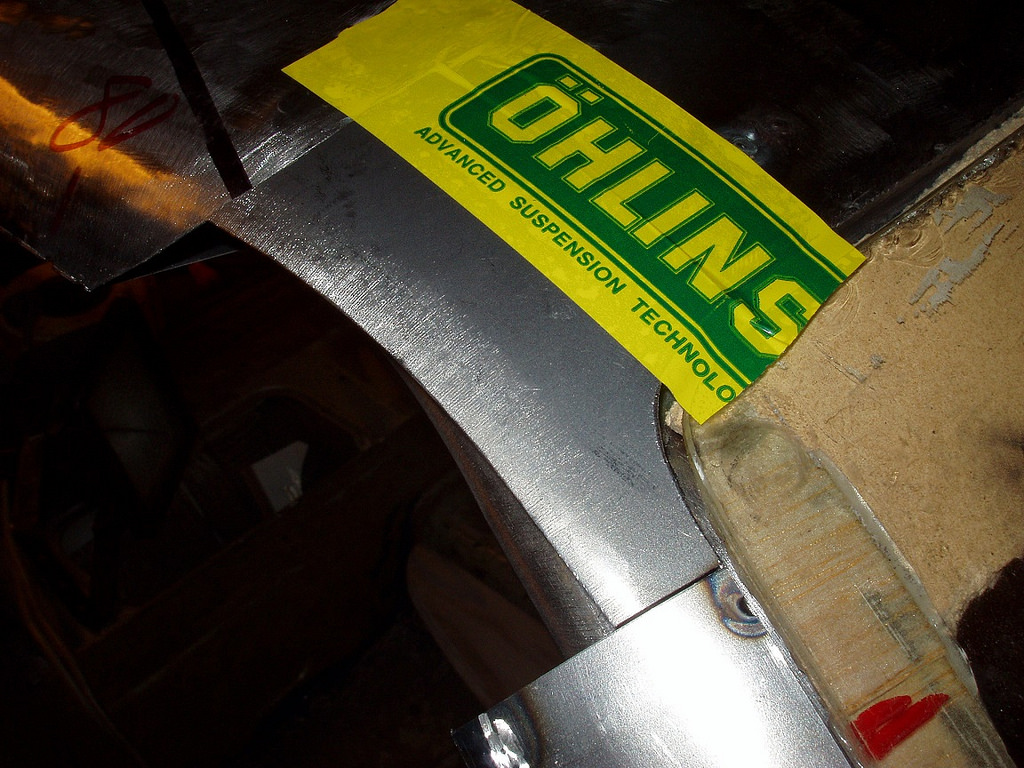
The cage is made of SAE 4130 chrome moly tubing. The home made bender I used for the Volvo wasn't up to the job, so I had to get a new one in the States, when I was there on a business trip. I bought one from Pro Tools that works well. I work as a design engineer at Öhlins Racing, designing shock absorbers for, among other things, NASCAR use. I also go to tests and races, which has given me a few memorable moments, such as riding with Tony Stewart in his Winston Cup car on a short track, sitting on the floor, with no seat, safety belt or helmet. Intelligent, right? If I had wanted, I could have reached out and filed my nails against the wall, going by at 150 mph!
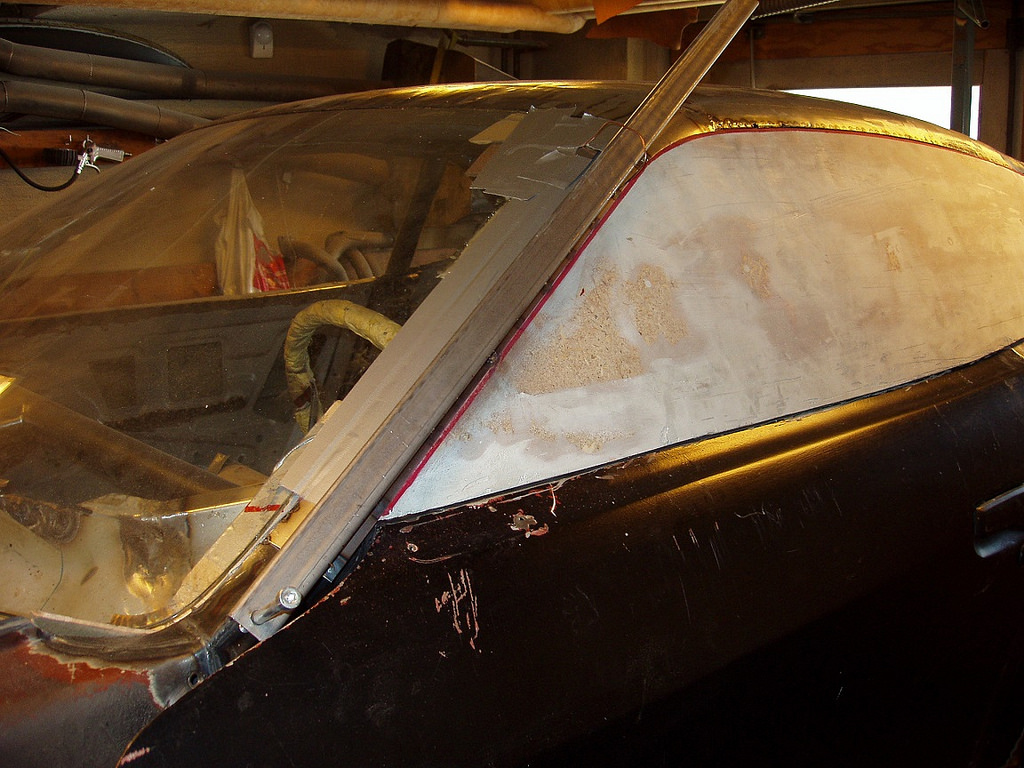
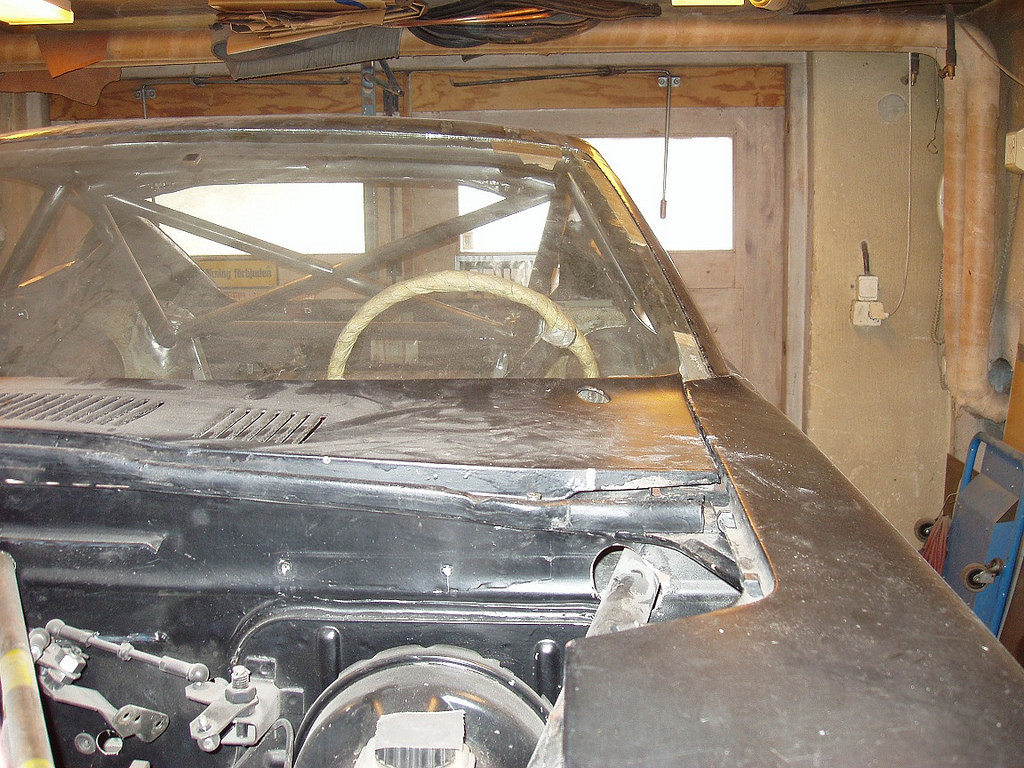
Here you can see how the windshield sticks down in the cowl. While putting the windshield in this way, I realized I could design a hidden wiper system, if I integrated the cowl panel with the hood. The silly lids in the fenders will also be a part of the new hood. This is something that will clean up the looks, I think.
05-11-2014 #4
Registered User
- Join Date
- Aug 2004
- Location
- Västerås, Sweden
- Posts
- 332
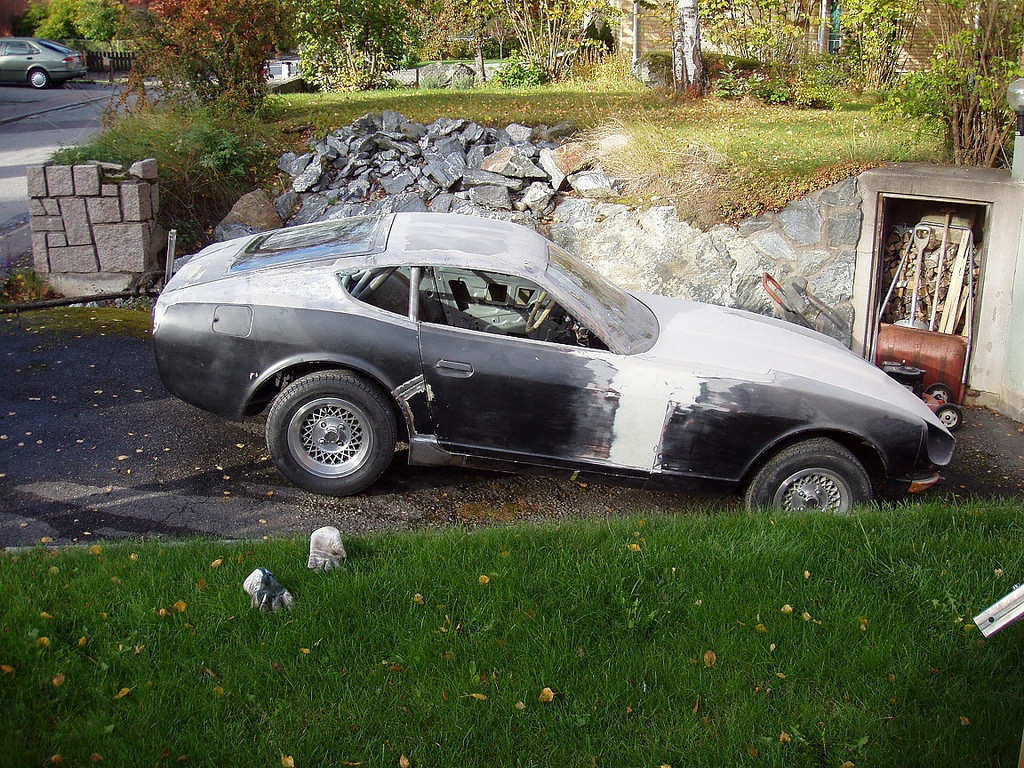
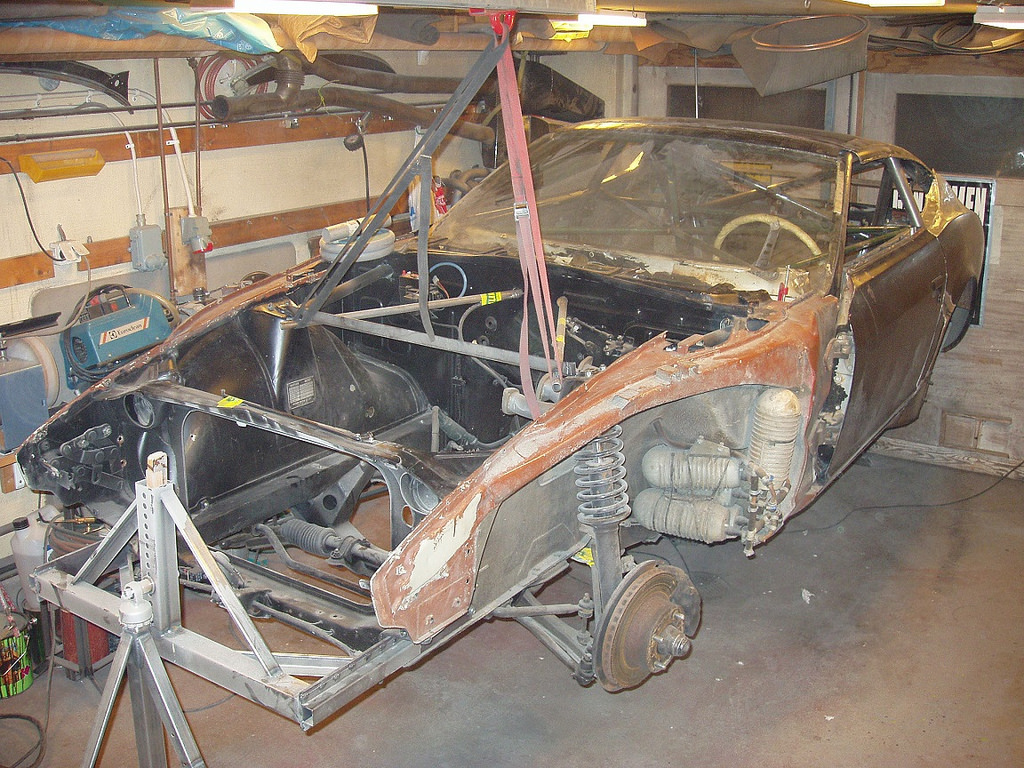
In May 2002, I had the roll cage tack welded enough to take the car down from the jack stands, where I had it carefully leveled. I winched the car up on the street, put on the roof, the hood and a door and a fender, to see what it would look like. The car hadn't seen daylight for several years, so this was a big psychological step! It looks a bit funky with the high stance, due to it not having the engine, interior and so on, in it.
With some cool 17" wheels placed in front of the car, some boards underneath it, to simulate a lower ride height, and a cardboard spoiler, it definitely starts to look pretty good, don't you think? With some work on the computer, I ended up with my lead picture on this site. This decision, to pull the car up on the street and take these pictures, for sure was a good one. These pictures are what has kept my faith in the project through the darkest moments, when contemplating giving up cars and starting to collect stamps or spending my evenings looking at soap operas instead!
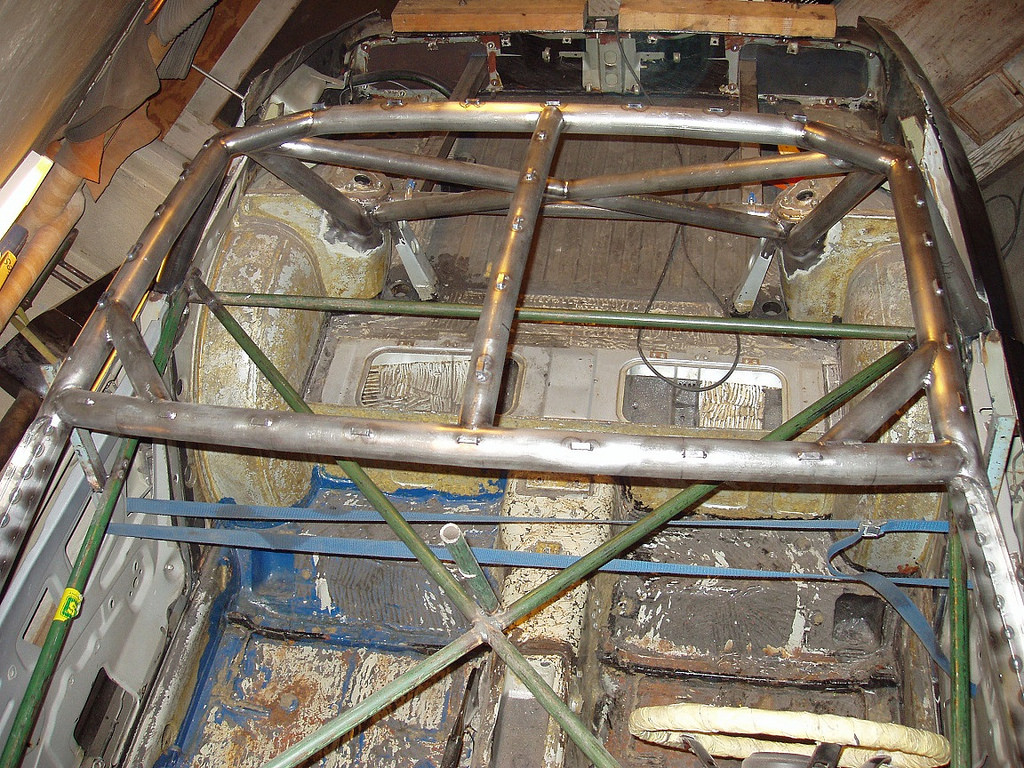
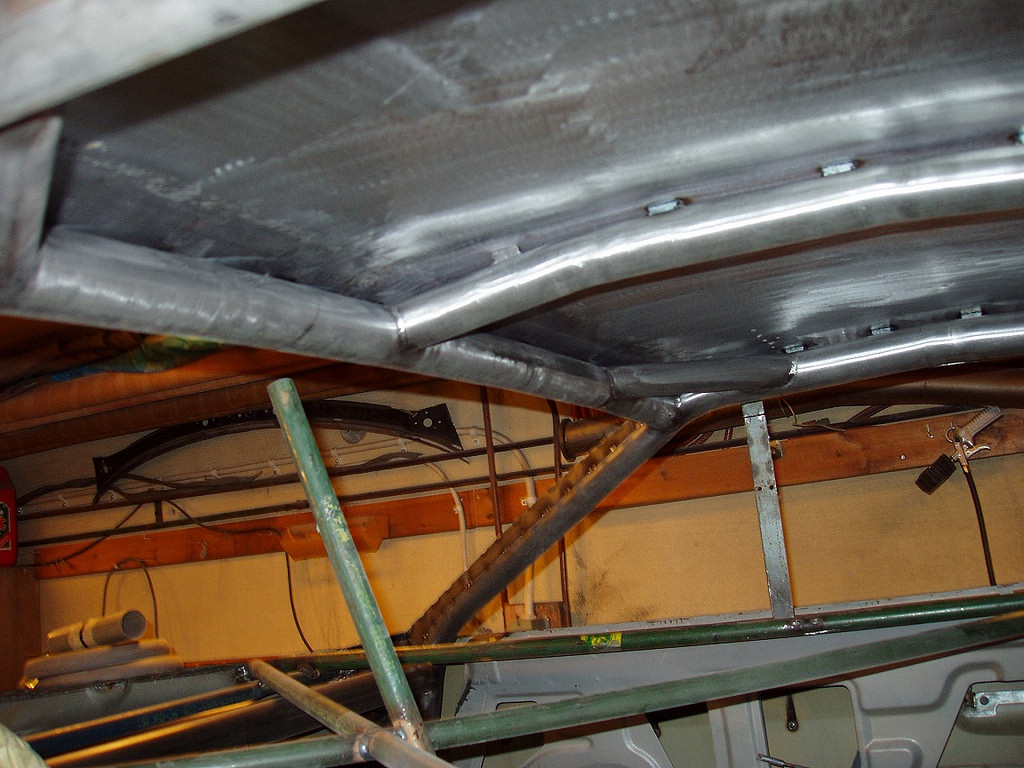
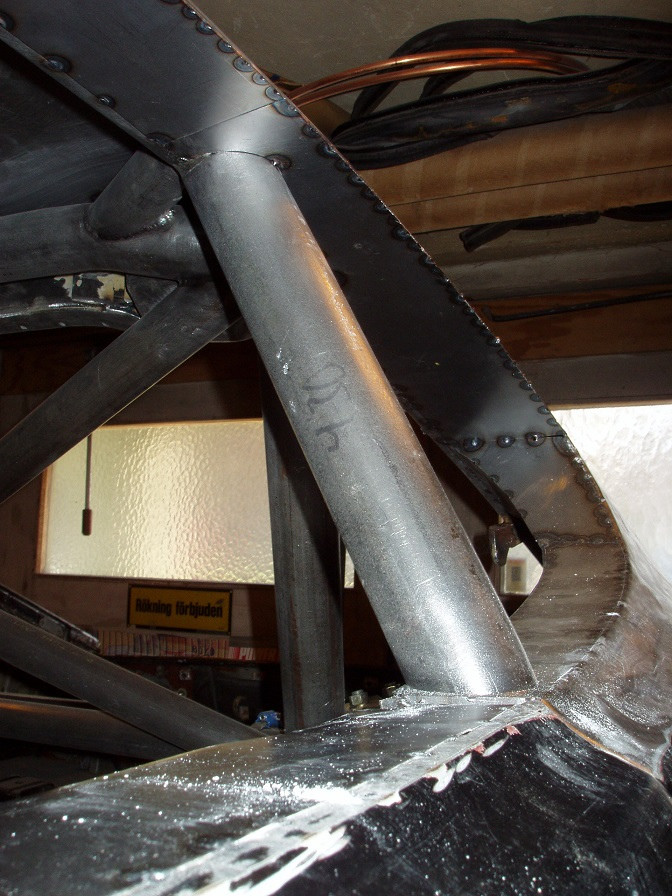
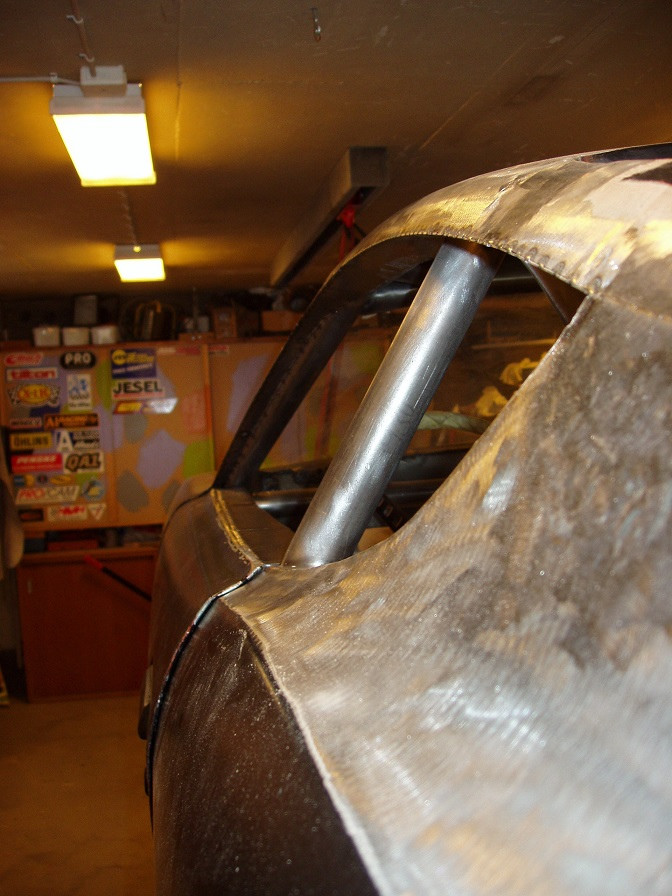
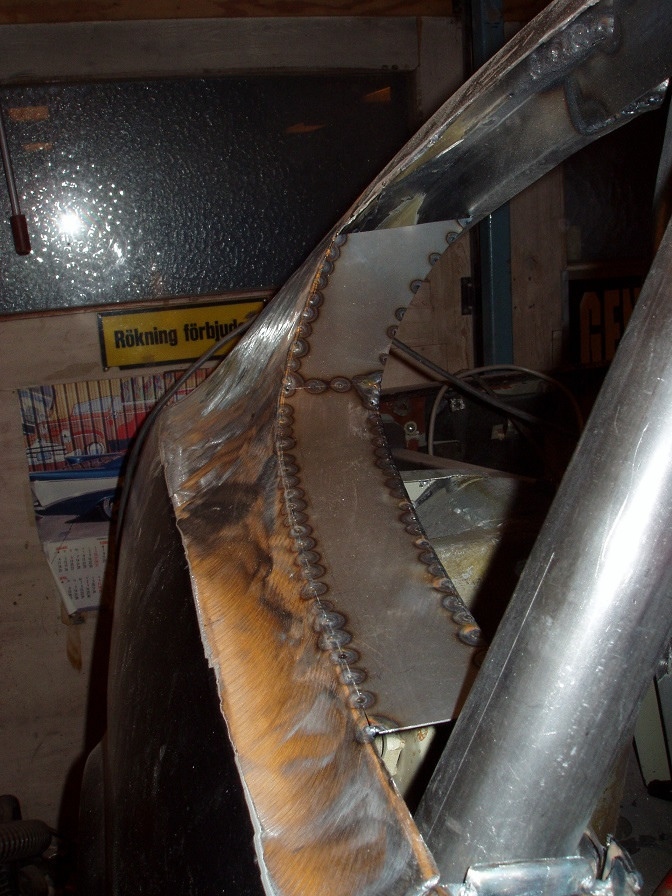
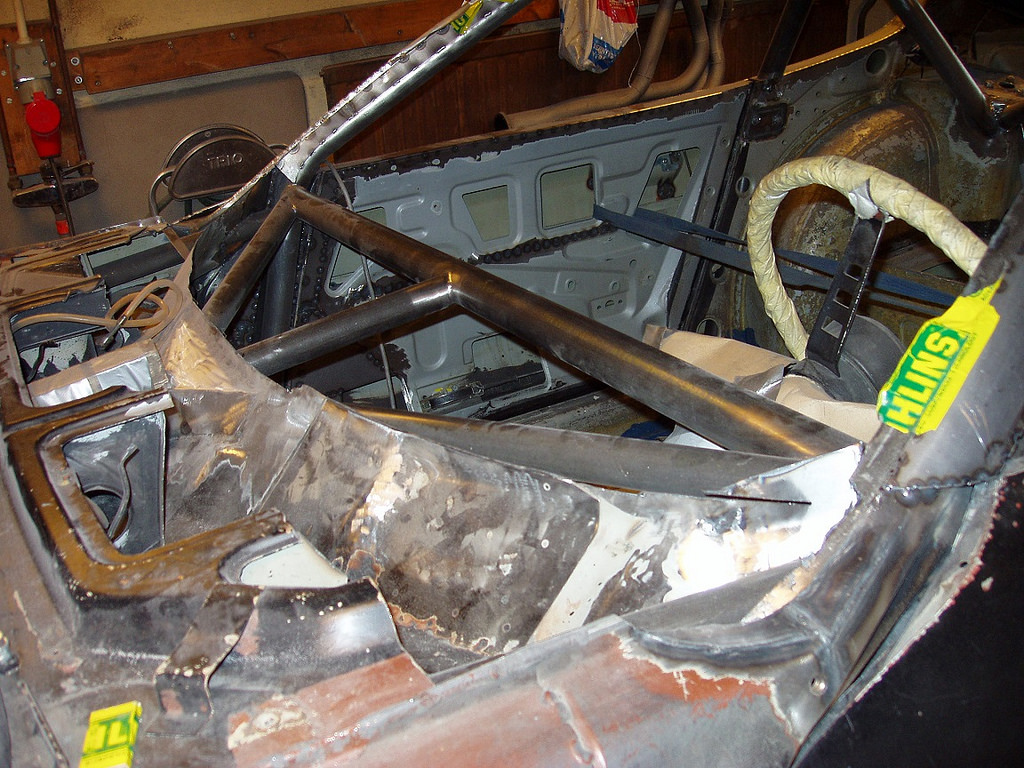
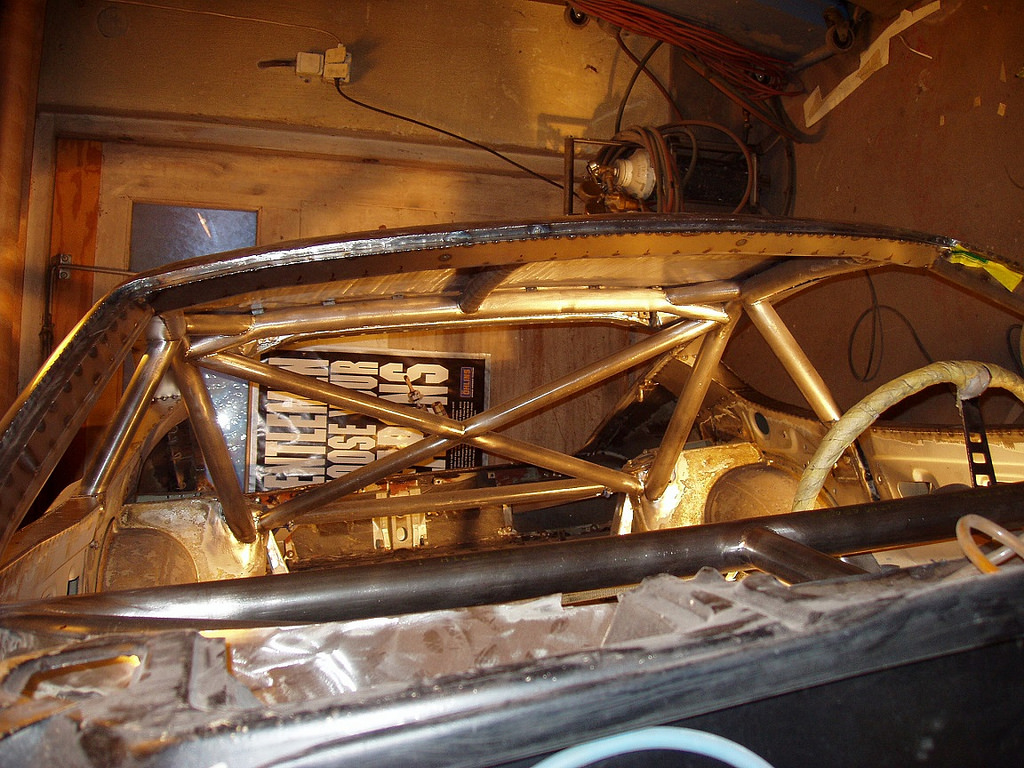
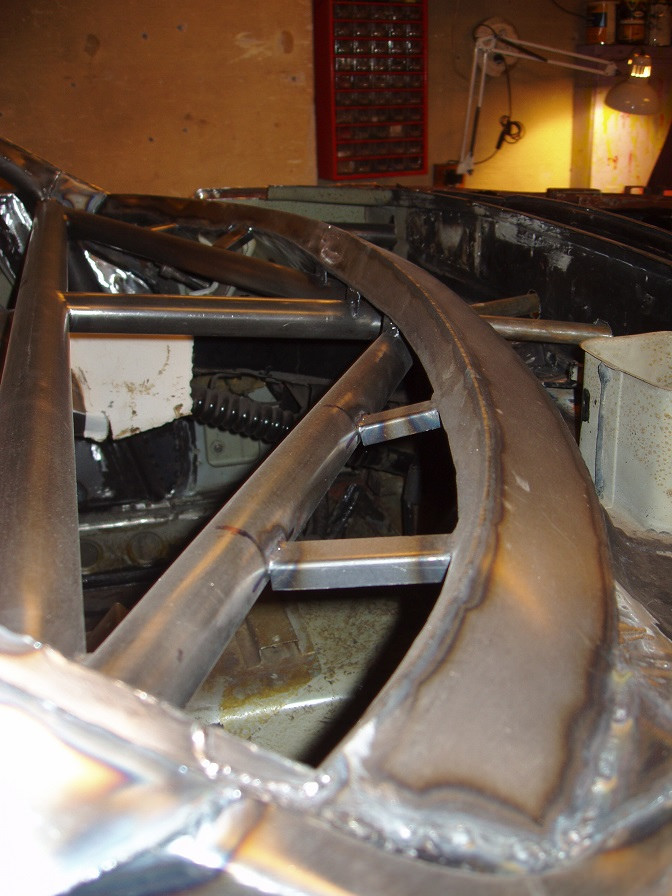
Due to head clearance issues, there is not much space for a proper roof diagonal bar in the cage. Instead, I put this longitudinal bar in, and added some corner reinforcements. In addition, the roof was welded to the cage via 33 pieces of flat iron stock, each one with 3 spot welds, giving 99 spot welds total. I think this will be at least as strong and stiff as a diagonal bar.
 P2040021liten by ChevyZ240, on Flickr
The roof is being welded to the cage.
 P3030001liten by ChevyZ240, on Flickr
05-11-2014 #5
Registered User
- Join Date
- Aug 2004
- Location
- Västerås, Sweden
- Posts
- 332
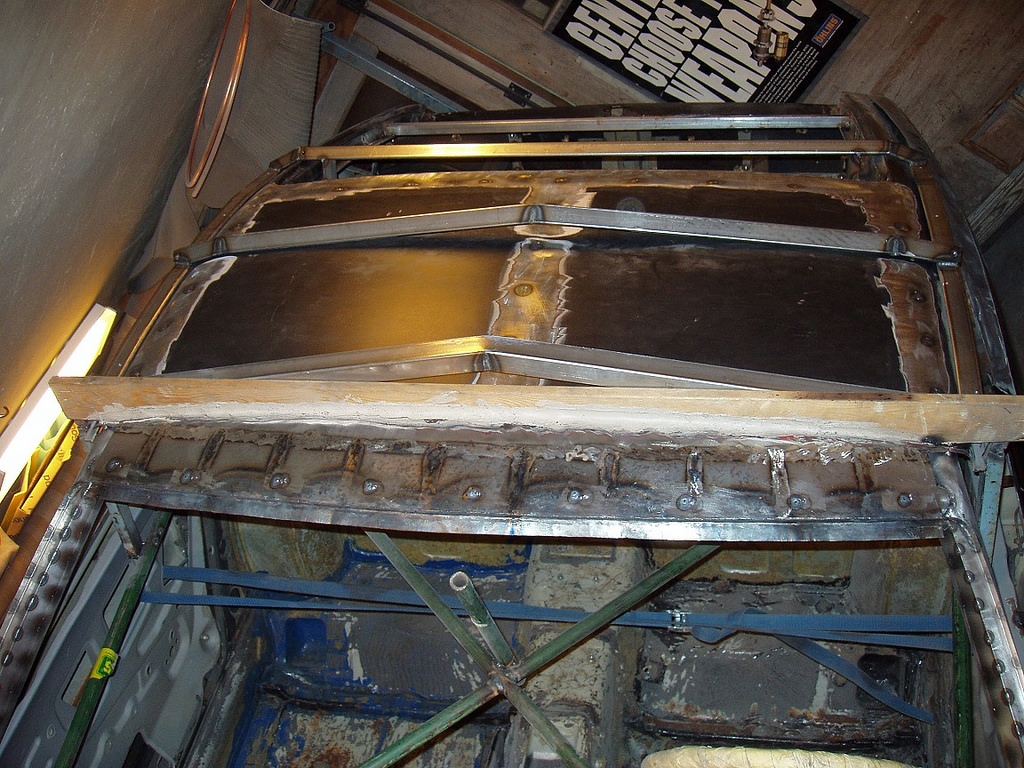
This is what it looks like from below. Each flat piece of bar stock had to be individually filed to the correct shape and thickness to make it fit to the roof sheet metal with minimal gap.
 P3030007liten by ChevyZ240, on Flickr
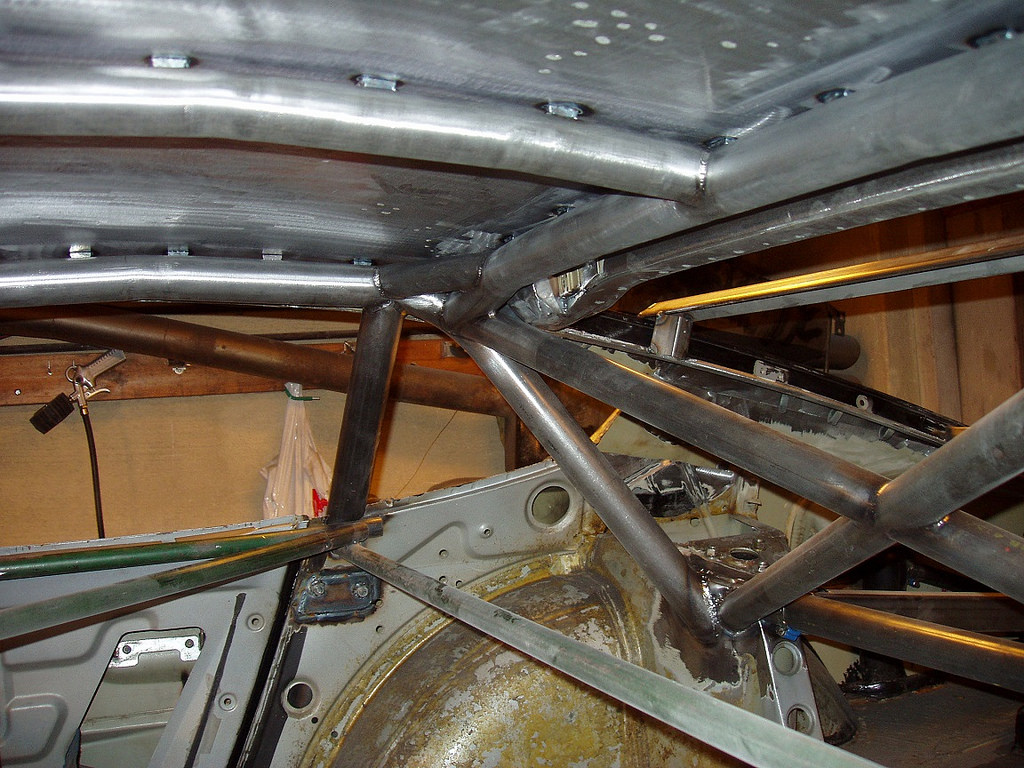
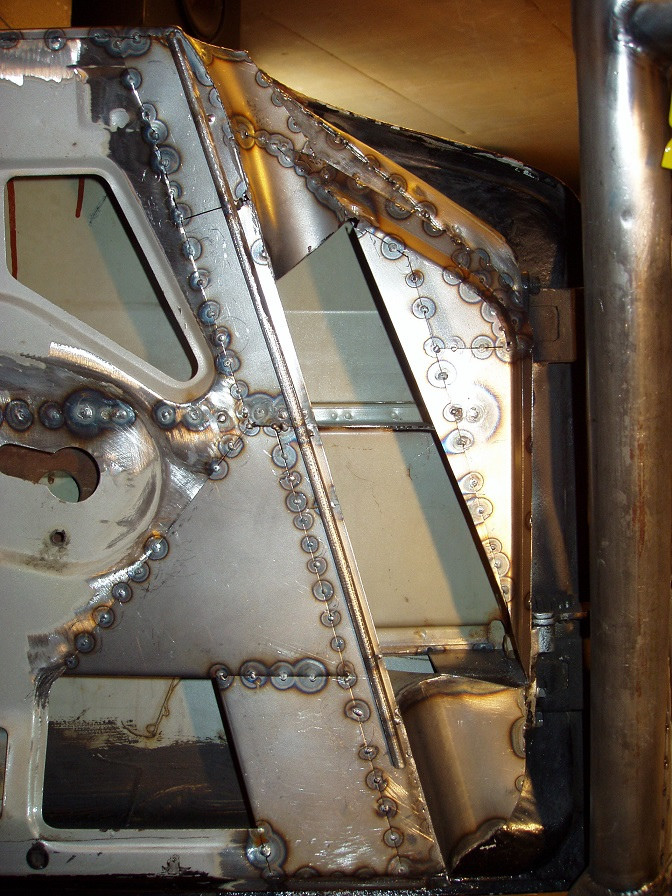
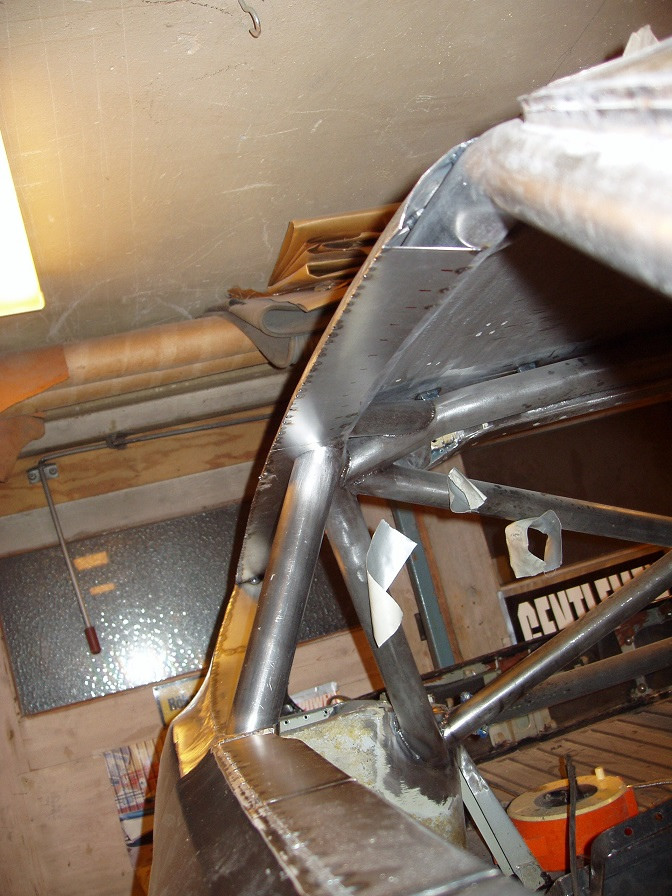
A view of the rear part of the cabin, with the bracing of the rear strut towers.
 P3030006liten by ChevyZ240, on Flickr
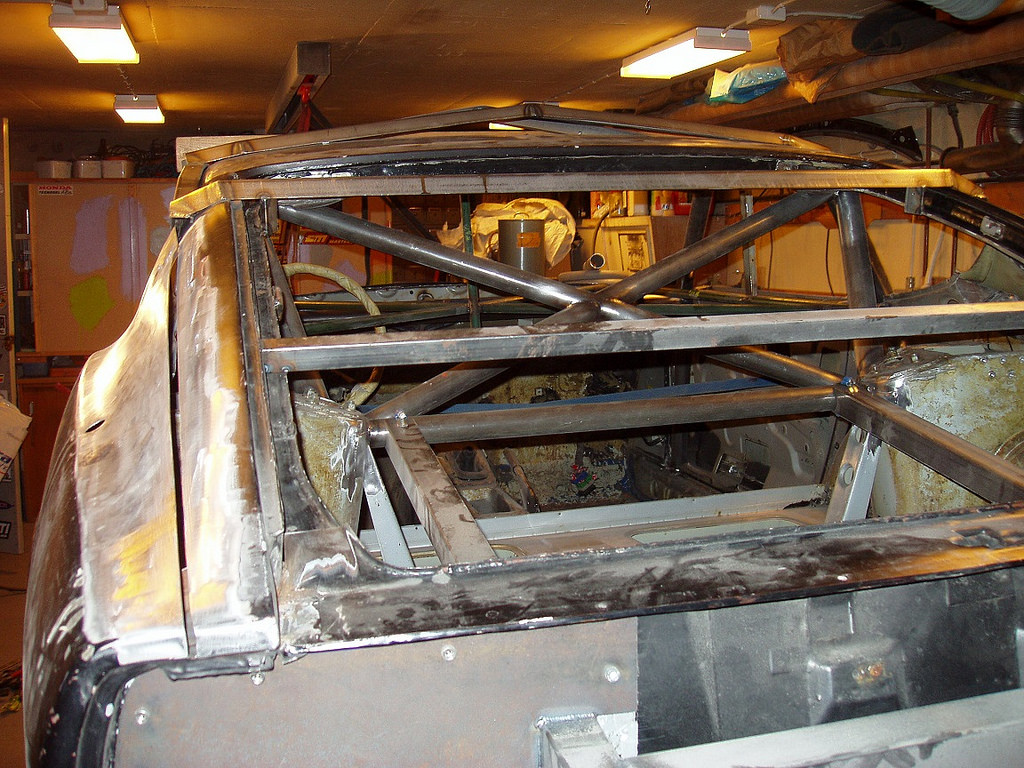
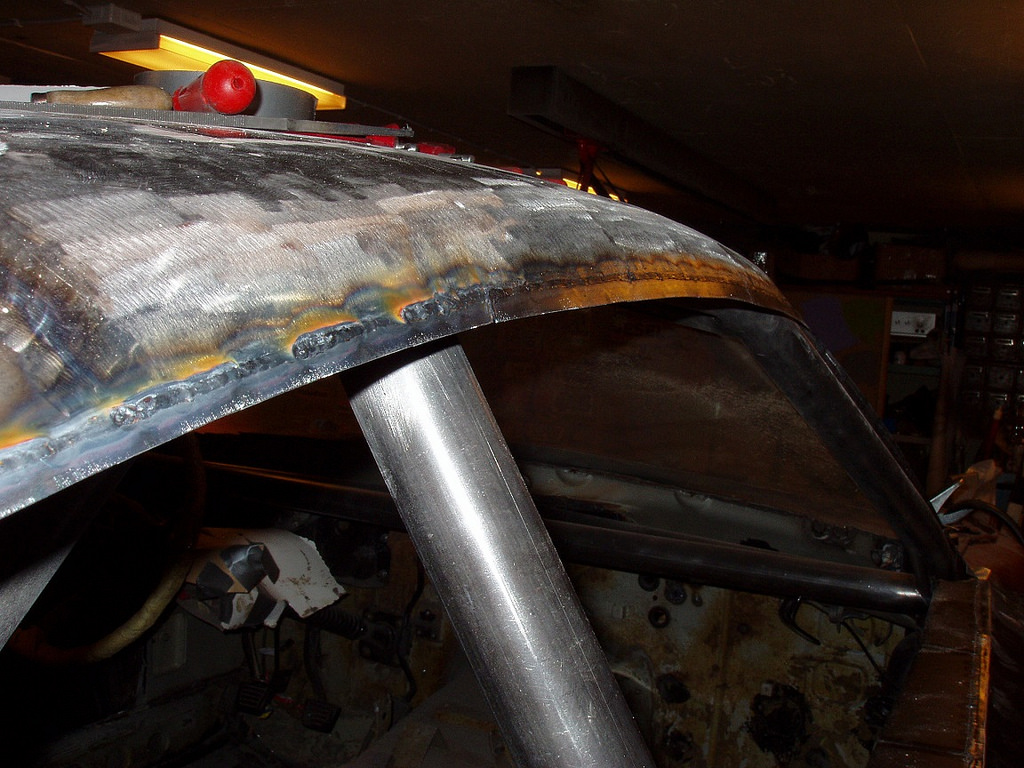
Here, the roof cut is clearly visible. The roof is not cut in the middle, to widen and lengthen it. Instead, the windshield is laid back, as already described, and the side windows are tilted in more. This means that I haven't had to do any welding in the middle of the roof, which is nice. The rear hatch and the rear window are also stock. The entire roof has been tilted forward.
 P3030010liten by ChevyZ240, on Flickr
With most of the temporary bracing of the roof taken away, it starts to look more like a car. The lines are starting to show!
 P3030012liten by ChevyZ240, on Flickr
05-11-2014 #6
Registered User
- Join Date
- Aug 2004
- Location
- Västerås, Sweden
- Posts
- 332
The roof cut is welded up.
 P3280012liten by ChevyZ240, on Flickr
The lower part of the stock A-pillar is connected to the roll cage.
 P3280002liten by ChevyZ240, on Flickr
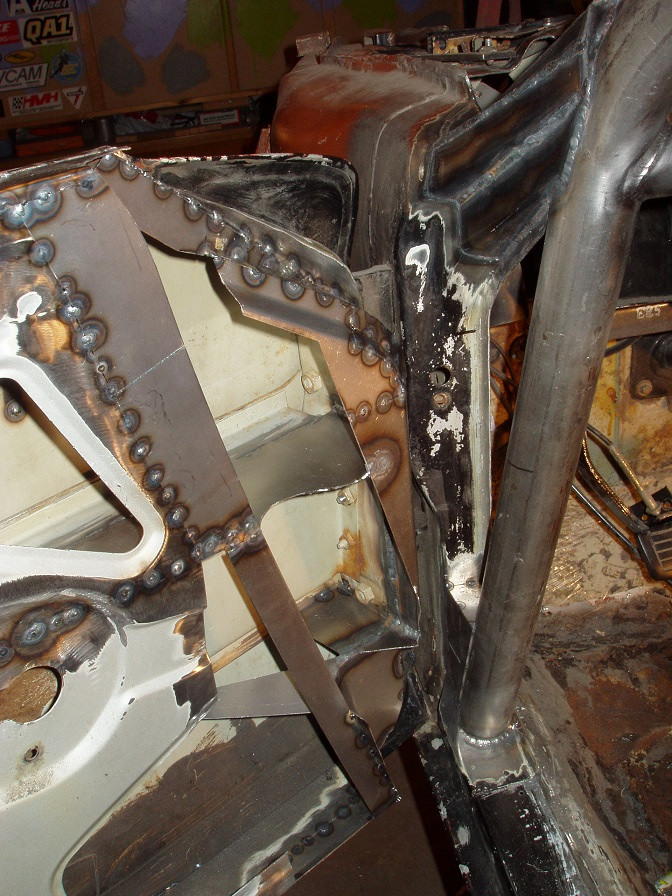
The C-pillar is being built up again.
 P3290050liten by ChevyZ240, on Flickr
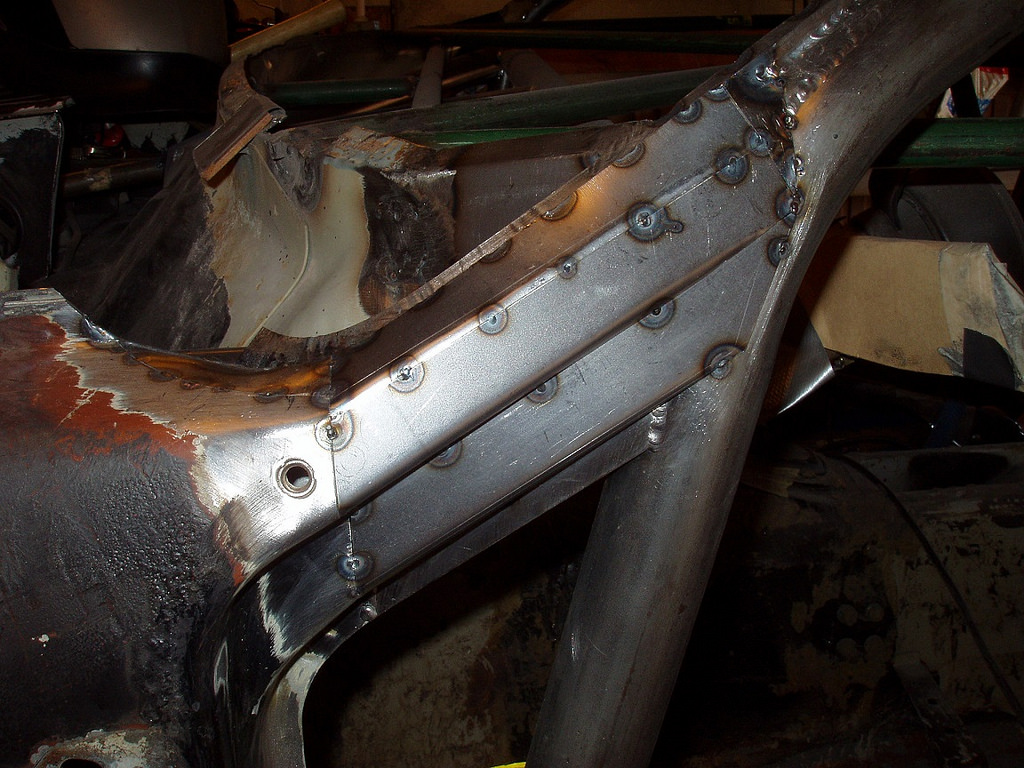
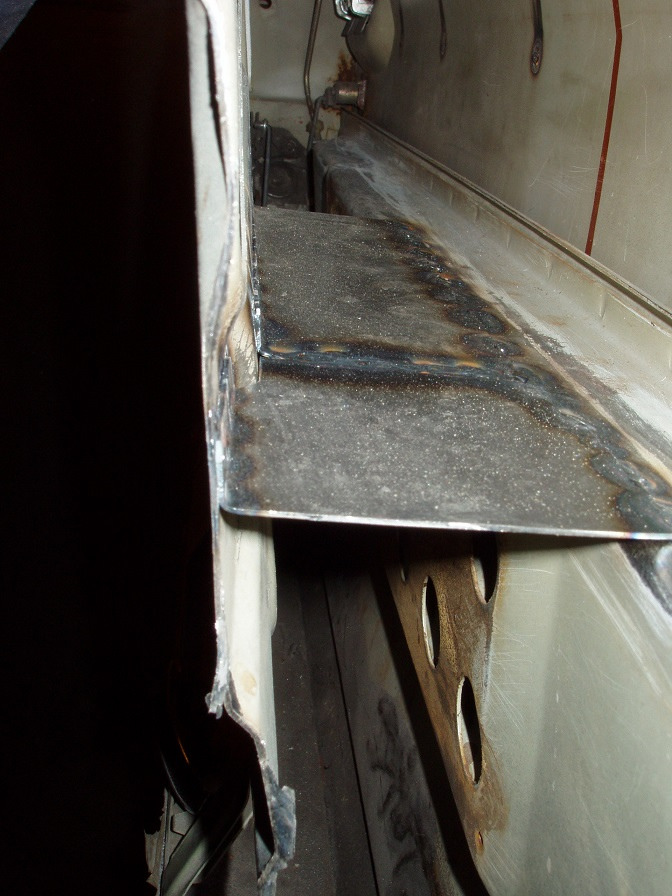
Again, in the interest of having the cage as invisible as possible, and making the car as stiff and strong as possible, I decided to place the main hoop between the outer and inner sheet metal of the rear fenders. It also gives more room for the seats. This meant I had to cut open the door jambs to gain access to the area in question.
 P3280010liten by ChevyZ240, on Flickr
05-11-2014 #7
Registered User
- Join Date
- Aug 2004
- Location
- Västerås, Sweden
- Posts
- 332
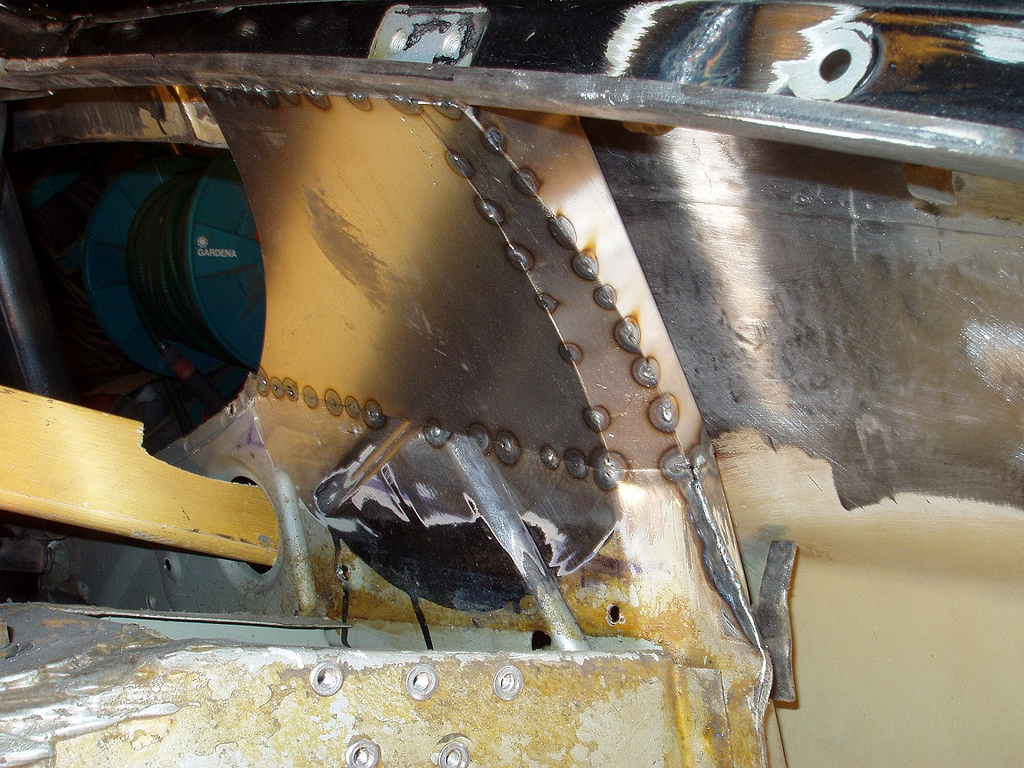
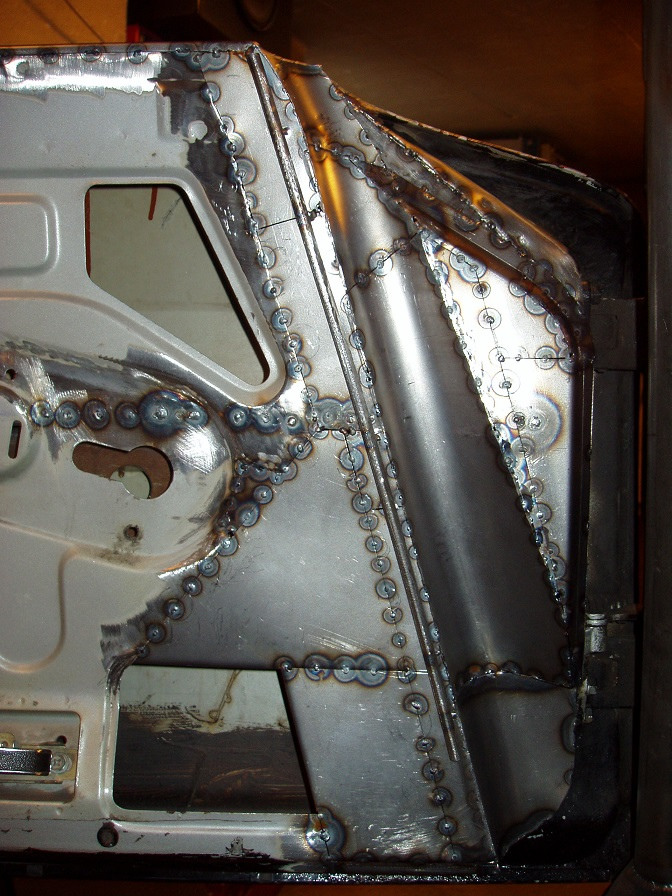
Since I will not have any roll-down door windows, I welded the gap in the top of the doors shut, stiffening them considerably.
 P3300013liten by ChevyZ240, on Flickr
Although the car has surprisingly sturdy door beams, I decided to stiffen and strengthen the doors even more by welding sheet metal between the inner skin and the door beam. This is possible to do, since no window will ever again go down here. This is in the interest of safety, which I am a big fan of.
 P3300023liten by ChevyZ240, on Flickr
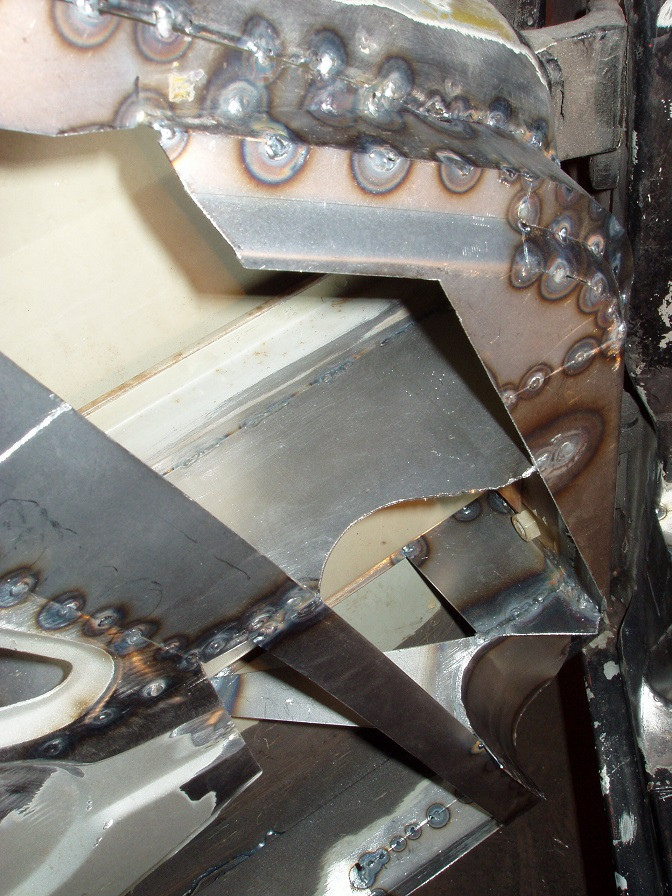
The front of the cage will intrude on the door space, for reasons I explained earlier, so this means that the door has to be cut up to accommodate the roll cage tubing.
 P4110020liten by ChevyZ240, on Flickr
Here's a close-up of the cut-out.
 P4110018liten by ChevyZ240, on Flickr
05-11-2014 #8 Registered User
- Join Date
- Sep 2013
- Location
- Chicago suburbia
- Posts
- 228

Damn that's going to be nice!
05-11-2014 #9
Registered User
- Join Date
- Aug 2004
- Location
- Västerås, Sweden
- Posts
- 332
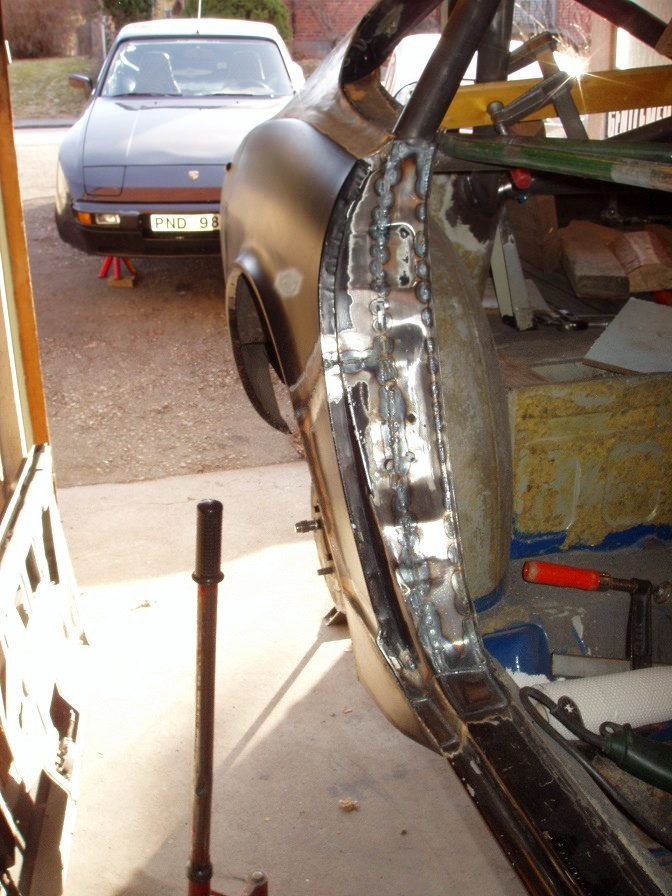
The cut-out is being welded closed.
 P4130032liten by ChevyZ240, on Flickr
Here it is fully closed, still just tack welded.
 P4130035liten by ChevyZ240, on Flickr
I made templates for the side windows, in order to get a smooth shape in this area. As with the windshield the side windows are going to be flush with the roof, and also with the door sheet metal. I put in a lot of effort getting all transitions between sheet metal and glass as smooth and seamless as possible. The templates will later be used to create bucks for shaping the Lexan or similar side windows. The angle-iron is used for holding the A-pillar's shape, before it is fully welded to the roll cage.
 P4250001liten by ChevyZ240, on Flickr
Another view of the side window template.
 P4250002liten by ChevyZ240, on Flickr
05-11-2014 #10
Registered User
- Join Date
- Aug 2004
- Location
- Västerås, Sweden
- Posts
- 332
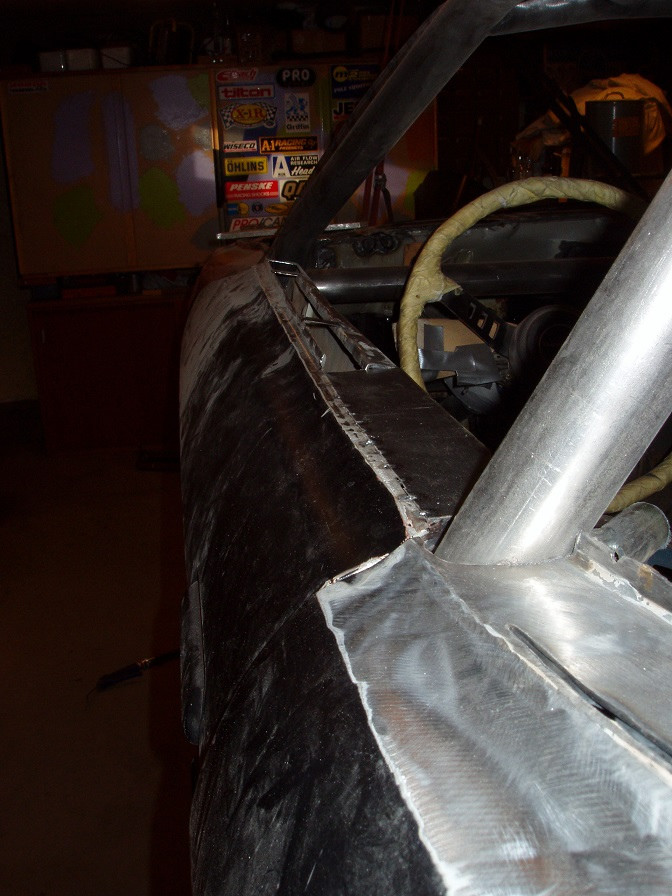
Here, I have started to weld the edge of the roof to the roll cage. The drip rail has gone to the blessed land.
 P4250006liten by ChevyZ240, on Flickr
Most of the sheet metal work on the driver side is done. Now, it's just a matter of duplicating it on the passenger side. Phew!!
 P4260010liten by ChevyZ240, on Flickr
View from the rear. The curvature of the roof side had to be modified, to give a smooth transition to the side glass.
 P4260013liten by ChevyZ240, on Flickr
View from the front.
 P4260021liten by ChevyZ240, on Flickr
05-11-2014 #11
Registered User
- Join Date
- Aug 2004
- Location
- Västerås, Sweden
- Posts
- 332
Close-up of the A-pillar.
 P4260020liten by ChevyZ240, on Flickr
The work on the passenger side has started.
 P4270028liten by ChevyZ240, on Flickr
I welded a strip of sheet metal to the side of the roof on the passenger side, to ease the transfer of the shape from the driver side.
 P4300012liten by ChevyZ240, on Flickr
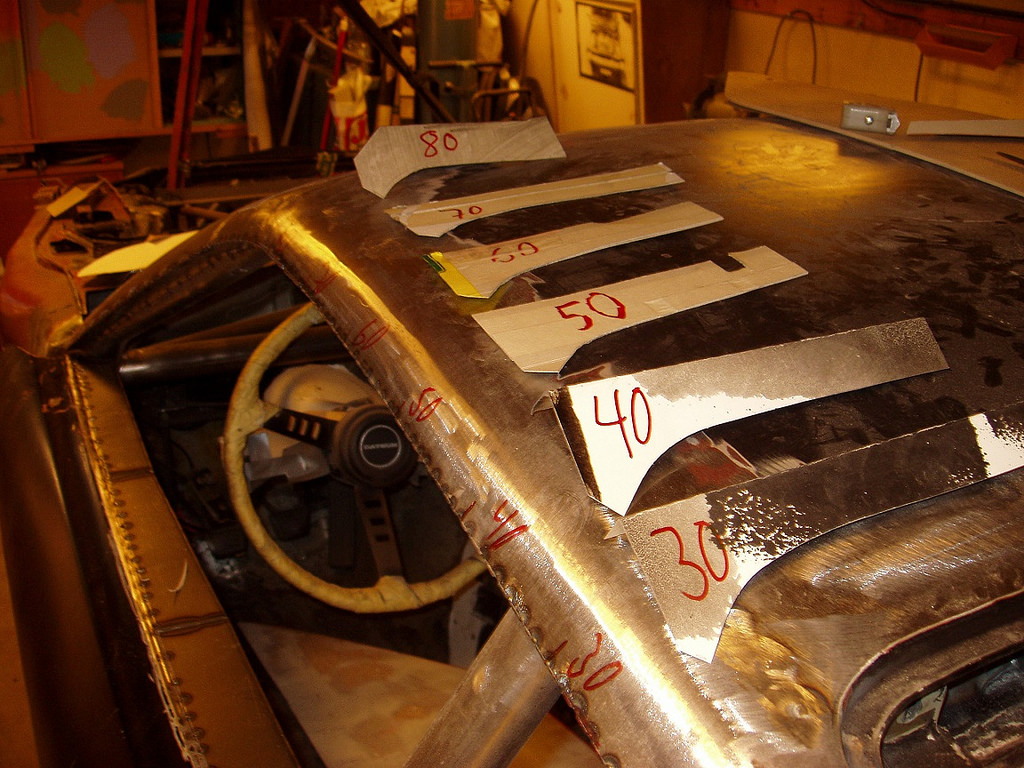
Templates were made to transfer the shape of the roof to the other side.
 P5010016liten by ChevyZ240, on Flickr
05-11-2014 #12
Registered User
- Join Date
- Dec 2008
- Location
- Sweden/Hedemora
- Posts
- 11
it looks good. Do you have the project on a Swedish site too?
05-11-2014 #13
Registered User
- Join Date
- Aug 2004
- Location
- Västerås, Sweden
- Posts
- 332
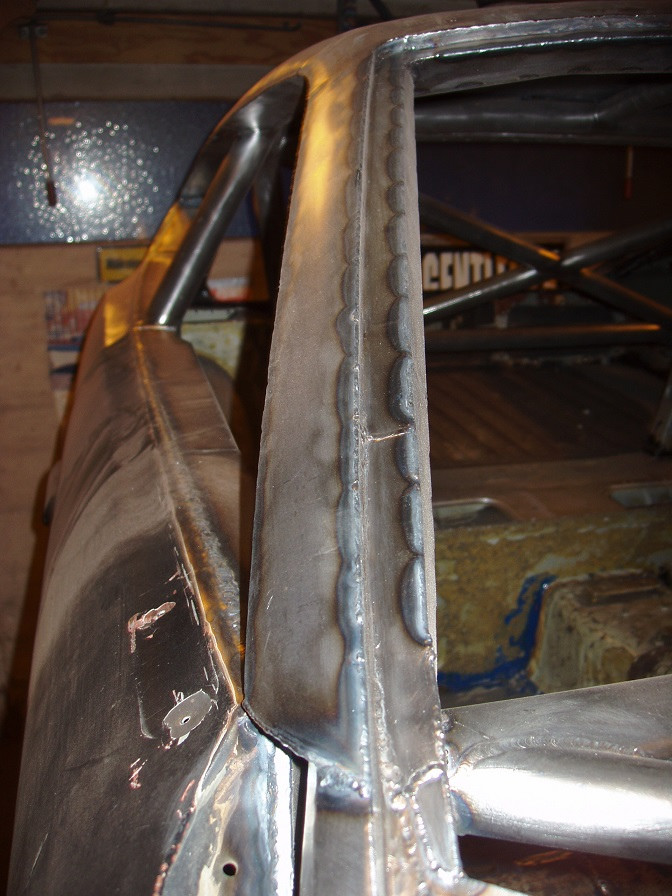
Here is the roof edge that needed modifying to be symmetrical to the driver side.
 P5010024liten by ChevyZ240, on Flickr
After getting the roof shape right, the edge was welded to the cage with a piece of sheet metal. Like I said before, all sheet metal is of the high strength type, about 3 times stronger than normal (old) car body sheet metal. Most sheet metal used is 0.7 mm thick, compared to the 1.0 mm that most people use.
 P5010025liten by ChevyZ240, on Flickr
The passenger side A-pillar is mocked up.
 P5020007liten by ChevyZ240, on Flickr
With the A-pillar tacked in place, the part connecting the A-pillar to the roof side can be shaped.
 P5020024liten by ChevyZ240, on Flickr
05-11-2014 #14
Registered User
- Join Date
- Aug 2004
- Location
- Västerås, Sweden
- Posts
- 332
Hi! No, I don't. But I'm currently in the process of copying around 200 pictures with text to this site. Originally Posted by Lygdman

05-11-2014 #15
Registered User
- Join Date
- Aug 2004
- Location
- Västerås, Sweden
- Posts
- 332
This is a view from below, of the cross bar and diagonals in the dash area. Later, a removable triangulated strut brace in the engine compartment will attach to the intersection of these tubes.
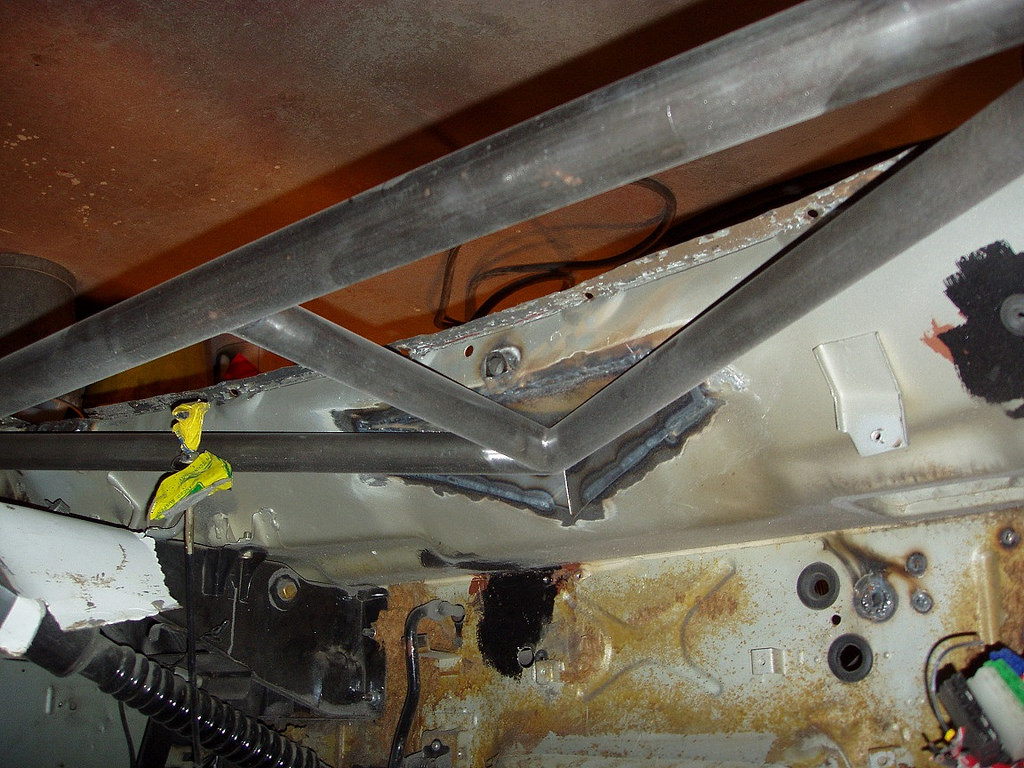 P5030006liten by ChevyZ240, on Flickr
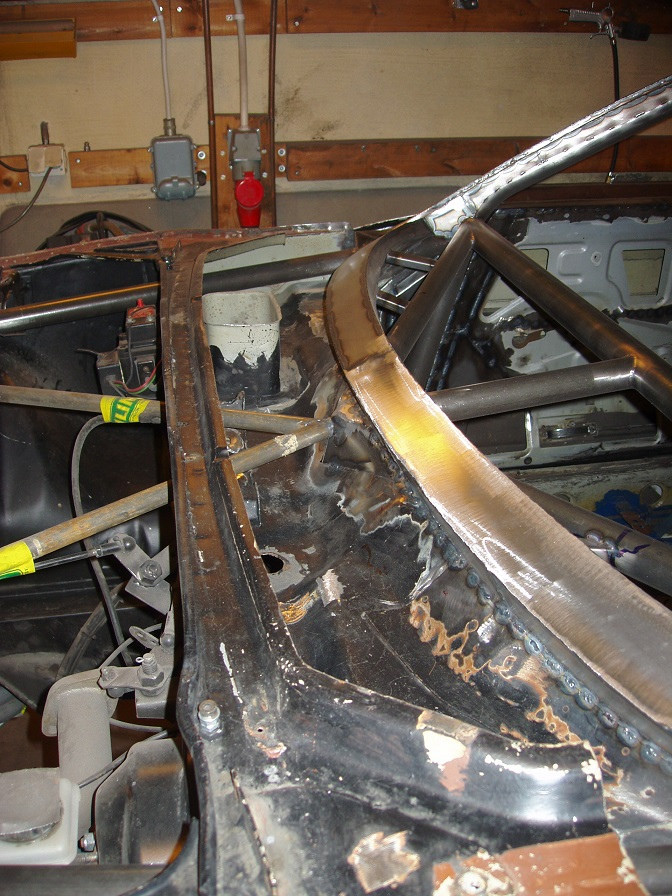
The cowl/firewall had to be modified quite a bit, to fit it to the new windshield. Here, the edge is just rough cut.
 P5040012liten by ChevyZ240, on Flickr
Most of the sheet metal connecting the roof and the windshield frame to the roll cage can be seen here.
 P5040015liten by ChevyZ240, on Flickr
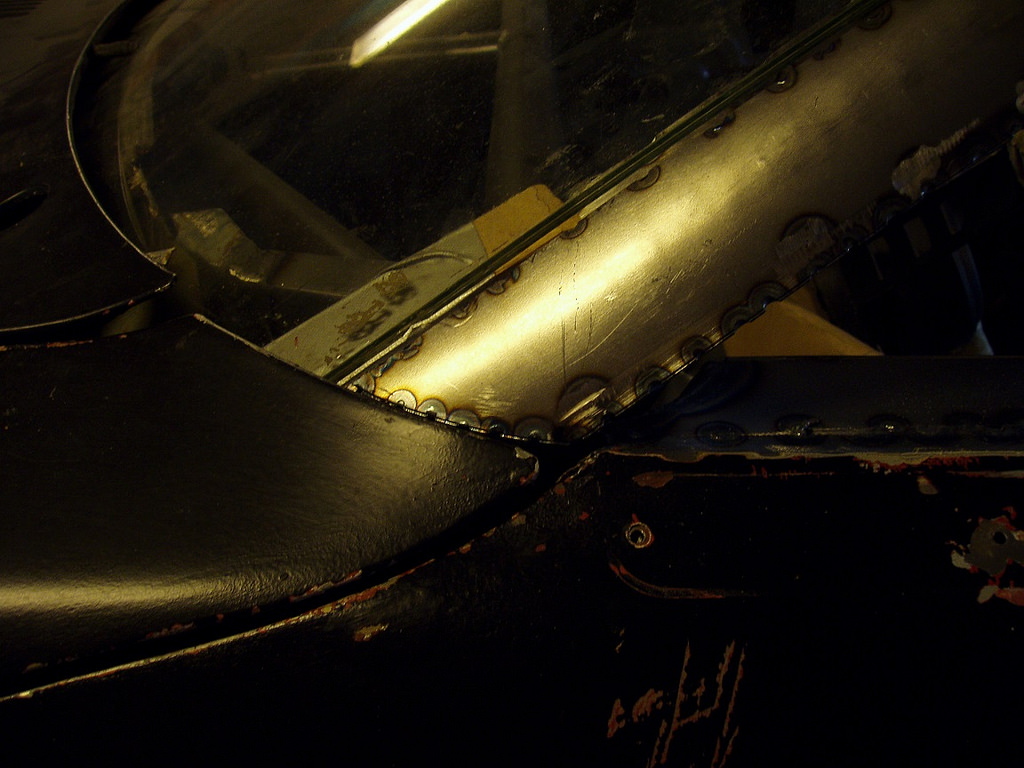
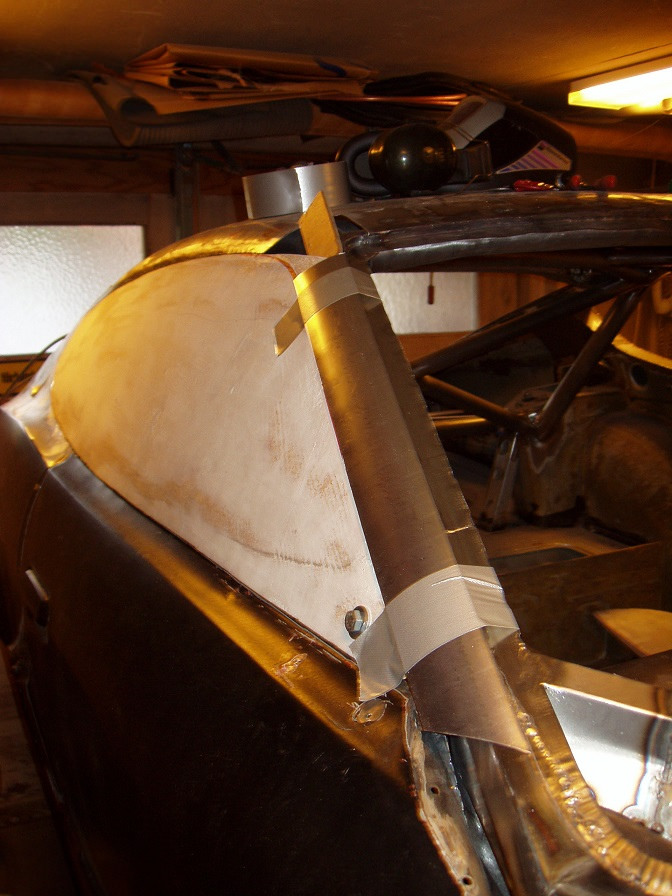
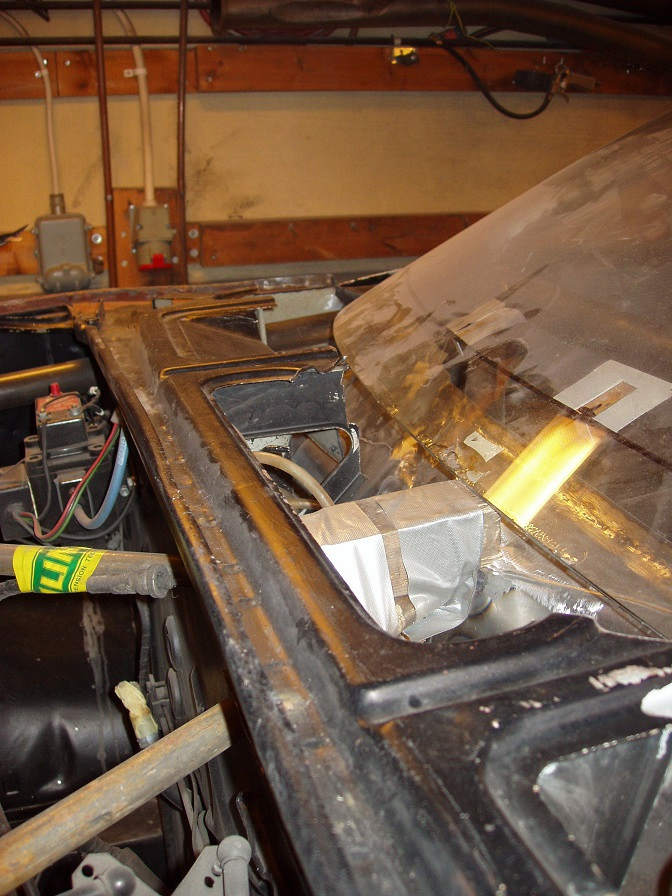
The windshield is being mocked up in the correct position, in preparation for the construction of a curved beam that will act as lower windshield frame. Since the cowl has been weakened by the cutting away of some sheet metal, I decided to make this beam fairly large in cross section. The line on the windshield shows where the hood edge will be. This gives some space to park the wipers in a hidden position below the hood.
 P5040019liten by ChevyZ240, on Flickr
05-11-2014 #16
Registered User
- Join Date
- Aug 2004
- Location
- Västerås, Sweden
- Posts
- 332
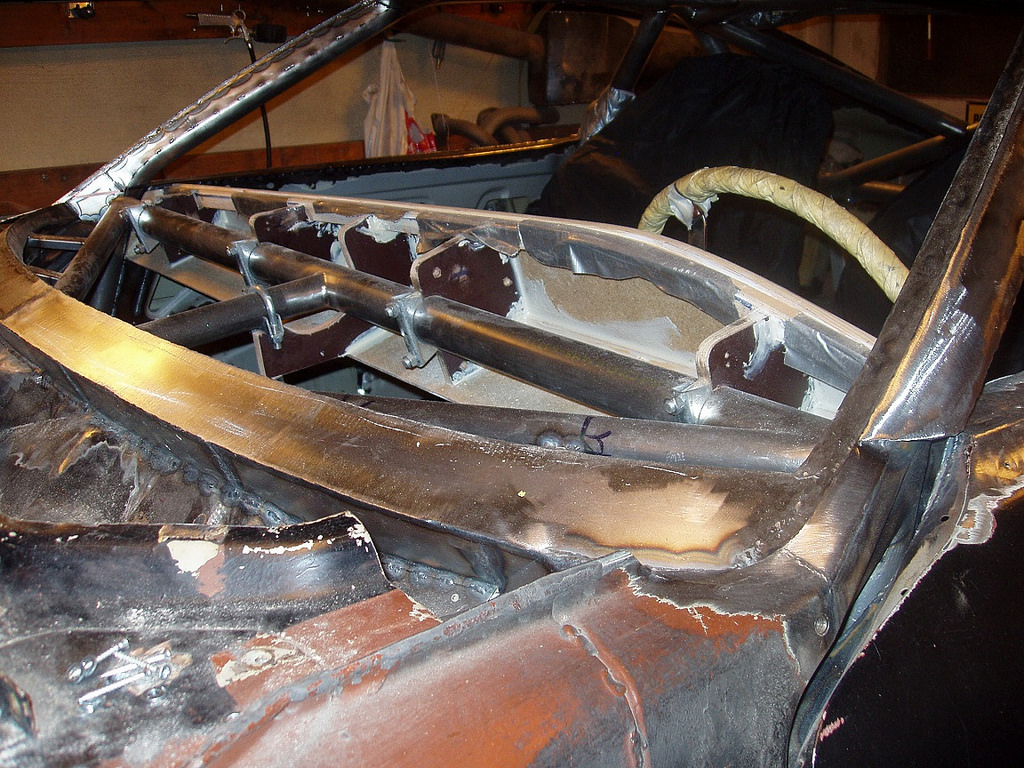
The new seats are carefully positioned in place. It was a bit tricky to get a good driving position, without hitting the roof, especially with a helmet on. Most racing seats are a bit too upright to be ideal. If I am going to raise the floor in the future, as was discussed initially, I will either have to buy single seater type seats, or make my own. Also, the "bat wings" of the seats barely clear the doors.
 P1180037liten by ChevyZ240, on Flickr
The sheet metal work on the roof and the door on the passenger side is also finished here.
 P1180036liten by ChevyZ240, on Flickr
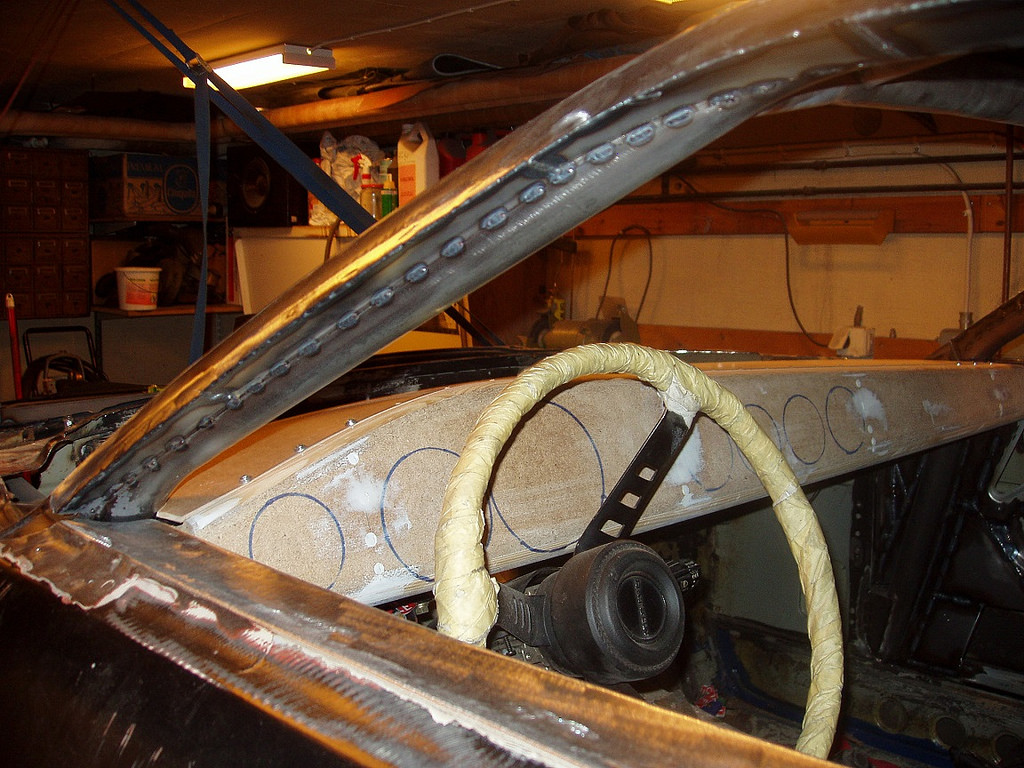
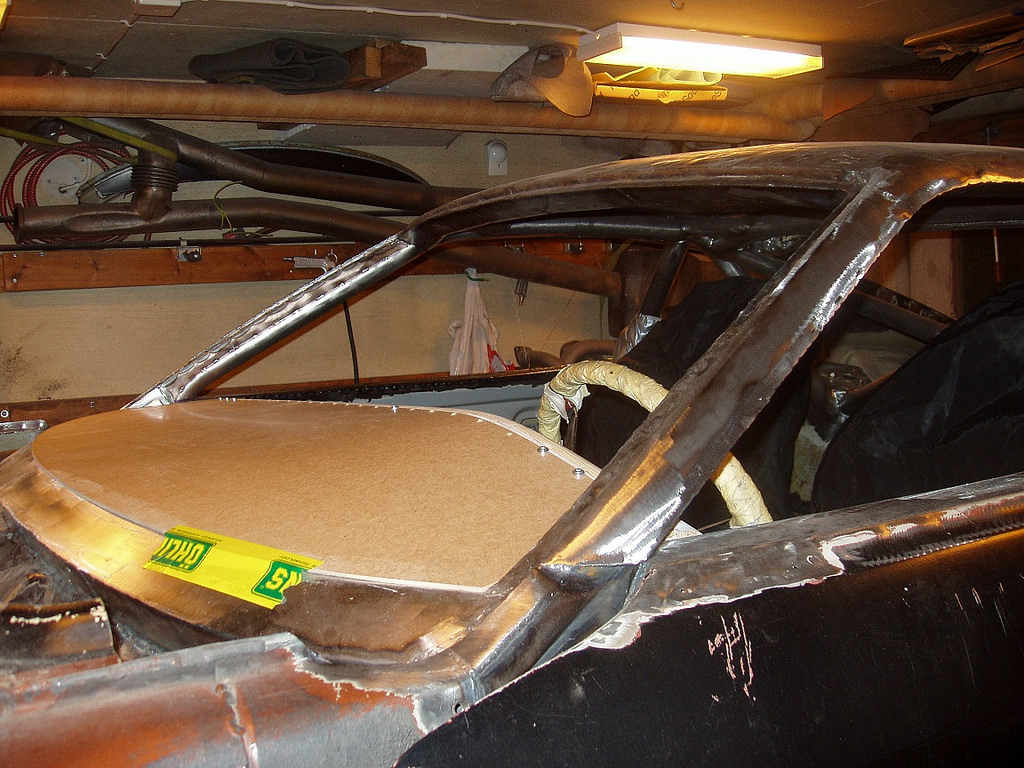
The beam making up the lower part of the windshield frame is finished.
 P1180041liten by ChevyZ240, on Flickr
Here's a front view of the beam. You can also see that I have started cleaning up the cowl area.
 P1180024liten by ChevyZ240, on Flickr
05-11-2014 #17
Registered User
- Join Date
- Aug 2004
- Location
- Västerås, Sweden
- Posts
- 332
Due to the front cross bar of the cage intruding on the dashboard area, the stock dash can no longer be used. As I like the look of it, I plan on making a similar looking dashboard out of glass- or carbon fiber in the future. For now, a temporary wood and masonite dash will do. The new dash is attached to the cross bar.
 P1010011liten by ChevyZ240, on Flickr
The layout of the instruments is sketched on the dash. I concentrated on the visibility of the dials more than the aesthetics of the layout.
 P1010005liten by ChevyZ240, on Flickr
The top of the dash consists of a bent piece of masonite that will be removable, for easy access to the instruments, wiring harness, etc.
 P1010004liten by ChevyZ240, on Flickr
The instruments are being put in.
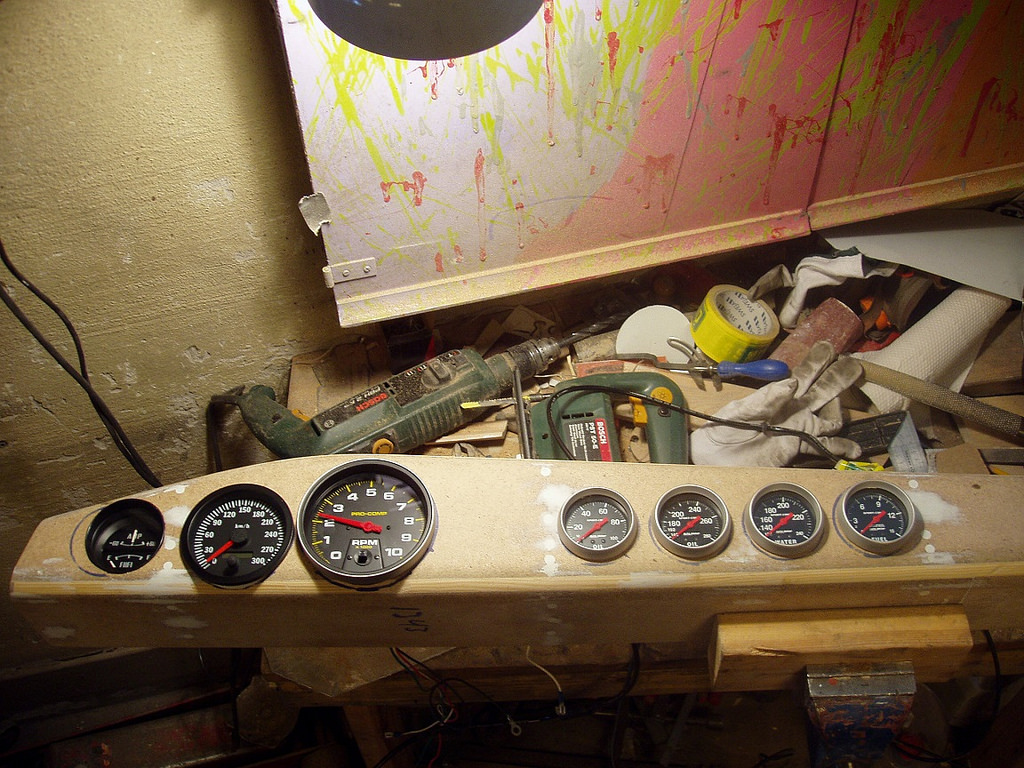 P1010027liten by ChevyZ240, on Flickr
05-11-2014 #18
Registered User
- Join Date
- Aug 2004
- Location
- Västerås, Sweden
- Posts
- 332
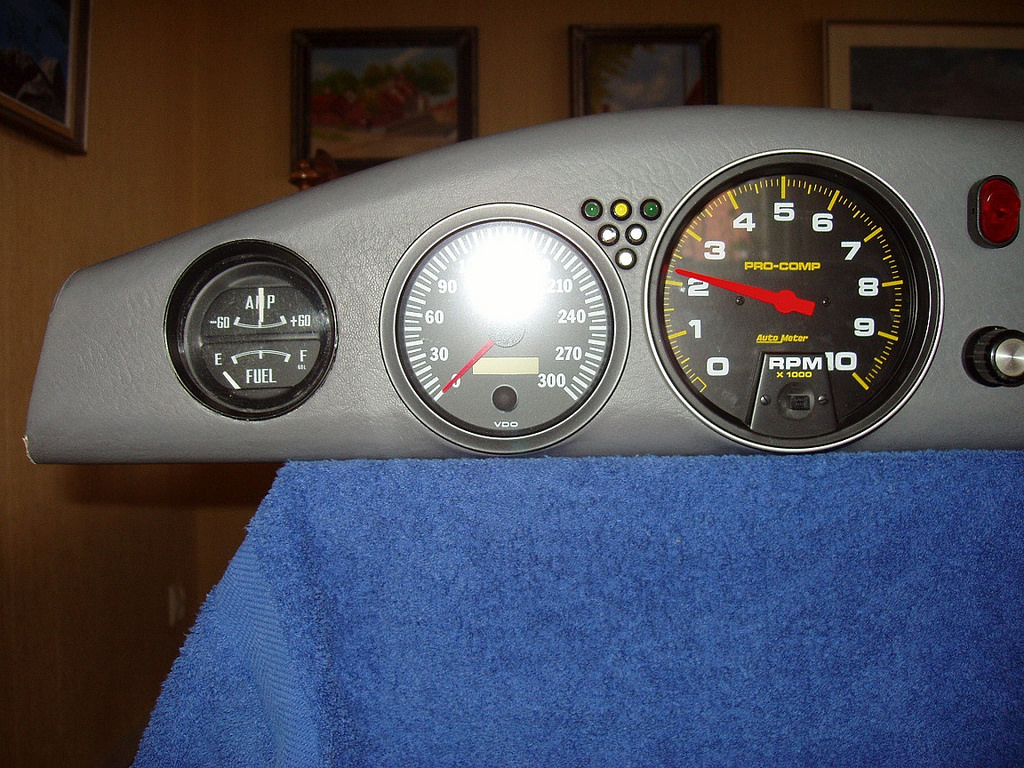
I covered the dash with grey vinyl. Looks decent, doesn't it?
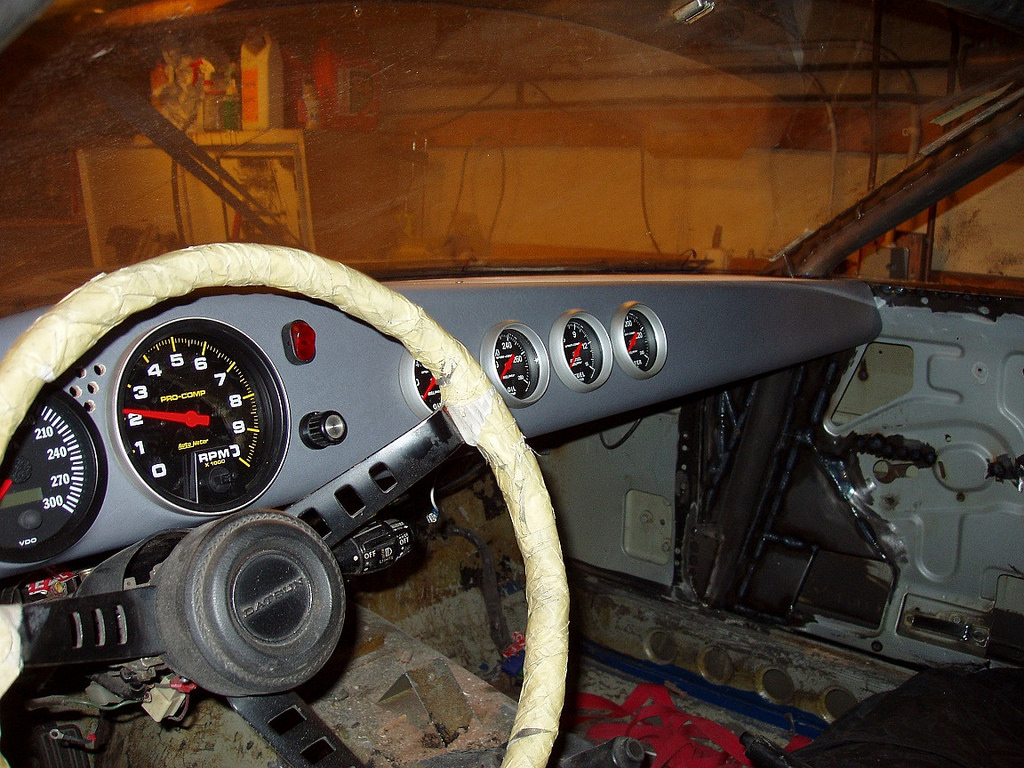 P3140006liten by ChevyZ240, on Flickr
In stead of using normal light bulbs for turn indicators and "idiot lights", I used LEDs. In case of the oil pressure light and shift light, I used the high intensity version. Although small, they emit a very bright light, which should be easily detected, even in daylight.
 P3200002liten by ChevyZ240, on Flickr
This is my new wiper arrangement. I used wipers from the current Volkswagen Passat, which are very low. That's needed for them to clear the hood in the parked position. Of course, I hade to cut the wiper blades down and make a new linkage, new wiper shafts etc. to make everything work. In all, around 40-50 hours work.
 DSC00781liten by ChevyZ240, on Flickr
Here's a bird's-eye view of the linkage and the motor with its bracket. I placed it under the dash, to clean up the cowl area (and for weight distribution).
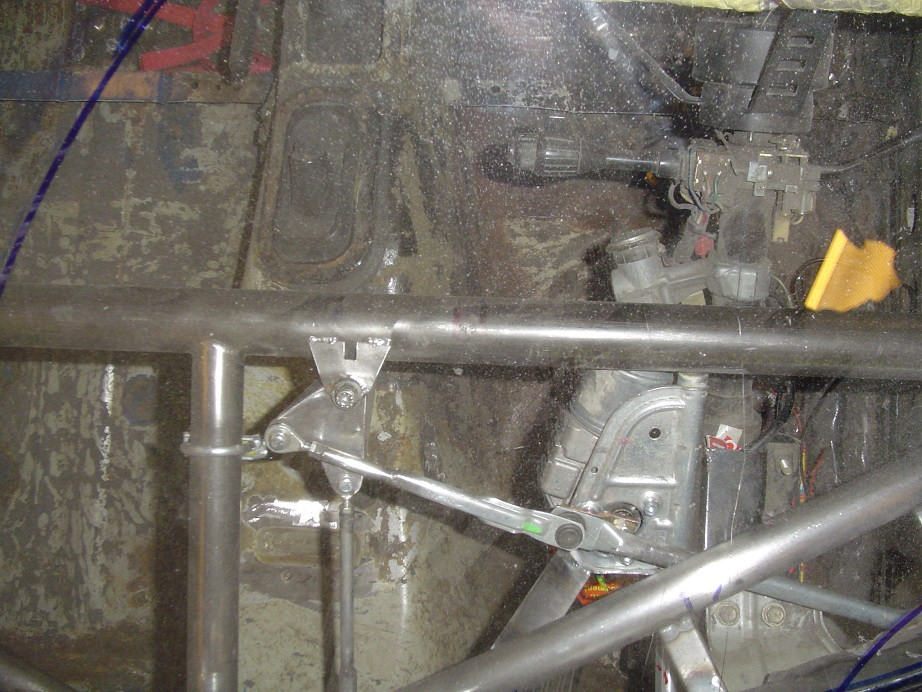 DSC00773liten by ChevyZ240, on Flickr
05-11-2014 #19 Registered User
- Join Date
- Nov 2012
- Posts
- 117

This thing is going to be a weapon. Nice cage work
05-11-2014 #20
Registered User
- Join Date
- Jun 2012
- Posts
- 427
that thing is NUTS! I LOVE IT. its got amazing lines and that thing'll fly...

 Reply With Quote