
Results 1 to 13 of 13
Thread: Tilt Cloumns
-
04-07-2014 #1

 Registered User
- Join Date
- May 2010
- Location
- WV
- Posts
- 202

Tilt Cloumns
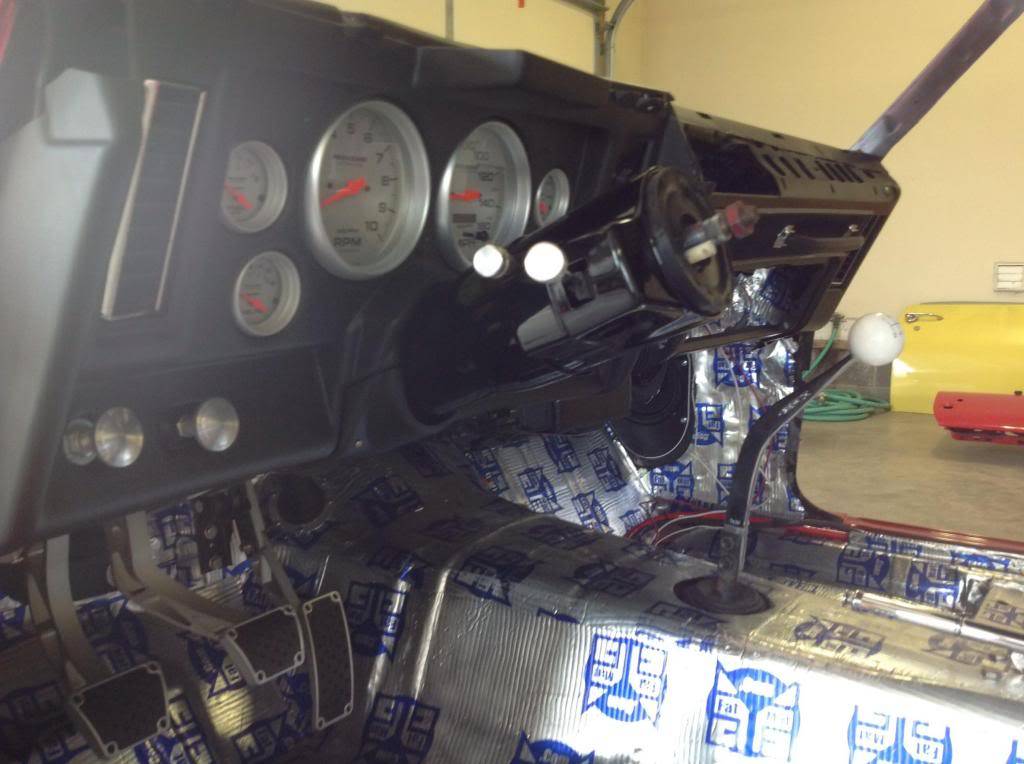
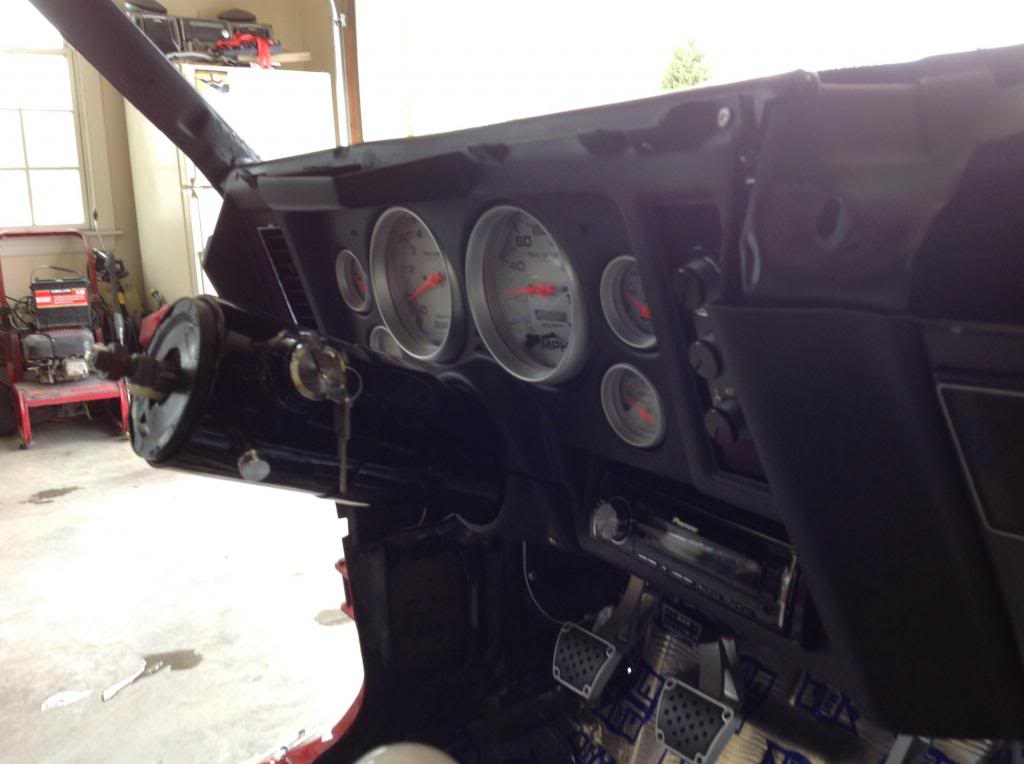
Guys here are a few pics of a new tilt column that Jim @ [email protected] is building now,it moves the dimmer switch up to the signal light switch which cleans up the floor area,his columns are very nice with a variety of options.

-
04-07-2014 #2
Registered User
- Join Date
- May 2010
- Location
- kitchener,Ontario,Canada
- Posts
- 2,336

I have to ask is that a throttle by wire I see....and Clayton machine works pedals?
 Spinnin'my tires in life's fast lane
Ryan Austin
On twitter @raustinss
On Instagram austinss70
-
04-07-2014 #3
Registered User
- Join Date
- May 2010
- Location
- WV
- Posts
- 202
It is Clayton pedals but I cut off a drive by wire and bolted it to the standard Clayton pedal.
-
04-07-2014 #4
Registered User
- Join Date
- May 2010
- Location
- kitchener,Ontario,Canada
- Posts
- 2,336
Looks good.. I like the pedals if you have anymore pictures of them please send them my way,being as that's exactly what I want to do
ThanksSpinnin'my tires in life's fast lane
Ryan Austin
On twitter @raustinss
On Instagram austinss70
-
04-07-2014 #5
Registered User
- Join Date
- May 2010
- Location
- WV
- Posts
- 202
I will get some for you.
-
04-08-2014 #6
Registered User
- Join Date
- Aug 2004
- Location
- Connecticut
- Posts
- 847
I would love to see some more pictures of that myself, as I would also like to do that set up I love those pedals.
Paul Krol
1968 Camaro
-
04-08-2014 #7
Registered User
- Join Date
- May 2010
- Location
- WV
- Posts
- 202
guys hopefully these pics will help,I started with a Grand Prix drive by wire pedal and cut off most of it if you can see the black part of the pedal arm there is not a lot left of it and drilled it and used the bolt in the Clayton pedal to bolt it together,If this don't help maybe I can get closer pics.


-
04-08-2014 #8
Registered User
- Join Date
- May 2010
- Location
- kitchener,Ontario,Canada
- Posts
- 2,336
Thats awesome thanks for the pictures
Spinnin'my tires in life's fast lane
Ryan Austin
On twitter @raustinss
On Instagram austinss70
-
05-22-2014 #9
Registered User
- Join Date
- Oct 2008
- Posts
- 81
What dash is that?
05-29-2014 #10
Registered User
- Join Date
- May 2010
- Location
- WV
- Posts
- 202
The dash is Thunder Road by Covan,sorry for the late update have not been here for a while.
05-30-2014 #11
New to Pro-Touring
- Join Date
- Jun 2007
- Location
- Tuscaloosa, AL
- Posts
- 29
Hey tubbed69.. I have a very similar setup to yours and have a specific question related to the A/C controls on that dash.. My Covan dash is cutout similar to yours and I am using the same A/C controls.. How did you mount the control to the dash itself? Looks like you cut a plate to fit the hole, mounted the controls to the plate, and somehow mounted this to the back of the plastic Covan panel.. could you offer any tips on how you did this? Im looking at the A/C vent on the other side too and trying to figure out what I am going to do.. Thanks.
05-30-2014 #12
Registered User
- Join Date
- May 2010
- Location
- WV
- Posts
- 202
Sure,I made a template to fit the hole with 3 tabs to cover the 3 mounting holes in the dash and cut it out on metal and bent the tabs in the direction of the dash mounting holes and then cut out for the the control,on the a/c vent I used the non a/c housing and just blocked off the cowl inlet and ran the a/c duct hose right into the side of the housing,sorry but I dont think I have any pics of it. Originally Posted by au1991rx

05-31-2014 #13
New to Pro-Touring
- Join Date
- Jun 2007
- Location
- Tuscaloosa, AL
- Posts
- 29
Why didn't I think of that.. I was trying to mount to the panel itself instead of the dash structure like you did. Thank you, I miss the obvious sometimes.


 Reply With Quote


