Results 1 to 20 of 40
-
02-25-2014 #1
 Full Blown G-Machiner
- Join Date
- Oct 2008
- Location
- Santa Fe Springs, CA
- Posts
- 625
Hotchkis Performance East - Project 1976 Dodge Dart
Hotchkis Performance East is our all-new facility in Mooresville, North Carolina that specializes in custom fabrication, cooling system optimization, racing safety equipment design and installation, and race car prep in addition to manufacturing and installing Hotchkis Sport Suspension products. It is headed up by Kevin Bryde, a designer and fabricator with over 17 years’ experience in motorsports. Kevin’s career has let him work with some of the most talented drivers in the industry including Dick Trickle, Tony Stewart, Sterling Marlin, Dario Franchiti, Juan Pablo Montoya, Martin Truex Jr., and Jamie McMurray. Most recently Kevin worked for Chip Ganassi Racing in its Engineering Department where his duties included design, fabrication, and prototyping for NASCAR, Indy Car, and Rolex Sports Car race cars. Kevin also has over ten years’ experience in all aspects of driver safety, including seat, head restraint, and race car cockpit design.
Introduction:
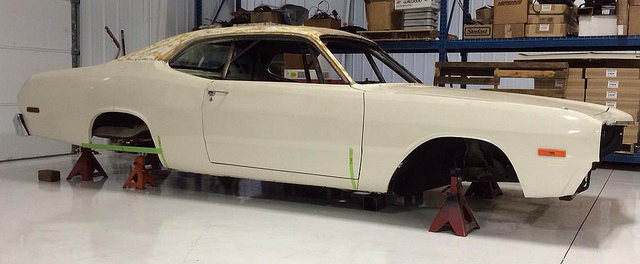
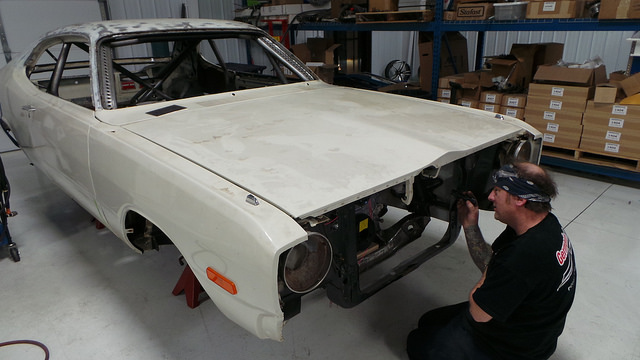
Hotchkis Performance East's latest project is a complete buildup of this 1976 Dodge Dart for Kevin Wesley, creator of the Hotchkis Autocross Taxi and avid driving enthusiast. Kevin's goal for this car is to have a car that he can take to compete in events like Targa Newfoundland and Pikes Peak, so this car has to be fast, but it also has to be safe. It will be receiving a full FIA-based roll cage, a modern 6.4L Hemi and Legend GT-700 transmission transplant, full Hotchkis TVS suspension, and more. Stay tuned to this thread as we continually update it with new pictures of the build as we overhaul this former Mopar econobox.
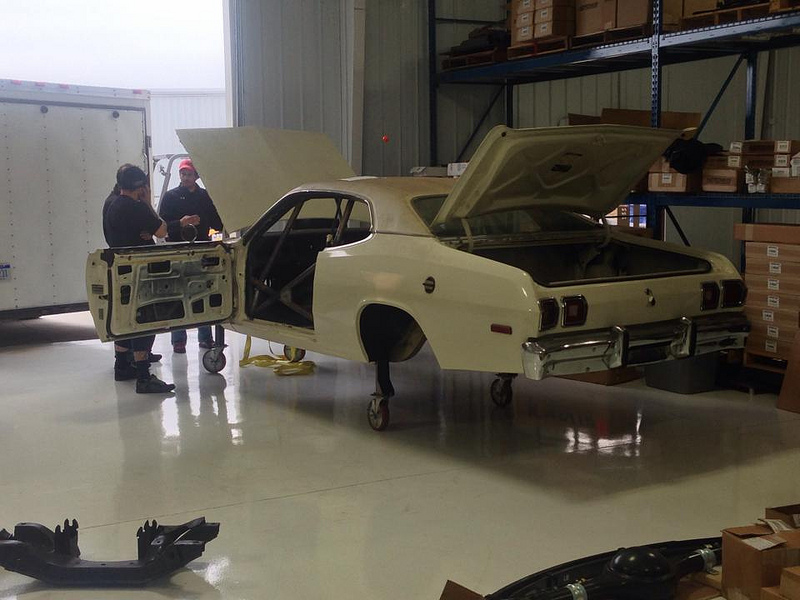
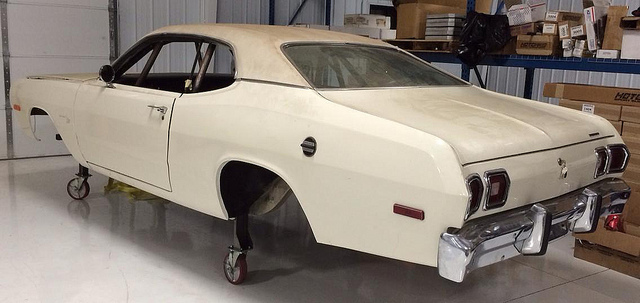
As you can see, when the car first rolled in the shop it was already stripped down and had an old roll cage in it. Though it looked a little rough, it was in fairly good shape and the body was straight and mostly rust-free.
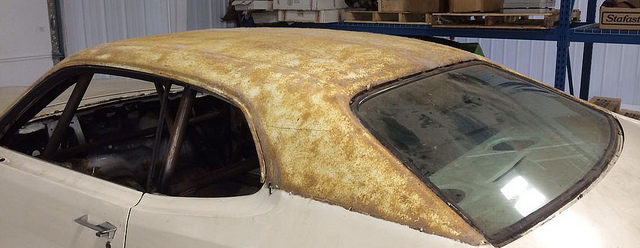
Even the roof was rust-free and only had the adhesive residue from the original vinyl top.
Table of Contents
Engine Mounts - https://www.pro-touring.com/threads/...61#post1053261
Transmission Crossmember - https://www.pro-touring.com/threads/...61#post1053261
FIA-based Safety Cage - https://www.pro-touring.com/threads/...61#post1053261
FIA-based Saftey Cage (continued) - https://www.pro-touring.com/threads/...63#post1053263
Alternator Bracket - https://www.pro-touring.com/threads/...64#post1053264
Transmission Tunnel - https://www.pro-touring.com/threads/...64#post1053264
Transmission Tunnel (continued) - https://www.pro-touring.com/threads/...64#post1053265
Radiator - https://www.pro-touring.com/threads/...64#post1053265
Fuel Cell - https://www.pro-touring.com/threads/...64#post1053265
Mini-Tub - https://www.pro-touring.com/threads/...64#post1053265
Rear Firewall - https://www.pro-touring.com/threads/...81#post1071281
Front Firewall - https://www.pro-touring.com/threads/...81#post1071281
Floorboards - https://www.pro-touring.com/threads/...81#post1071281
Racing Pedal Assembly - https://www.pro-touring.com/threads/...91#post1086291
Steering Column - https://www.pro-touring.com/threads/...91#post1086291
Fluid Reservoirs - https://www.pro-touring.com/threads/...91#post1086291
Bumpers - https://www.pro-touring.com/threads/...91#post1086291
Interior - https://www.pro-touring.com/threads/...91#post1086291Last edited by Hotchkis; 08-15-2014 at 01:08 PM.
 Hotchkis Sport SuspensionToll Free: 877-466-7655
-
02-25-2014 #2
Full Blown G-Machiner
- Join Date
- Oct 2008
- Location
- Santa Fe Springs, CA
- Posts
- 625
Engine Mounts
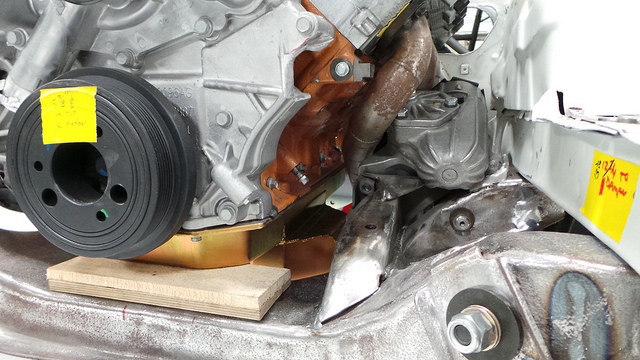
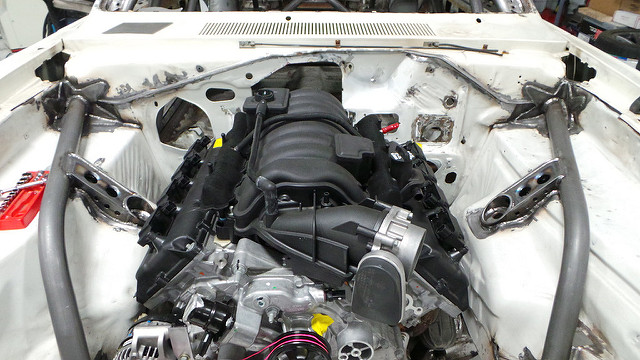
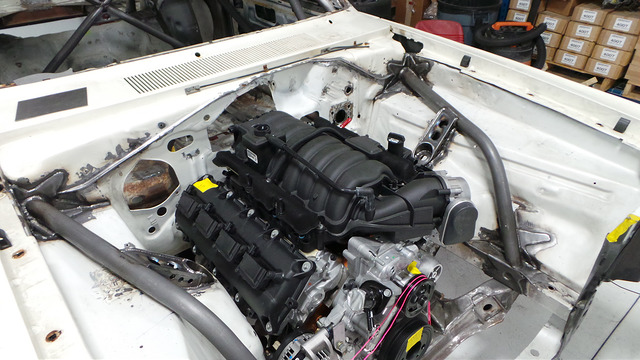
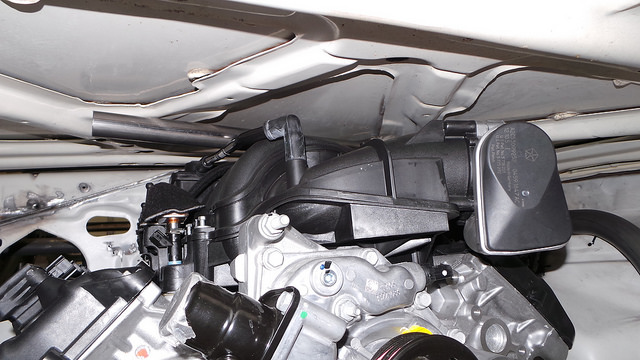
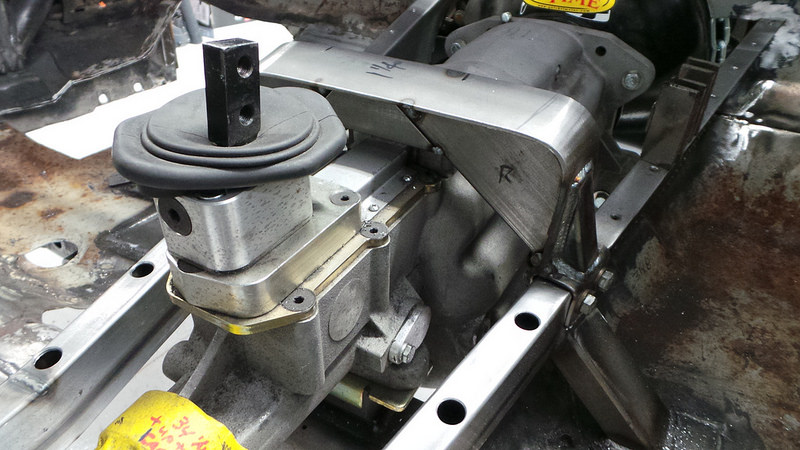
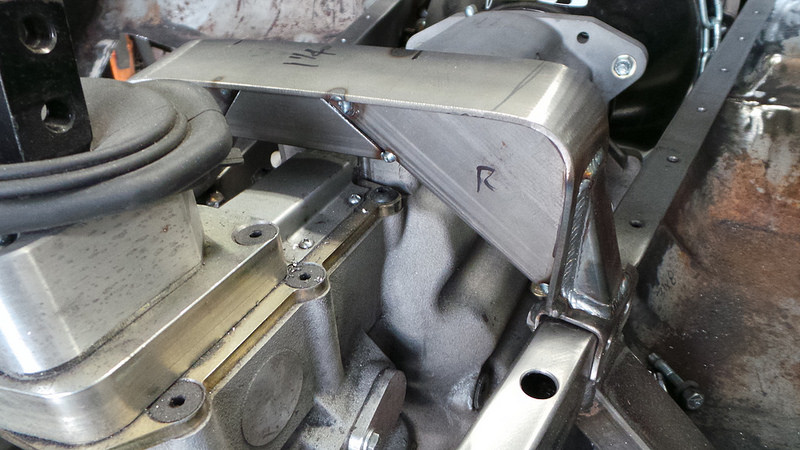
The first thing we had to do with the Dart was to get its new Mopar 6.4L HEMI and Legend GT-700 transmission into place. Once we determined how much clearance was needed for the oil pan, headers, steering rack, etc, we were able to begin to design the mounts.
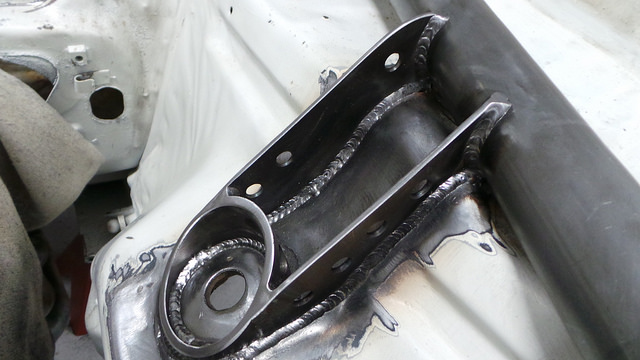
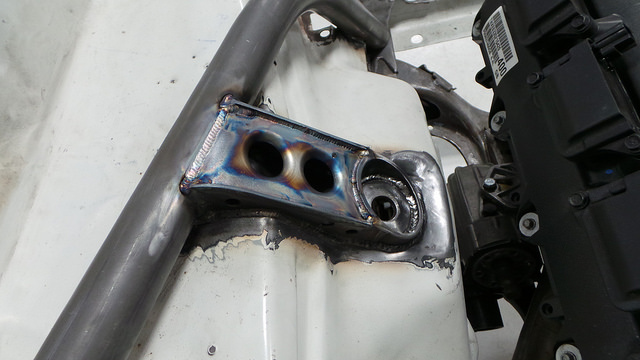
Once we got all of our measurements, it was off to the drawing board. What we came back with was this beautiful piece:
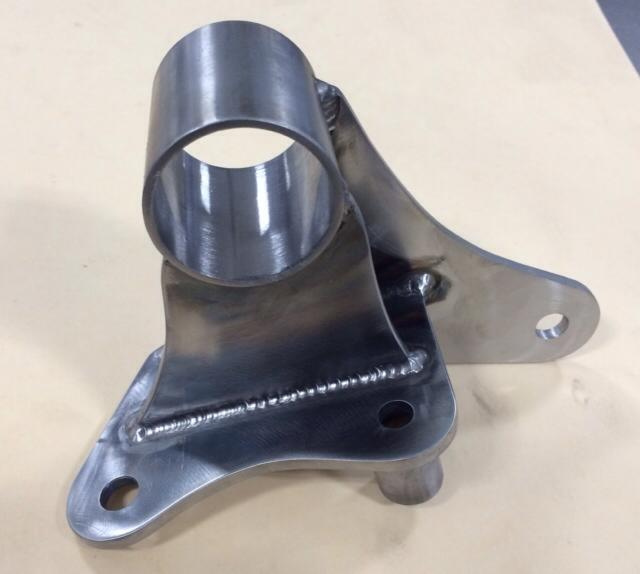
Now we were free to create the frame mounts and test fit the mounts together. Here's the passenger side:
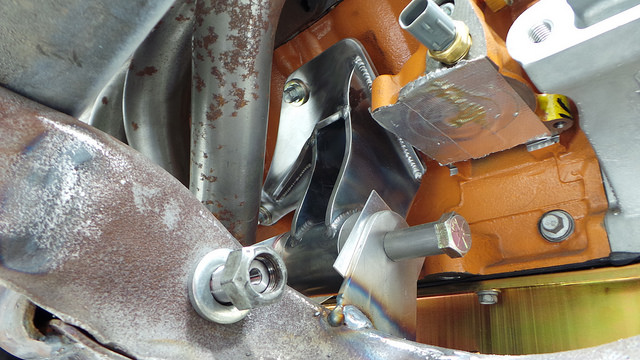
And here's the driver's side:
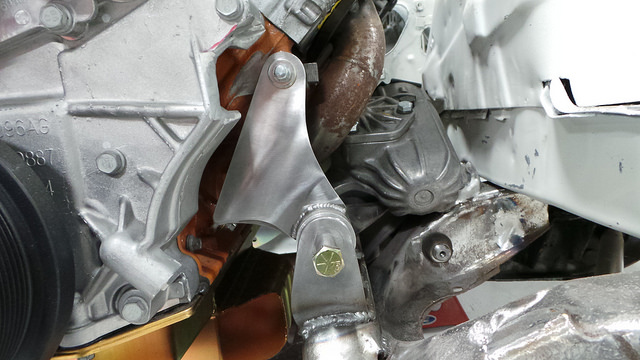
As you can see, the clearance is perfect and the new HEMI looks quite good in its new home.
More photos of the engine mounts here: http://www.flickr.com/photos/hotchki...7639748590773/
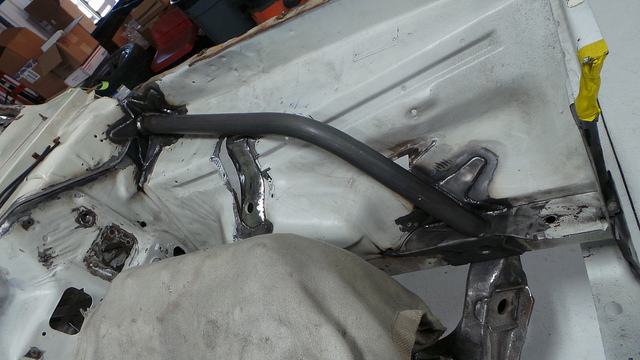
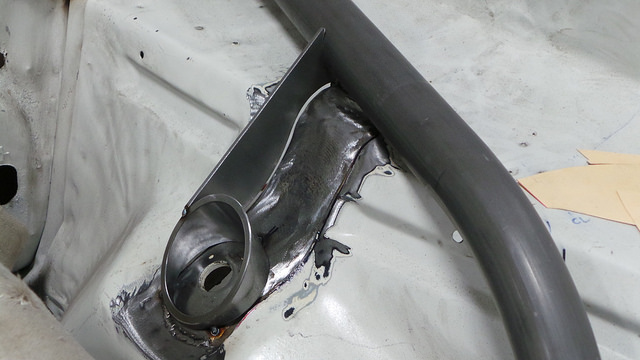
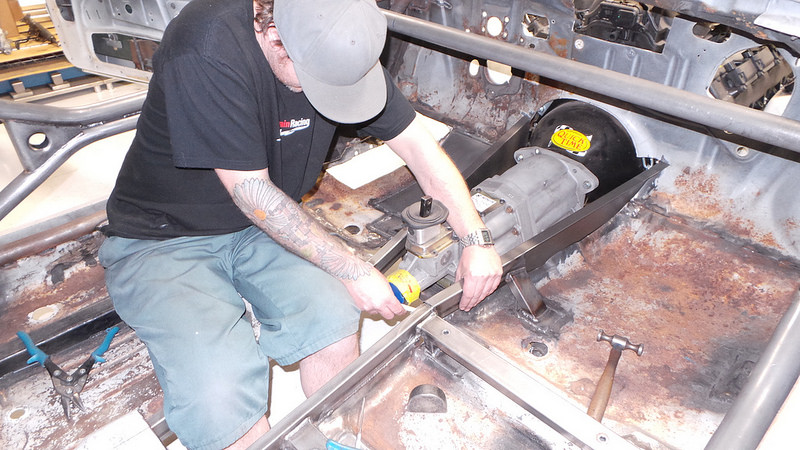
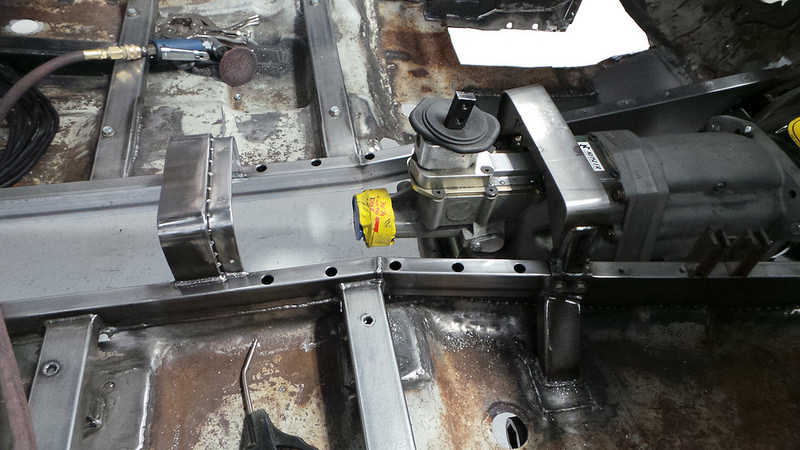
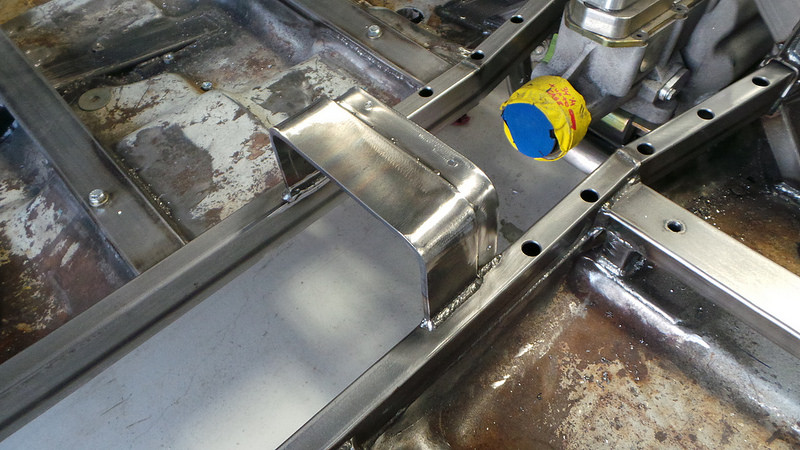
Transmission Crossmember:
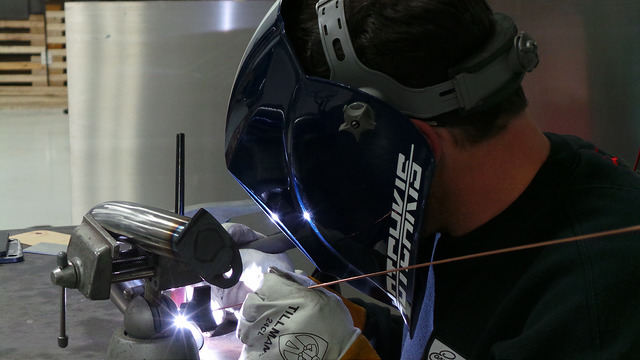
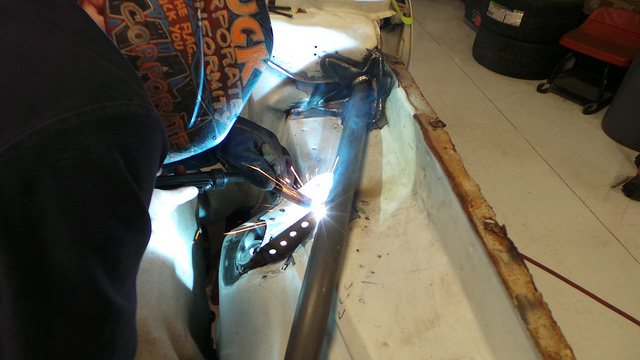
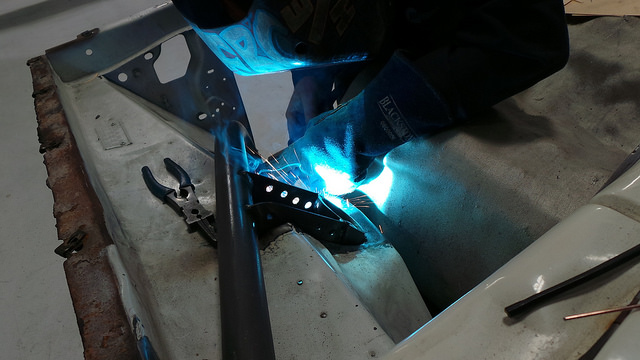
The final step to marrying the modern 392 HEMI and Legend transmission to the car was the fabrication of a new transmission crossmember. Here you can see one of our master welders and fabricators working on the end plate to the new crossmember:
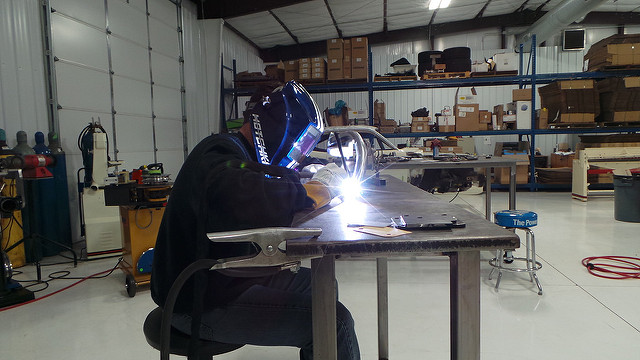
And here's a close-up of his steady hands at work:
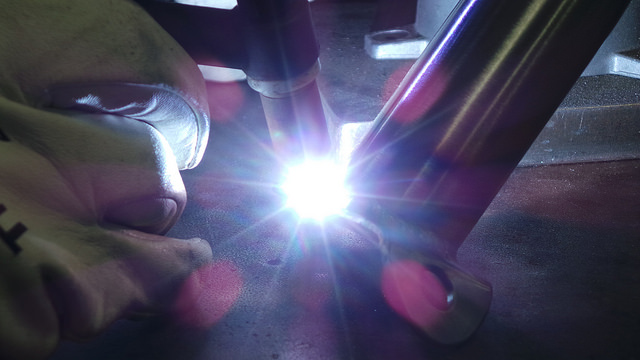
More welding:
Here's the finished product. Gotta love the color of welding:
And now to fitting the newly fabricated crossmember to the car:

More photos of the crossmember here: http://www.flickr.com/photos/hotchki...7639747282175/
FIA-Based Roll Cage
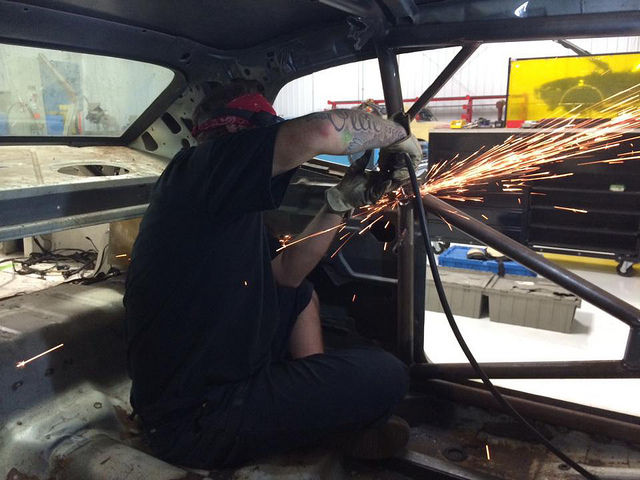
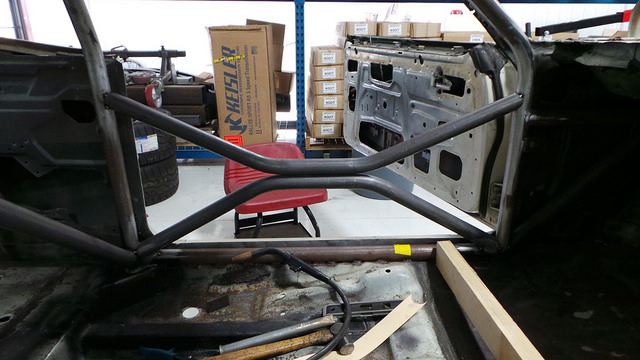
Now that the engine and transmission have been mounted, it was time to construct the roll cage. Because of the different races the owner wants to be able to use this car for, we needed to make sure that all of the safety equipment conformed to the necessary regulations so that it could be raced anywhere in the world. After consulting with the Rally America Competition Director Mike Hurst, it was time to begin the construction. But before we could do that we had to cut out a few sections of the existing cage.
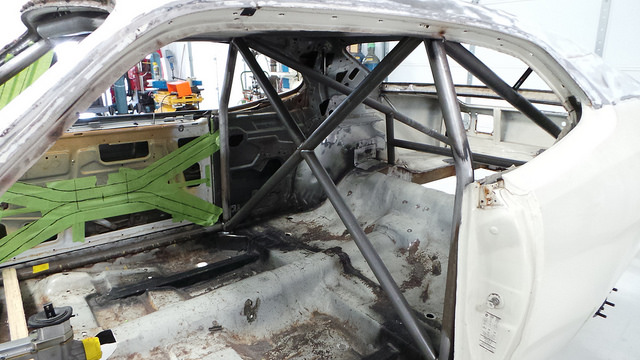
Once the parts of the old cage were removed we began by constructing diagonal bracing and rear kicker braces that connect to the main hoop. Because this is going to be a leaf spring car, the rear kickers had to extend all of the way to the rear mounting points of the springs.
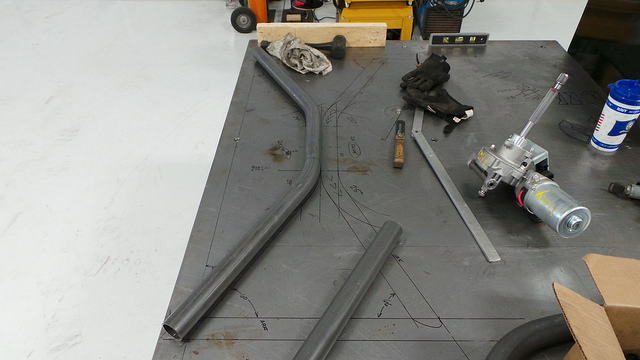
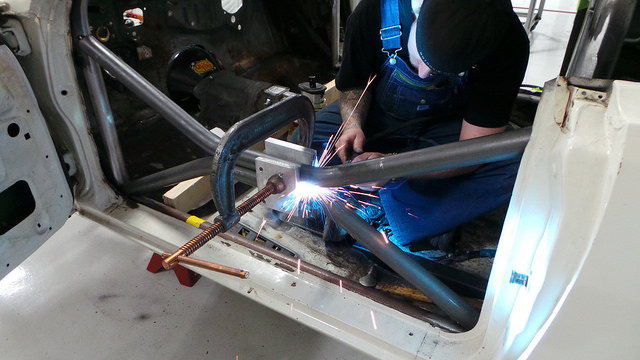
Now that the basics were covered it was time to add the increased protection required by the higher levels of motorsports. First up were the door bars, which help protect the driver and passenger from cabin intrusions from contact during wheel-to-wheel racing or from collisions with other objects. After laying out the design on the table, we bent the bars to match the pattern before fitting them to the car.
After the bars were tacked into place, we double checked all of the measurements and angles for compliance before fully welding all of the joints.
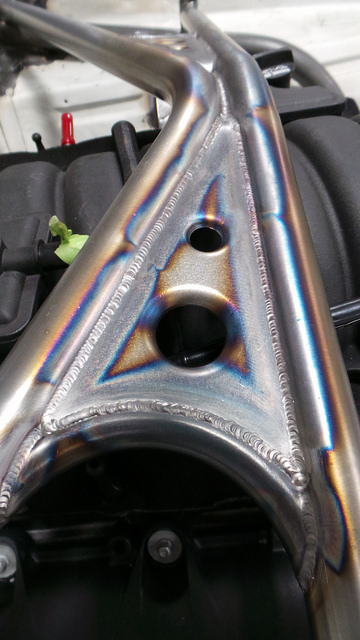
To make this cage as strong as possible, the main joints all received additional bracing and “taco gusset“ reinforcement.
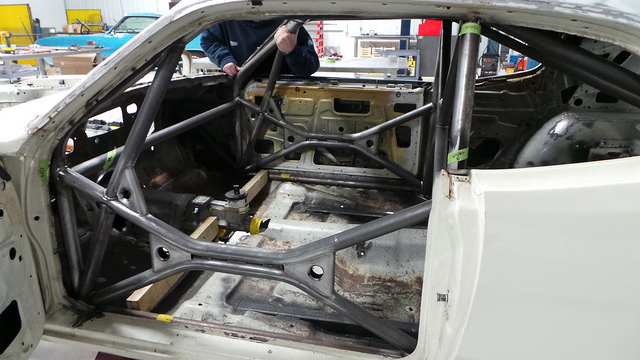
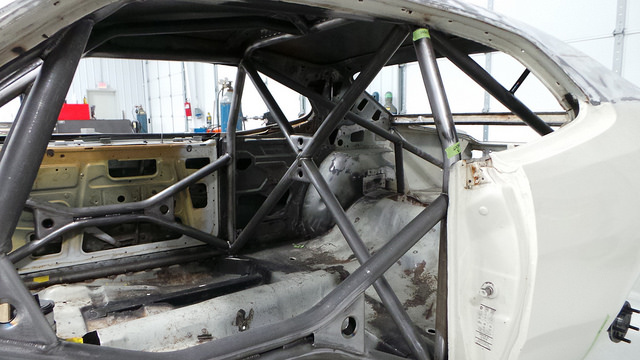
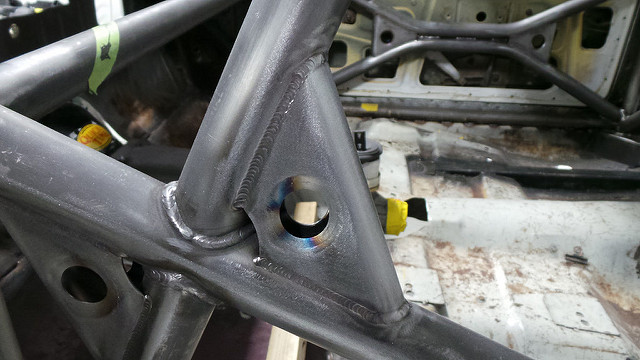
A good roll cage will tie into the unibody structure in as many places as possible. Not only does this make the vehicle safer, but it dramatically increases the rigidity of the unibody, reducing chassis flex during hard cornering. Here you can see the installation of the A-pillar gussets that are critical for driver safety in the event of a roll over.
More photos of the safety cage construction here: http://www.flickr.com/photos/hotchki...7639747044065/Last edited by Hotchkis; 04-28-2014 at 07:28 PM.
Hotchkis Sport SuspensionToll Free: 877-466-7655
-
02-25-2014 #3
Full Blown G-Machiner
- Join Date
- Oct 2008
- Location
- Santa Fe Springs, CA
- Posts
- 625
But a proper safety cage doesn’t just end at the firewall. It extends all the way through the engine bay to reinforce the front clip and add stiffness to the front of the car. This added rigidity helps handling by allowing the suspension to do its work without having to control chassis flex while also delivering improved driver safety.
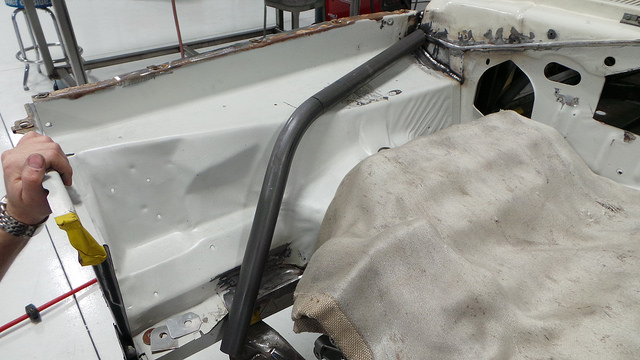
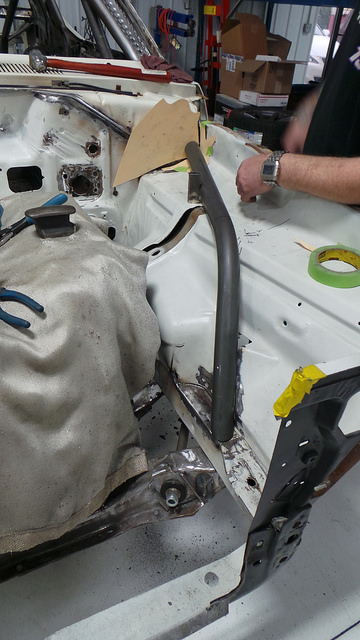
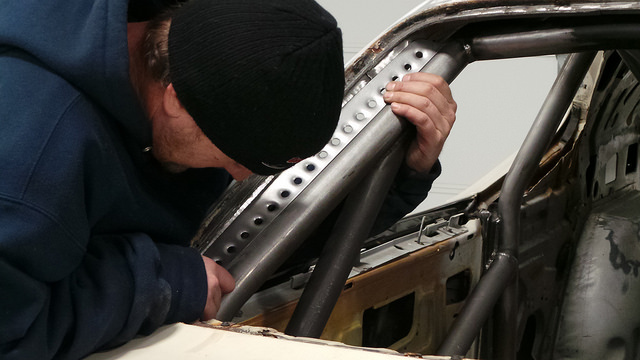
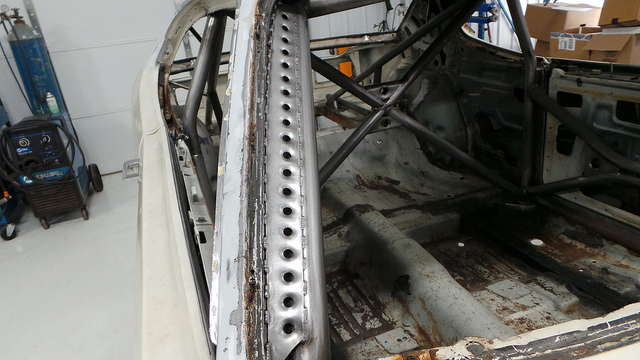
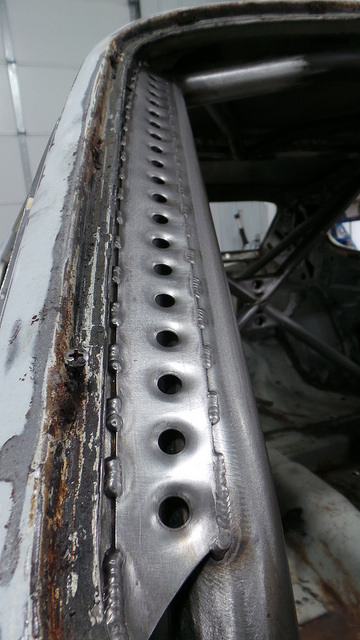
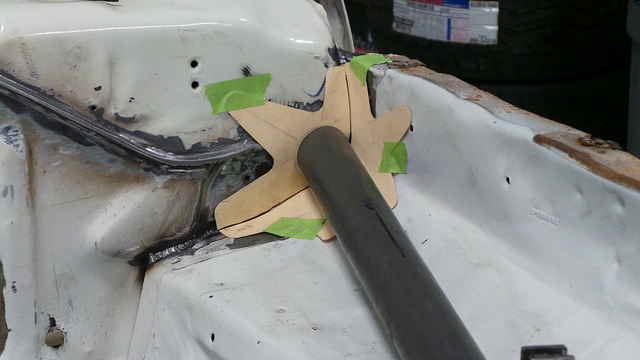
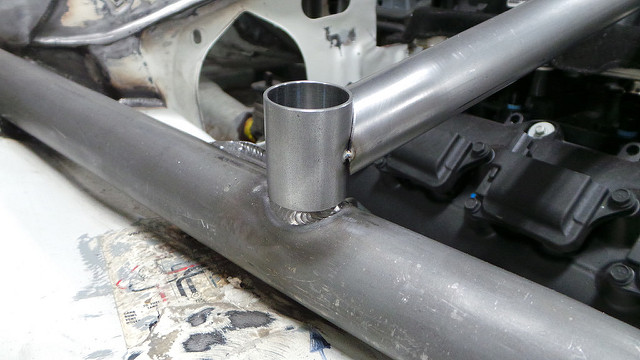
Regulations require the mounting points to be 18 square inches, so to maximize area we developed a compact mount with multiple fingers to better fit the unique curves at the corners of the engine bay while also helping to spread the load over a larger area.
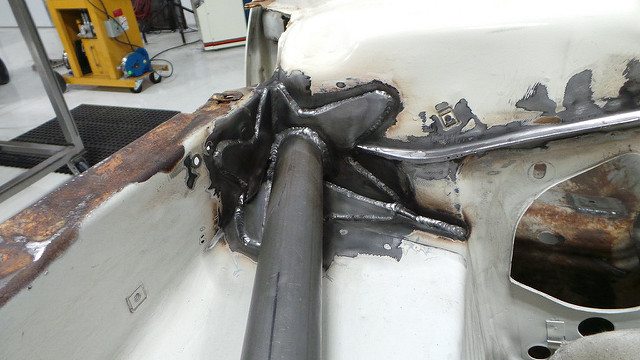
The next step to reinforcing the front end was to tie these new bars into the upper shock mounts. Like the star-shaped mounts on the firewall, these mounts are fabricated out of 16-gauge sheet metal and are designed to disperse the tremendous forces the upper shock mounts will see during racing events.
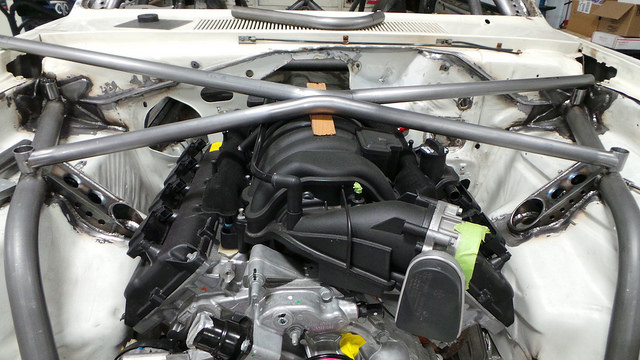
Here is the finished product with completed firewall, frame, and shock mounts:
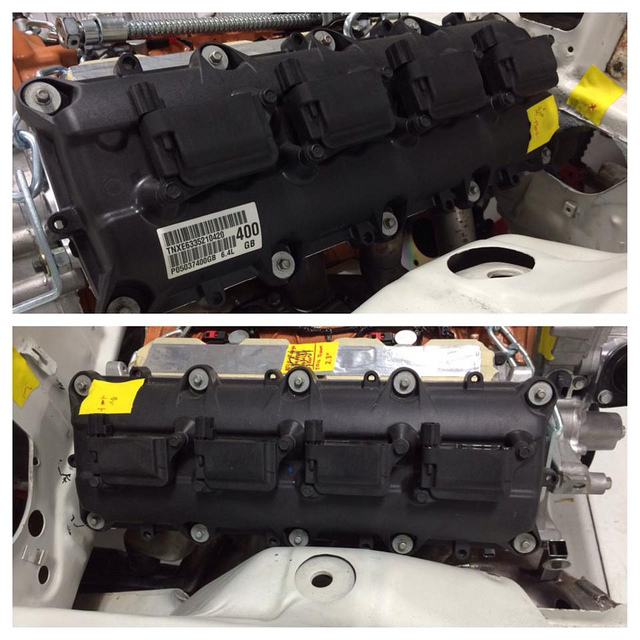
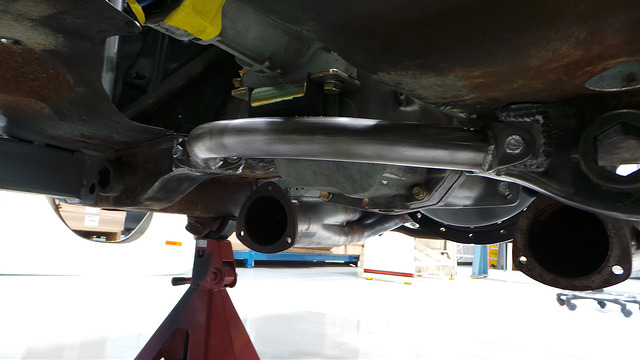
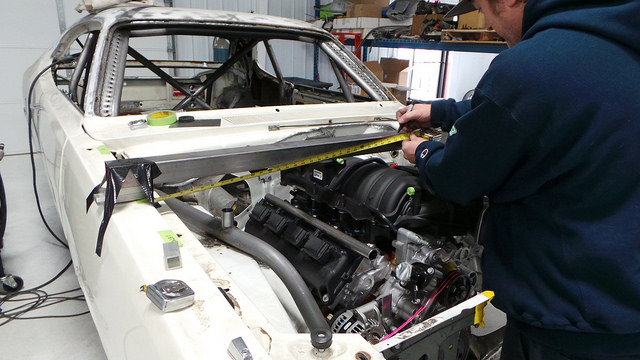
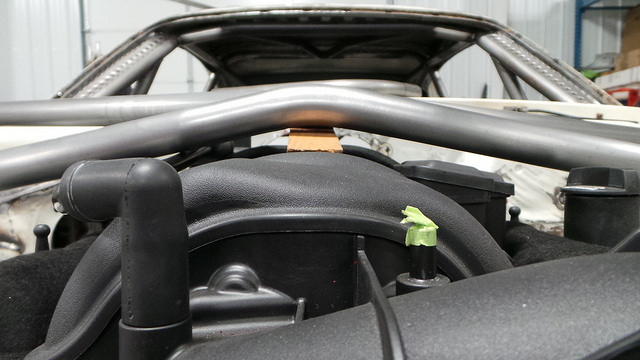
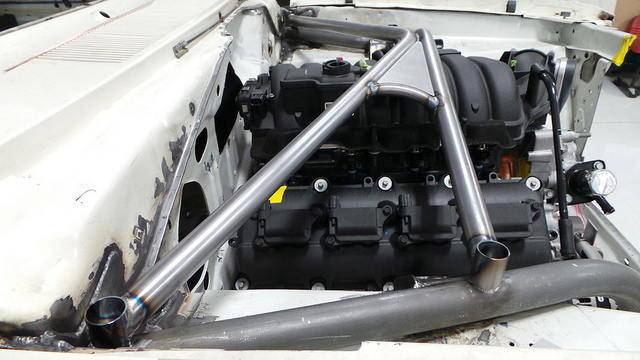
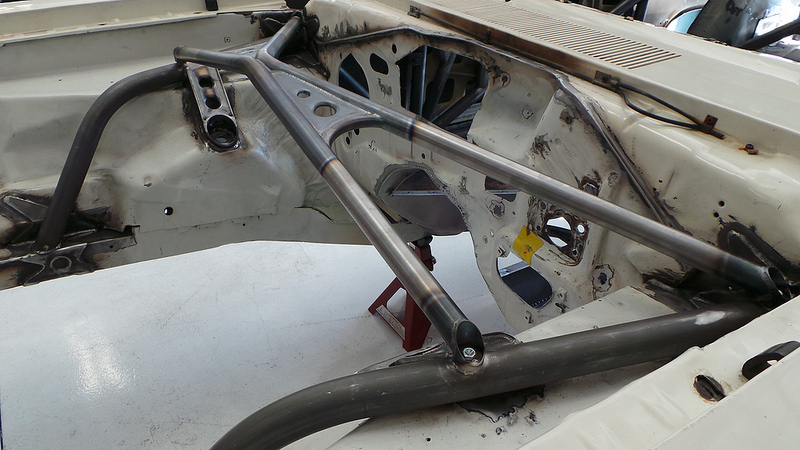
Now it was time to work on the bay bars that will tie the two shock towers together. But before we could start designing those we had to check how much clearance we had between the engine and the hood.
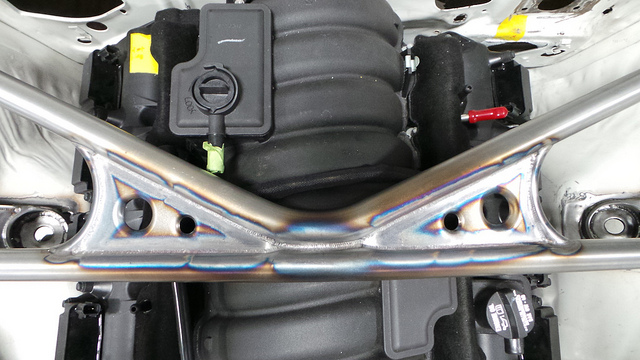
Even thought he clearance was tight, there was still ample room to fit the bars without contacting the hood or the intake manifold. Now it was time to take our measurements and begin constructing the bay bars (which act similar to a bolt-in strut/shock tower brace in street cars).
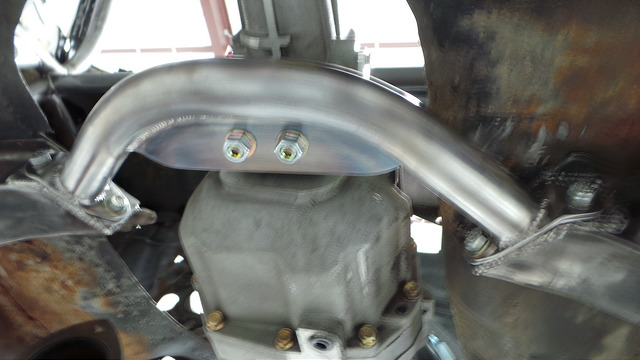
After creating the basic structure of the bay bars we reinforced them with new gussets.
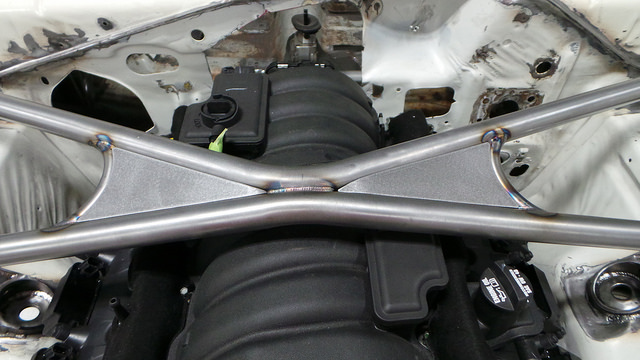

More photos of the Engine Bay Bar construction here: http://www.flickr.com/photos/hotchki...7639746540665/Last edited by Hotchkis; 03-10-2014 at 03:37 PM.
Hotchkis Sport SuspensionToll Free: 877-466-7655
-
02-25-2014 #4
Full Blown G-Machiner
- Join Date
- Oct 2008
- Location
- Santa Fe Springs, CA
- Posts
- 625
Alternator Bracket Design
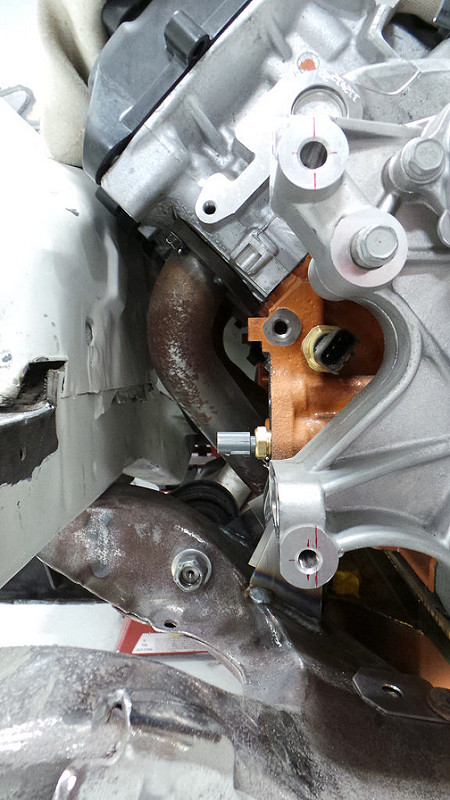
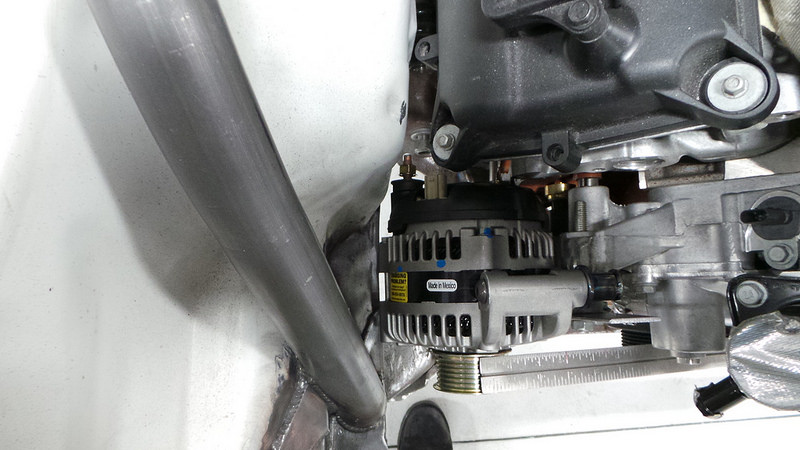
One of trickiest parts about swapping an engine from one vehicle into another is getting all of the engine accessories to clear all of the sheet metal of the new vehicle's engine bay. After we swapped the modern 392 HEMI into our Project '76 Dart, we found that the factory alternator was just too big to fit without some serious modification to the car. Luckily, there was a better option than modifying the car to fit the alternator - finding an alternator to fit the car! The reason we could do this is because the factory alternator that came with the engine was designed to put out a lot of amperage to be able to support a modern vehicle's massive electronic system. Because this was going into a race car with minimal electronics we could utilize a smaller alternator that generated less amps, but we had to design an all new mounting bracket for it.
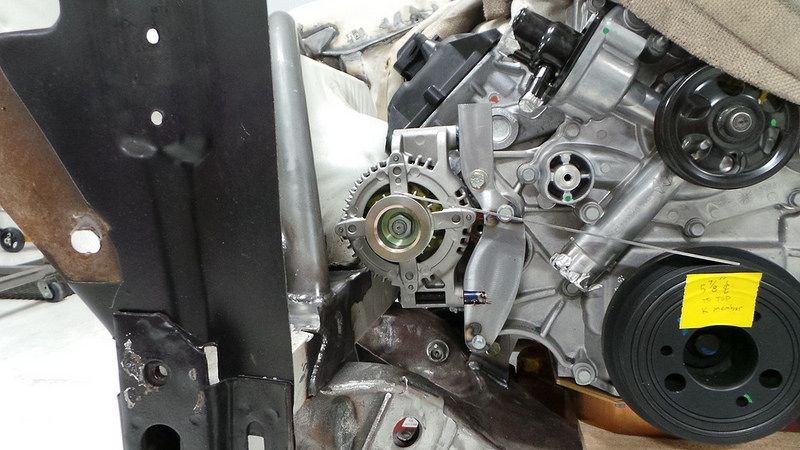
After selecting the new alternator, we set out looking at the available mounting holes in the block to determine the design of the new bracket. We needed to be able to move the alternator up to clear the chassis and forward to bring the pulley into alignment. Once we measured the location of the mounting holes we were able to make our initial design of the bracket out of cardboard to verify clearance and make the final adjustments to the design.
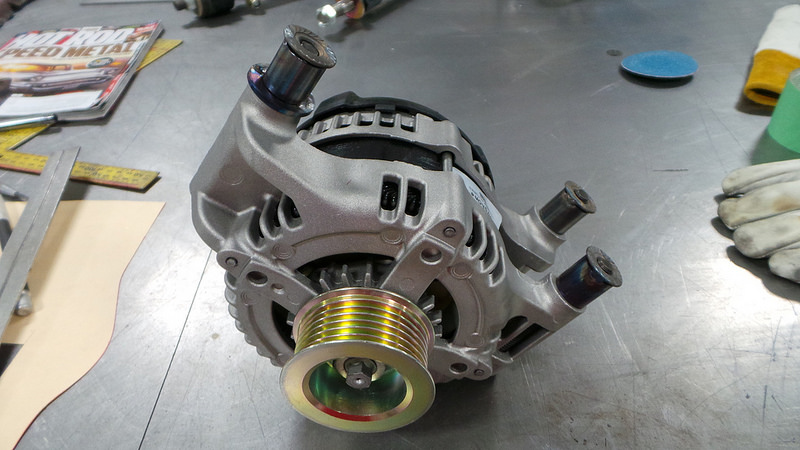

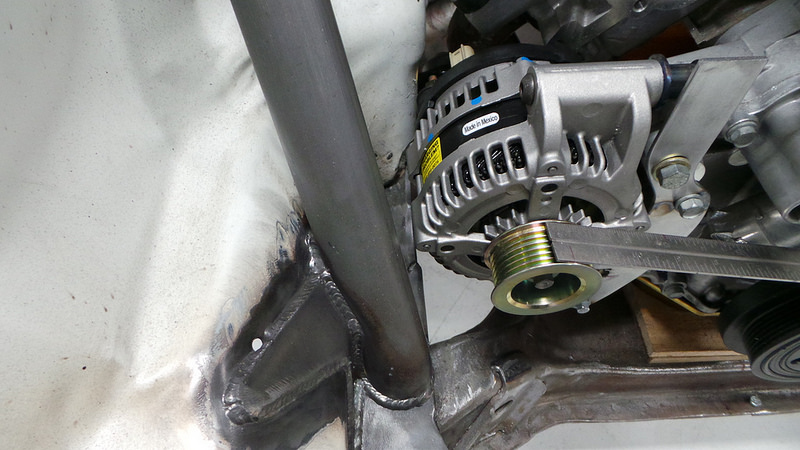
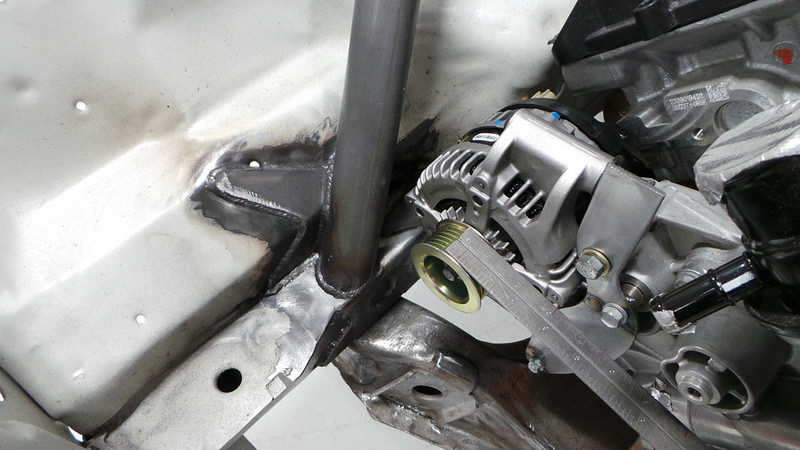
The next step in the process was to create a temporary metal bracket that we would use to really fine tune the alternator's position to ensure proper belt alignment before we fabricate the final version of the bracket.
See more images of the alternator bracket design here: http://www.flickr.com/photos/hotchki...7640291514085/
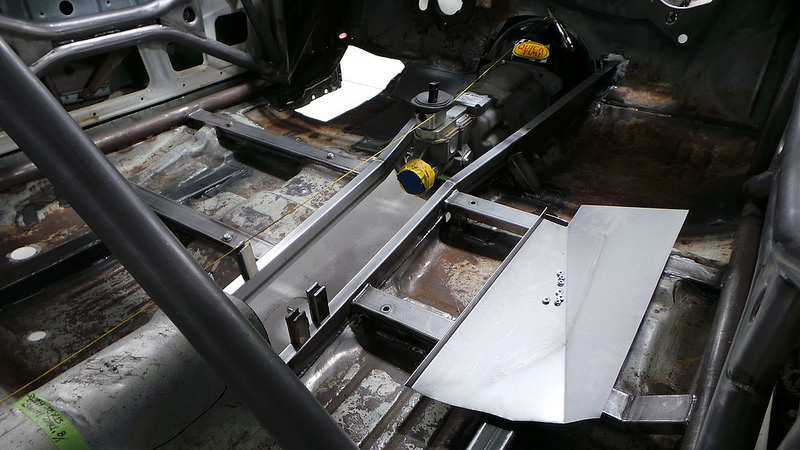
Transmission Tunnel
The design requirement of the transmission tunnel on Project '76 Dart was much different than what most people are used to seeing. Because of the types of racing that Kevin will be doing, he asked that the front half of the tunnel be removable so that the transmission can be serviced and removed through the tunnel itself - much like in professional rally cars.
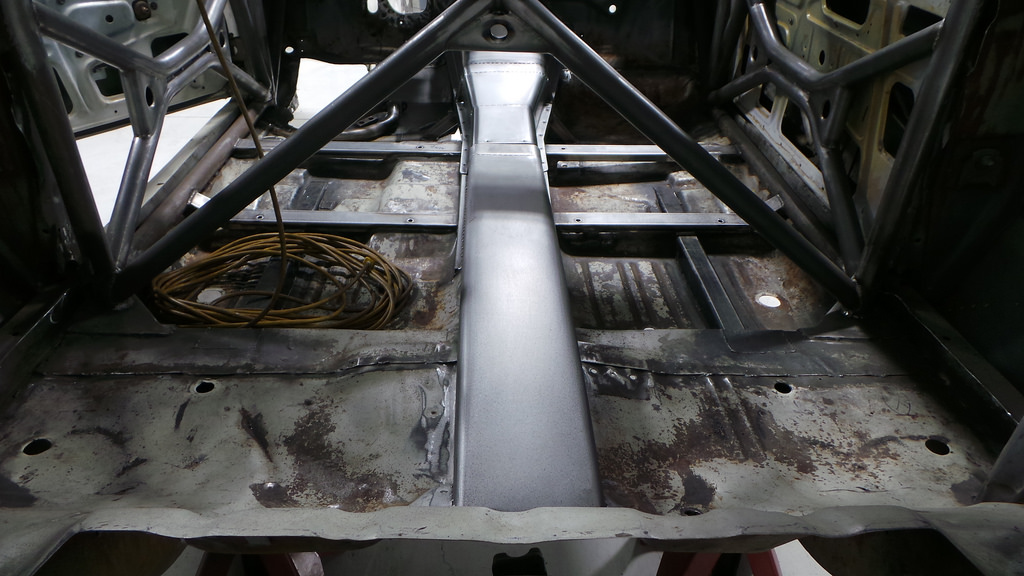
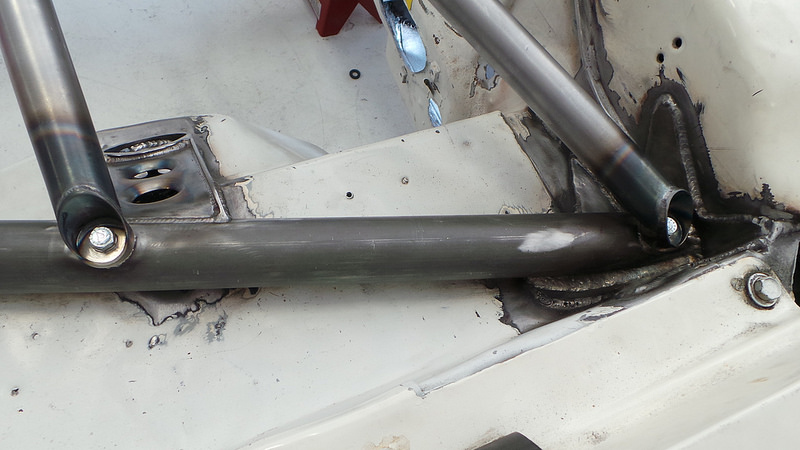
The first step of the process was to create the frame of the transmission tunnel. This framework was also tied into the safety cage through the supports rails for the racing buckets.
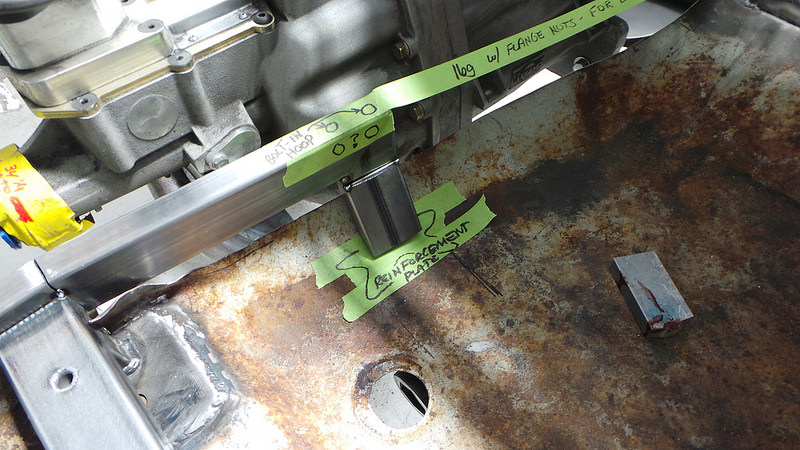
The next step was to construct the transmission tunnel support hoops which included both a removable hoop over the transmission as well as an integrated drive shaft safety hoop just aft of the front driveshaft yoke.
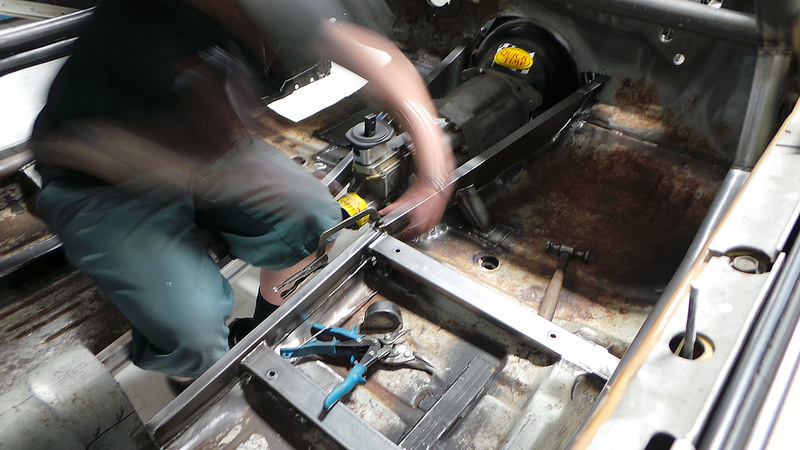
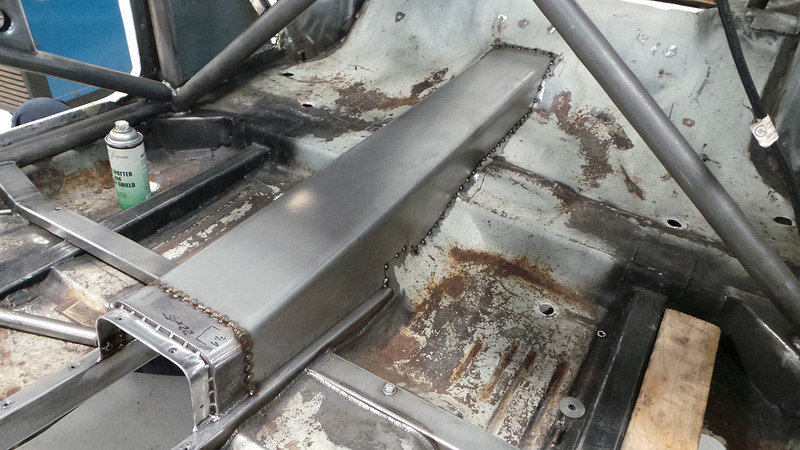
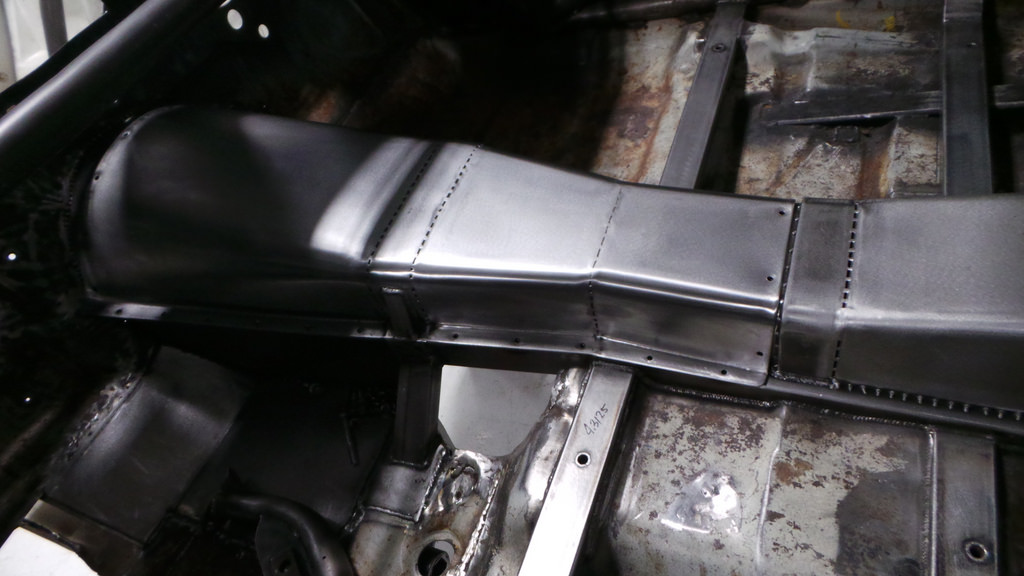
Now that all of the support hoops were in place, we were able to move forward with fabricating the skin of the tunnel itself. The permanent rear section of the tunnel was the first to be completed. After creating patterns to match the contour of the floor pan, we sketched out the locations for the tack welds onto the finished piece and secured it into place.
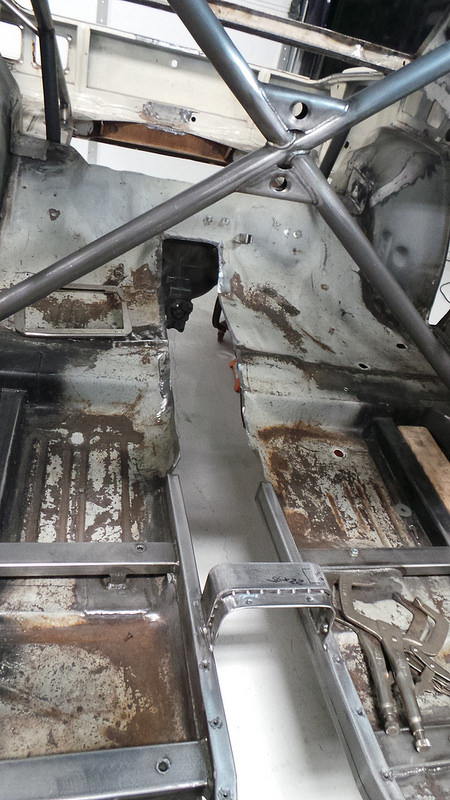
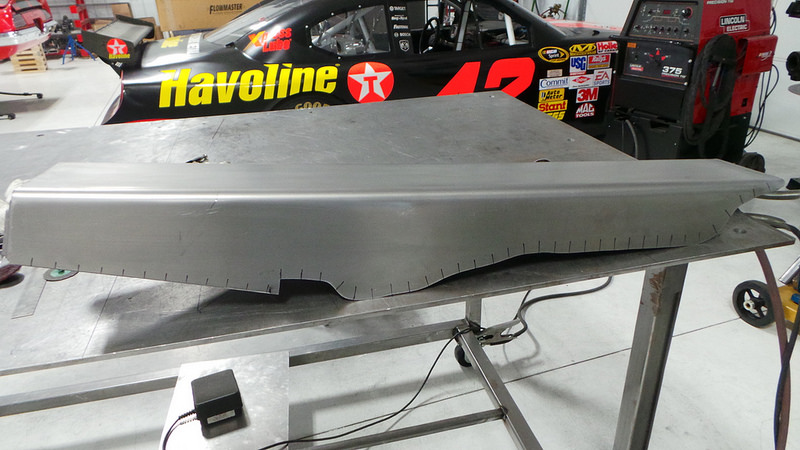

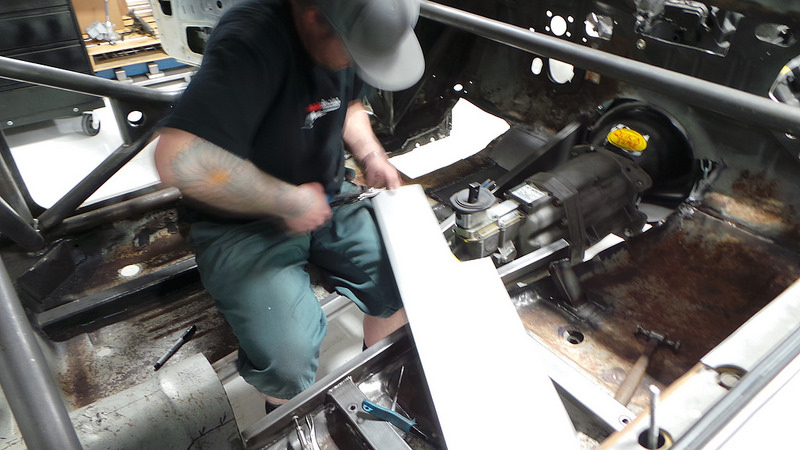
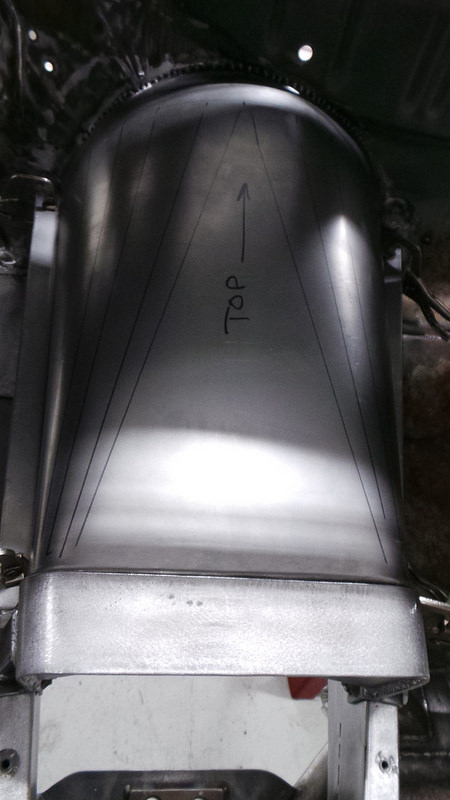
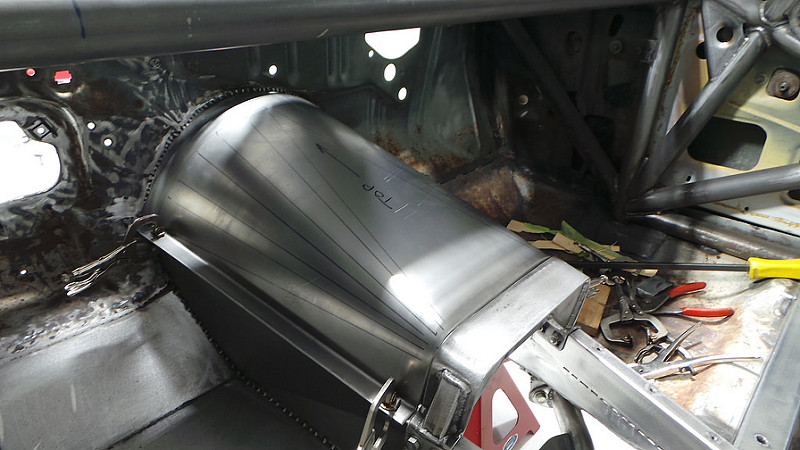
Next it was on to the first removable section which covers most of the transmission. The sheet metal was bent into shape and structural tack weld points were identified before the new piece was secured onto the front and rear brackets.
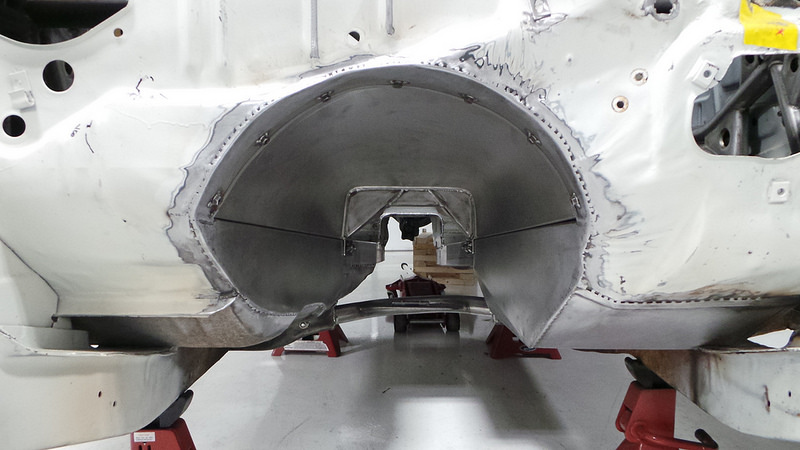
Here is the view down the mostly complete transmission tunnel. More updates to come soon.
For more pictures of the transmission tunnel fabrication click here: http://www.flickr.com/photos/hotchki...7642564086195/Last edited by Hotchkis; 04-28-2014 at 07:27 PM.
Hotchkis Sport SuspensionToll Free: 877-466-7655
-
02-25-2014 #5
Full Blown G-Machiner
- Join Date
- Oct 2008
- Location
- Santa Fe Springs, CA
- Posts
- 625
Transmission Tunnel (continued)
When we last saw the Hotchkis Performance East Project 76 Dart the transmission tunnel structure was built and welded into place with reinforcing plates and the sheet metal covering has mostly been finished.
More pics of the transmission tunnel here: https://www.flickr.com/photos/hotchk...7642564086195/
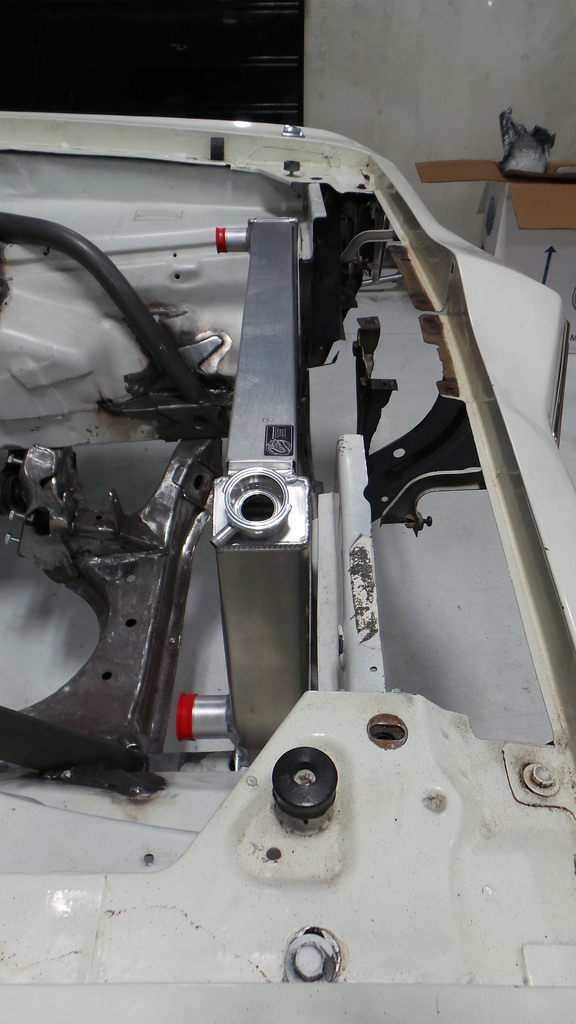
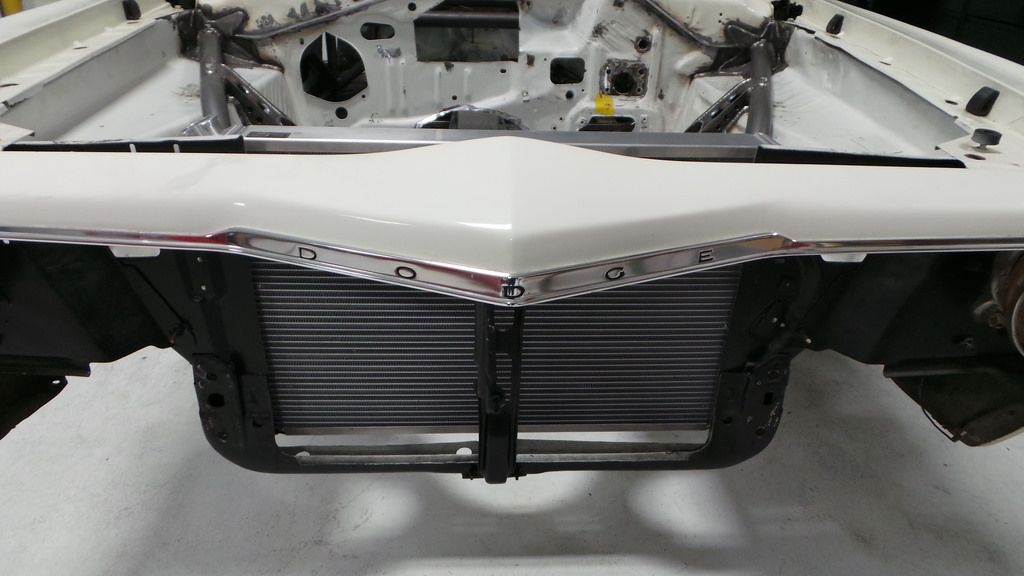
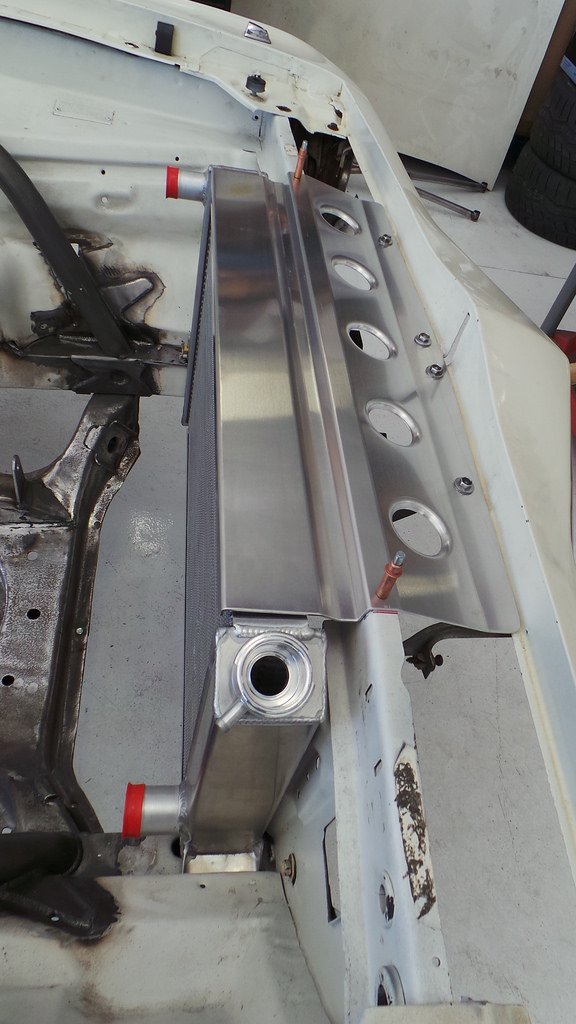
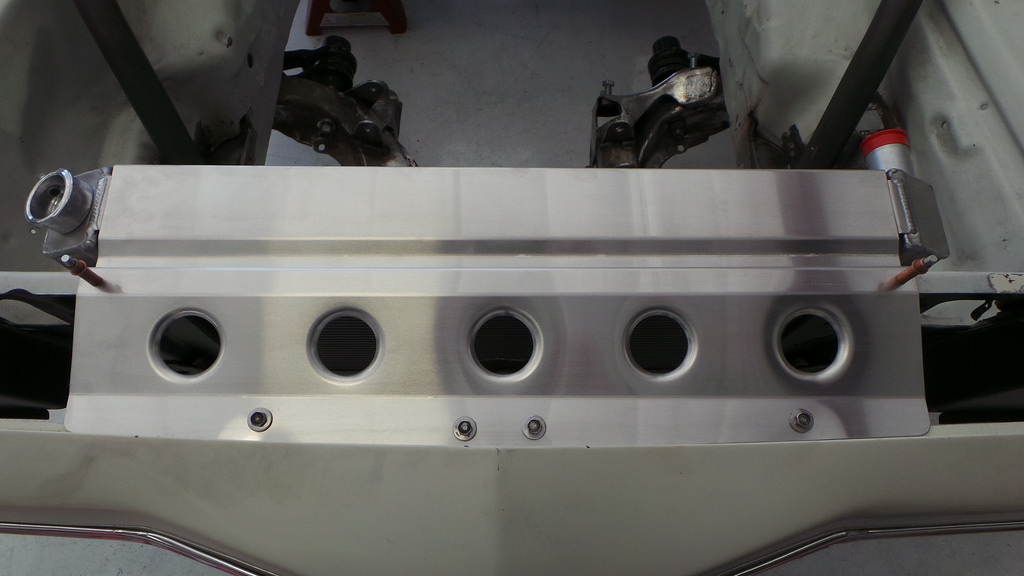
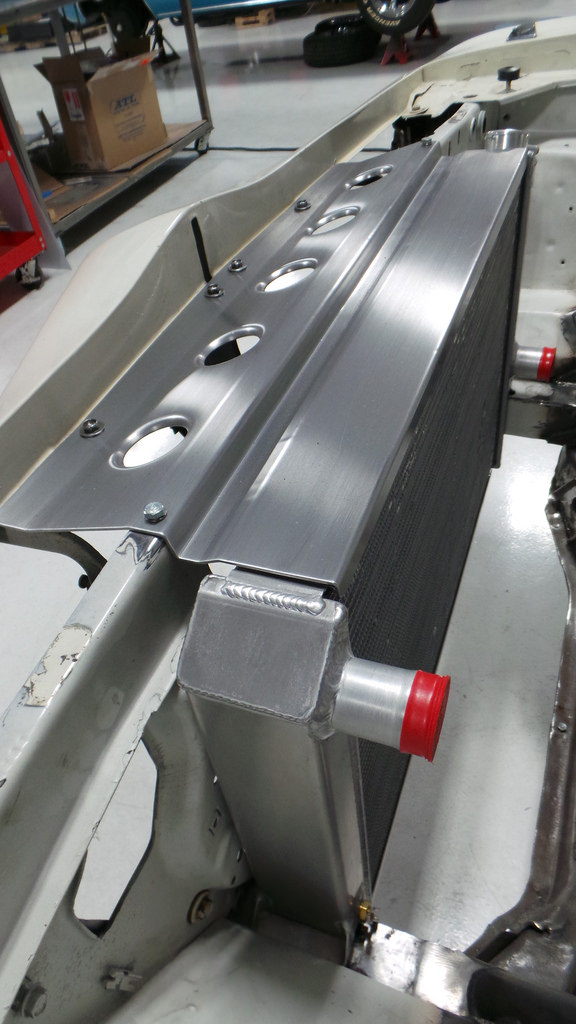
Radiator
Now that the engine bay bars have been built and the engine placement finalized, it was time to focus on the cooling system. Obviously for the rigorous racing that Project Dart was going to be used for an OE-spec radiator just wouldn't do. Instead, we opted for this robust all-aluminum unit from BeCool that will offer great reliability and tremendous cooling capacity. After we bolted the unit into place, it was time to secure it from the top to keep it from rocking back and forth. Rather than creating a simple two point brace, we fabricated an entire cooling tray secures the top of the radiator to the upper radiator support and also creates an air dam both in front of and behind the support to maximize the air flow through the radiator and prevent air from escaping over the top.

More pics of the radiator install here: https://www.flickr.com/photos/hotchk...7642567217623/
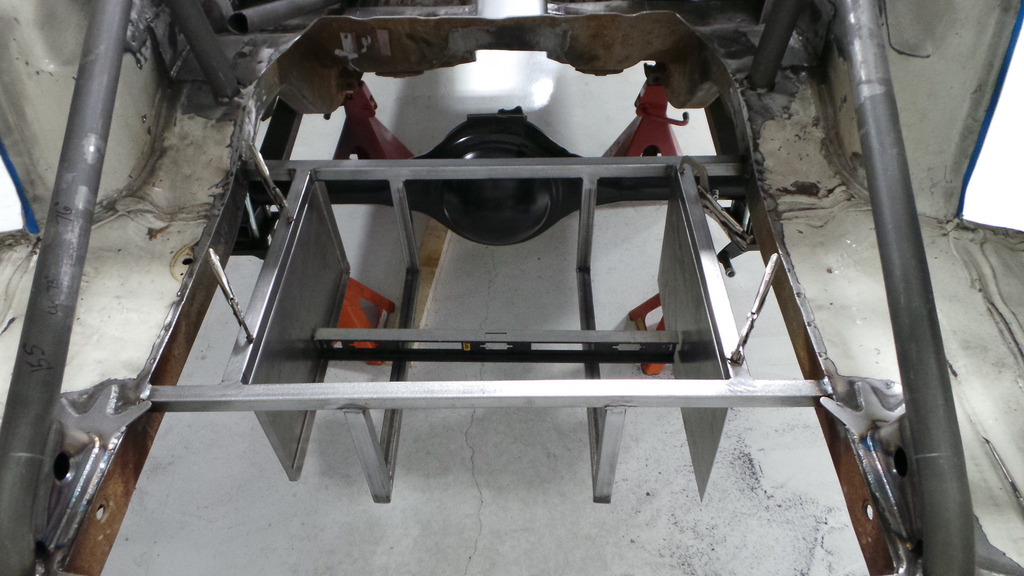
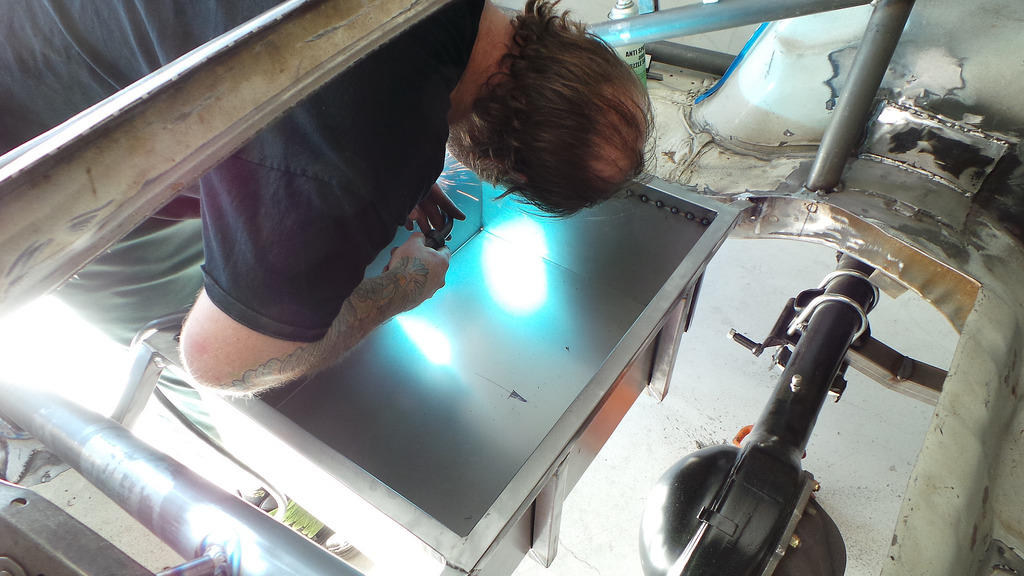
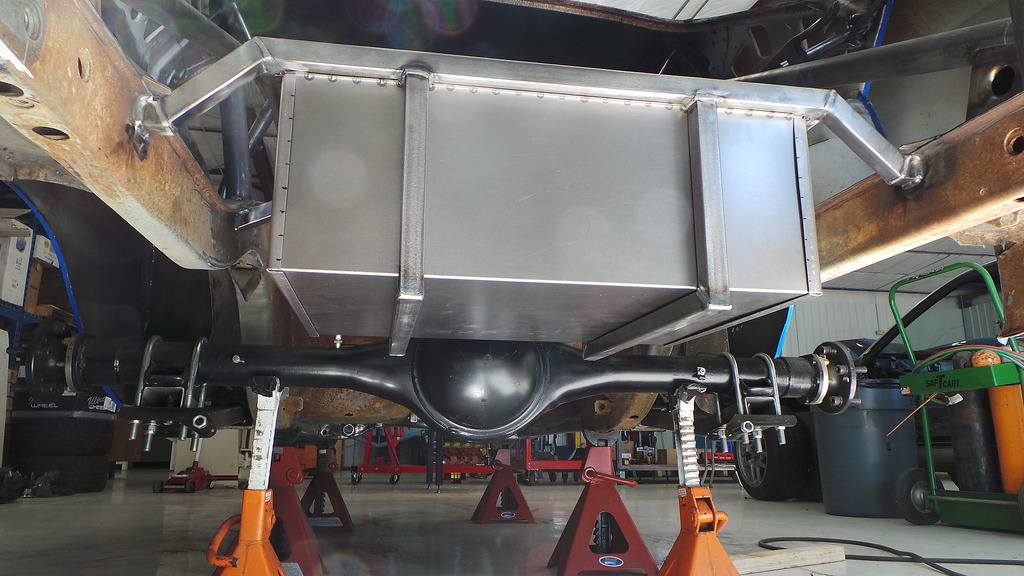
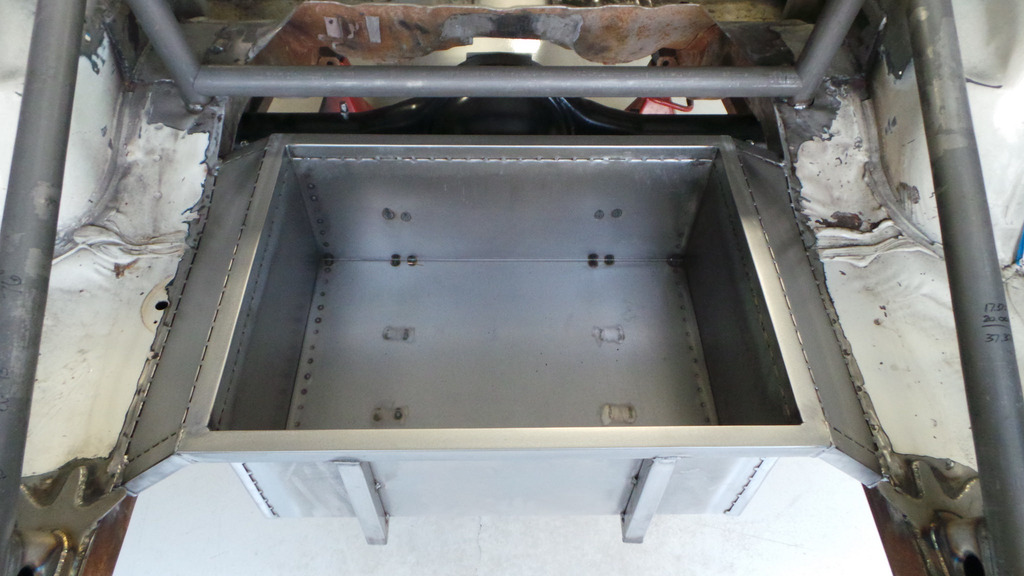
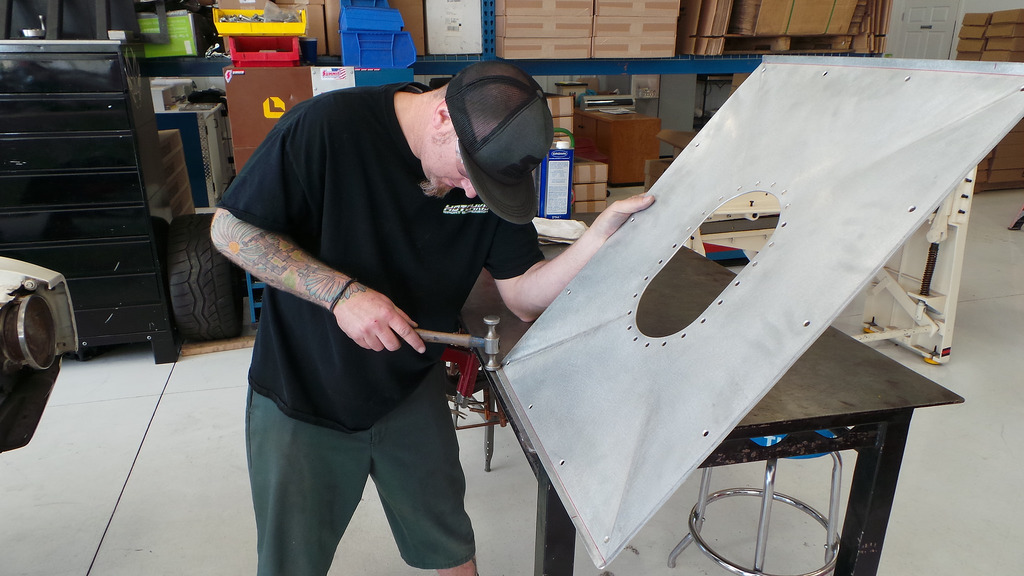
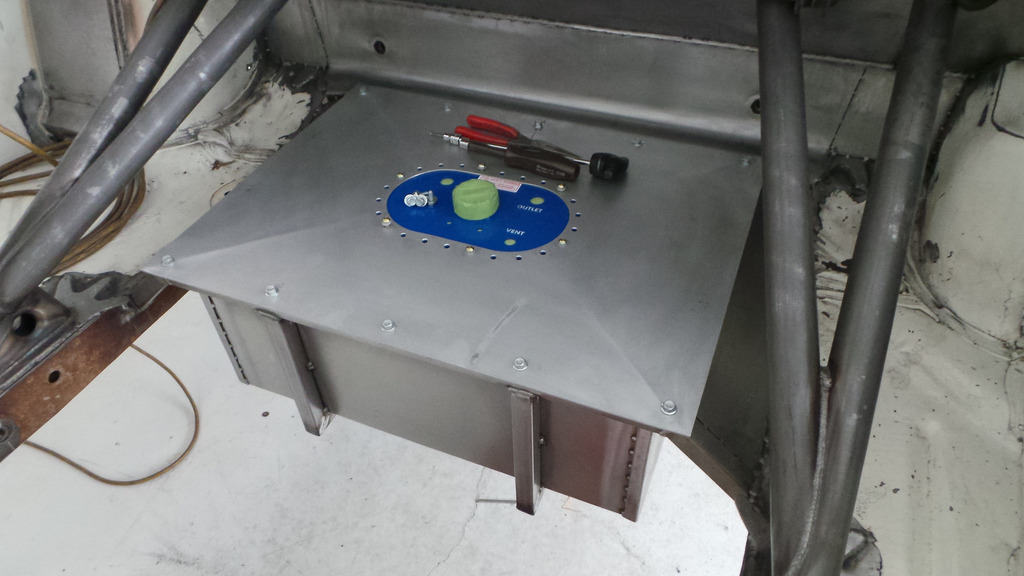
Fuel Cell
Safety on a race car doesn't end at just the roll cage and racing seat. A properly mounted fuel cell must also be installed to make sure that the supply of volatile fuel remains safe and leak-free in the event of an on-track collision or off-track excursion. One other important factor when building the fuel cell is to make sure that the unit is level so that your fuel pickup(s) can get as much out of the cell as possible before it runs dry. If the compartment isn't level with the vehicle, you will have an accumulation of fuel on one side of the tank away from the pickup, effectively reducing the usable amount of fuel in the tank.
More pics of the fuel cell construction here: https://www.flickr.com/photos/hotchk...7644400355381/
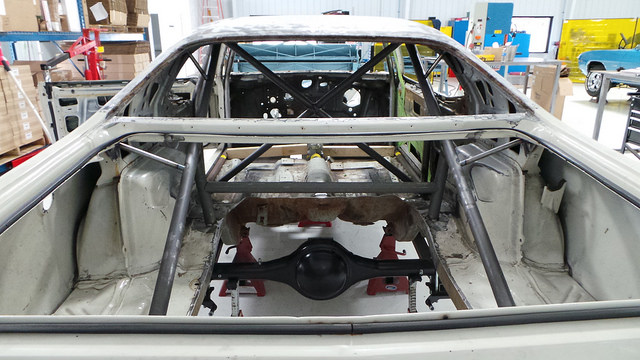
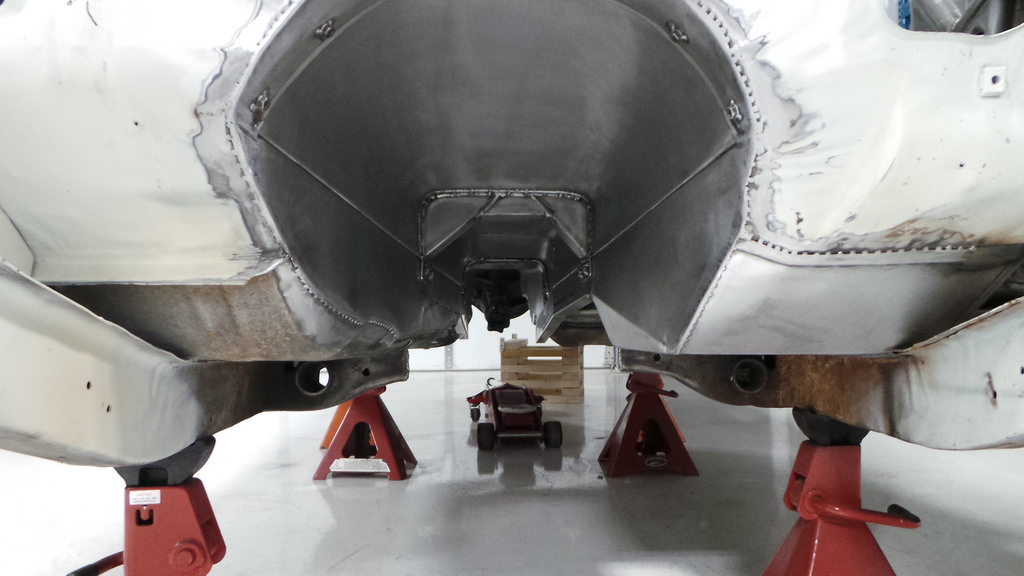
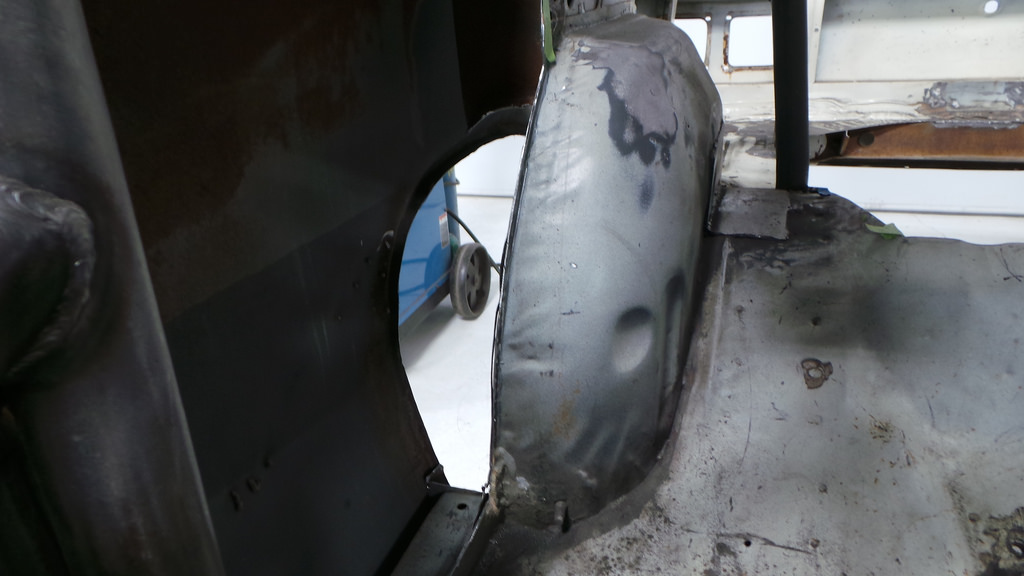
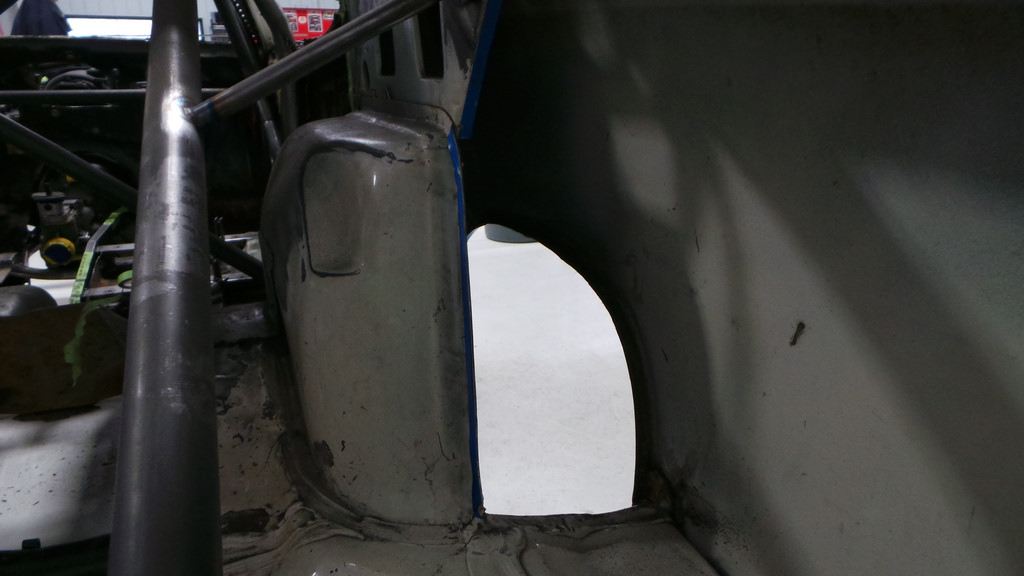
Mini-Tub
Obviously one of the major keys to traction is how much rubber you can put in contact with the ground, and the easiest way to stuff as much tire under the rear end of a classic muscle car is to mini-tub it. Now because Project Dart will remain a leaf spring car, we didn't need to go to extremes to widen the wheel wells. We just needed them to be opened up and free of any potential obstructions.
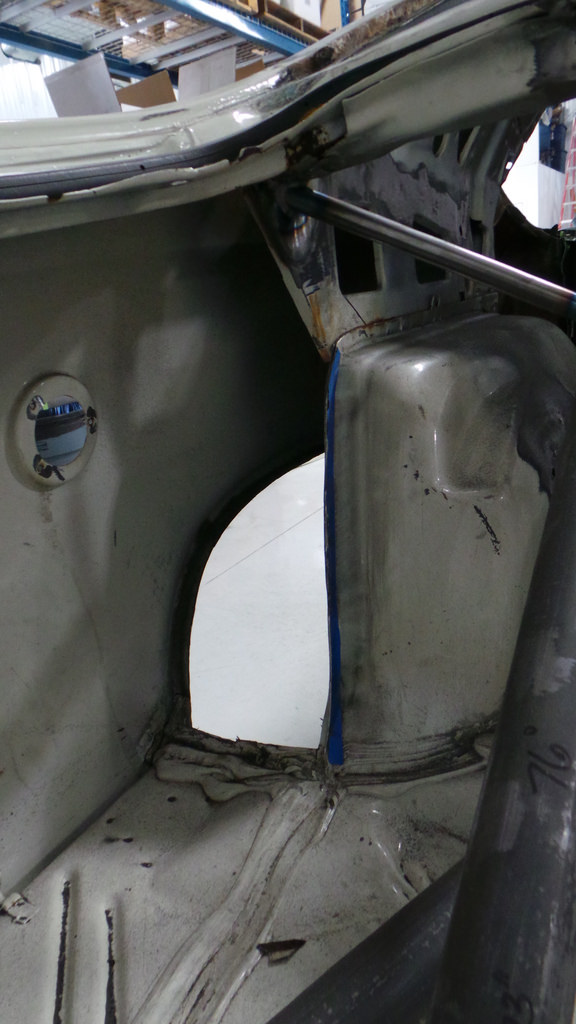
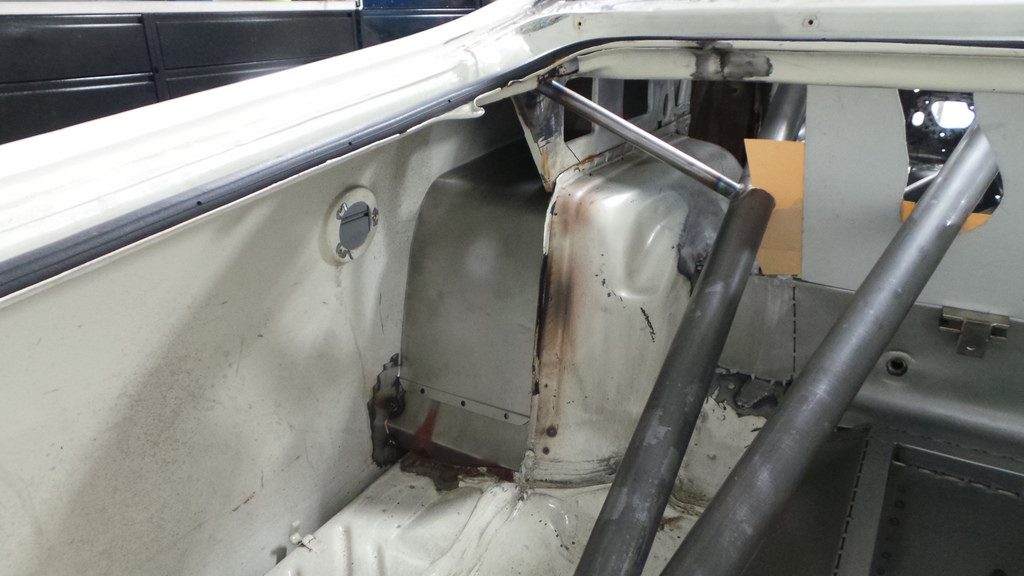
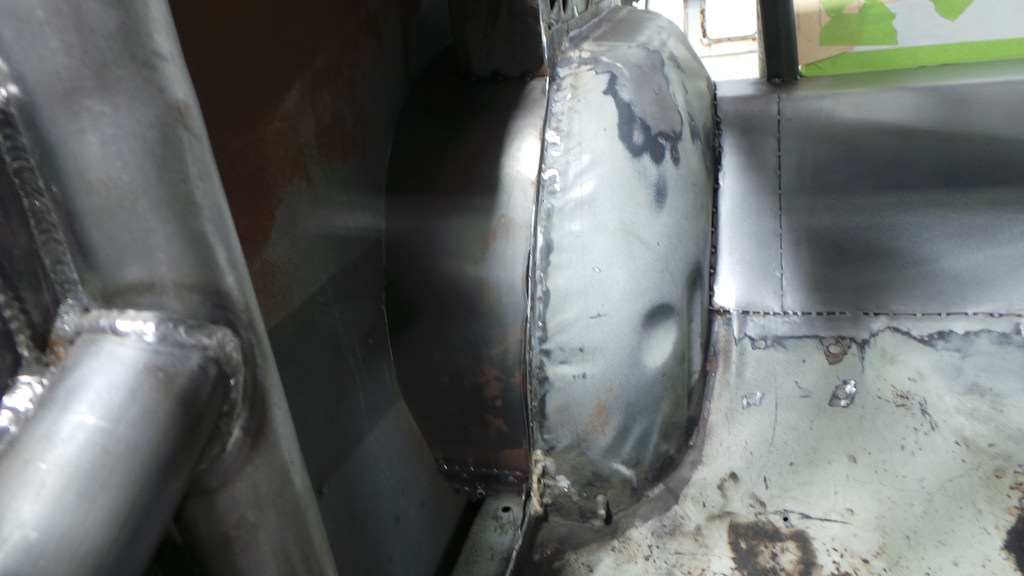

More pics of the mini-tubbing here: https://www.flickr.com/photos/hotchk...7644414804724/Last edited by Hotchkis; 04-29-2014 at 06:37 PM.
Hotchkis Sport SuspensionToll Free: 877-466-7655
-
02-25-2014 #6
 Registered User
- Join Date
- Aug 2011
- Location
- North Platte,NE
- Posts
- 876

Kevin gave me a sneak peak of it on Moparts, thing is gonna be something for sure.
-
02-26-2014 #7
Full Blown G-Machiner
- Join Date
- Oct 2008
- Location
- Santa Fe Springs, CA
- Posts
- 625
Updated with pics of the new engine mounts and transmission cross member!
Hotchkis Sport SuspensionToll Free: 877-466-7655
-
03-04-2014 #8
 Registered User
- Join Date
- Mar 2012
- Location
- Lethbridge, AB
- Posts
- 177

great project! I'll be following this one for ideas
 Build Thread!!!https://www.pro-touring.com/showthread.php?88692-1971-Speedipus-Rex&p=925864&posted=1#post925864
-
03-07-2014 #9
Full Blown G-Machiner
- Join Date
- Oct 2008
- Location
- Santa Fe Springs, CA
- Posts
- 625
FIA-based Safety Cage construction just added!
Last edited by Hotchkis; 03-10-2014 at 03:37 PM.
Hotchkis Sport SuspensionToll Free: 877-466-7655
-
03-10-2014 #10
Registered User
- Join Date
- Mar 2012
- Location
- Lethbridge, AB
- Posts
- 177
great work guys!! curious are the bay bars welded on? wouldn't you want to make them removable to pull the engine? or do you just drop the whole K frame down to get the motor out?
Build Thread!!!https://www.pro-touring.com/showthread.php?88692-1971-Speedipus-Rex&p=925864&posted=1#post925864
-
03-10-2014 #11
Registered User
- Join Date
- Jul 2004
- Location
- Braselton, Ga.
- Posts
- 1,477
WOW! I'm glad to see you expanding! Hope things go well.
By the way you have a great product too!
03-11-2014 #12 Registered User
- Join Date
- Aug 2009
- Posts
- 16
The bar is a bolt in. Originally Posted by dangina
 Thanks,
Kevin Wesley
03-11-2014 #13 Registered User
- Join Date
- Apr 2011
- Location
- Ewing, NJ
- Posts
- 407
What all had to be changed to go from the cage that was in the car to FIA? The bar that was in there didn't look too bad.
-TimNJSPEEDER - Tim Mullaney
New Jersey F-body Owners Association
www.NJFBOA.org
NJ's home for all owners, friends, and fans of Camaros and Firebirds
03-11-2014 #14
Full Blown G-Machiner
- Join Date
- Oct 2008
- Location
- Santa Fe Springs, CA
- Posts
- 625
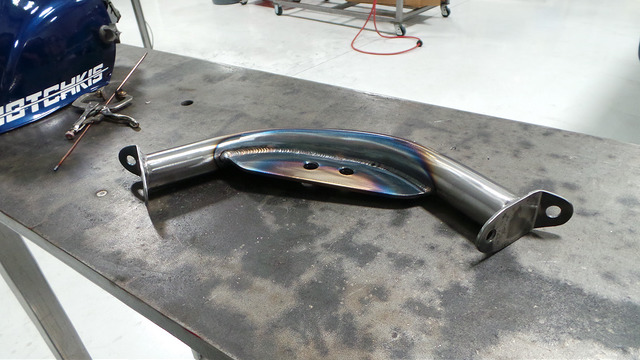
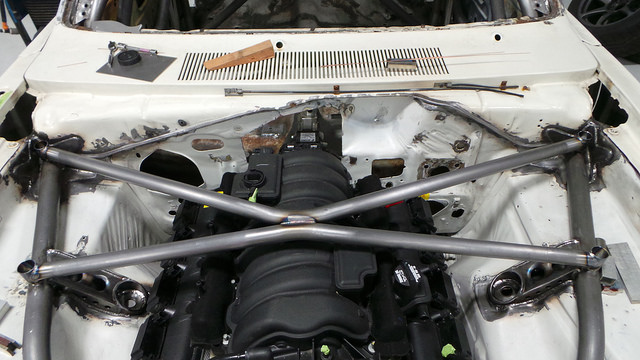
Good question. The bar is a bolt-in bar. The pictures posted didn't show the 100% complete bar as it still needed to have the ends cut down. Here is the finished product: Originally Posted by dangina
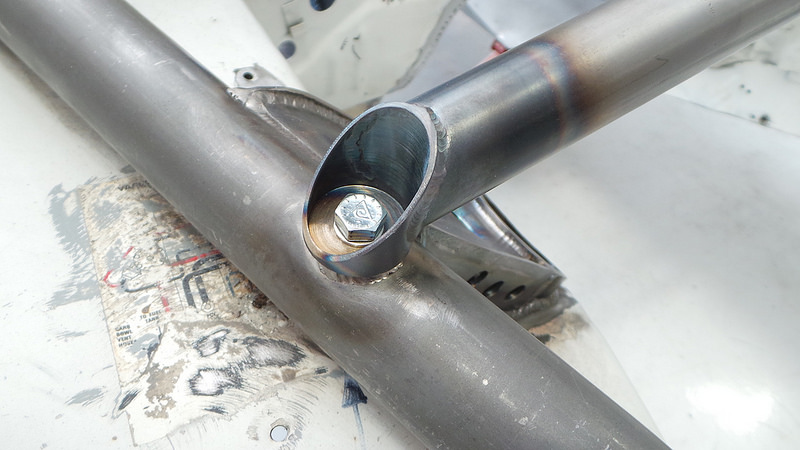
Last edited by Hotchkis; 03-11-2014 at 03:14 PM.
Hotchkis Sport SuspensionToll Free: 877-466-7655
03-11-2014 #15 Registered User
- Join Date
- Apr 2011
- Location
- mass
- Posts
- 493
Great work...The fabrication skills are first class. cant wait to see updates
Paul
1966 Buick Skylark GS
Turbo 401 Buick Nailhead
Build Thread
https://www.pro-touring.com/showthre...uild&highlight=
http://s917.photobucket.com/user/66l...rbo%20nailhead
03-12-2014 #16 Registered User
- Join Date
- Oct 2011
- Location
- Katy, Tx
- Posts
- 309
Beautiful welds. Excellent fabrication skills.
03-15-2014 #17
Registered User
- Join Date
- Aug 2009
- Posts
- 16
The door bars were too high, the main hoop needed an "X" brace to be current, none of the gusseting was finished and the rear backstays were changed to tie into the rear spring mount. Originally Posted by NJSPEEDER
The cage was built before the last round of rule changes and never log booked. Could I have gotten by with it? At some events, absolutely. But, it would have been a bunch of grief at others and probably not allowed to compete. Better to just fix it right now than to haul it across the country and not be able to run.Thanks,
Kevin Wesley
03-19-2014 #18
Full Blown G-Machiner
- Join Date
- Oct 2008
- Location
- Santa Fe Springs, CA
- Posts
- 625
Alternator relocation bracket design has been added!
Hotchkis Sport SuspensionToll Free: 877-466-7655
03-19-2014 #19 Registered User
- Join Date
- Dec 2006
- Location
- Barrie, Ontario, Canada
- Posts
- 108
Looking great, good job!
Used to be known as 455regal
03-19-2014 #20
Full Blown G-Machiner
- Join Date
- Oct 2008
- Location
- Santa Fe Springs, CA
- Posts
- 625
Transmission tunnel fabrication is now up as well!
Hotchkis Sport SuspensionToll Free: 877-466-7655

 Reply With Quote