

Results 61 to 80 of 110
Thread: AutoBahn F-100
-
07-16-2014 #61

 Registered User
- Join Date
- Feb 2005
- Location
- Minneapolis, MN
- Posts
- 195

Residual pressure valves go between your master cylinder and brake calipers, before you split for the sides. So one valve for front, one for rear. This image from Speedwaymotors.com should help explain what I'm trying to say.
-
07-17-2014 #62
Registered User
- Join Date
- Feb 2014
- Location
- Hanau, Germany
- Posts
- 56

Thank you. Makes sense, but means I have to modify the already completed brake lines to get these two into the system. The Big 10 chassis comes with all hard lines installed. Wonder why the valves are not included. May be Rob will enlighten us here.
-
07-17-2014 #63
Registered User
- Join Date
- Feb 2005
- Location
- Minneapolis, MN
- Posts
- 195
I'm not sure how the hardline is set up, but I'd guess there is a connection running to the front and one to rear. Maybe two of each, depending on the planned proportioning valve. I think at a minimum, the residual pressure valves install at the outlet of the master cylinder. Either between the master cylinder and the proportioning valve, or maybe between the proportioning valve and the hardline.
-
07-17-2014 #64
 Registered User
- Join Date
- Aug 2010
- Location
- now In Dandridge, Tn.
- Posts
- 1,301
Yes Kai, everything is already plumbed. I'll post up some picts for you.
-
07-19-2014 #65
Registered User
- Join Date
- Aug 2010
- Location
- now In Dandridge, Tn.
- Posts
- 1,301
OK this is from a chassis that we shipped Friday. From the center of the chassis, under the 'X' member ledge, the valving mounts to the X rail in pre-cut holes. For the front brakes there is a bulkhead and nut, then a 1/8" pipe nipple (hex), then the 2 lb. RCV. the last fitting is an adapter 1/8" NPT to #3AN. For the rear Brakes, the adjustable proportioning valve bolts to the X rail, then a 1/8" pipe nipple attaches the 2 lb. RCV, then a 1/8" NPT to 3/16" IF. adapter connects to the output line. Following the rear line back, it passes through the X rail at its termination point at the rear brake junction block. The block mounts to the 'Center' side of the X rail - the holes are pre cut. From this point the rear flex lines travel to the rear brakes through the trailing arms. - Note that there is a bleed point on the block.
-
07-19-2014 #66
Registered User
- Join Date
- Aug 2010
- Location
- now In Dandridge, Tn.
- Posts
- 1,301
From the top you can see how the front bulkhead passes through the X rail and to the front brakes. With the booster and master installed, the connection is made with #3 Teflon AN line. - Short 14" hose to the front, longer 16" for the rear.
Hope this helps.
-
07-22-2014 #67
 Registered User
- Join Date
- Mar 2009
- Location
- overseas
- Posts
- 3,434
wow looks awesome so far!!
 Kevin S. (overseas in Germany)
1963 Chevrolet Impala 2d ht Coupe
www.CruznArt.com
CRUZN - Automotive Artworks
-
07-31-2014 #68
Registered User
- Join Date
- Feb 2014
- Location
- Hanau, Germany
- Posts
- 56
Spoke with Rob a few days ago. My chassis is plumbed differently as I will be using a Wilwood pedal box with swinging pedals mounted to the fire wall. Therefore I will not need a proportioning valve and I do not really need the residual pressure valves either. However, since I have the Rob suggested to mount them right onto the master cylinder outlets. The reason for needing these is when the master cylinder is mounted lower than the brake calipers. My master cylinders are way higher.
-
07-31-2014 #69
Registered User
- Join Date
- Feb 2014
- Location
- Hanau, Germany
- Posts
- 56
My T56 Magnum took a little tour to the Street Magazine car show in Hannover (1.500 cars and 600 bikes) this past weekend. Matt and Gray from American Powertrain came over the big pond for that. Check out the rusty stand I built for the tranny using a Chrysler rim.
-
08-02-2014 #70
 Registered User
- Join Date
- Nov 2006
- Location
- Ma.
- Posts
- 5,567
Awesome build. The frame looks killer. I can't wait to seethe body on it.
Wayne
Car FINALLY home !!!!!! lol
Project FNQUIK https://www.pro-touring.com/showthre...ghlight=FNQUIK
-
08-10-2014 #71
Registered User
- Join Date
- Feb 2014
- Location
- Hanau, Germany
- Posts
- 56
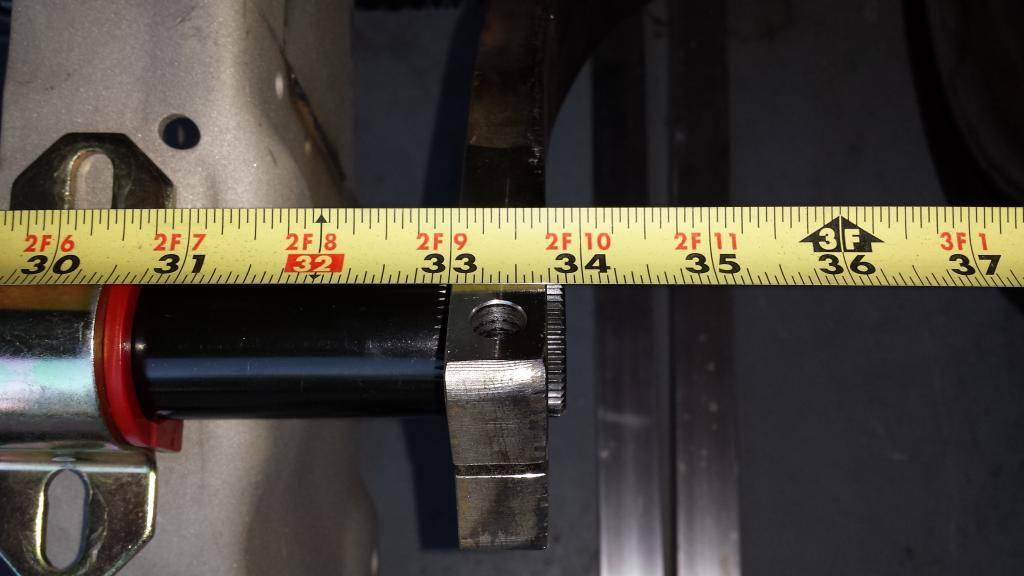
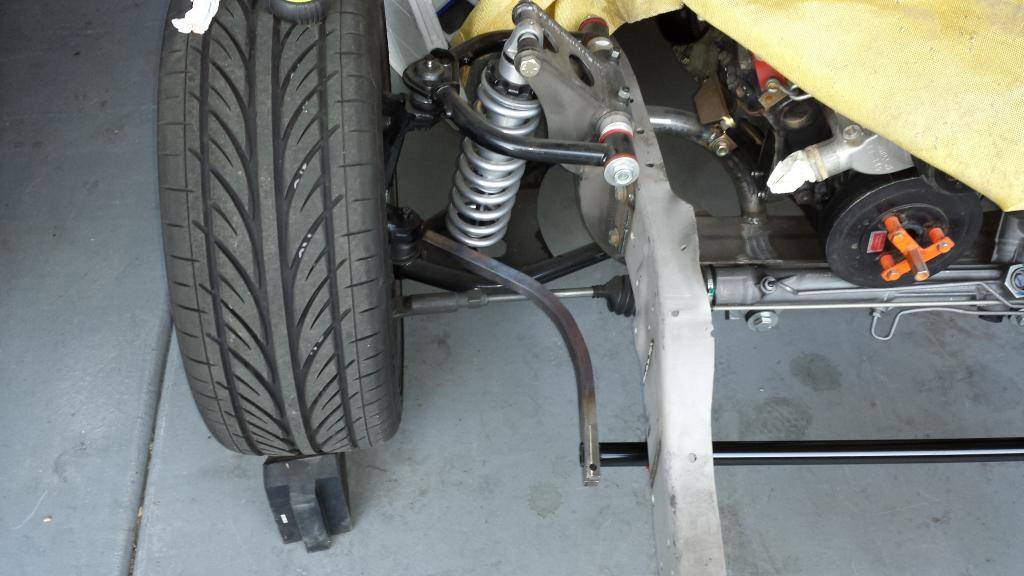
Things are slow right now. Waiting for parts. Bought a set of S10 steel wheels with tires for about $135. My OZ Racing wheels will just be manufactured after the summer break at OZ and I need to move the chassis around. I was very much surprised that these 15 inters actually clear the 12.88" rotors with the calipers mounted. It is very tight with about 1mm clearance. Good enough.
-
08-10-2014 #72
Registered User
- Join Date
- Feb 2014
- Location
- Hanau, Germany
- Posts
- 56
Started to make a very simple exhaust using two Flowmaster 44s. Bought 2 1/2 inch exhaust tubing, but this stuff is so bad that it did not survive bending in a professional bending machine. Had to weld my 67 degree bends using pieces from a 180 degree bend. In order to get the truck running I will exit above the running boards right behind the cab. Will make a full exhaust to the rear later and then use cut outs to exit again were my exhaust ends now.
-
08-27-2014 #73
Registered User
- Join Date
- Feb 2014
- Location
- Hanau, Germany
- Posts
- 56
The chassis is pretty much done. Just need to torque a couple of nuts and bolts.
Sorry for another side way photo.
I need a couple of torque settings for the No Limit Wide Ride IFS and the rear suspension of the Big10 chassis. So in case Rob is listening, here's what I need:
1. upper front control arm to chassis
2. lower front control arm to chassis
3. upper front coil over mount
4. steering rack to chassis
5. panhard bar to chassis and to the rear end mount
6. rear coil over mount, both ends
All standard nuts and bolts are torqued in accordance with the relevant torque settings that you find all over the web.
The truck is still in one piece and I will drive it one more time to a cruise night in a couple of days. The very next day the swap will start. Can't wait.
Kai
-
09-10-2014 #74
Registered User
- Join Date
- Feb 2014
- Location
- Hanau, Germany
- Posts
- 56
Started to take the truck apart. Also got my new rims and tires today.
09-11-2014 #75 New to Pro-Touring
- Join Date
- Nov 2012
- Location
- Arizona
- Posts
- 41
Looking good! It will look pretty awesome on the new frame!
My Build Thread: http://67-72chevytrucks.com/vboard/s...d.php?t=611112
09-11-2014 #76
Registered User
- Join Date
- Feb 2014
- Location
- Hanau, Germany
- Posts
- 56
Could not wait. Had to mount at least one side to see if they fit. I did make my own tool to measure, but things can go wrong because you overlooked something. I did not and they fit. May need some custom spacers later to fit them perfectly, but this is a very good start I think. Quite happy now.
... and yes, the front wheels touch the sway bar. Need to find a solution for that.
09-13-2014 #77
New to Pro-Touring
- Join Date
- Nov 2012
- Location
- Arizona
- Posts
- 41
No limit offers an upgraded splined bar for the 67-72 front bar that may allow the arms to be closer to the frame. I got one with mine, but I haven't put it on yet, so I am not sure where the position of the arms is. I will see if I can pull it out and look at if for you.
Wheels look great also!My Build Thread: http://67-72chevytrucks.com/vboard/s...d.php?t=611112
09-13-2014 #78
New to Pro-Touring
- Join Date
- Nov 2012
- Location
- Arizona
- Posts
- 41
So I looked at the sway bar that I got from No Limit tonight. The width was roughly 34" from outsides edges of the arms.
Here is a photo of how it looks to give you a better idea of the extra clearance. With the shape and bends in the arms, I will have to mount this bar towards the top of the frame to get the angles lined up for the links to the upper control arms. If nothing else, hopefully this will give you some ideas. Good luck!
 My Build Thread: http://67-72chevytrucks.com/vboard/s...d.php?t=611112
09-13-2014 #79
Registered User
- Join Date
- Feb 2014
- Location
- Hanau, Germany
- Posts
- 56
Thanx. That looks interesting. Wonder how much more clearance this will give. Also wonder why the bar could not be even shorter. I.e. barely as wide as the frame width plus the spline for the arms. 10" wheels in front is freakin wide. But the more the better, right ? Will talk with Rob when they have settled in their new location in TN.
10-13-2014 #80 Registered User
- Join Date
- Jul 2010
- Location
- OREGON
- Posts
- 365
Good looking effie...

 Reply With Quote


