

Results 1 to 20 of 146
-
08-23-2008 #1

 Registered User
- Join Date
- Jul 2007
- Location
- Los Angeles, CA
- Posts
- 1,303
Project "Sleeper" - 69 Camaro Resto-Mod - updates
Well I finally decided I needed my own project thread rather than keep posting updates to my welcome thread:
https://www.pro-touring.com/forum/sh...d.php?p=342337
For lack of a better project name, I chose "Sleeper" since I want to keep the stock look of my 69 Camaro but modernize it with more HP, better brakes, suspension etc. Obviously if you look closely you will notice it is not stock, but hopefully to the casual observer it will look like a stocker. I am still considering putting full Z/28 emblems on it and a 302 cowl decal just to throw one off further.
Some pictures of the car:
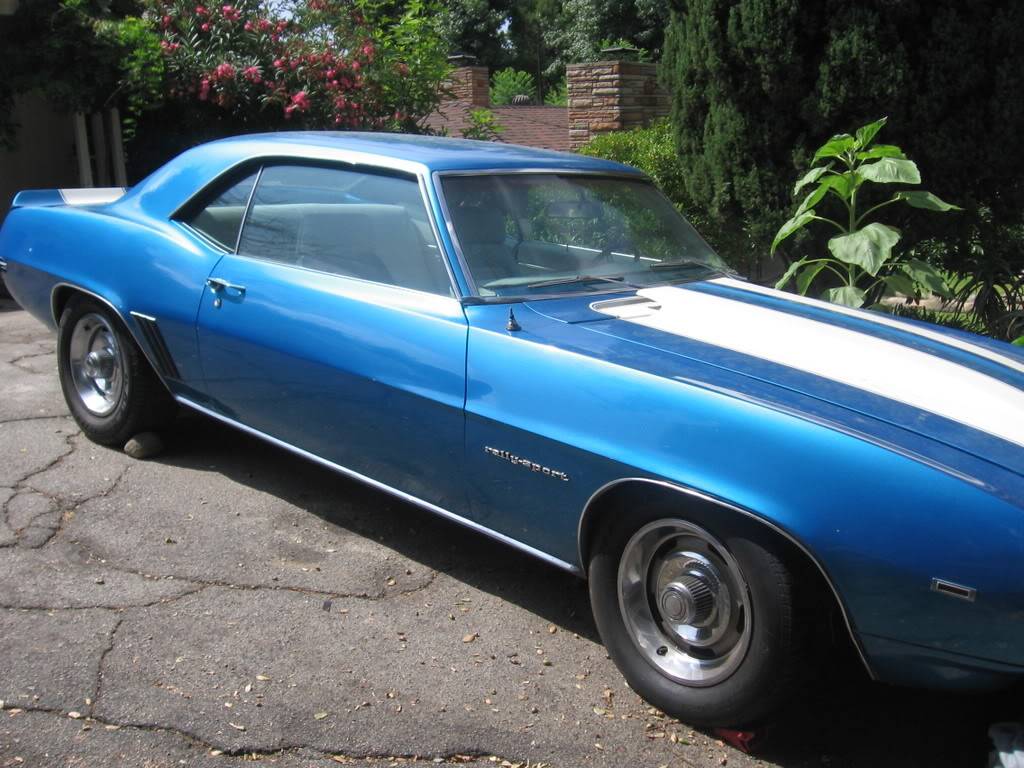
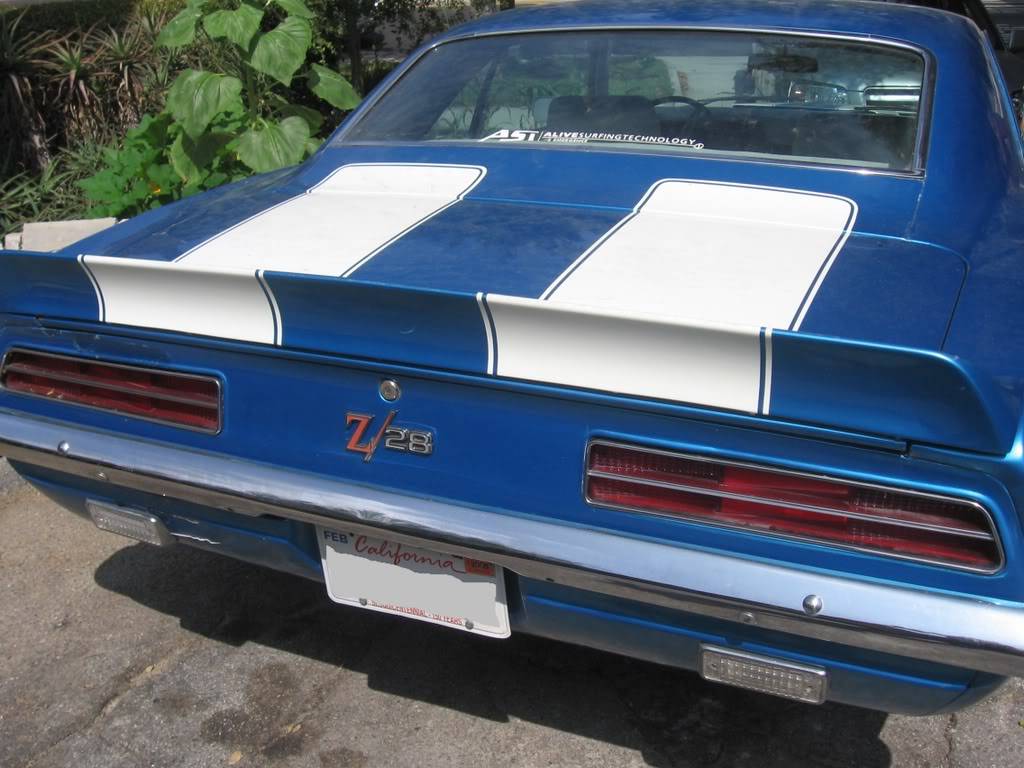
It is a 69 Camaro with the RS option with a cowl hood, automatic (700R4) and white interior. It has some z/28 Emblems that the previous owner had put on them. I was also told that it had a early 90s restoration done to it. I think the guy I bought the car from got it running again (bought it from a younger guy) and flipped it. I base this on the general state that the car was in (all the fluids hadn't been changed in a long time, radiator was just about rusted out etc). But that is okay, I was looking for something that had a really good body but needed an engine. I was still able to drive it home just fine, although it had some electrical and carb problems later and sat.
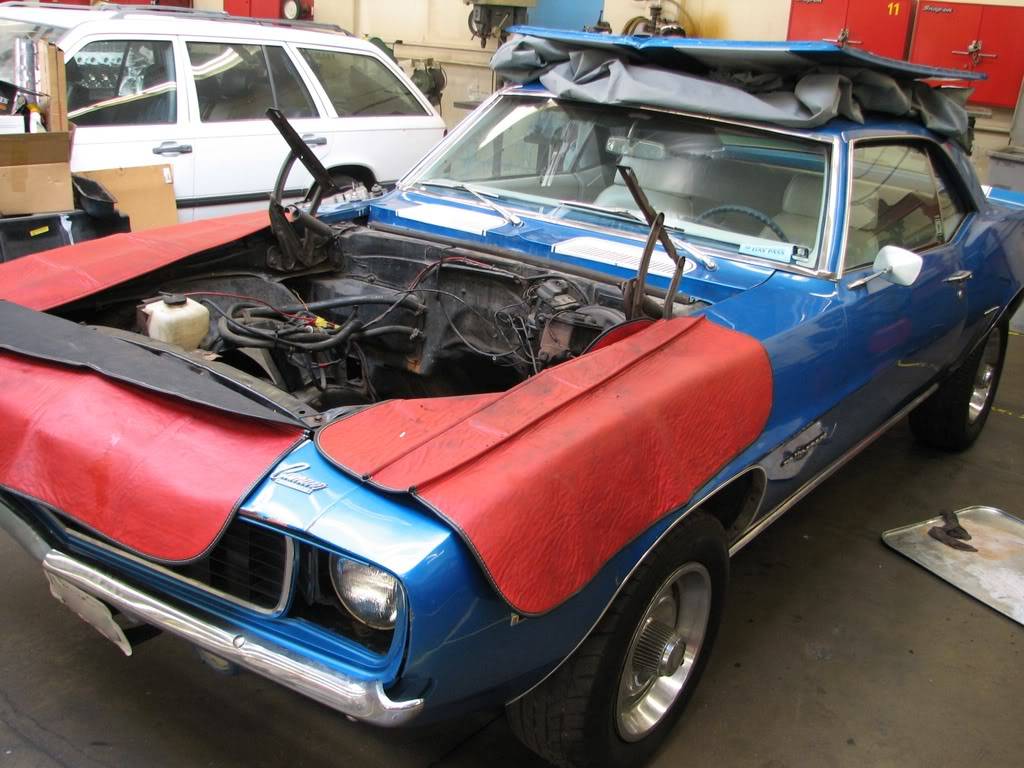
Overall the goal is to do as much work myself as I possibly can, both to learn how to do it and for the challenge.
I enrolled in a local JC and started taking automotive classes as I really hadn't done stuff like this before and really wanted to do it right. So it didn't take long for me to pull it apart anyways:
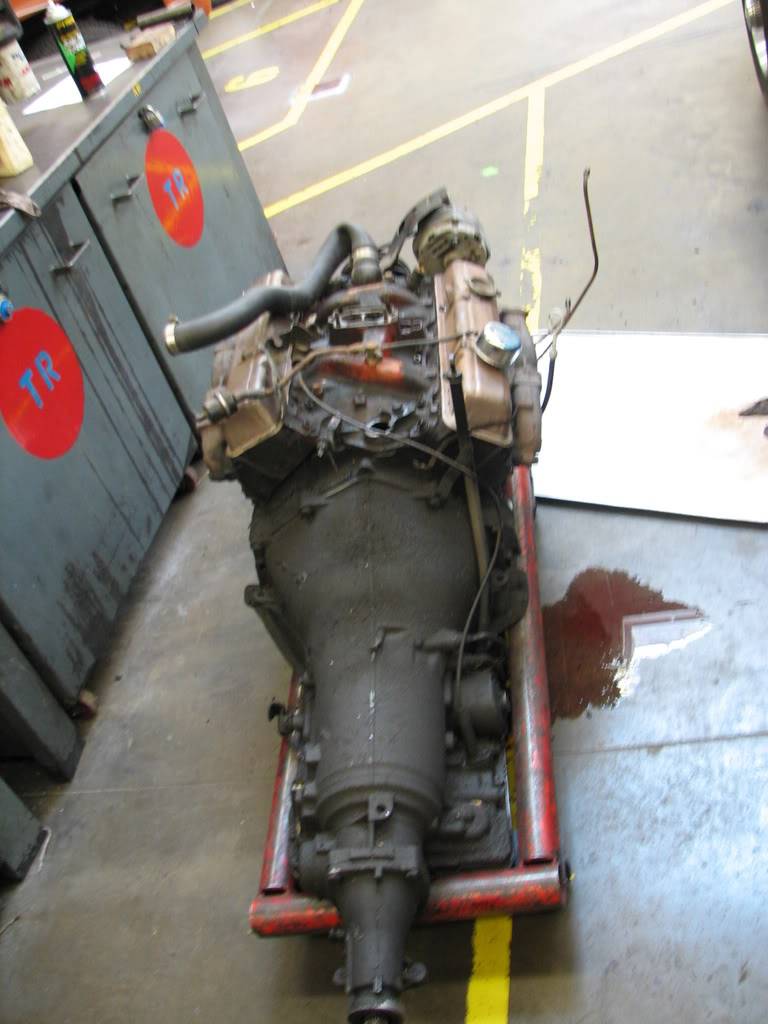
Old engine and trans, and old tired 307 passenger block from a late 70s early 80s car and a 700R4 trans:
Originally the plan was just to build an engine for the car, but that snowballed (more about that later). So I started building a big block to drop in the car. It is a 454 GenV block I found at a junkyard (took 4 tries to get one without cracks in it). It is bored 030 over with a stroker crank making it 489ci (8.0L).
So starting on the engine blue print, it is magna-fluxed, sonic tested. Mains, cylinder bores and deck are checked for straightness to get a baseline (pretty good but some machining is in order to make it perfect):
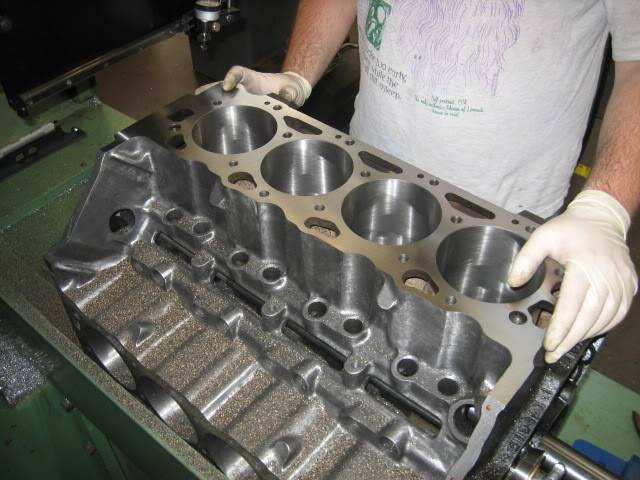
All the machining is done by me in my engine machining class (except boring and honing they didn't have that machine at the time).
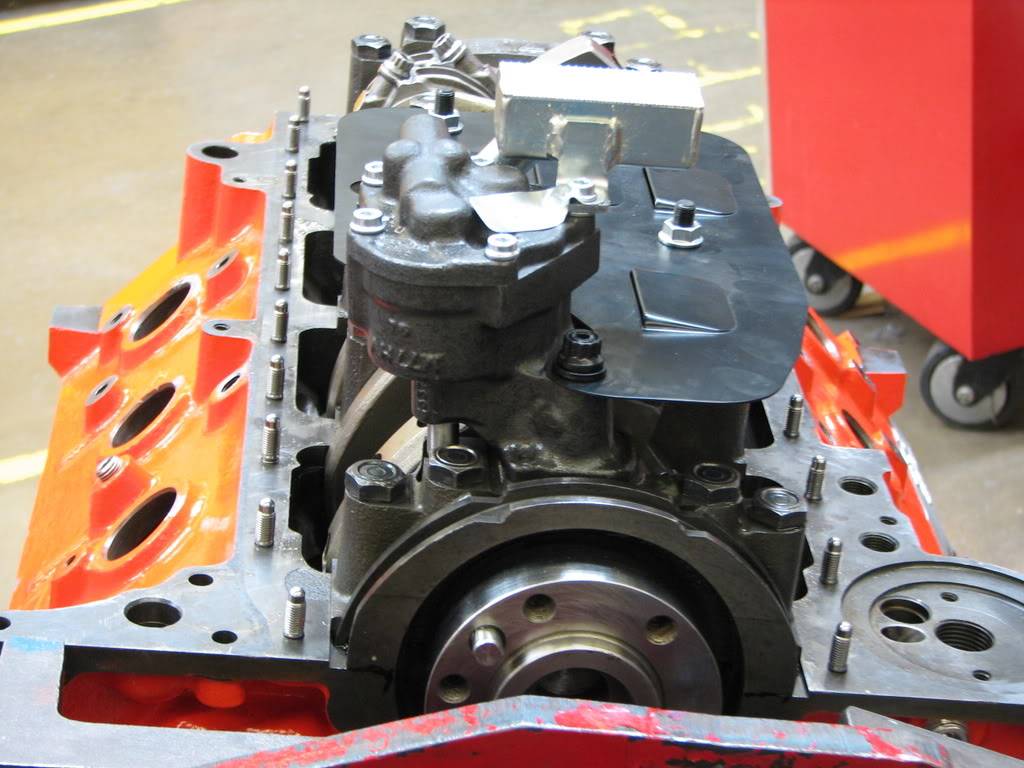
Nice fresh block (with Por-15 engine paint on it; I just love this paint, you can hammer it and pour brake clean on it, doesn't phase it):

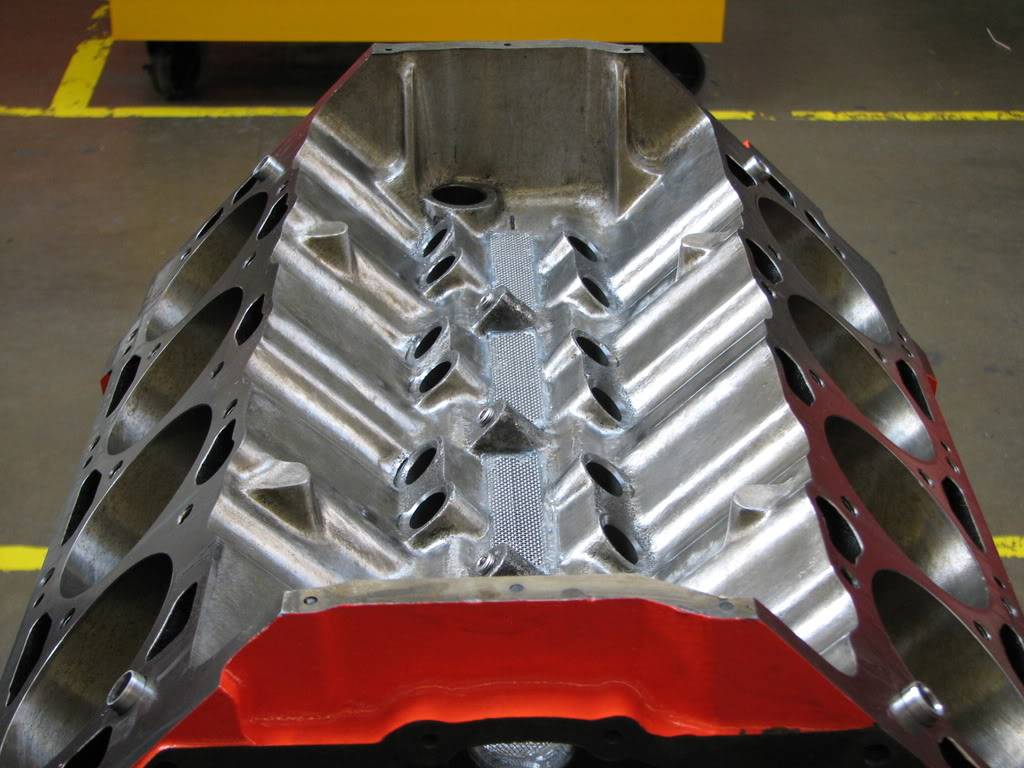
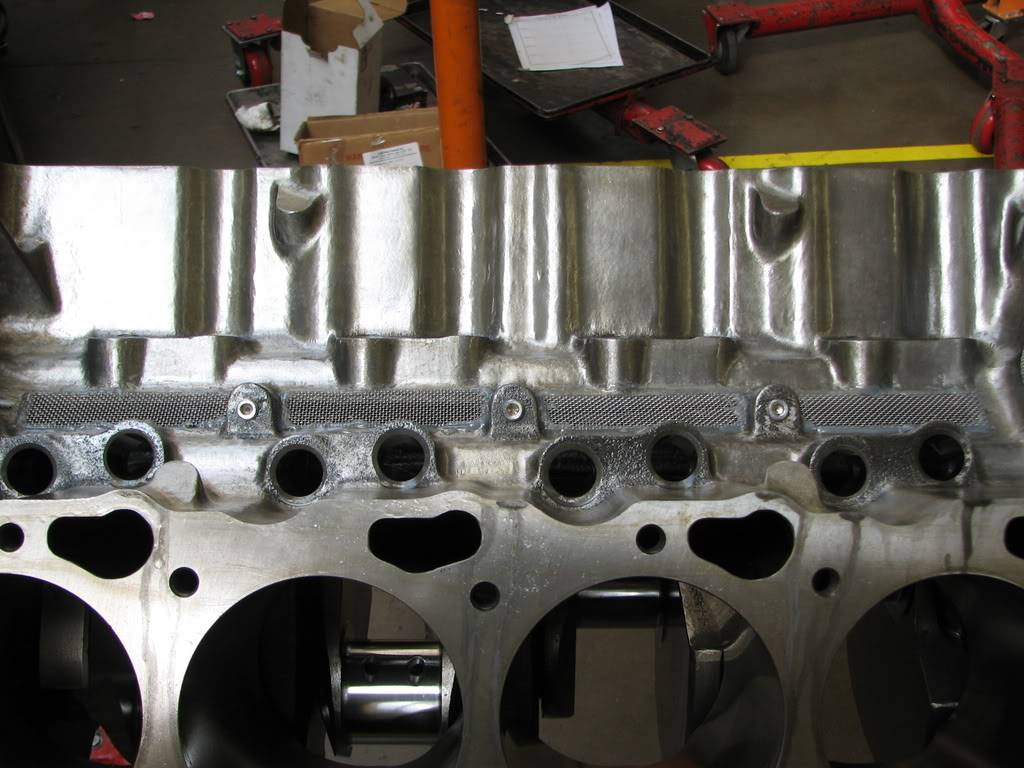
Custom grinding was done on the top of the block for increased oil return and a screen kit is installed (case I grenade a valve it will save my bottom end):
-
08-23-2008 #2
Registered User
- Join Date
- Jul 2007
- Location
- Los Angeles, CA
- Posts
- 1,303
Bottom end goes together:

All the main bearings are clearanced within .0001 of each other, for very even oil distribution. The goal is not so much max HP but a high HP build that will be very reliable.
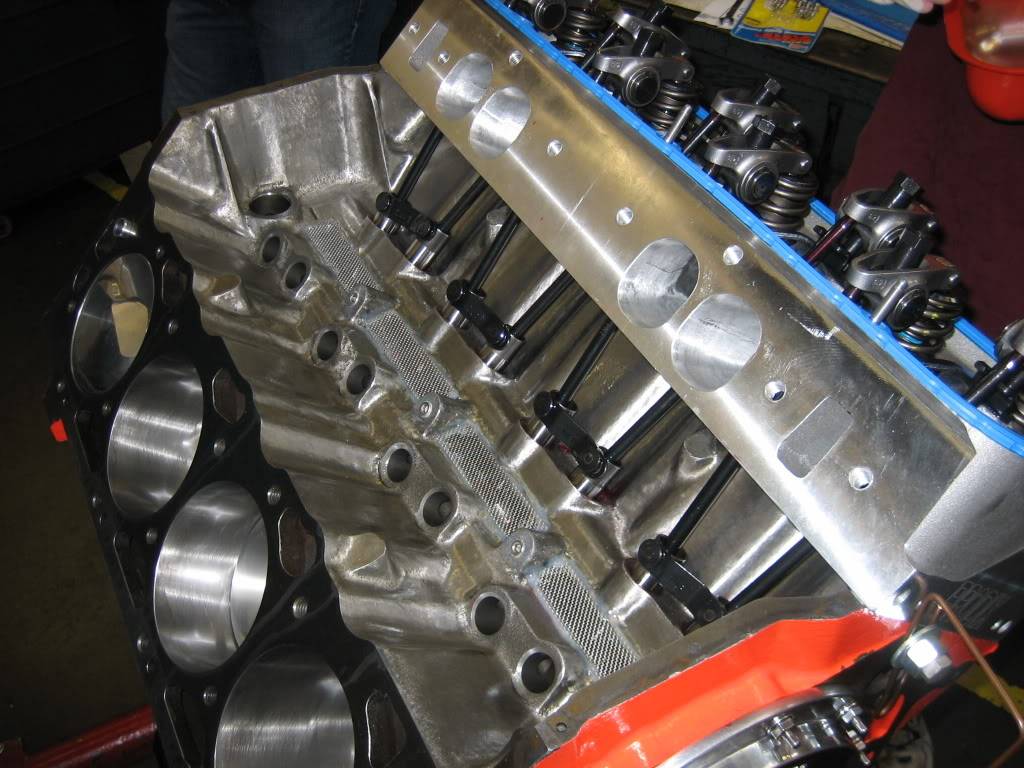
Brodix RR-O heads are purchased. Out of the box they have a horrible run-out on the valve seats (max of .009; when we want to see under .002 at least; ideal is under .0005). The guides are honed, valves are checked (they are really good less than .0005 run out on the valve face). Machining the valve seats is done and a run-out of under .0005 is attained. The heads are surfaced (the surface wasn't perfectly flat, plus wanted to raise the compression just a tad).
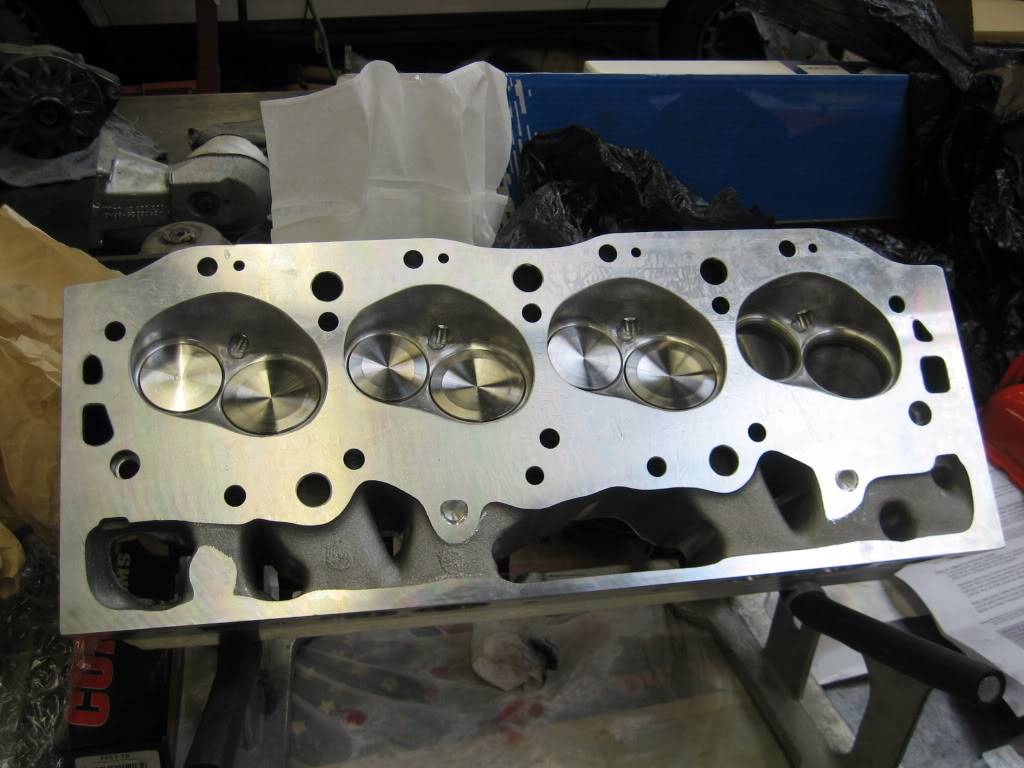
The intake and exhaust ports are ported and polished.
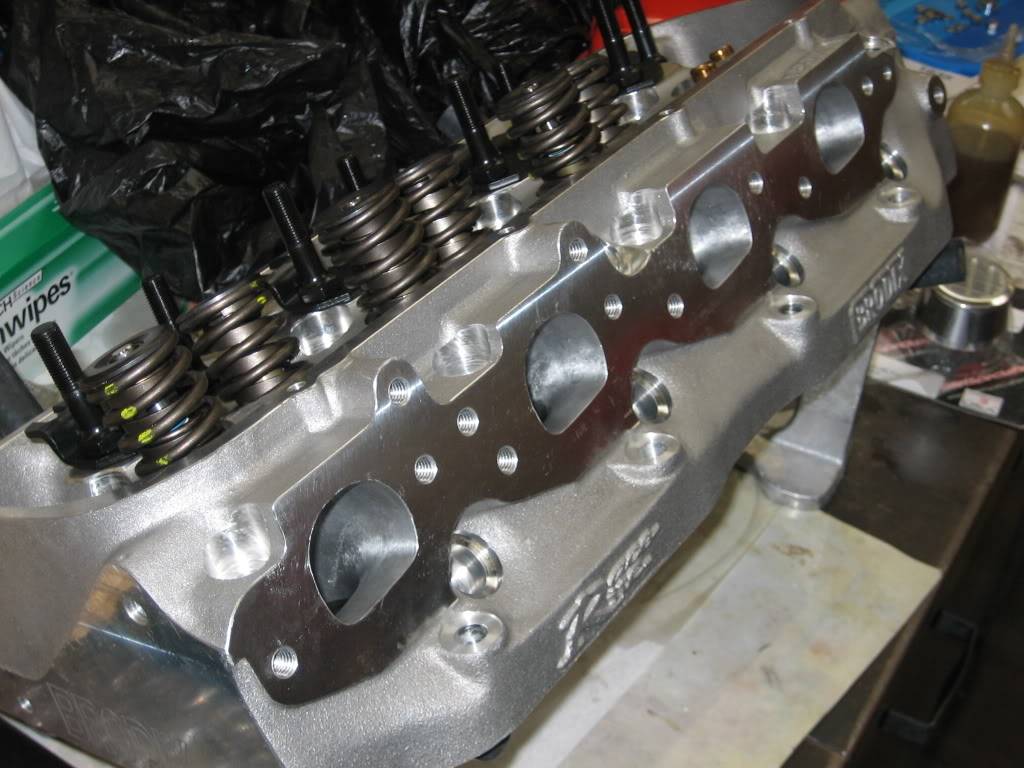
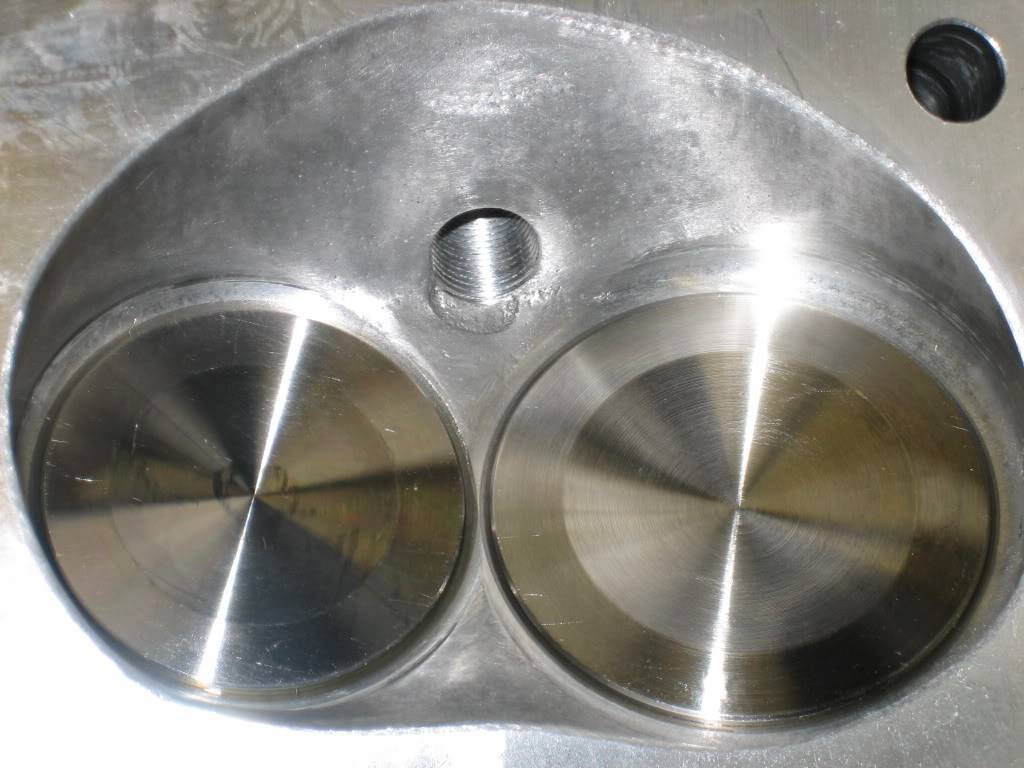
The chambers are cleaned up and CC matched within 0.1 CC of each other. The heads are vacuum checked (20in of Vacuum they seal nice and tight). Should have a real nice and even compression ratio across all cylinders of 9.8:1:
Cam goes in:

It is a Comp Cams "Thumpr" roller cam 227/241 @.050 547/530 lift 107deg lobe separation. I went with the Thumpr as from my understanding a common weakness of a big block is it lack of exhaust breathing. My hope is that with the 107 deg lob separation and the increased exhaust duration that this will help correct some it.
Pistons, rods and pins are all weighed and measured. One Piston was a bit out of spec but JE in Huntington Beach swapped it right out for me with a smile, even giving me one that allowed me to get my piston to cylinder wall clearances all within .0001 of each other.
Pistons are SRP forged, crank is a Eagle cast crank good for 750hp (since I am not building a high RPM motor should be good), rings are Perfect Circle moly and rods are I-Beam Eagle.
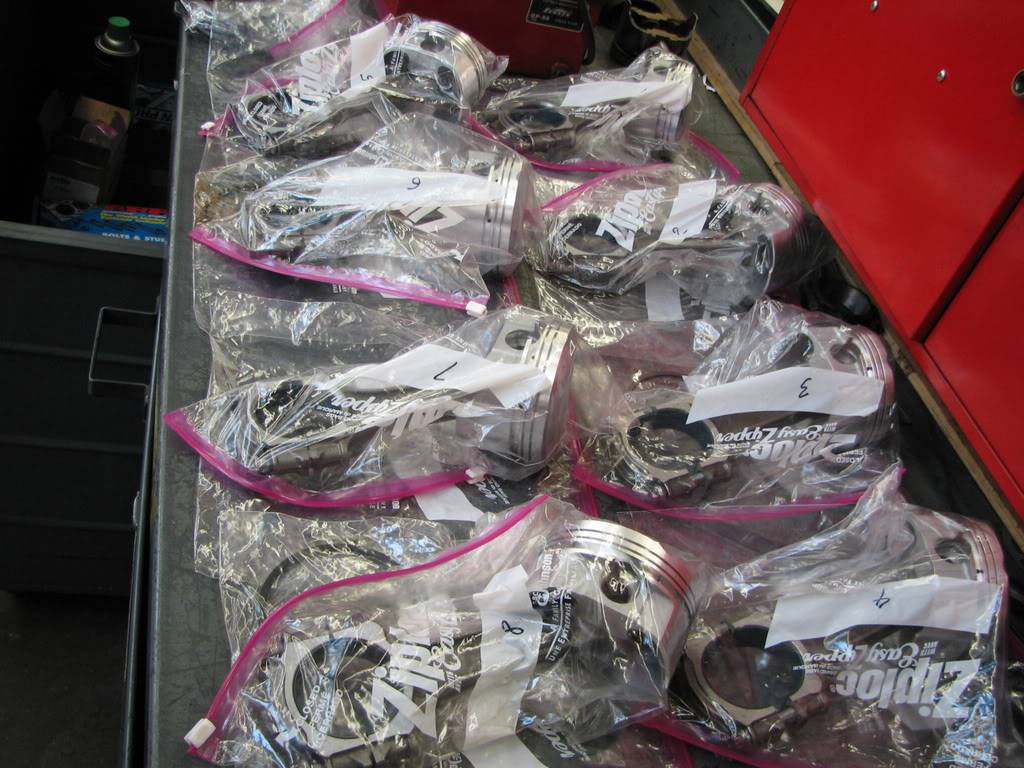
Pins are installed, rings are gapped, rod bearings clearance like the mains to .0001 of each other.
Short block is together now:

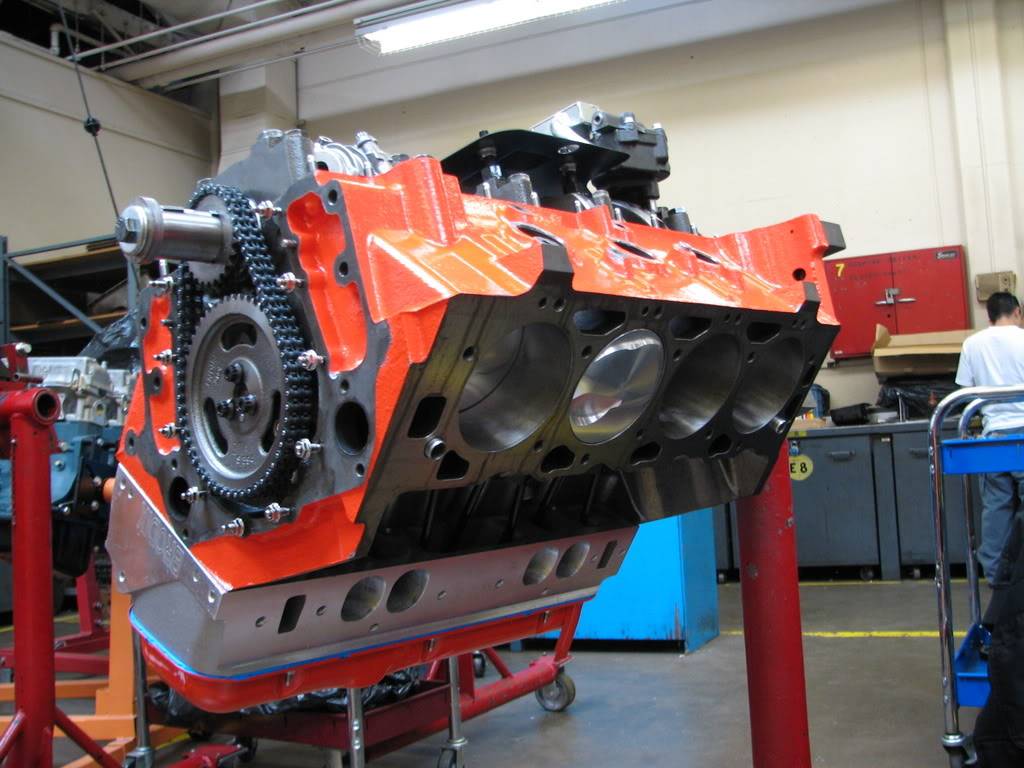
Oil pump is a Moroso high volume with pickup and wind age tray.
08-23-2008 #3
Registered User
- Join Date
- Jul 2007
- Location
- Los Angeles, CA
- Posts
- 1,303
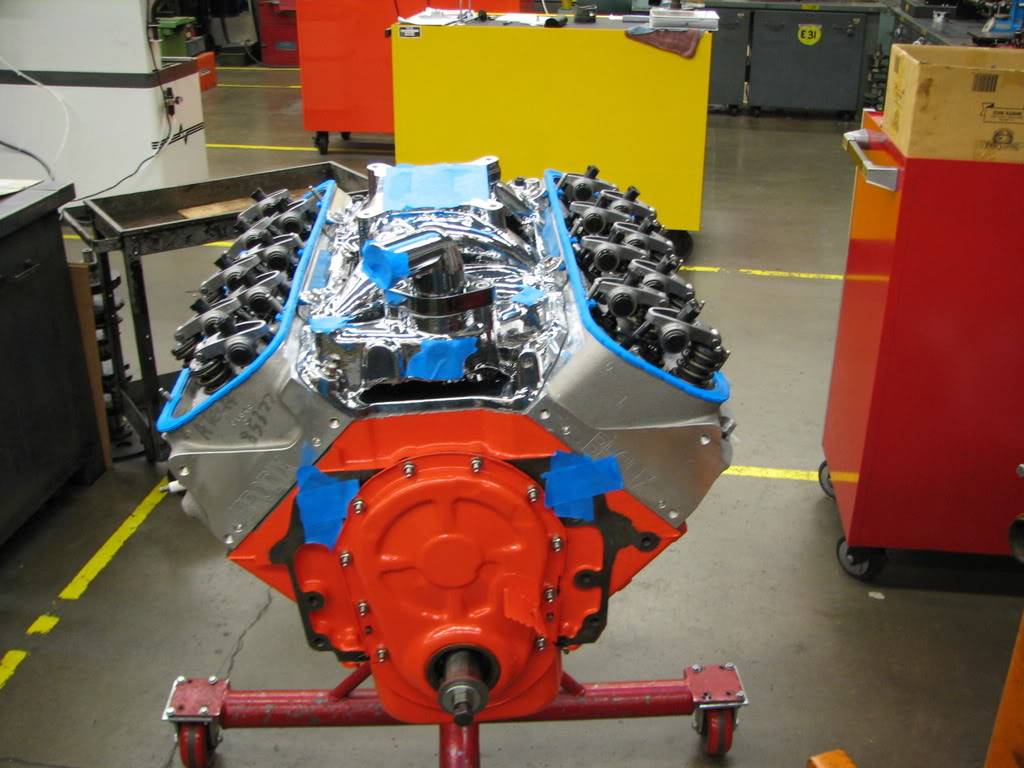
Heads go on, nice shot of the custom grinding both on the block and heads:
Verifying timing:
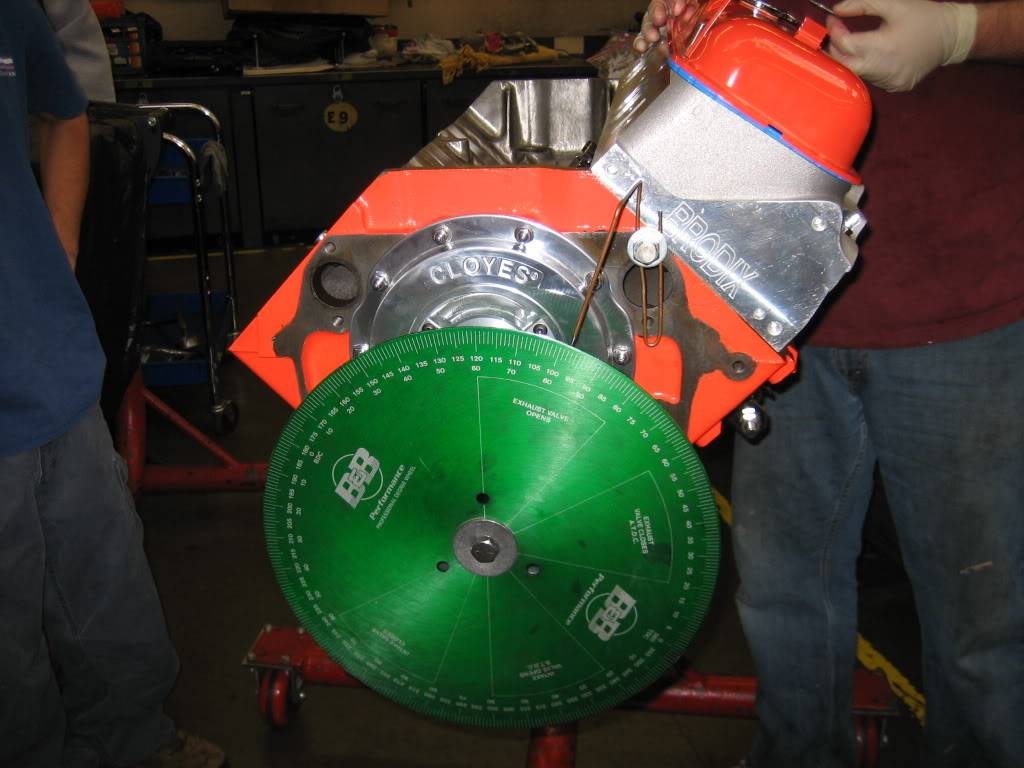
Intake is port matched to the heads and goes on. Full roller rockers (Comp Cams) with 1.7:1 ratio. Edelbrock RPM Air gap:
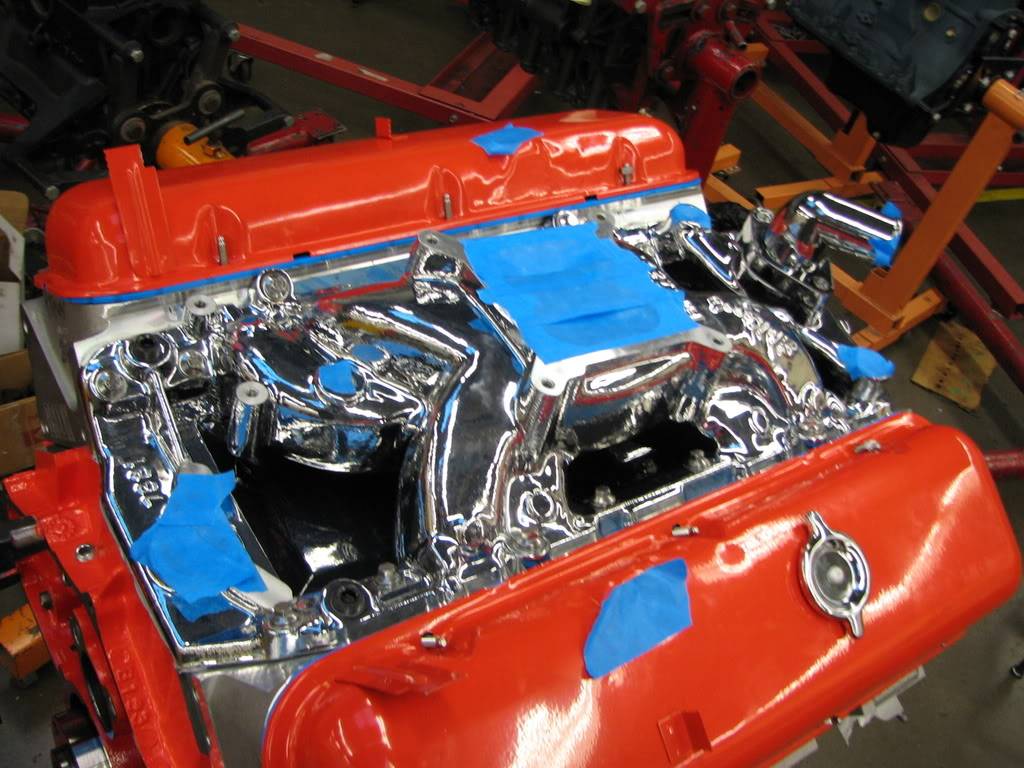
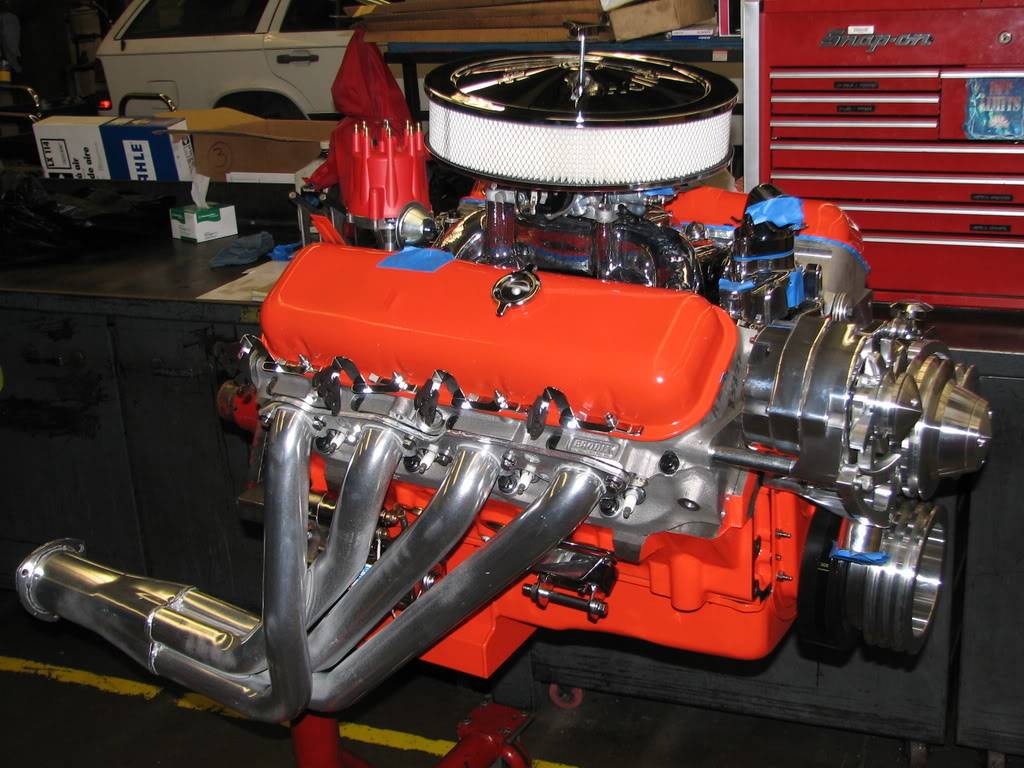
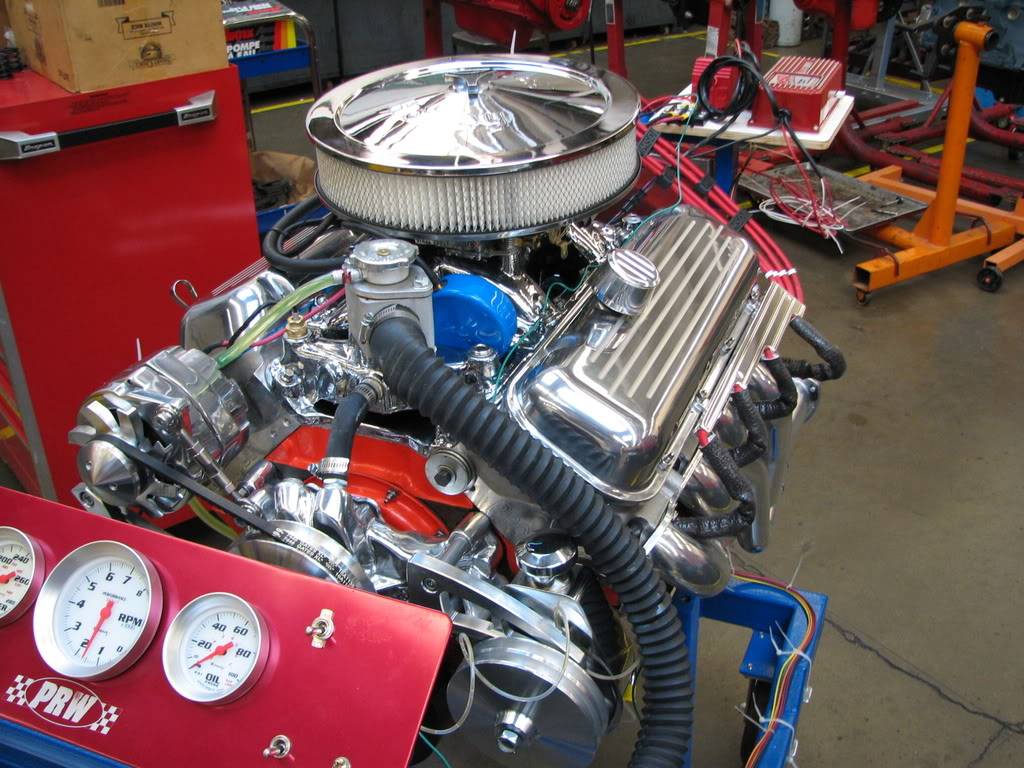
Valve and timing covers go on (Trans-dapt powder coated valve covers and GM stock timing cover for a GenV motor painted with left over Por-15):
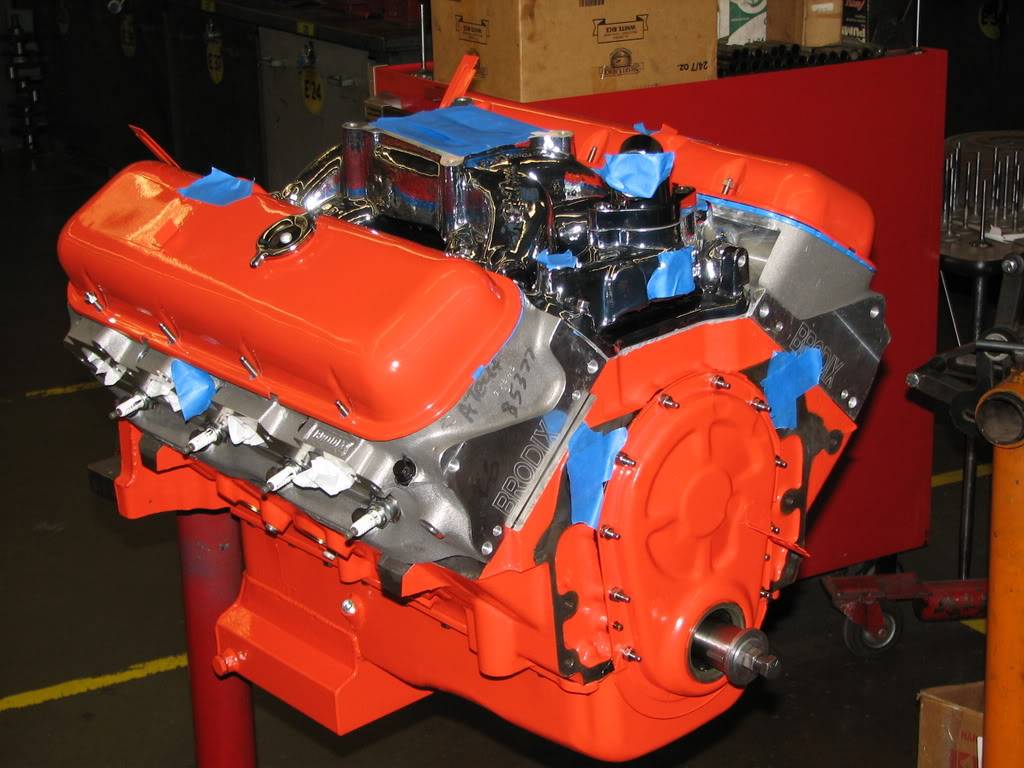
Valve covers are crappy and leak and replaced later but the intake sure looks nice (durashine finish):
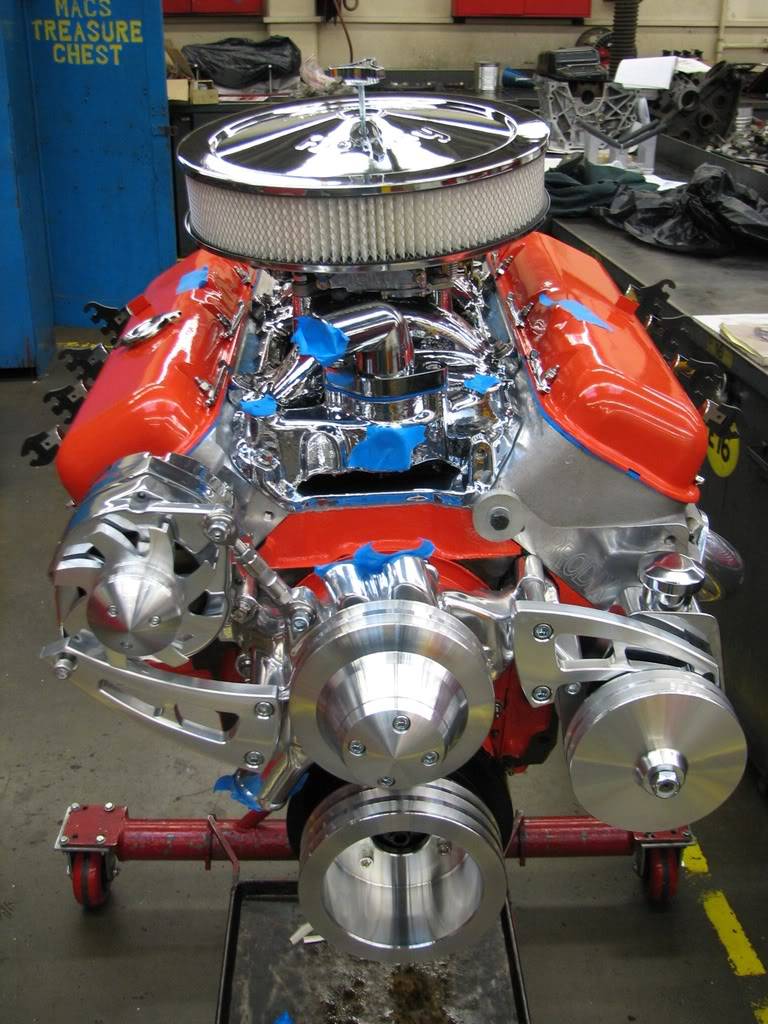
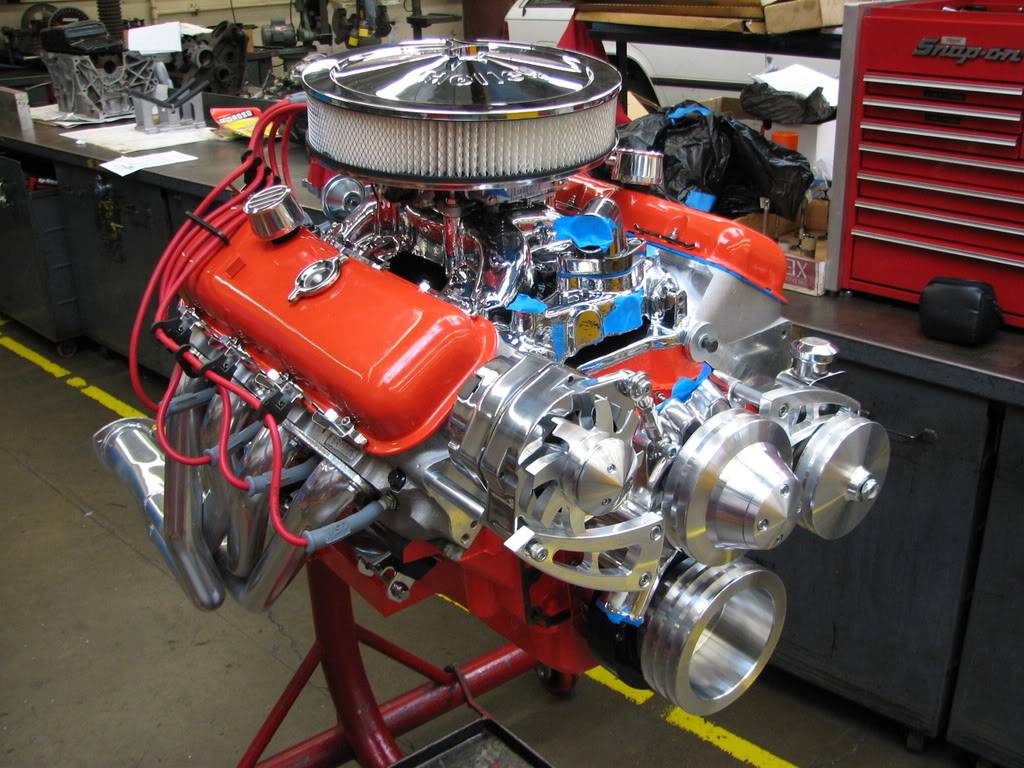
Water pump (Stewart Components Stage 2 pump) and MSD Distributor go in:
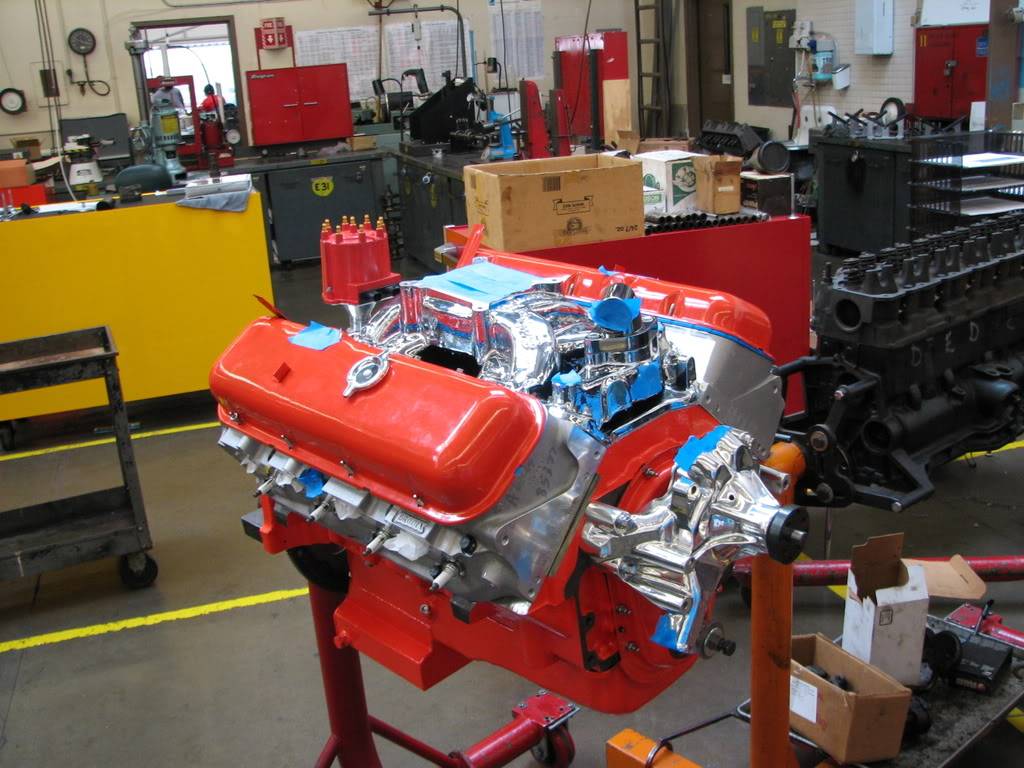
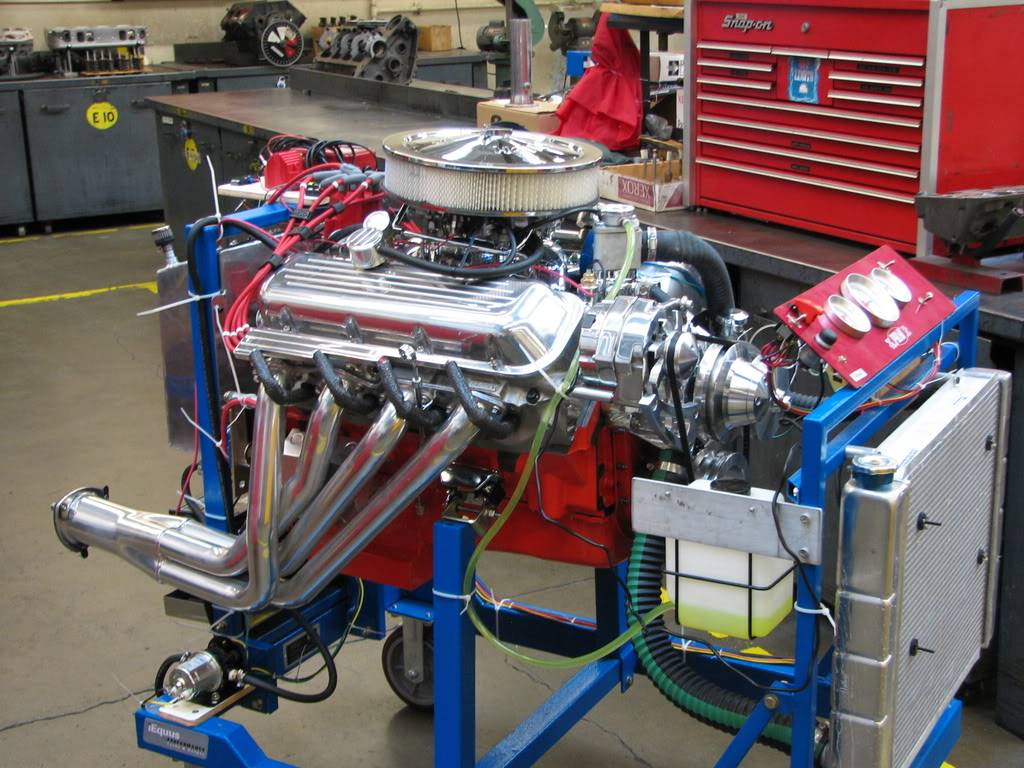
March performance pulleys for v-belt systems and Holly Street avenger 770cfm with air cleaner go on:
Hooker ceramic coated headers with 2 primaries and 3.5 collectors:
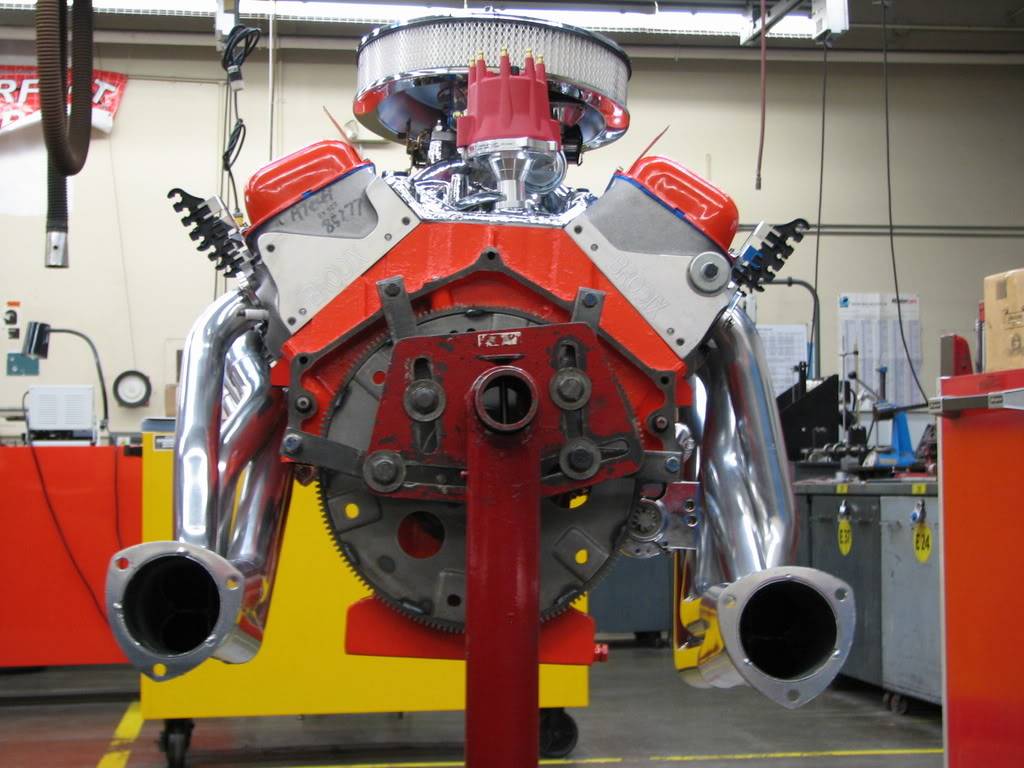
Finished product ready to start up:
08-23-2008 #4
Registered User
- Join Date
- Jul 2007
- Location
- Los Angeles, CA
- Posts
- 1,303
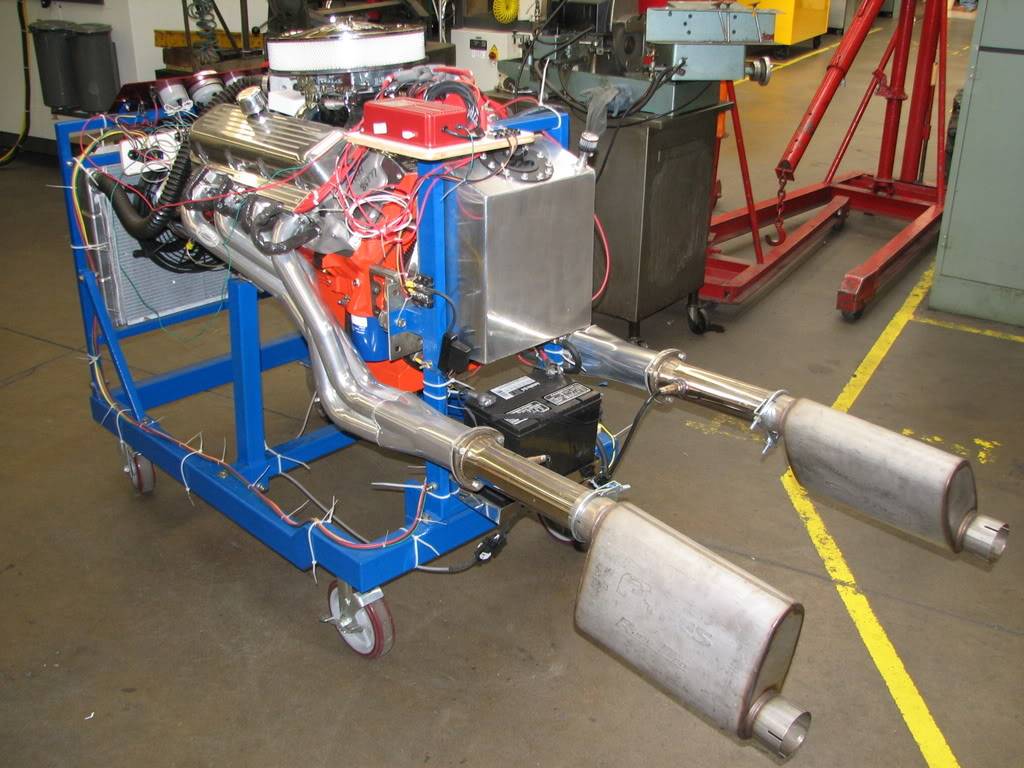
After initialing firing up the motor on an engine stand, all the problems found were fixed (bad radiator cap, leaking valve covers, spark plug wire holders that let the wires hit the headers etc)
Fast Air/Fuel meter and dual wideband O2 sensors are installed, along with Pypes Race-Pro mufflers (went with their 3 stainless exhaust kit as well):
More engine buildup pics here:
http://s328.photobucket.com/albums/l...oweter/Engine/
General Stats for the engine
Engine Type
Big Block Chevy displacing 489ci / 8.0L
(4.280 bore x 4.250 stroke)
Block
454 Big Block Chevy GenV standard deck
Compression Ratio
9.8:1
Oiling
Moroso 6 quart oil pan
Moroso high volume oil pump
Moroso windage tray
Custom machining done to top of block to increase oil return
Rotating Assembly
Eagle Rotating Assembly, Eagle cast crank, Forged SRP Pistons, Eagle I-Beam Rods, Perfect Circle Moly Rings, Clevite Tri-Armor Bearings
Cylinder Heads
Brodix Race-Rite Oval Port 270cc intake runner, 119cc Combustion chambers. Race valve job, Mini-ported, chambers matched and polished.
Camshaft
Comp Cams "Thumpr" roller cam 227/241 @.050 547/530 lift 107deg lobe separation. Roller timing chain
Valvetrain
2.250 inch intake / 1.880 exhaust valves
5/16" Comp Cams magnum push rods
dual valve springs
Induction
Edelbrock RPM Air Gap manifold, Holly Street Avenger 770cfm, Aeromotive Street Rod electric fuel pump
Ignition
MSD 6AL box and Distributor with MSD 8.8 spark plug wires
Exhaust
Hooker ceramic coated headers 2 in primaries, 3.5 in collector. Pypes 3" stainless exhaust system with Race-pro mufflers
Fastners
ARP
Gaskets
Fel-Pro
Cooling
Ron Davis Double pass radiator with integrated coolant recovery tank, dual 13" spal fans and controller, Stewart Components Stage 2 high flow water pump, Robert Shaw thermostat, Earl's transmission cooler.
Misc
Tilton Super Starter, March Performance V-Belt system. Billet Specialties Valve covers, wire holders and breathers. Moroso battery relocation kit. Por-15 engine paint.
Should be about 600hp and 600ft-lbs of torque at peak at the flywheel and about 500ft-lbs off idle!
Special thanks to my school and instructor(s) for teaching me and letting me work on my car in the shop.
Ready to put in the car now. But wait all the brakes and suspension stuff will be easier to work on while the motor is out
08-23-2008 #5
Registered User
- Join Date
- Jul 2007
- Location
- Los Angeles, CA
- Posts
- 1,303
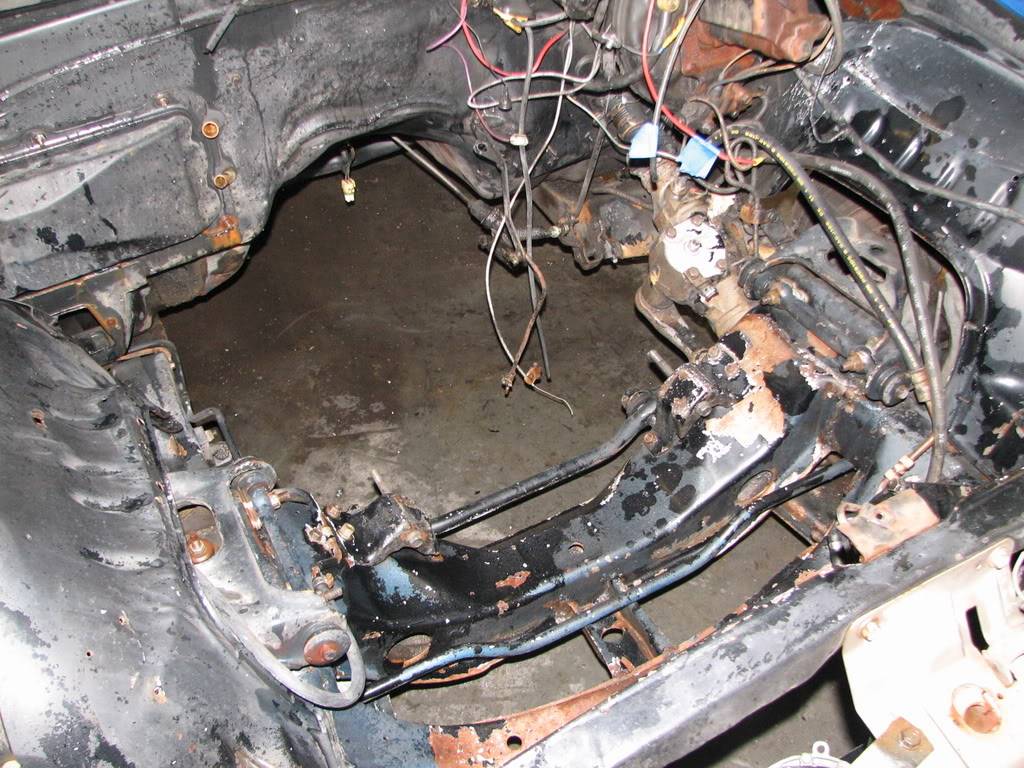
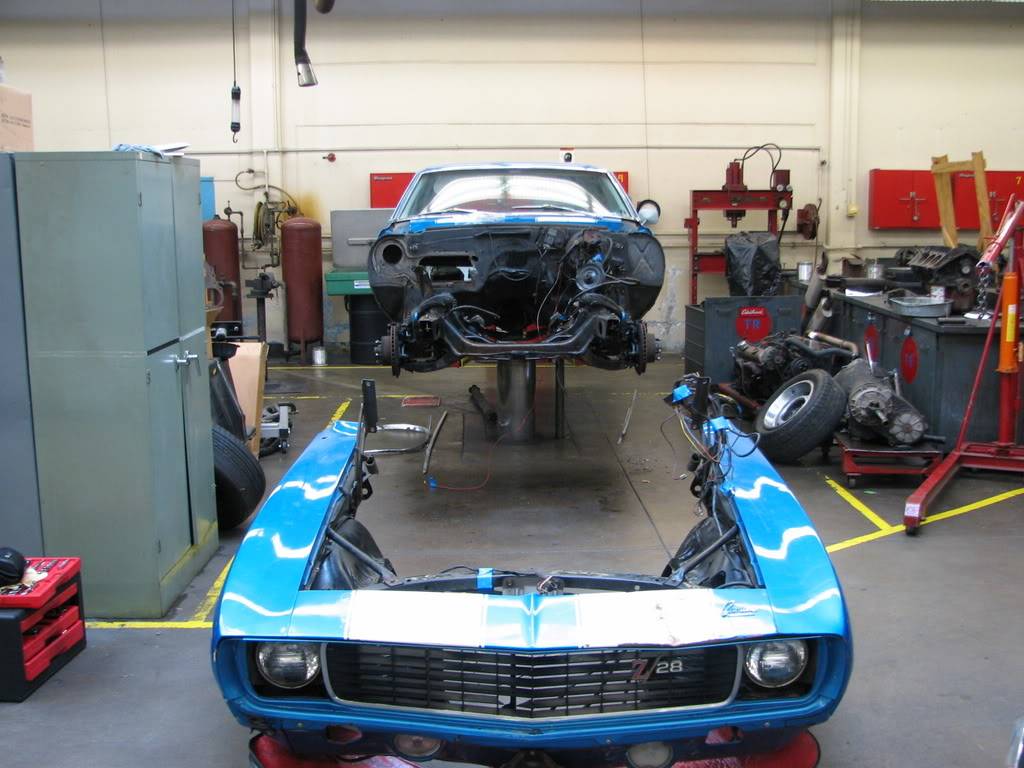
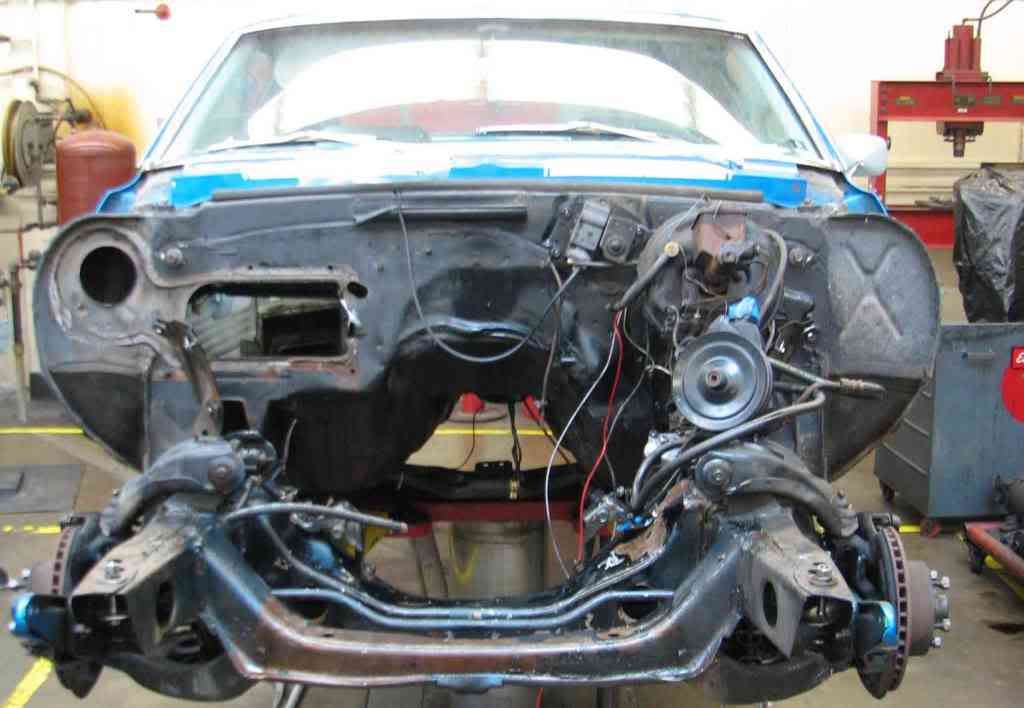
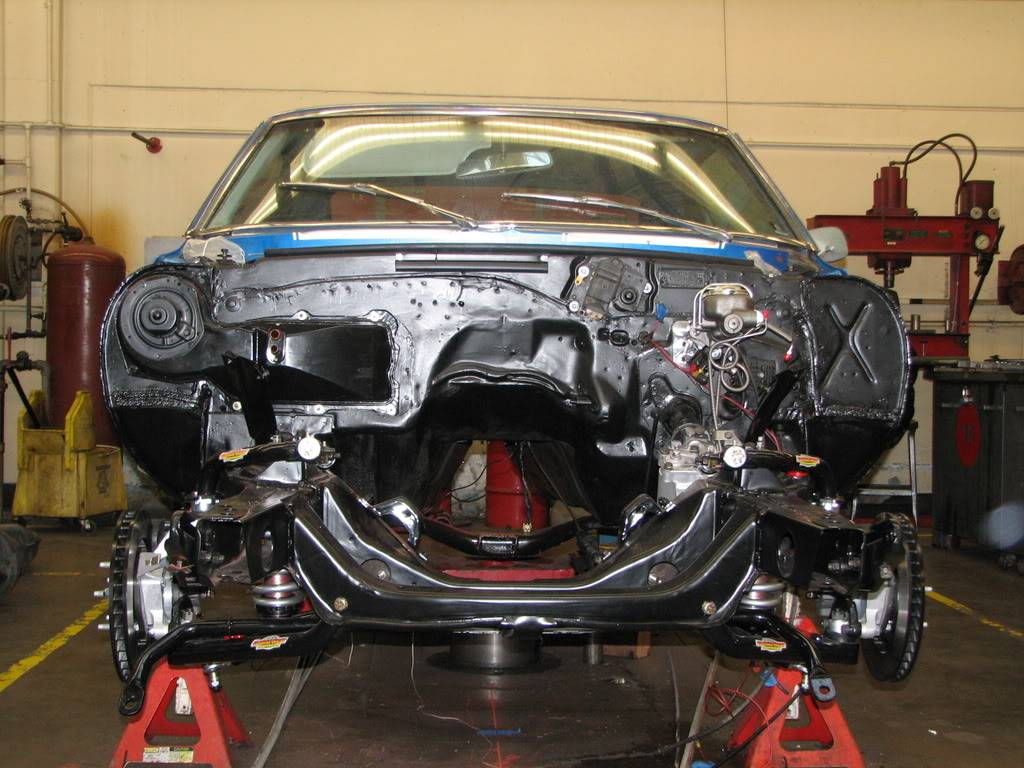
I cant put this nice new engine in an engine compartment like this:
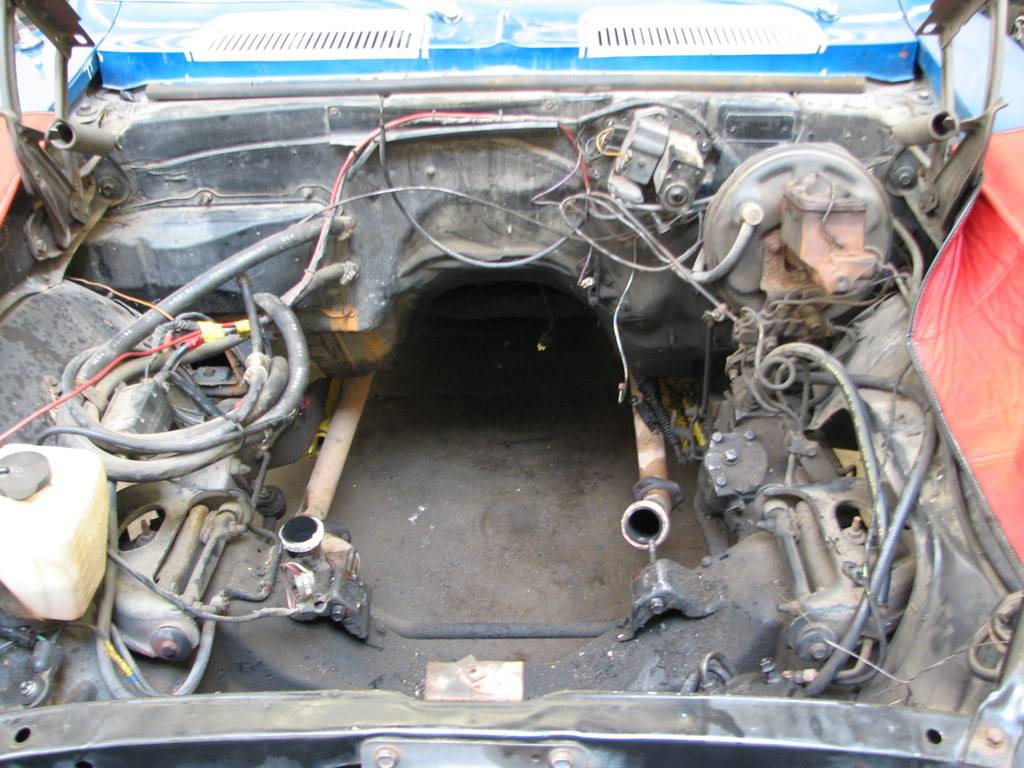
So off the front clip it goes:
Needs paint badly:
[Bad pick] Once cleaned up and painted looks like new:
Time to take a look at the front suspension and firewall, just about everything needed attention (new brakes, ball joints bushings etc)
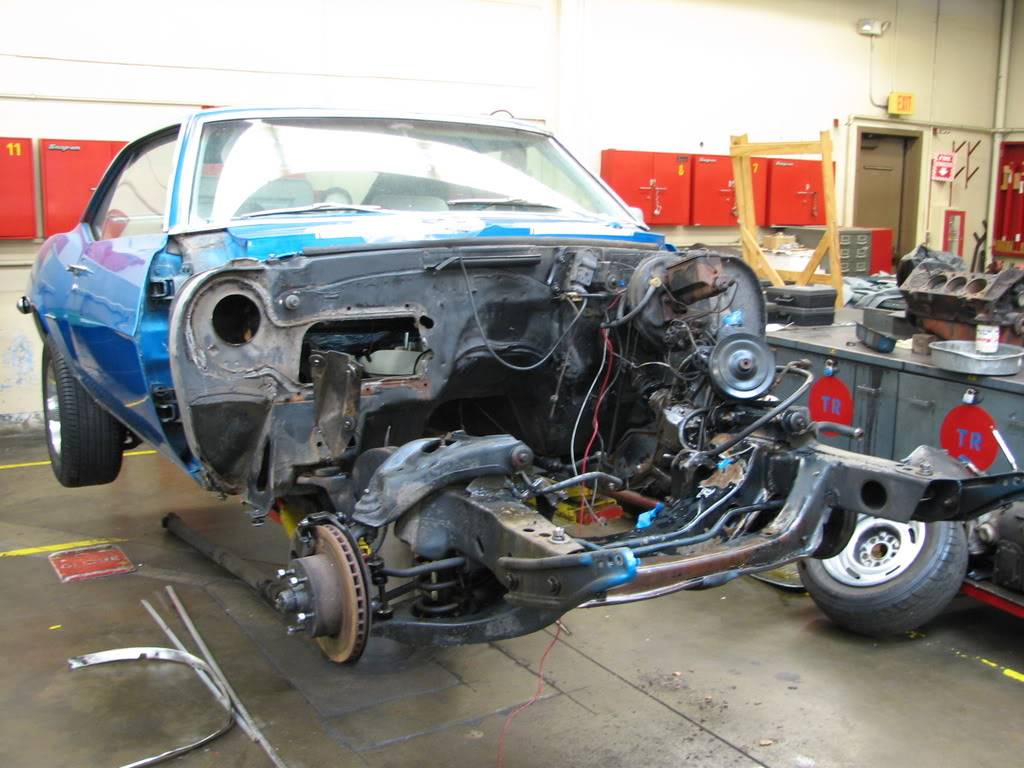
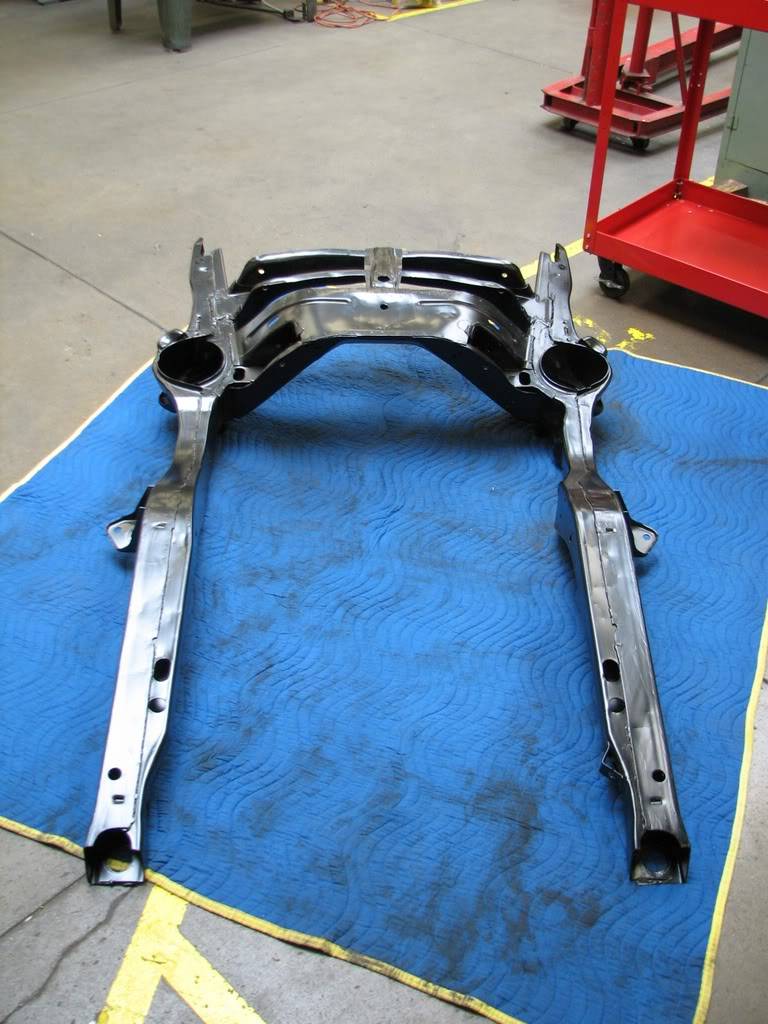
Lets pull the front sub-frame. It needed some minor welding to get it back in shape:
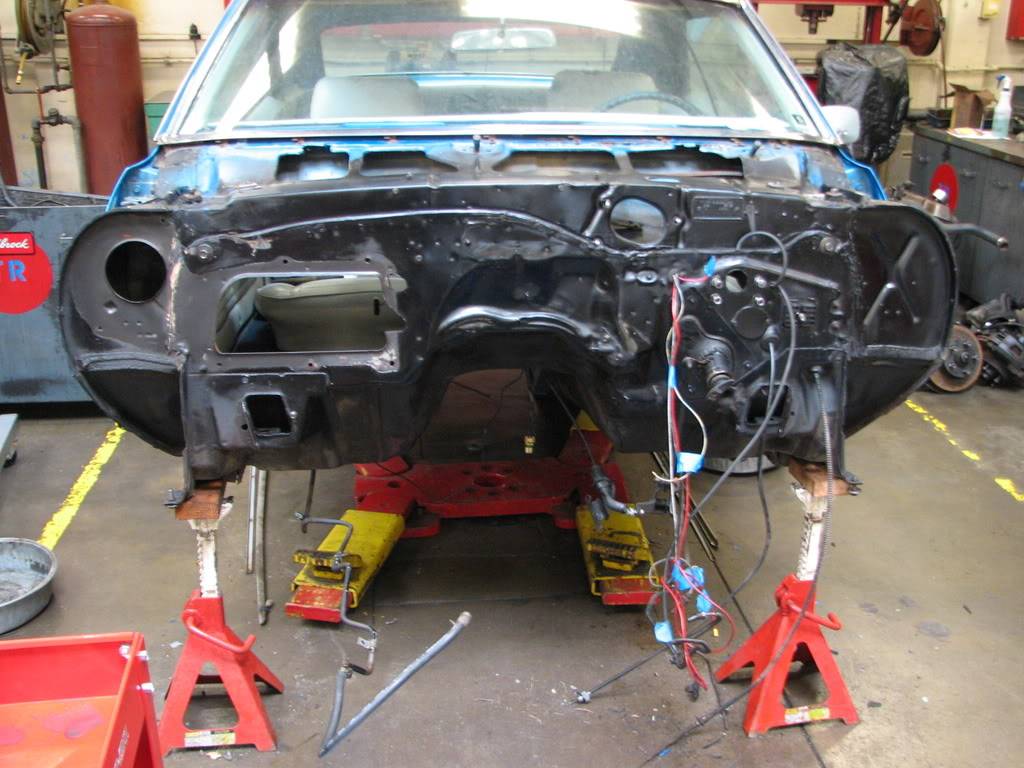
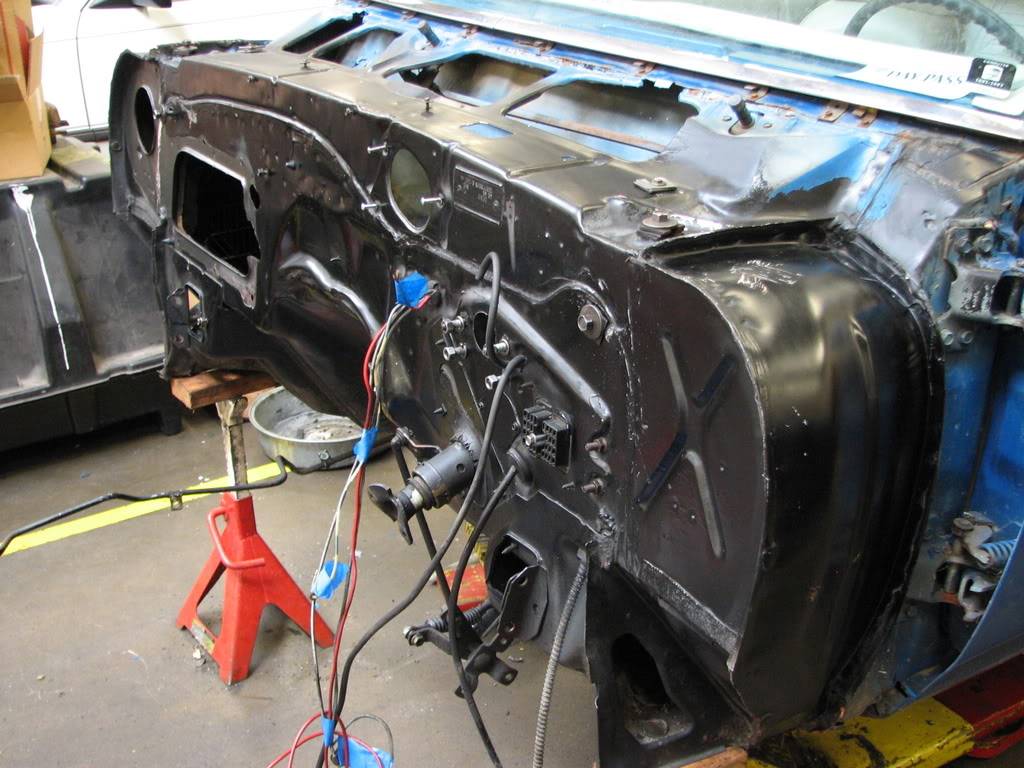
And start cleaning up the firewall:
Front clip back from the powder coaters:
08-23-2008 #6
Registered User
- Join Date
- Jul 2007
- Location
- Los Angeles, CA
- Posts
- 1,303
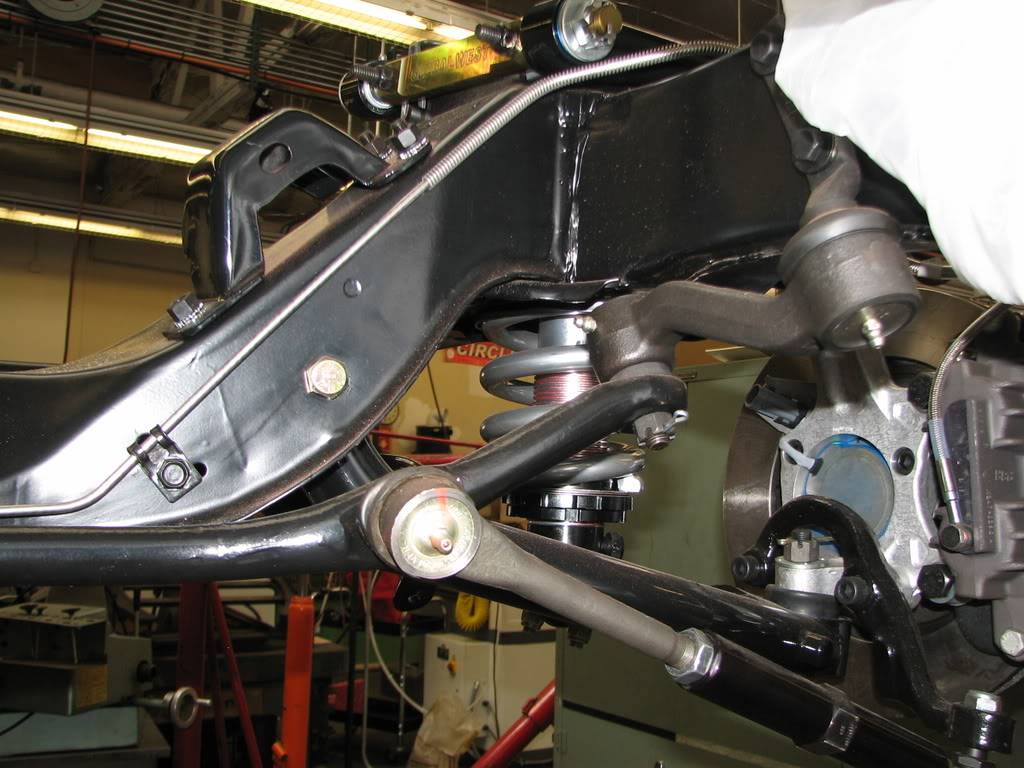
Now we are cooking, fresh paint on the firewall and front sub-frame, and new goodies:
Touring Classics C5 kit with 12.7” rotors,
AFX spindles
Global West upper and lower control arms
QA1 Double adjustable coil overs
The Right Stuff Detailing stainless brake lines
Hydroboost unit
ATS Lee blueprinted steering box
Baer Trackers
New Moog inner tie rods, pitman arm and idler arm
Thanks to Tyler at ATS for answering all my questions and setting me up with the goods.
New Big block heater core cover, restored heater box, new heater fan etc.

More front suspension pictures:
http://s328.photobucket.com/albums/l...%20Suspension/
Hmm, now I have to get new wheels and tires to fit the big brakes.
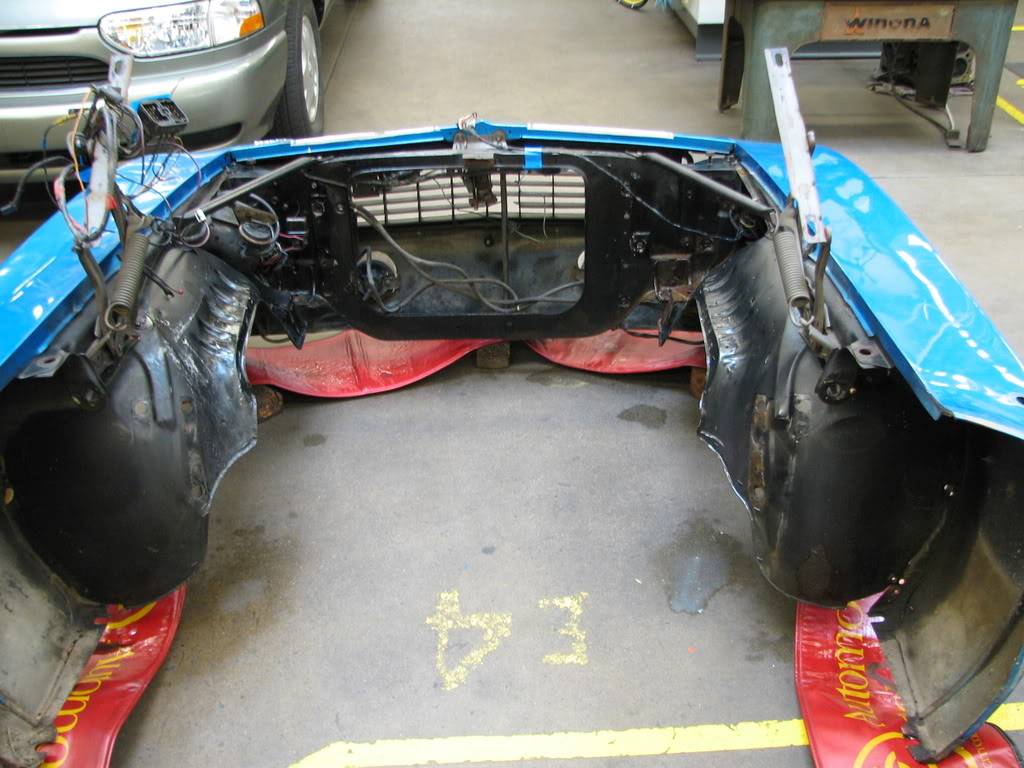
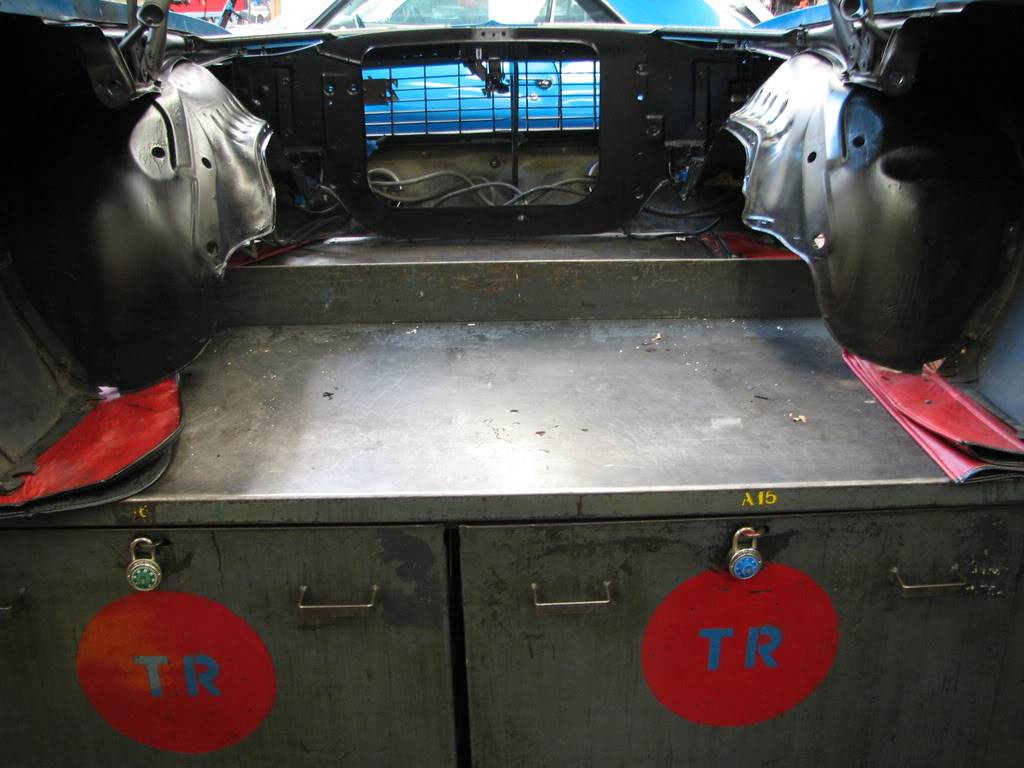
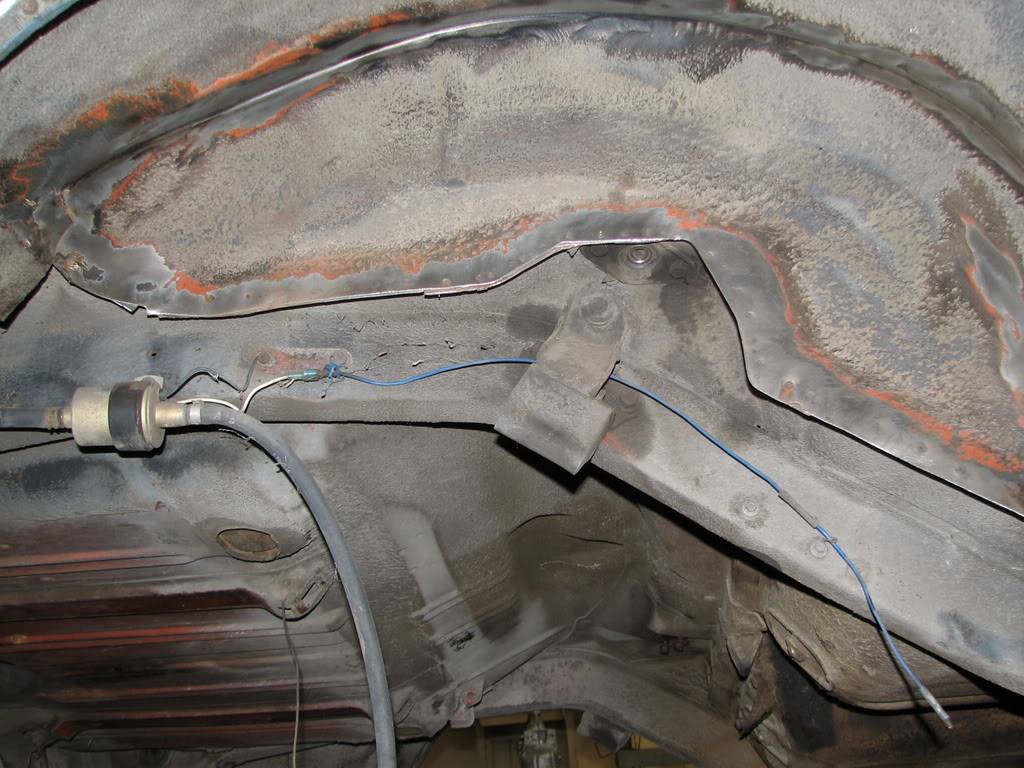
Since I am going to have to buy new wheels anyways might as well mini-tub the car so I only have to buy wheels/tires once.
That part of the project can be found here and was done up as a mini-tub guide:
https://www.pro-touring.com/forum/sh...ad.php?t=46900
but here is some before and after shots:
after: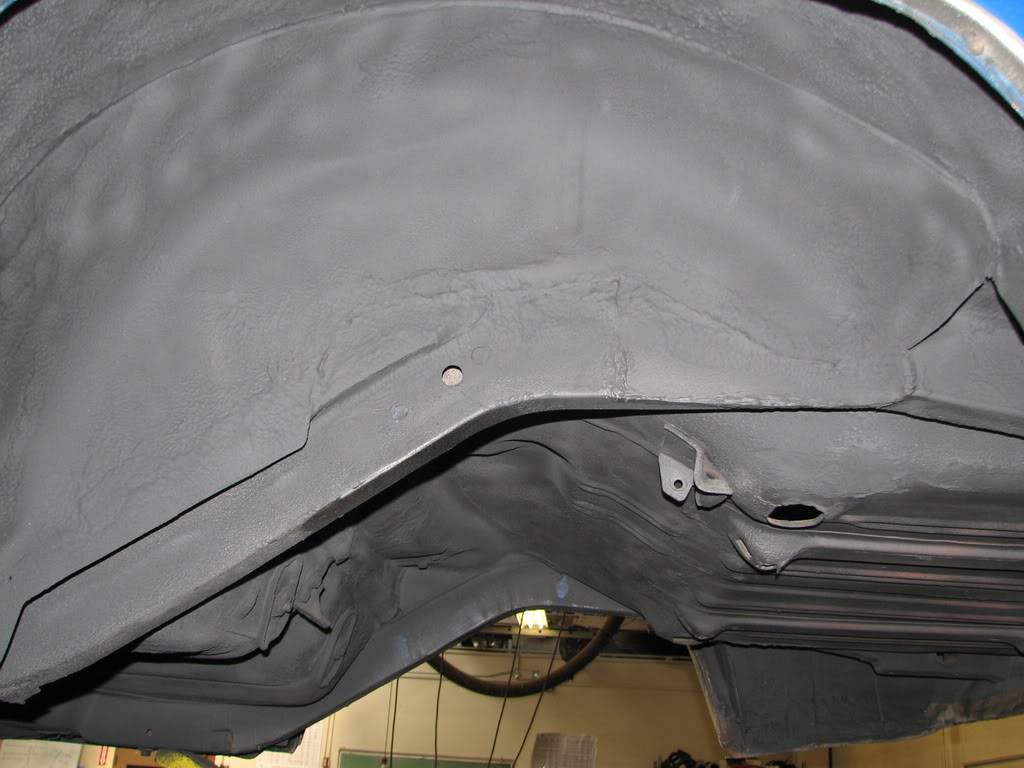
08-23-2008 #7
Registered User
- Join Date
- Jul 2007
- Location
- Los Angeles, CA
- Posts
- 1,303
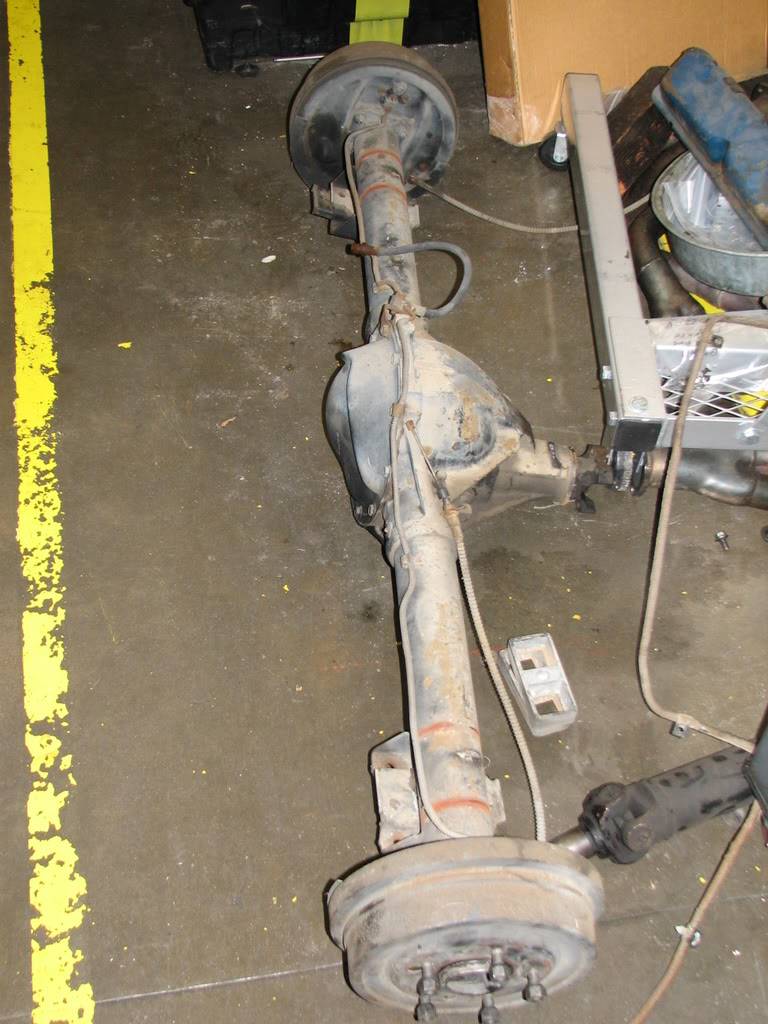
Now to make the rear suspension match the front:
Old axle (2.72 open 10 bolt with mono-perches):
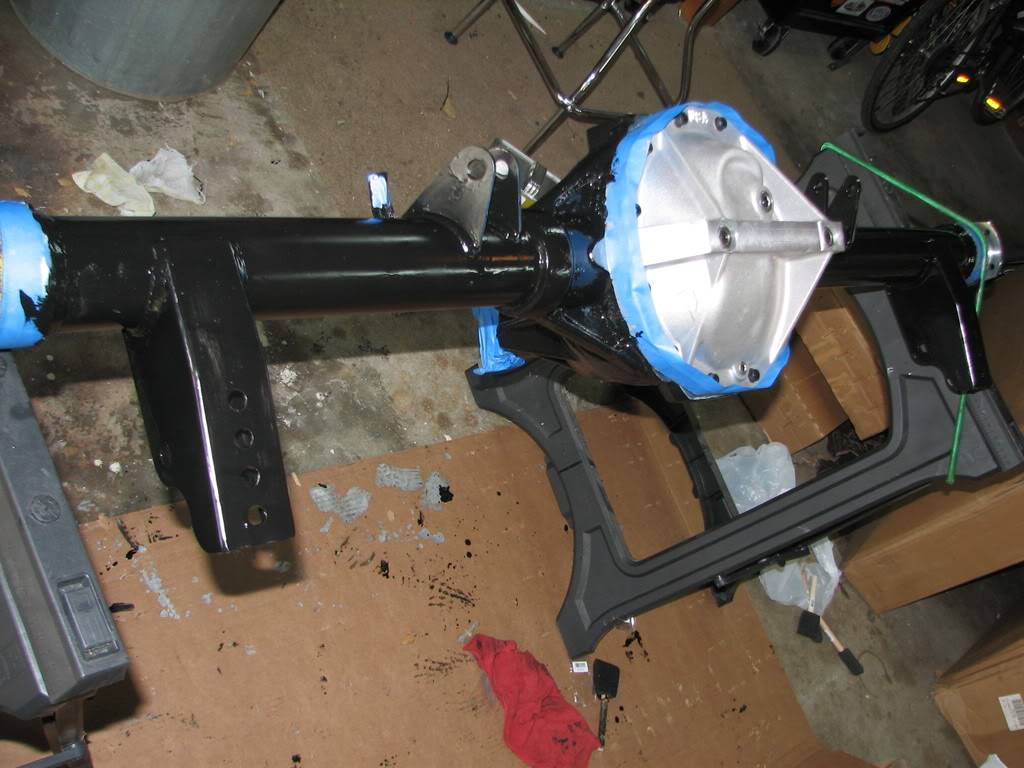
New Moser with 3.73 gears, 33-spline 1350 yoke, painted with Por-15 and their chassis black:
Starting the G-Bar install:
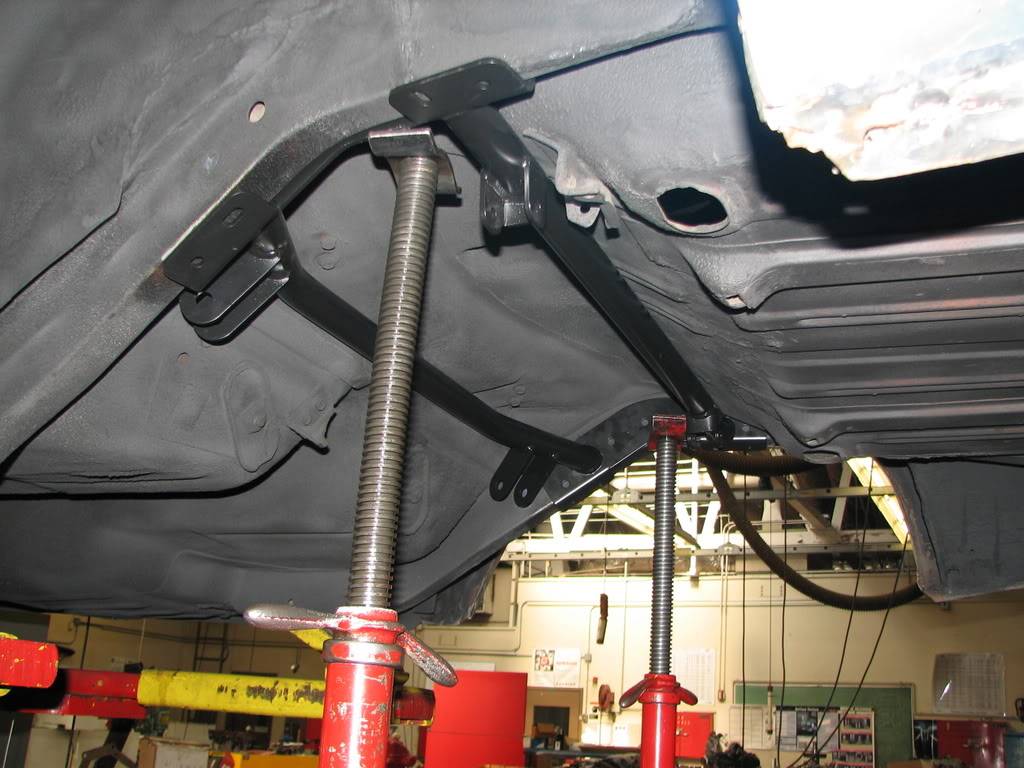
Bolts are in:
Going to weld the entire sucker in once everything is confirmed straight and true. I really like the G-Bar of all the stuff I have installed this was very easy and straight forward to install the only hiccup so far was a bolt hole in the rear of the bar that there isnt a good way to drill a hole or start the threads:

due to the trunk being in the way (maybe particular to a 69, I dunno). Since in the end it is going to be all welded up, it really doesnt matter.
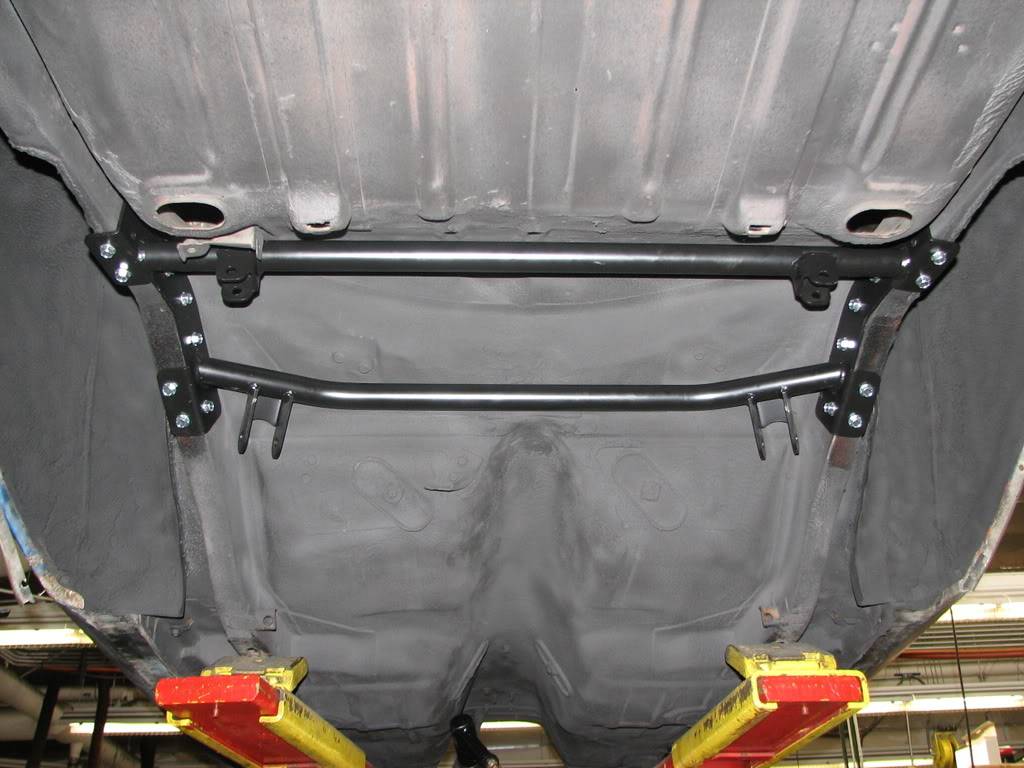
Axle housing / diff and shocks going on:
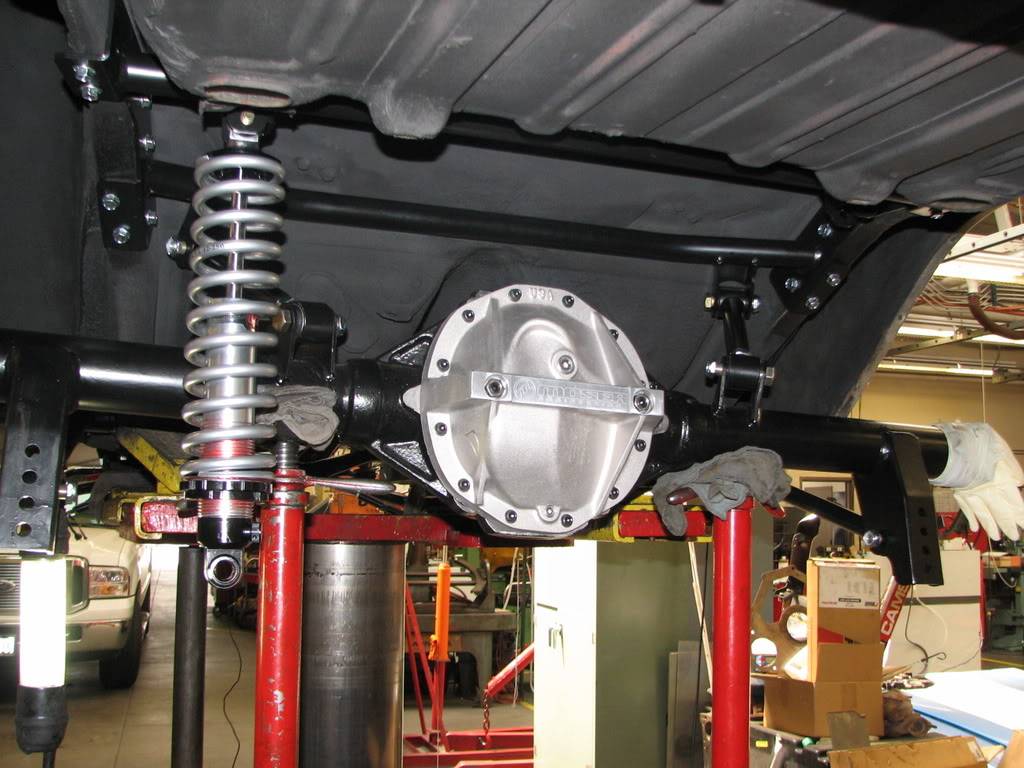
Completed:

Also went with a Ricks notched stainless tank, that is baffled and sumped.
More pictures can be found here:
http://s328.photobucket.com/albums/l...%20Suspension/
Thanks to Frank and Prodigy for helping answer my questions and hooking me up with the right parts!
Next up in the project (when I get back in school) is putting brake lines and fuel lines in and then I can drop the motor in. Very much looking forward to that. Then I am going to rewire the entire car with a AAW kit, and replace the old vacuum RS headlights with a DSE electric kit, get new head lights and running lights as well as rear taillights. All new Stewart Warner gauges will be installed as well. Everything electrical in the car will be in tip top shape.
08-23-2008 #8 Registered User
- Join Date
- Jan 2007
- Location
- CT
- Posts
- 782

looks great. I love the G-Bar/mini tub combo. I complete mine last winter. What are you planning on running for wheel/tire.
what are the front shocks/spring ?
08-23-2008 #9 Registered User
- Join Date
- Nov 2004
- Location
- KC, MO
- Posts
- 298
I am looking forward to this build. I love that you are trying to keep the stock apperance as much as possible.
08-23-2008 #10 Registered User
- Join Date
- Jun 2007
- Location
- Dayton Ohio
- Posts
- 1,283
looking real nice man
GTO Project https://www.pro-touring.com/showthre...-The-Great-One
Colorado Project https://www.pro-touring.com/showthre...cab-CodeRedZQ8
Check Out My YouTube Channel http://www.youtube.com/c/geedsgarage
08-23-2008 #11
Registered User
- Join Date
- Jul 2007
- Location
- Los Angeles, CA
- Posts
- 1,303
Thanks. Front is QA1s double adjustables same as the rear. Most likely going to go with a 17x11 with 335/35/17 tire in the rear. Originally Posted by nicks67camaro
Still undecided on rims (my first choice still changes each day). Leaning towards either the Wheel Vintiques Billet Rallyes, Vintage Wheel Works V45s, Rushforths, even looked at Forgelines. Really a matter of budget mostly now. Hence me trying to sell all the unneeded parts.
08-23-2008 #12
Registered User
- Join Date
- Jan 2007
- Location
- CT
- Posts
- 782
I'm in the same boat....Rims are very expensive ....I have the qa1 on mine as well. One bit of advice if you didn't know REALLY GOOD bump stops, and don't drop it too low. I have the "small block" version which are kinda on the soft side.
oh and very nice motor.
08-23-2008 #13
Registered User
- Join Date
- Jul 2007
- Location
- Los Angeles, CA
- Posts
- 1,303
Nick,
Thanks, yep I went with pretty stiff springs in front 550lbs/in and the rear are 225lbs/in. I don't plan on dropping it to the weeds, but going to go for that nice look, but still able to drive it on the street w/o scraping everywhere, probably leave 5" of space between the ground and the lowest point in the car. Probably even weld something onto the undercarriage to scrape before something important.
08-24-2008 #14
Registered User
- Join Date
- Jan 2007
- Location
- CT
- Posts
- 782
oh good the stiffer srings should help. Keep the updates coming!
08-24-2008 #15
New to Pro-Touring
- Join Date
- Nov 2005
- Posts
- 54
lookin good
08-24-2008 #16
Registered User
- Join Date
- Oct 2007
- Location
- MarshvilleNC
- Posts
- 175
Awsome job, this is going to be a bad camaro!!!
08-24-2008 #17 Registered User
- Join Date
- Nov 2006
- Location
- Ma.
- Posts
- 5,567
Awesome Job
Wayne
Car FINALLY home !!!!!! lol
Project FNQUIK https://www.pro-touring.com/showthre...ghlight=FNQUIK
08-25-2008 #18 Starting The Transformation
- Join Date
- Jun 2006
- Posts
- 232
Nice Job
Cool stuff, the engine looks awesome. I actually liked it better with the orange valve covers, broke it up a bit, cool to see the G-bar installation with the Moser that is what I am going with as well. Keep up the good work...
Project: Back in Black.
69 Camaro LS6, T56, Wilwood Brakes, Forgeline Wheels, Moser rear w/Gbar, Ron Davis Radiator, Pioneer Nav/Stereo, Magnaflow Exhaust.
08-25-2008 #19
Registered User
- Join Date
- Nov 2004
- Location
- KC, MO
- Posts
- 298
I agree, the orange valve covers where pretty sweet and kinda held with the "sleeper" image. Originally Posted by wblanton
08-25-2008 #20
Registered User
- Join Date
- Jul 2007
- Location
- Los Angeles, CA
- Posts
- 1,303
Yeah I like the Chevy orange theme too. Too bad I couldn't them to actually not leak. Originally Posted by Jarcaines
The only other powder coated valve covers in orange out there where the GM at $400.00 a pair. I supposed I could have gotten a nice set then had them powder coated. But the Billet Specialties ball milled are nice too. Plus the sleeper look is just on the surface once you start looking there is no way to fake it then.

 Reply With Quote


